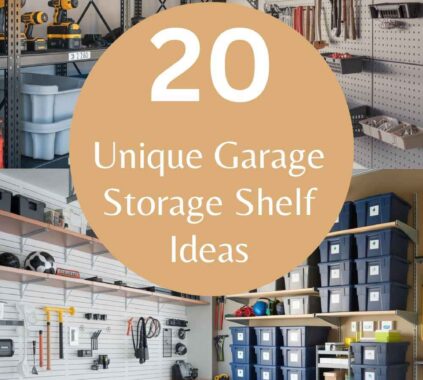
In this article, we’ll explore 15 of the best Do It Yourself Garage Storage Ideas, ranging from wall-mounted shelving to clever bike racks and overhead storage systems. These practical solutions are easy to build and can help you make the most out of your garage, regardless of its size or shape. Let’s dive in and discover how you can create a more organized and efficient garage with these simple, yet effective DIY projects!
Best Do It Yourself Garage Storage Ideas
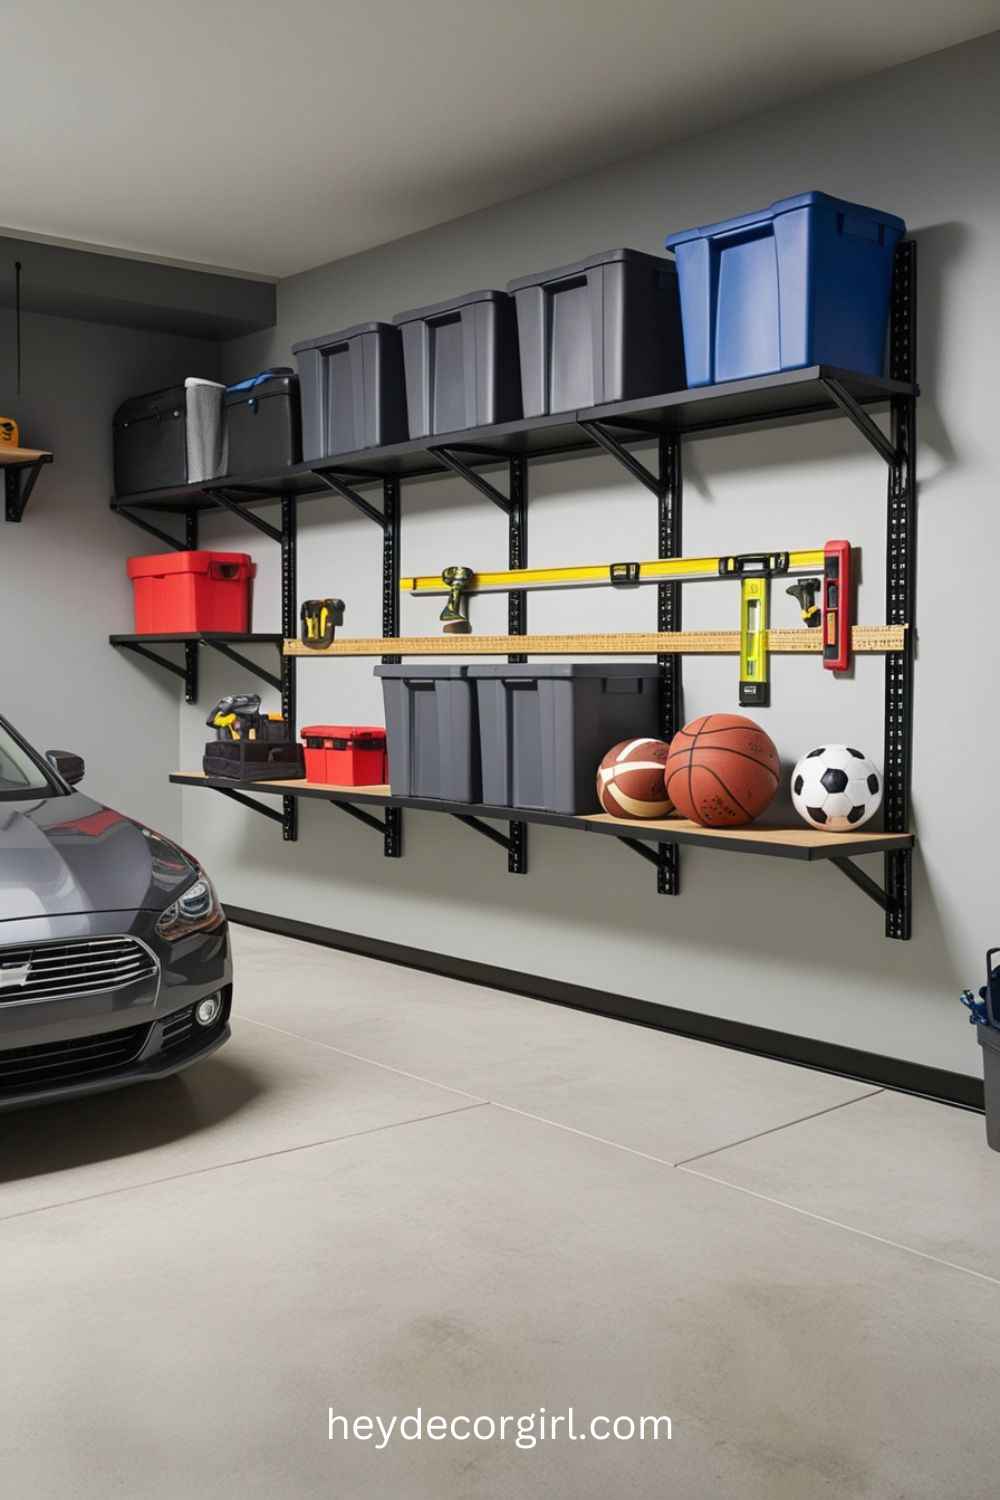
1. Wall-Mounted Shelving Units
Explanation of Wall-Mounted Shelves and How They Save Floor Space
Wall-mounted shelving units are an excellent solution for maximizing storage in your garage while keeping the floor area clear. By utilizing the vertical space in your garage, you can store tools, bins, sports equipment, or other items off the ground, reducing clutter and freeing up more space for other uses, such as parking your car or working on projects. Wall-mounted shelves take advantage of often unused wall space and can be customized to fit your specific storage needs.
Materials Required and Steps for Installation
- Materials:
- Wooden or metal shelves (depending on preference)
- Brackets (heavy-duty, depending on the load)
- Screws and wall anchors
- Drill and drill bits
- Level
- Tape measure
- Pencil for marking
- Installation Steps:
- Measure the Space: Start by measuring the area where you want to install the shelves. Take note of the wall’s dimensions and how much space you need for your items.
- Choose the Right Shelves: Based on your storage needs, select shelves that are sturdy enough to hold your items. Wood shelves can be a good option for heavier items, while metal shelves are great for lighter loads.
- Mark Shelf Placement: Use a pencil to mark where the brackets will go on the wall. Ensure the marks are level by using a level tool to avoid uneven shelving.
- Install the Brackets: Drill holes into the wall at the marked spots. If you’re drilling into drywall, use wall anchors for extra stability. Then, attach the brackets securely to the wall with screws.
- Place the Shelves: After the brackets are installed, carefully place the shelves on top. Ensure the shelves are level before securing them with screws to the brackets.
- Organize Your Items: Once the shelves are installed, arrange your items based on their size and weight. Heavier items should go on lower shelves, and lighter items can be placed higher.
Benefits of Utilizing Vertical Space
- Maximized Storage: Wall-mounted shelves make it possible to store a large quantity of items without taking up any additional floor space, allowing you to use the remaining floor area for vehicles, workspaces, or walking.
- Improved Organization: With everything neatly stored on shelves, it becomes easier to locate what you need. You can also organize items by category—tools, sports gear, seasonal decorations, etc.—to make retrieval fast and simple.
- Customizable Layout: Wall-mounted shelving units are customizable, meaning you can adjust their height, width, and depth based on your specific storage needs and the available space on your walls.
- Clean and Clutter-Free: By getting things off the floor, the garage instantly looks cleaner and more organized. This reduces the risk of accidents, as there are fewer obstacles in your way, and you’ll have more room for movement.
By installing wall-mounted shelving, you’ll not only declutter your garage but also create a system that enhances your ability to access and store items with ease.
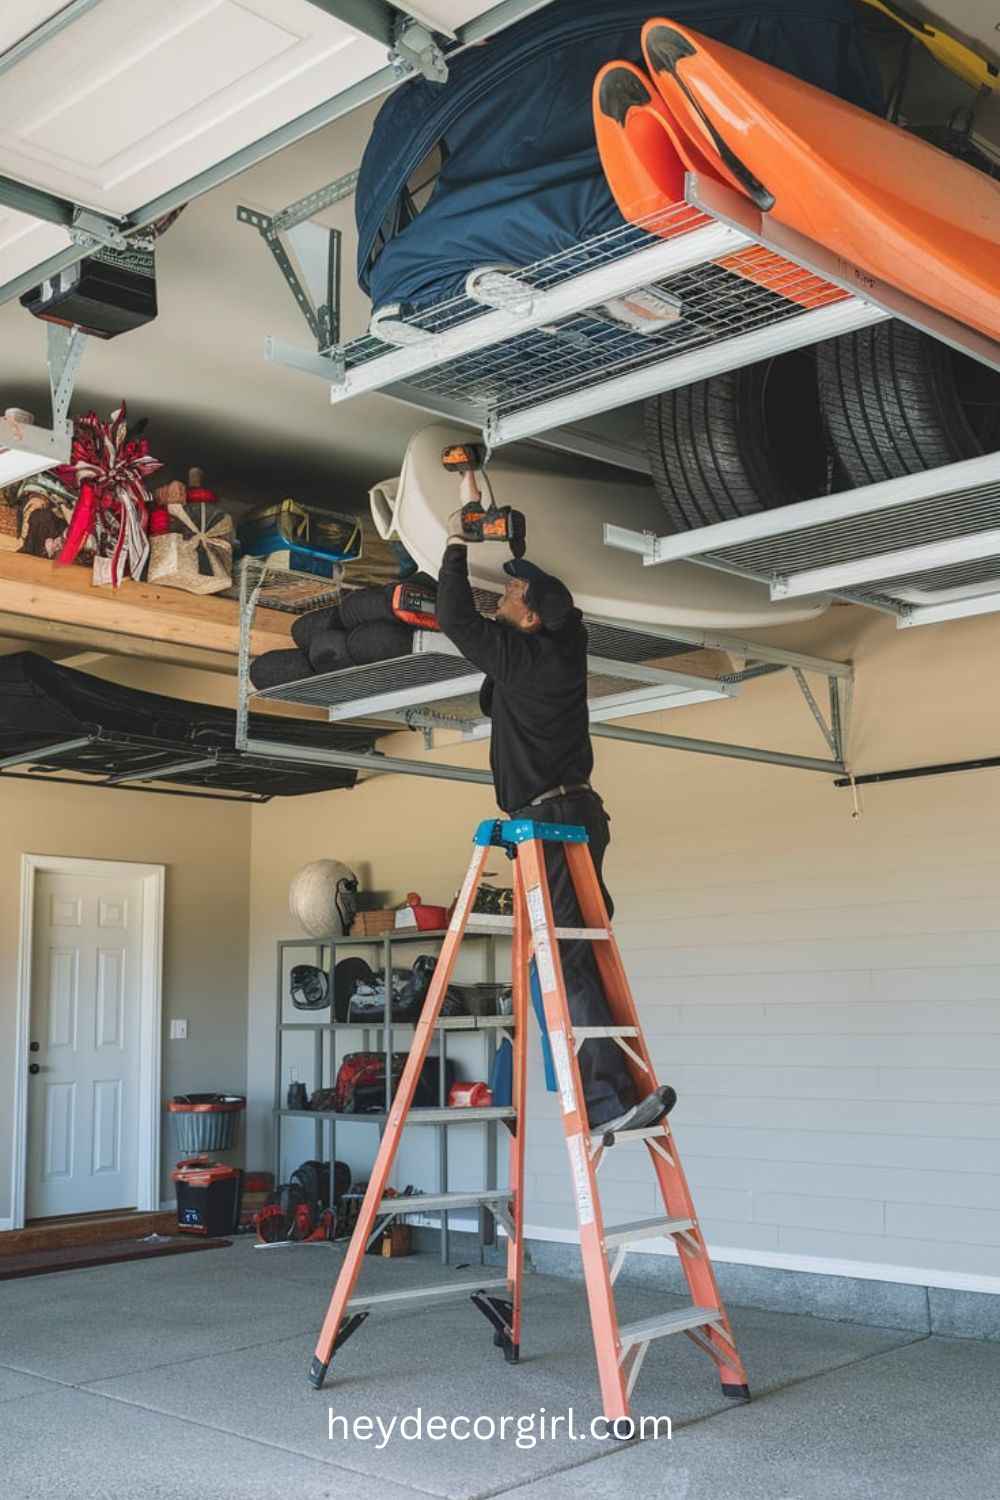
2. Overhead Garage Storage
Overview of Overhead Storage Racks for Seasonal Items
Overhead garage storage racks are an excellent way to utilize the often-overlooked ceiling space in your garage. These racks allow you to store seasonal items such as holiday decorations, camping gear, winter tires, or other bulky equipment that you don’t need access to on a regular basis. By storing these items up high, you can free up valuable floor space for everyday use, like parking your car or moving around easily.
Overhead storage is especially beneficial in garages with high ceilings, as it can hold a significant amount of weight and maximize vertical space. The racks are typically adjustable, so you can tailor the height to fit your specific needs, ensuring that they are both practical and safe.
How to Safely Install Overhead Storage Solutions
- Materials:
- Overhead storage rack kit (usually includes brackets, beams, and hardware)
- Power drill
- Stud finder
- Level
- Tape measure
- Pencil for marking
- Installation Steps:
- Measure and Plan: Determine where you want to install the overhead storage. Use a tape measure to ensure the rack will fit comfortably within the available space without interfering with any doors or other ceiling-mounted items like lights.
- Locate Ceiling Joists: Use a stud finder to locate the ceiling joists. The storage rack will need to be attached directly to these joists to ensure the weight is supported properly. Mark the spots where the joists are located.
- Install the Brackets: Position the mounting brackets where you’ve marked the ceiling. Use a power drill to insert screws through the brackets and into the ceiling joists. Ensure that each bracket is securely anchored before moving to the next step.
- Attach the Rack: Once the brackets are installed, assemble the storage rack according to the instructions provided. Carefully lift the rack into place and secure it to the mounted brackets.
- Adjust for Height: If your rack is adjustable, set it at a height that allows you to safely load and unload items without straining yourself. Ensure the rack is level before tightening all screws to hold it in place.
- Test for Stability: Before loading heavy items, test the stability of the rack by applying gentle pressure to ensure everything is securely in place.
Items Best Suited for Overhead Storage
- Seasonal Decorations: Store Christmas trees, Halloween decorations, or other holiday-specific items that only need to be accessed a few times a year.
- Camping Gear: Store tents, sleeping bags, coolers, and other outdoor gear that doesn’t need to be used regularly.
- Winter Tires or Seasonal Tires: If you live in an area where you swap tires seasonally, overhead storage can be a great way to keep tires organized and out of the way.
- Luggage: Use the space for storing suitcases and travel gear, keeping them out of your living spaces.
- Sports Equipment: Large items like skis, snowboards, or kayaks can easily be stored overhead when not in use, keeping them safe and off the floor.
- Seasonal Furniture: Patio furniture or other seasonal items like lawn chairs or cushions can be stored overhead during the off-season.
Benefits of Overhead Storage
- Maximizes Ceiling Space: By using the ceiling, you’re able to store more items without losing floor space, making the garage more efficient.
- Keeps Items Safe: Items stored overhead are less likely to be damaged by accidents or spills since they are out of reach from foot traffic and other garage activities.
- Declutters the Garage: With seasonal items tucked safely overhead, you can declutter your garage, freeing up more room for daily-use tools and vehicles.
- Easy Access: Though they are stored overhead, seasonal items can still be easily retrieved with a ladder or step stool when needed.
Overhead storage racks are a simple yet effective solution to keeping your garage organized, especially for items that are bulky, infrequently used, or season-specific. When installed correctly, they offer a safe, space-saving option to store your belongings without compromising garage floor space.
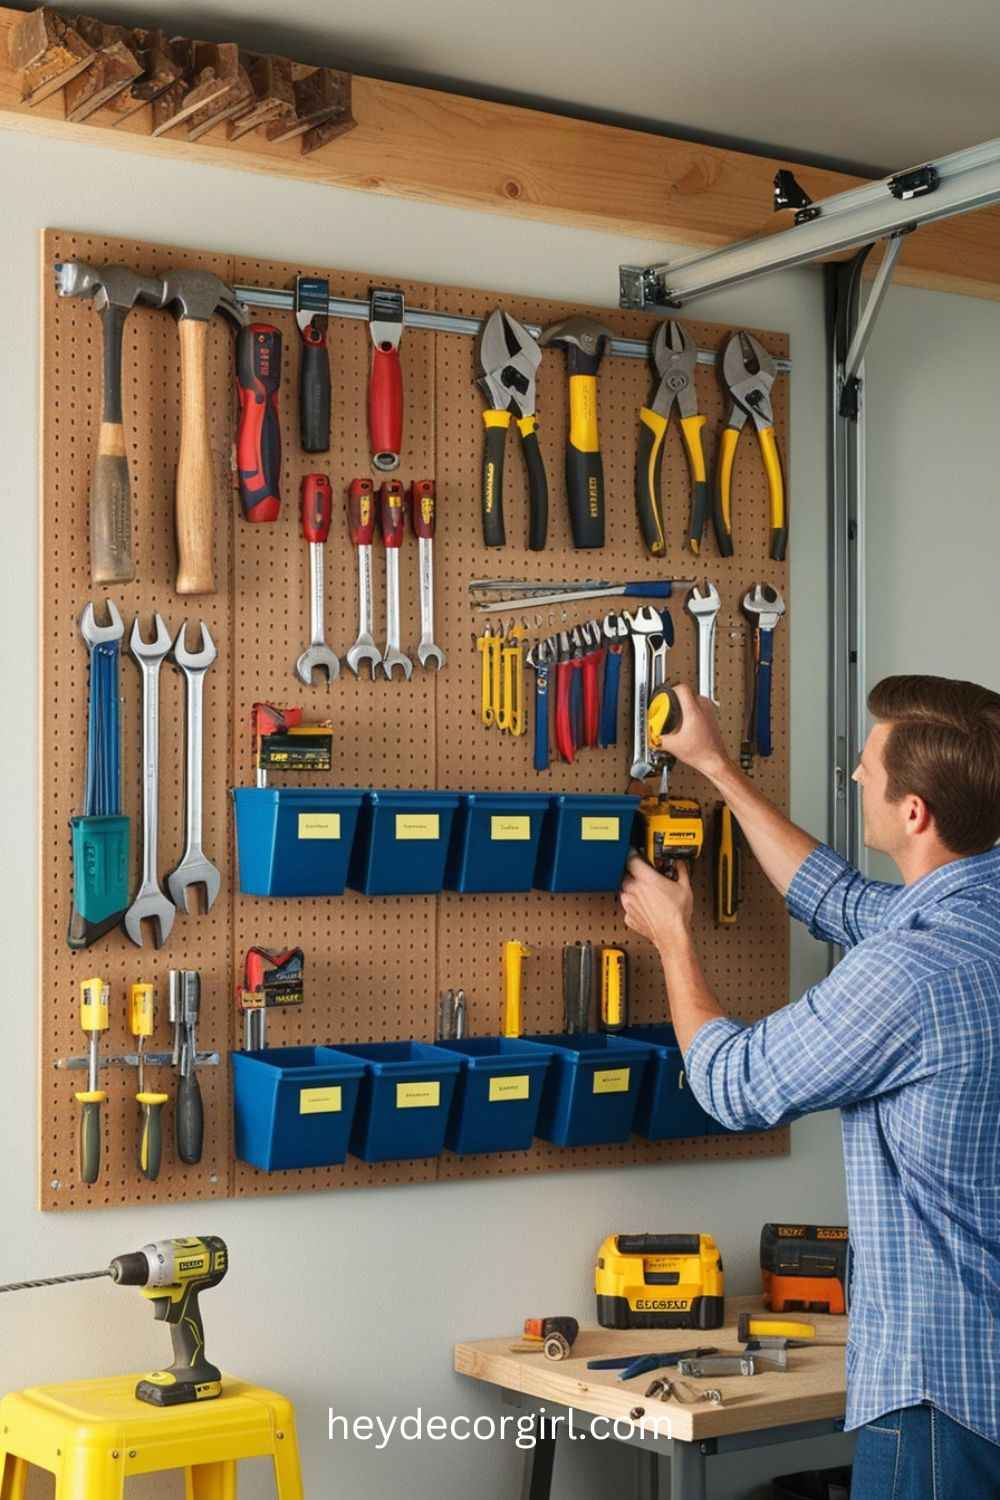
3. Pegboard Tool Storage
How a Pegboard System Helps Organize Tools
A pegboard system is a versatile and space-efficient way to organize tools in your garage. It allows you to store tools vertically, keeping them within easy reach and reducing clutter. With pegboards, you can create a dedicated space for each tool by using hooks, shelves, and bins, making it easy to access and quickly find the tools you need. The grid-like design of a pegboard also makes it simple to adjust the layout as your tool collection grows, offering flexible and customizable storage options.
Using a pegboard system not only saves shelf and floor space but also helps prevent tools from being misplaced or lost. Whether you’re hanging hammers, screwdrivers, wrenches, or power tools, pegboards help keep everything organized and visible, allowing for an efficient workspace.
Step-by-Step Guide on How to Create a Pegboard Wall
- Materials:
- Pegboard sheets (typically 2×4 feet in size)
- Pegboard hooks, shelves, or baskets
- Mounting hardware (pegboard spacers, screws, and wall anchors)
- Drill and drill bits
- Stud finder
- Level
- Tape measure
- Pencil for marking
- Installation Steps:
- Choose the Location: Decide where you want to install your pegboard wall. It’s best to choose a space that’s easily accessible, such as above a workbench or near your main tool storage area.
- Measure the Area: Use a tape measure to determine the size of the pegboard wall you want to create. Mark the area on the wall where you plan to install the pegboard.
- Locate Wall Studs: Use a stud finder to locate the studs in the wall. Pegboards should be mounted to these studs for stability and strength. Mark the stud locations with a pencil.
- Install Pegboard Spacers: Pegboard requires a small gap between the wall and the board to allow the hooks to slide into place. Install pegboard spacers along the studs where the pegboard will hang. These spacers can be small wooden blocks or metal brackets.
- Mount the Pegboard: Align the pegboard with the spacers and use a drill to secure the pegboard to the wall with screws. Make sure the pegboard is level before tightening the screws to hold it firmly in place.
- Add Hooks and Accessories: Once the pegboard is securely mounted, add hooks, shelves, or baskets to hold your tools and small items. Arrange them in a way that keeps your most-used tools within easy reach.
- Organize Your Tools: Begin organizing your tools on the pegboard by category or size. Place larger tools on the bottom rows and smaller tools or accessories at the top for better accessibility.
Tips for Maximizing Pegboard Storage
- Use Pegboard Bins and Shelves: Incorporate small bins and shelves into your pegboard system to hold screws, nails, bolts, and other small parts. This will help keep your tools and accessories organized while also providing additional storage.
- Categorize Your Tools: Group similar tools together, such as placing all your screwdrivers in one section and your hammers or pliers in another. This will make it easier to find what you need quickly, reducing time spent searching for tools.
- Use Adjustable Hooks: Choose adjustable or multi-purpose hooks that can hold a variety of tools in different shapes and sizes. This flexibility allows you to adapt your pegboard storage as your collection grows or changes.
- Label Your Tools: For added organization, label the spaces where each tool belongs. This will help you quickly identify when a tool is missing and ensure that everything has a designated spot.
- Make Use of the Entire Wall: Don’t just use the bottom half of the pegboard. Organize tools vertically, making use of the entire pegboard wall. Store smaller or less frequently used items at the top and keep your most-used tools within arm’s reach.
- Utilize Pegboard Accessories: There are many pegboard accessories available, such as specialized hooks for power tools, adjustable racks, and even magnetic strips for smaller items like screws and nails. Incorporating these accessories can expand your storage options and help keep your workspace organized.
By following these tips and creating a pegboard wall, you can turn your garage into an efficient and organized tool storage area. A well-planned pegboard system will not only save space but will also enhance your productivity by making tools easy to access and keeping your garage clutter-free.
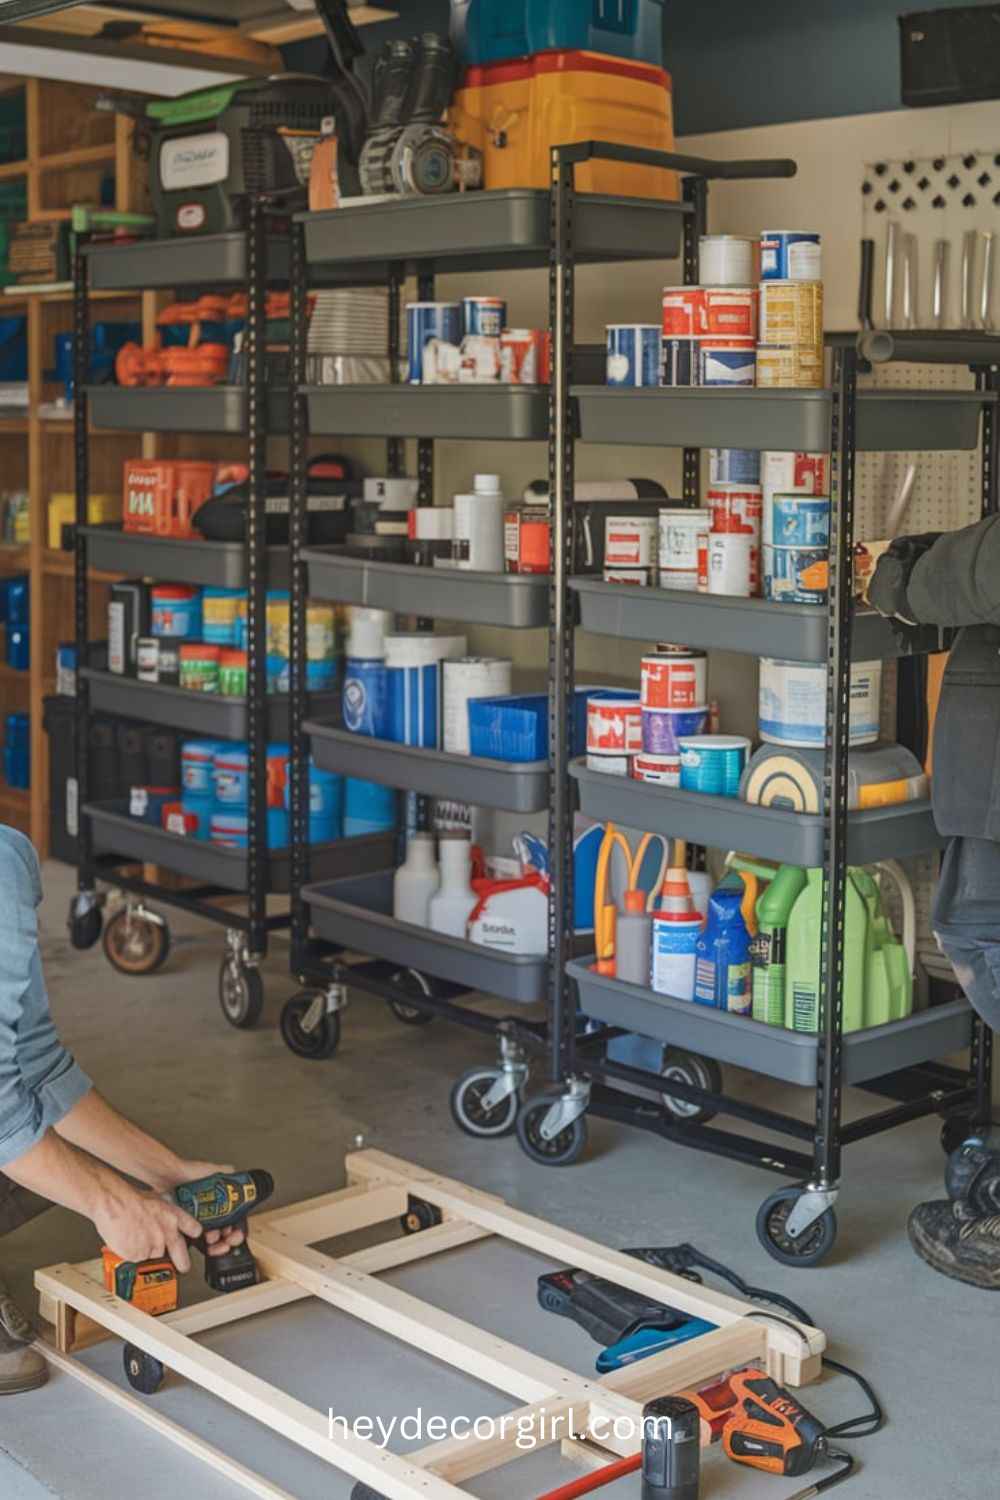
4. Rolling Storage Carts
Benefits of Using Rolling Carts for Portable Storage
Rolling storage carts offer a versatile and mobile solution for organizing tools, supplies, and garden equipment in your garage. The key benefit of using rolling carts is their portability—these carts can easily be moved to different areas of the garage or even taken to other parts of the house or yard for outdoor projects. This flexibility allows you to keep all your essential tools or materials in one place, but still move them wherever needed.
Rolling carts are also excellent for optimizing space. They come in various sizes and configurations, offering options for both small and large items. With built-in shelves, drawers, or baskets, these carts can hold a variety of items and are a great way to keep frequently used tools or supplies within arm’s reach. Whether you’re working on a project or doing routine garage maintenance, rolling carts help streamline your workflow while keeping your garage organized.
Easy-to-Follow Instructions to Build Your Own Cart
- Materials:
- Wood (plywood or MDF for the base and shelves)
- Four caster wheels (heavy-duty for added weight capacity)
- Screws and wood glue
- Drill and drill bits
- Saw (if wood needs to be cut to size)
- Tape measure
- Level
- Sandpaper (for smoothing edges)
- Paint or wood finish (optional for aesthetics)
- Building Steps:
- Plan and Measure: Determine the size of the rolling cart based on what you plan to store. Measure the length, width, and height to fit your available space and the size of the items you want to store.
- Cut the Wood: Cut the plywood or MDF to size for the base and shelves of the cart. You’ll need a piece for the top shelf, a middle shelf, and the bottom base. Be sure to cut the wood to the desired dimensions.
- Assemble the Cart Frame: Lay out the four pieces of wood (top shelf, middle shelf, bottom base, and side panels). Attach the side panels to the base and top shelf using screws and wood glue. Use a level to ensure the shelves are straight.
- Attach the Casters: Once the frame is assembled, attach the four caster wheels to the bottom corners of the base. Make sure the casters are secured tightly so the cart can support the weight of your items.
- Add the Middle Shelf: If you’re building a multi-shelf cart, install the middle shelf by securing it to the side panels using screws. Make sure the shelf is level and spaced appropriately for your items.
- Smooth Edges and Finish: Sand down any rough edges or surfaces, and paint or finish the cart as desired to protect the wood and improve its appearance.
- Organize and Use: Once the cart is fully assembled, start organizing your tools, supplies, or other items on the cart. Arrange them by category for easy access, such as grouping gardening tools together, or organizing hand tools on the top shelf.
How to Organize Tools, Supplies, or Garden Equipment on Rolling Carts
- Group Similar Items: Keep your tools and supplies organized by category. For instance, on the top shelf, you could store commonly used hand tools like screwdrivers and hammers, while the lower shelves could hold larger items such as power tools or gardening equipment like shovels and rakes.
- Use Storage Bins: Small parts like screws, nails, or bolts can be stored in clear plastic bins or small drawers on the cart. Labeling these bins can help you quickly identify what you need.
- Optimize Shelf Space: If you need to store taller items, adjust the shelf spacing accordingly. Some carts have adjustable shelves, which is perfect for accommodating different-sized tools or equipment.
- Mobile Workshop: For DIY projects, you can create a mobile workshop by placing all the tools you need for the project on the cart. This way, you have everything in one place and can easily move the cart to where the work is happening.
- Garden Tools Organization: For garden equipment, use the bottom shelf to store heavier items like fertilizer bags, watering cans, and soil bags, while the top shelf can hold lighter tools like pruners, gloves, and plant markers.
- Add Hooks or Tool Holders: To maximize vertical storage space on the cart, attach small hooks or pegboard-style panels to hold items like hoses, belts, or tool handles.
Rolling storage carts provide both portability and organization, making them an ideal solution for keeping your garage clutter-free and efficient. Whether for tools, gardening supplies, or any other items, a rolling cart makes it easy to store, access, and move your items around as needed.
5. Hanging Bike Storage
DIY Methods for Hanging Bikes on the Wall or Ceiling
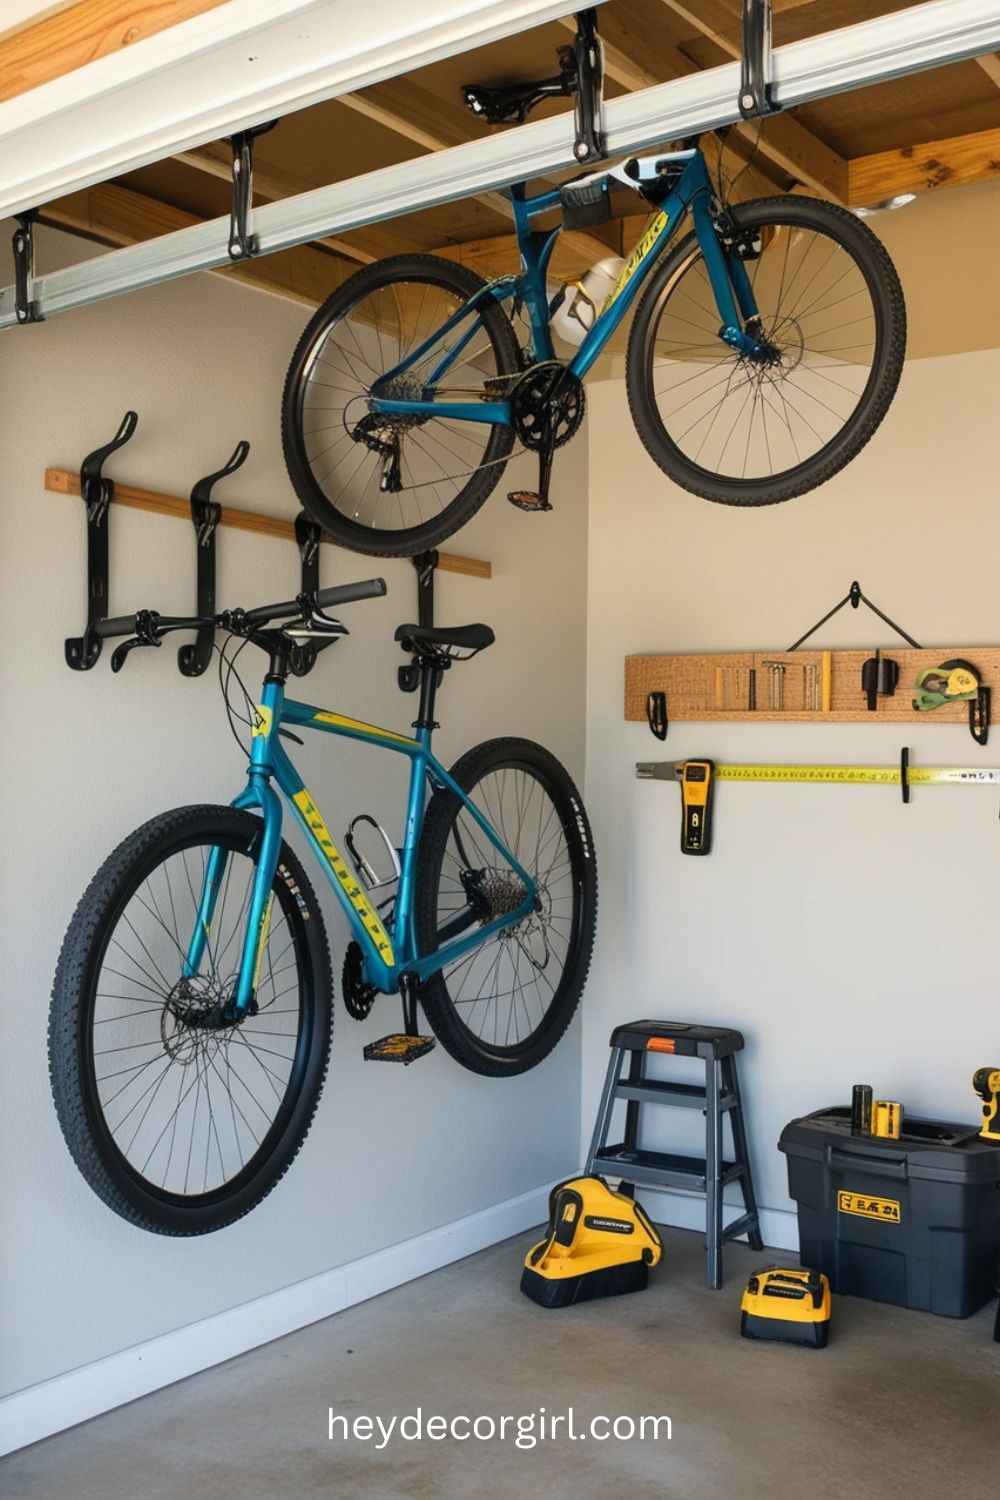
Hanging bikes on the wall or ceiling is a smart, space-saving solution for garage storage. Not only does it keep your bikes off the floor and out of the way, but it also maximizes available space for other uses, such as parking cars or setting up a workshop. There are several DIY methods to hang bikes, depending on the type of storage you prefer and the layout of your garage.
- Wall-Mounted Bike Rack: A popular option is a wall-mounted bike rack, which uses hooks, brackets, or shelves to hold the bike by its frame or wheels. This is a great solution if you have enough wall space and want to keep the bike easily accessible.
- Ceiling-Mounted Pulley System: Another great method is installing a ceiling-mounted pulley system. This system allows you to hoist the bike up and down using a rope or cable, which is ideal for garages with limited floor space. Ceiling-mounted hooks or tracks are another option if you want to keep the bike securely out of the way.
Materials Needed and Installation Tips
- Materials for Wall-Mounted Bike Rack:
- Heavy-duty bike hooks or brackets
- Screws and wall anchors
- Drill and drill bits
- Stud finder
- Level
- Tape measure
- Pencil for marking
- Materials for Ceiling-Mounted Pulley System:
- Ceiling hooks or brackets
- Pulley system (available at most hardware stores)
- Rope or cable
- Drill and drill bits
- Eye bolts or carabiners
- Ladder
- Installation Steps (Wall-Mounted Bike Rack):
- Choose the Location: Select a clear wall space that is free from obstructions. Make sure the area is high enough to hang the bike comfortably without hitting anything.
- Locate the Wall Studs: Use a stud finder to locate the studs in the wall where the bike hooks will be anchored. Mark the positions of the studs with a pencil.
- Install the Hooks or Brackets: Attach the bike hooks or brackets to the wall by drilling screws directly into the wall studs. Use wall anchors if you are installing on drywall without studs. Make sure the hooks are level and spaced adequately to accommodate the bike’s frame or wheels.
- Hang the Bike: Once the hooks are in place, hang the bike by its frame or wheels. Adjust the height and position to make sure the bike is secure and accessible.
- Installation Steps (Ceiling-Mounted Pulley System):
- Find the Ceiling Joists: Use a stud finder to locate the ceiling joists. Mark the positions where you will install the hooks for the pulley system.
- Install Ceiling Hooks or Tracks: Drill the ceiling hooks or tracks into the joists, making sure they are securely attached.
- Attach the Pulley System: Follow the instructions on your pulley system kit to attach the pulleys and secure the rope or cable.
- Hoist the Bike: Attach the bike to the pulley system using the provided hooks or straps. Pull the rope to lift the bike up to the ceiling, and secure it in place.
Space-Saving Benefits and Safety Considerations
- Space-Saving Benefits: Hanging bikes on the wall or ceiling is a great way to free up floor space in your garage. By using vertical space, you can make room for other storage solutions or create more space for walking, parking, or working in the garage. Bikes that are stored overhead or against the wall are also less likely to get damaged by being knocked over or exposed to the elements.
- Safety Considerations: When hanging bikes, safety is crucial. Always make sure the hooks, brackets, or pulley systems are securely installed and can handle the weight of the bike. For wall-mounted storage, double-check that the hooks are anchored into studs to prevent the bike from falling. When using a ceiling-mounted pulley system, ensure the bike is lifted and lowered safely, without the risk of it falling from an unstable position.
- Accessibility: While hanging bikes saves space, it’s also important to ensure that they are still easily accessible. Wall-mounted bike racks should be placed at a comfortable height so you can easily hang and remove the bike. If you’re using a ceiling-mounted system, consider the height and make sure you can comfortably reach the rope to lower the bike when needed.
Hanging bike storage is an effective and efficient solution for keeping your garage organized and your bikes safe. With the right installation method, your bikes will be stored securely, freeing up valuable floor space while maintaining easy access.
6. Custom Cabinetry
Building Customized Storage Cabinets for Specific Needs
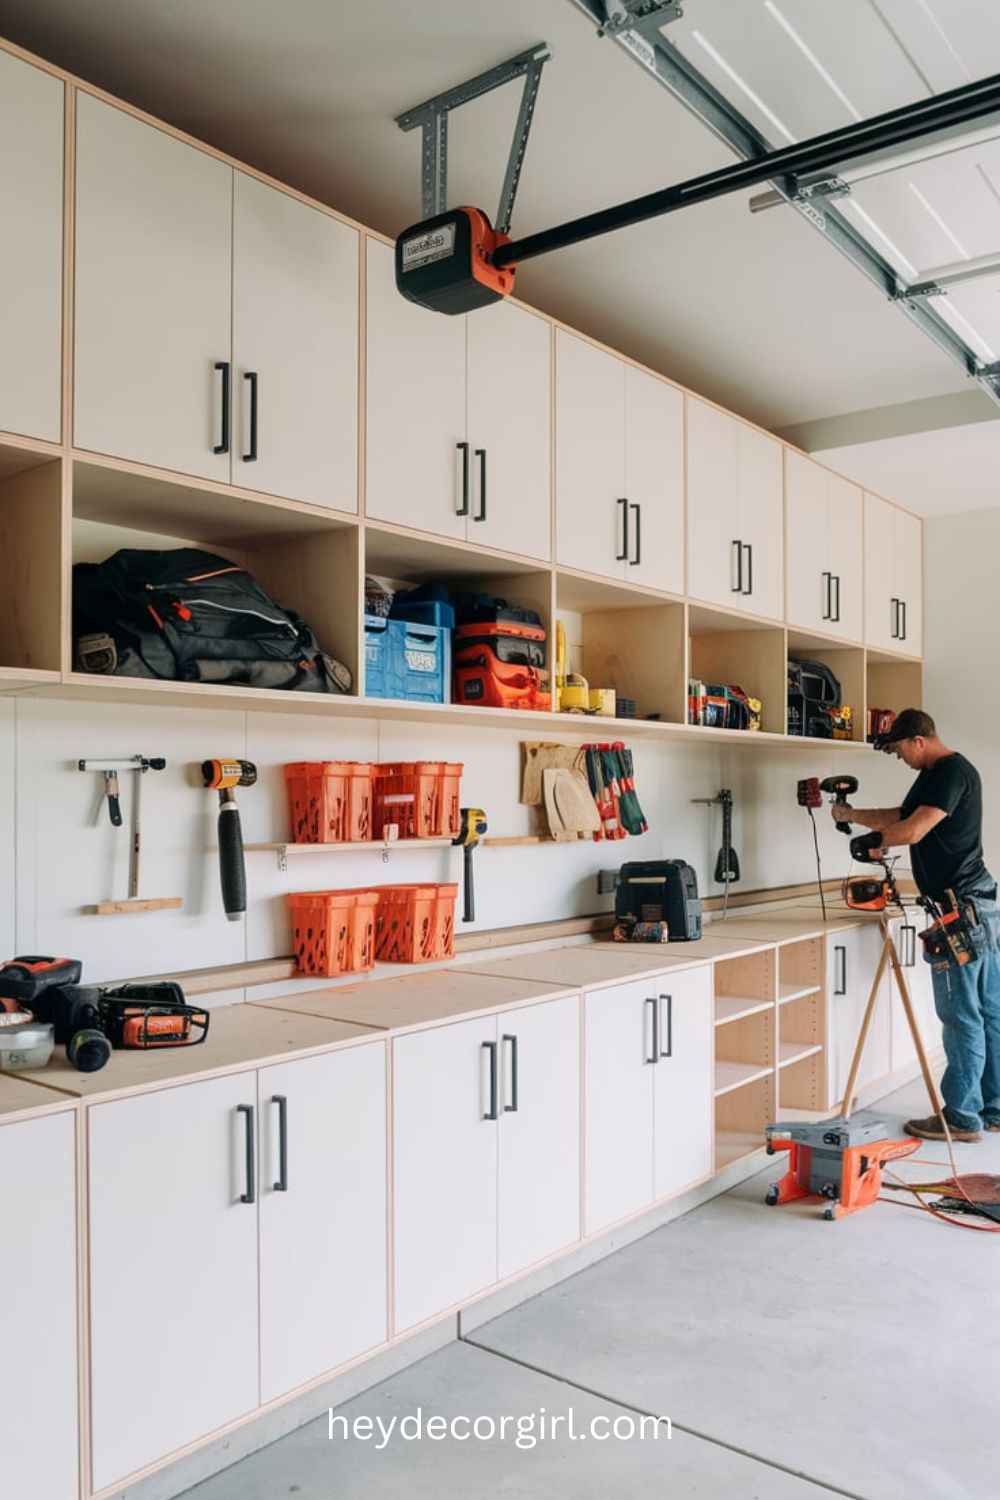
Custom cabinetry is a fantastic way to optimize garage storage by creating a system that fits your exact needs. Whether you’re storing tools, supplies, sports gear, or anything else, custom cabinets offer a tailored solution that makes the most of your available space. By designing cabinets that suit your particular garage layout, you can ensure every item has its designated place, keeping your space neat, accessible, and functional.
Custom cabinets can be built to various sizes and configurations, whether you need shallow cabinets for small items or deeper ones for larger equipment. You can also include drawers, shelves, or pull-out bins for additional organization, ensuring that everything from screws and nails to larger items like lawn equipment or sports gear is stored safely and efficiently.
How to Design and Build Cabinets for Tools, Supplies, or Sports Gear
- Materials:
- Plywood (for cabinet boxes and shelves)
- MDF or wood for doors and drawer fronts
- Cabinet hardware (hinges, handles, pulls)
- Wood screws, nails, and wood glue
- Drawer slides (for pull-out drawers)
- Power tools (saw, drill, screwdriver, sander)
- Paint or finish (optional for aesthetics)
- Designing Your Cabinets:
- Assess Your Needs: Start by determining what you will be storing in the cabinets. Measure the size of your tools, sports gear, or supplies to make sure the cabinets will be deep and wide enough to accommodate your items. Decide if you need shelves for taller items or drawers for smaller, more organized storage.
- Sketch a Plan: Create a design for your cabinet layout. Sketch the number of shelves or drawers, and plan for a section that can hold larger equipment like lawnmowers or sports equipment. Take into account the available space in your garage and how you want the cabinets to blend with your workspace.
- Choose Cabinet Style: Determine whether you want open shelving, closed cabinets with doors, or a combination. For tools and supplies that need quick access, open shelving or shallow drawers work well. For sports gear or seasonal items that require more protection from dust, closed cabinets with doors are ideal.
- Building Your Cabinets:
- Cut the Wood: Using your measurements and design, cut plywood to create the cabinet sides, shelves, and base. Be sure to smooth the edges with sandpaper to ensure a clean finish.
- Assemble the Box: Begin by attaching the sides of the cabinet to the base with screws or nails, ensuring the box is square. If building drawers, assemble them separately using screws or nails to create the frame and attach the drawer slides.
- Install Shelves or Drawers: Install shelves or fit the drawers into the cabinet box. For adjustable shelves, use shelf pins to allow flexibility in height.
- Attach Doors: If your design includes doors, attach them using hinges. Ensure the doors open easily and don’t obstruct any shelves or drawers.
- Finish and Install: Sand the cabinet to remove any rough edges and apply a finish or paint if desired. Once dry, install the cabinets on the wall or floor, making sure they are securely anchored to support the weight of your stored items.
Space-Saving and Aesthetic Benefits
- Maximized Storage: Custom cabinets allow you to tailor the storage to fit the size and quantity of your items, making it possible to store more in less space. By utilizing vertical space or creating deep cabinets, you can store everything efficiently without overcrowding the floor.
- Improved Organization: Cabinets can help you keep your garage organized by providing specific places for tools, supplies, and sports gear. With closed storage, you can keep the clutter hidden and reduce visual chaos, creating a cleaner, more streamlined environment.
- Aesthetic Appeal: Unlike generic storage solutions, custom cabinetry can be built to complement the design and color scheme of your garage. Whether you prefer a sleek modern look with clean lines or a more rustic, natural aesthetic, custom cabinets can be finished to match your style, turning your garage into a functional yet visually appealing space.
- Durability and Strength: Custom cabinetry is built to last. By choosing quality materials and following solid construction techniques, you can create cabinets that will withstand the weight of heavy tools or sports equipment and endure for years.
- Flexibility and Customization: As your storage needs change, custom cabinetry can be easily adapted. You can add new shelves or modify the configuration of your cabinets as your tool collection or storage requirements evolve.
Custom cabinetry is an ideal solution for anyone looking to maximize their garage’s potential. Whether you’re storing tools, sports gear, or supplies, custom cabinets offer a personalized, space-efficient, and attractive way to keep your garage organized and functional.
7. Magnetic Tool Holders
Explanation of Magnetic Strips and Tool Holders for Easy Access
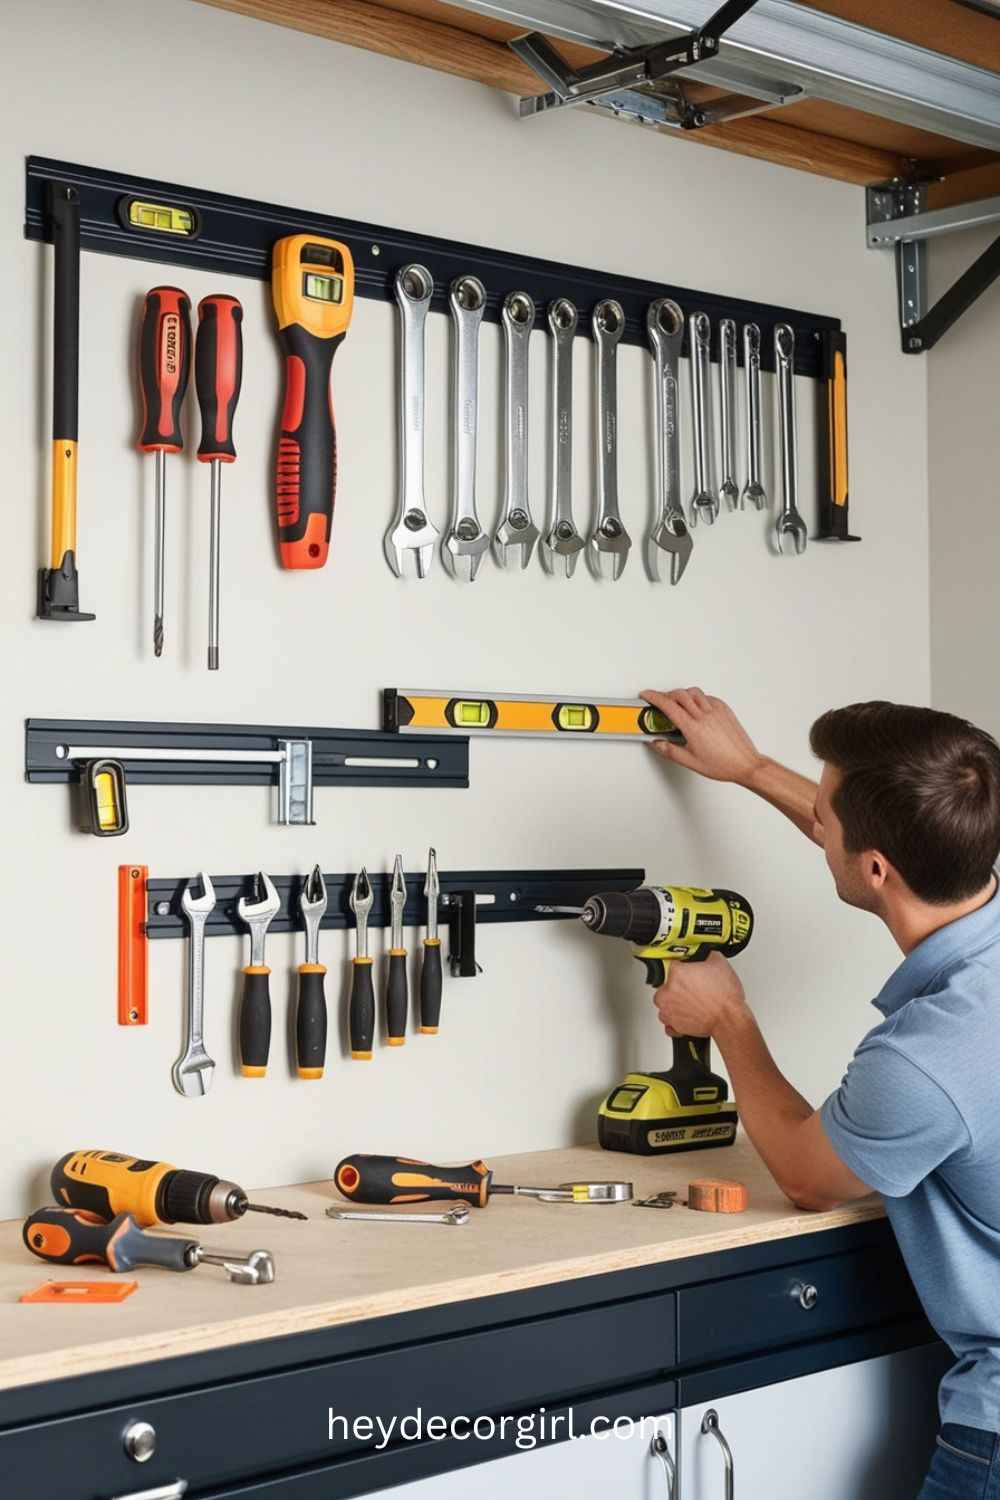
Magnetic tool holders, often in the form of strips or bars, are a simple yet highly effective solution for organizing tools in the garage. These strips use powerful magnets to hold metal tools in place, keeping them easily accessible and visible. Whether it’s a magnetic strip on the wall or a more advanced magnetic tool holder, these systems allow you to quickly grab the right tool without the hassle of rummaging through drawers or boxes.
Magnetic tool holders come in various sizes, designed to accommodate different types of tools, such as screwdrivers, wrenches, pliers, and even smaller hand tools. They can be mounted on walls, near workbenches, or in any accessible location in your garage. The beauty of magnetic tool holders lies in their versatility—they are easily adjustable and don’t take up much space, offering a clutter-free solution to tool storage.
How to Install Magnetic Strips in the Garage
- Materials:
- Magnetic tool strips or holders (available in various lengths)
- Drill and drill bits
- Screws or wall anchors (depending on the wall type)
- Level
- Tape measure
- Pencil for marking
- Installation Steps:
- Choose the Location: Select a location for your magnetic tool holder where you frequently use your tools, such as above your workbench or on a nearby wall. Ensure that the area is clear of any obstructions and allows easy access to the tools.
- Measure and Mark: Use a tape measure to determine where to place the magnetic strip on the wall. Mark the drill holes with a pencil, ensuring the strip will be level and at a height that’s comfortable for you to reach.
- Drill Holes: Use a drill to create pilot holes for the screws or wall anchors. If you’re installing the strip on drywall, use wall anchors to ensure the magnetic strip is secure. If you’re installing on a wooden surface, screws alone will suffice.
- Attach the Magnetic Strip: Align the magnetic strip with the holes and secure it to the wall using screws. Ensure that it is firmly attached and level before tightening the screws completely.
- Test for Stability: Once the strip is mounted, test its stability by hanging a few tools to make sure the magnets hold securely.
Benefits of Magnetic Tool Storage
- Easy Access: Magnetic tool holders keep your tools visible and within easy reach. With everything organized in one spot, there’s no need to dig through drawers or search for missing tools, improving efficiency when working on projects.
- Space-Saving: By using vertical wall space, magnetic tool holders keep your tools off the workbench and garage floor, saving space and reducing clutter. The slim design of the magnetic strips ensures that they don’t take up much room while providing ample storage.
- Prevents Damage: With tools suspended on a magnetic strip, there is less risk of damage from jumbled drawers or boxes. Tools are less likely to be scratched, dulled, or broken since they are kept in an organized and secure manner.
- Organization: Magnetic tool holders allow for quick identification of tools, ensuring that everything has its place. The ability to see all your tools at once makes it easy to grab the right one for the job.
- Flexibility: Magnetic strips can be easily repositioned as your tool collection grows or your garage layout changes. They can be installed on any wall, workbench, or even inside cabinet doors, providing flexibility in organizing your workspace.
- No Additional Hardware Required: Unlike pegboards or shelves, magnetic strips do not require hooks or additional hardware to hang each tool. Tools simply attach to the magnets, making it easier to add or remove them.
8. Corner Shelving Units
Utilizing Garage Corners for Added Storage Space
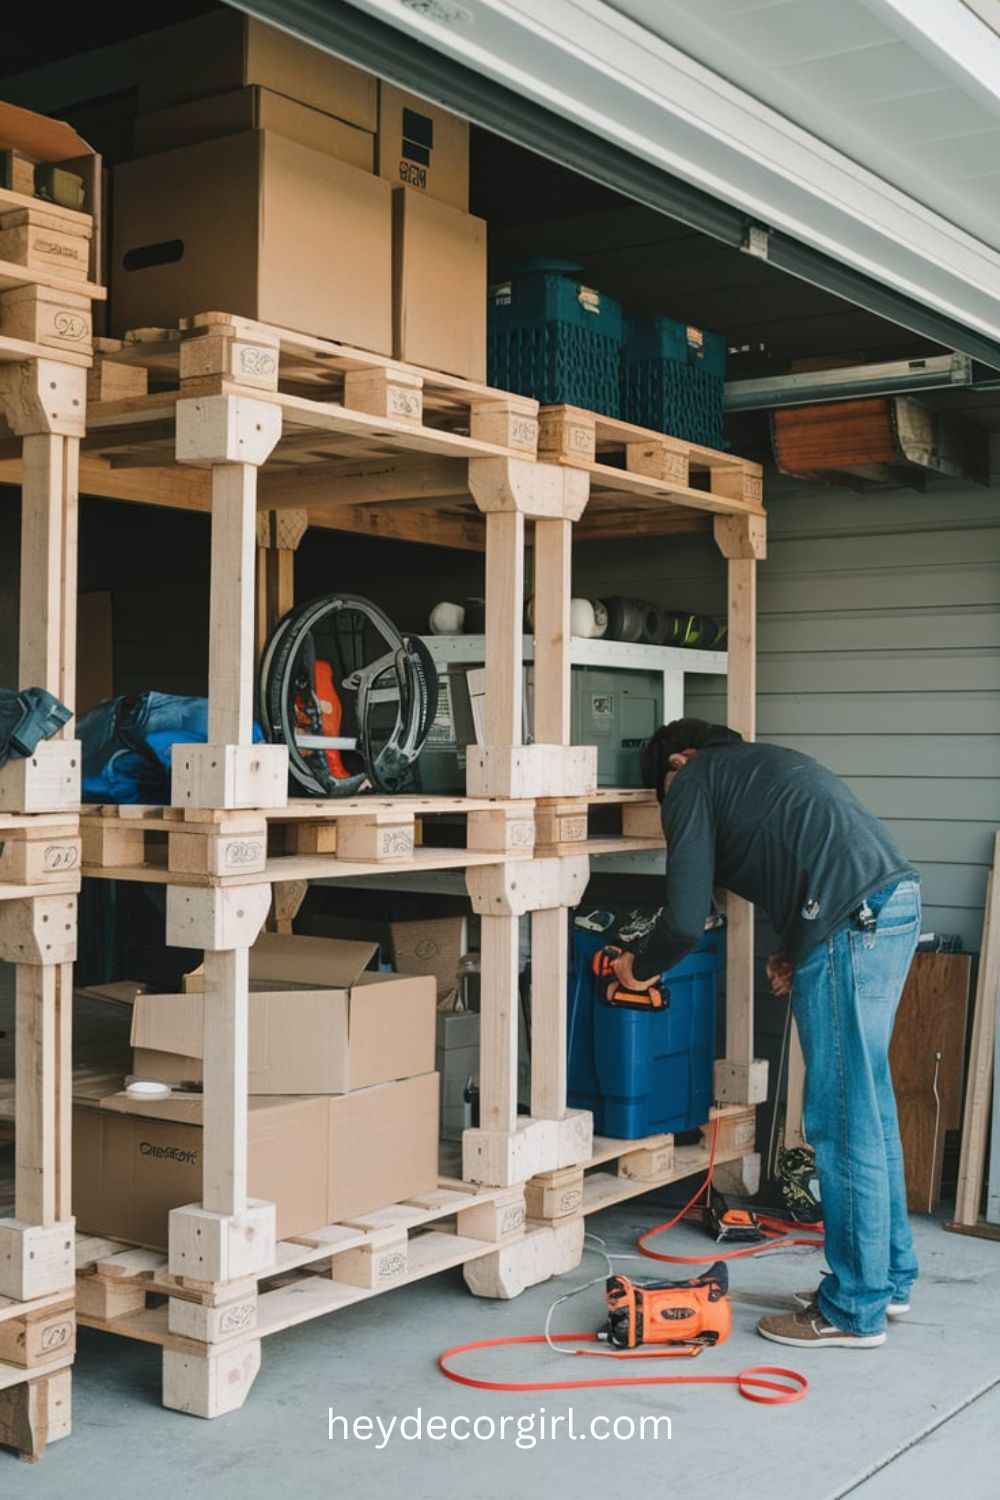
Corners in a garage are often underutilized, but with the right storage solutions, they can become a valuable asset for organizing tools, bins, and boxes. Corner shelving units allow you to make the most of these often-overlooked areas, adding storage space without sacrificing floor area. By using vertical space and designing shelves to fit snugly into the corners, you can store a wide variety of items such as sports gear, cleaning supplies, and seasonal decorations. Corner shelves help keep your garage organized by consolidating stored items and providing easy access.
How to Build Corner Shelves to Hold Bins, Boxes, or Tools
- Materials:
- Plywood or MDF boards (for shelves)
- Wood screws or nails
- Drill and drill bits
- Saw (if wood needs to be cut to size)
- Brackets or corner brackets (for added support)
- Measuring tape and pencil
- Level
- Sandpaper (for smoothing edges)
- Paint or wood finish (optional for aesthetics)
- Building Steps:
- Measure the Corner: Start by measuring the corner space where you want to install the shelving. Be sure to account for the width, depth, and height of the area to determine the shelf dimensions.
- Cut the Wood: Use a saw to cut the plywood or MDF into the appropriate lengths for the shelves. Typically, corner shelves are triangular, but they can also be designed with an L-shape to fit more items.
- Install the Brackets: Attach corner brackets to the wall in the measured corner, ensuring they are level and properly anchored into the studs for maximum support. The brackets should be strong enough to support the weight of the items you plan to store.
- Place the Shelves: Once the brackets are secured, place the cut shelf pieces onto the brackets. Make sure the shelves are level and properly aligned. Secure the shelves with screws or nails.
- Finishing Touches: Sand the edges of the shelves to smooth any rough spots. If desired, paint or finish the shelves to match the decor of your garage. You can also add labels or bins to help keep items organized on the shelves.
Why Corner Shelving Is an Often-Overlooked Storage Solution
- Maximizing Unused Space: Corners are frequently wasted in garages, but by installing shelving units, you can turn these underused areas into valuable storage. Corner shelves allow you to add storage without taking up additional floor space, making them an efficient option in smaller garages.
- Improved Organization: Corner shelving units help keep items organized by grouping them together and providing easy access. With everything stored neatly in bins or boxes, you can locate what you need without sifting through piles of clutter.
- Hidden Potential: Many people overlook corners when planning garage storage, focusing more on wall-mounted shelves or freestanding units. However, corners offer an often-untapped opportunity to store things vertically and keep your garage neat and tidy.
- Space-Efficient Design: Corner shelves make use of vertical space in ways that other storage methods might not. They fit neatly into the corner, leaving the rest of the garage floor open for larger equipment or vehicles. The shelves can also be stacked to increase storage capacity without taking up additional room.
- Customizable and Versatile: Corner shelves can be designed to fit any garage layout. You can create a shelf that works around obstacles, such as windows or light fixtures, and tailor the shelving to accommodate specific items, whether it’s heavy tools or lighter boxes.

Hi, I’m Richa, the creative mind and passionate soul behind Hey Decor Girl. With a bachelor’s degree in Inter-space Design and a deep love for transforming spaces, I’ve dedicated my career to bringing style, comfort, and personality into homes. As an interior designer and architect, I’ve had the pleasure of crafting unique living environments that reflect the individuality of those who live in them.
At Hey Decor Girl, I share my expertise in all things home decor—from cozy living room makeovers to rustic farmhouse designs and everything in between. My mission is to inspire you to create spaces that not only look stunning but also feel like home. Whether you’re looking for the latest trends or timeless classics, I’m here to guide you every step of the way. Let’s make your dream home a reality, one stylish detail at a time.
Do It Yourself Do It Yourself Garage Storage Ideas Garage Storage Ideas Yourself Garage
Last modified: November 28, 2024
![Hey Decor Girl [Latest Trending Decor Design Ideas]](https://heydecorgirl.com/wordpress/wp-content/uploads/2024/08/Heygirldecor-Logo.png)


