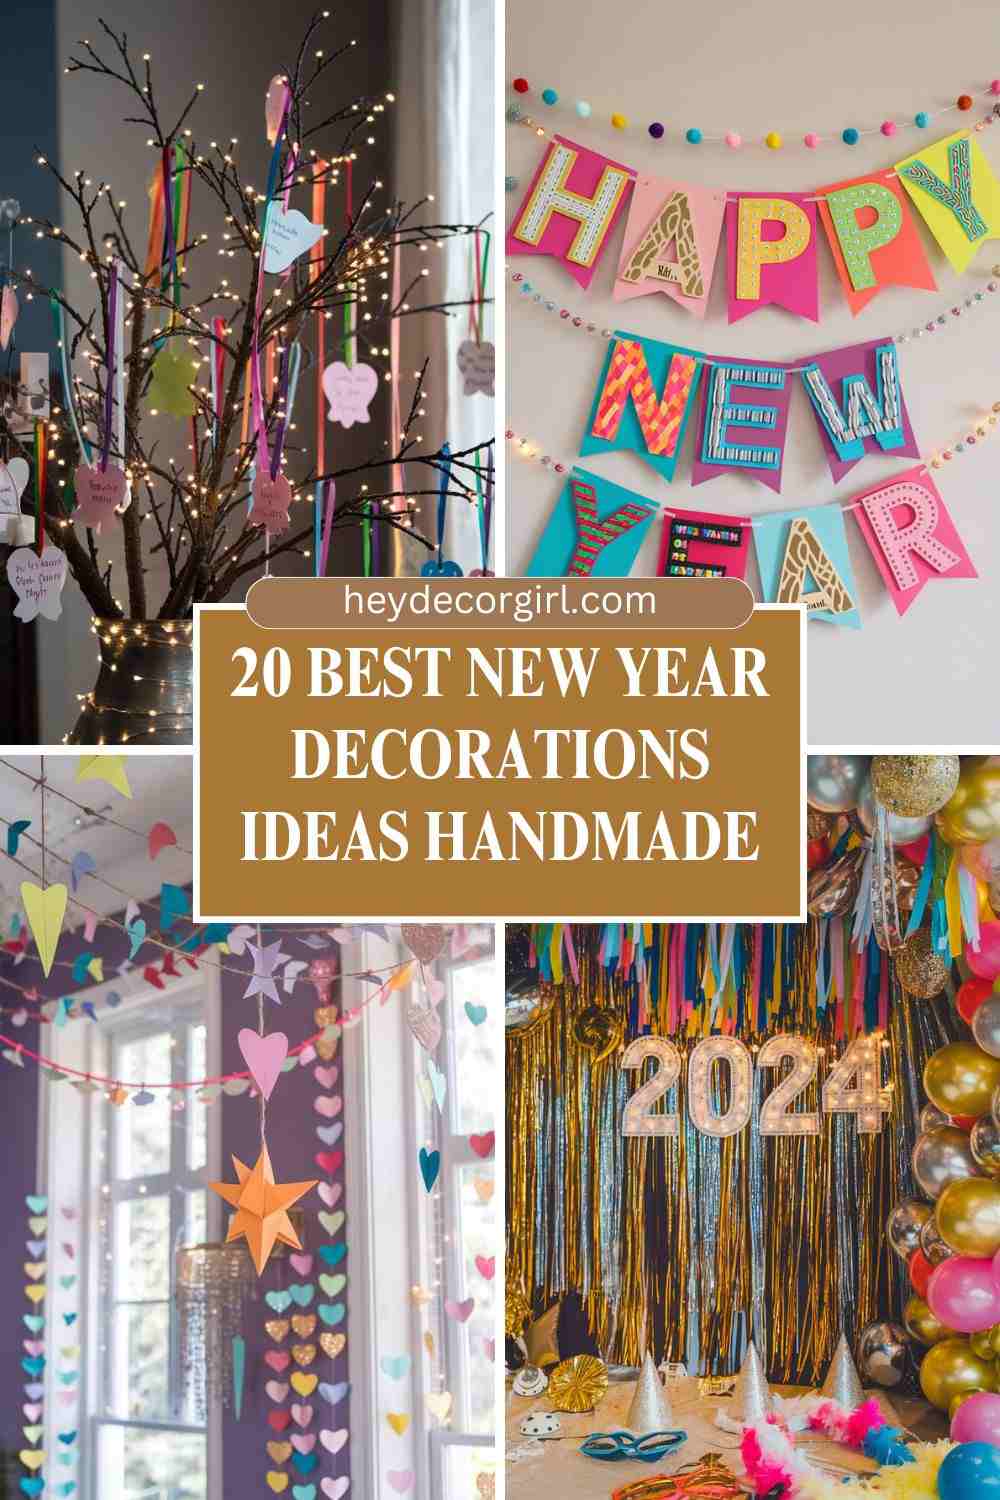
These “New Year Decorations Ideas Handmade” bring a creative twist to any space, filling it with charm and holiday spirit. From glittery accents to colorful garlands and DIY party hats, each idea in this collection has been selected to inspire a lively, personalized celebration. Whether you’re looking to make a bold statement or just add a few thoughtful touches, handmade decorations ensure that your New Year’s setup feels uniquely yours, setting the perfect backdrop for a memorable celebration.
As the New Year approaches, many people look for ways to refresh their home décor and set a festive atmosphere to welcome new beginnings. Handmade decorations add a unique charm and warmth that can’t be matched by store-bought items. Not only are DIY decorations often more affordable, but they also allow for complete customization—enabling you to choose colors, themes, and designs that reflect your personal style and the tone of the celebration you want to create. Plus, crafting your own decorations is a fun and meaningful activity that can involve family and friends, making the preparations feel even more special.
Best New Year Decorations Ideas Handmade
1: Glittery Mason Jar Candle Holders
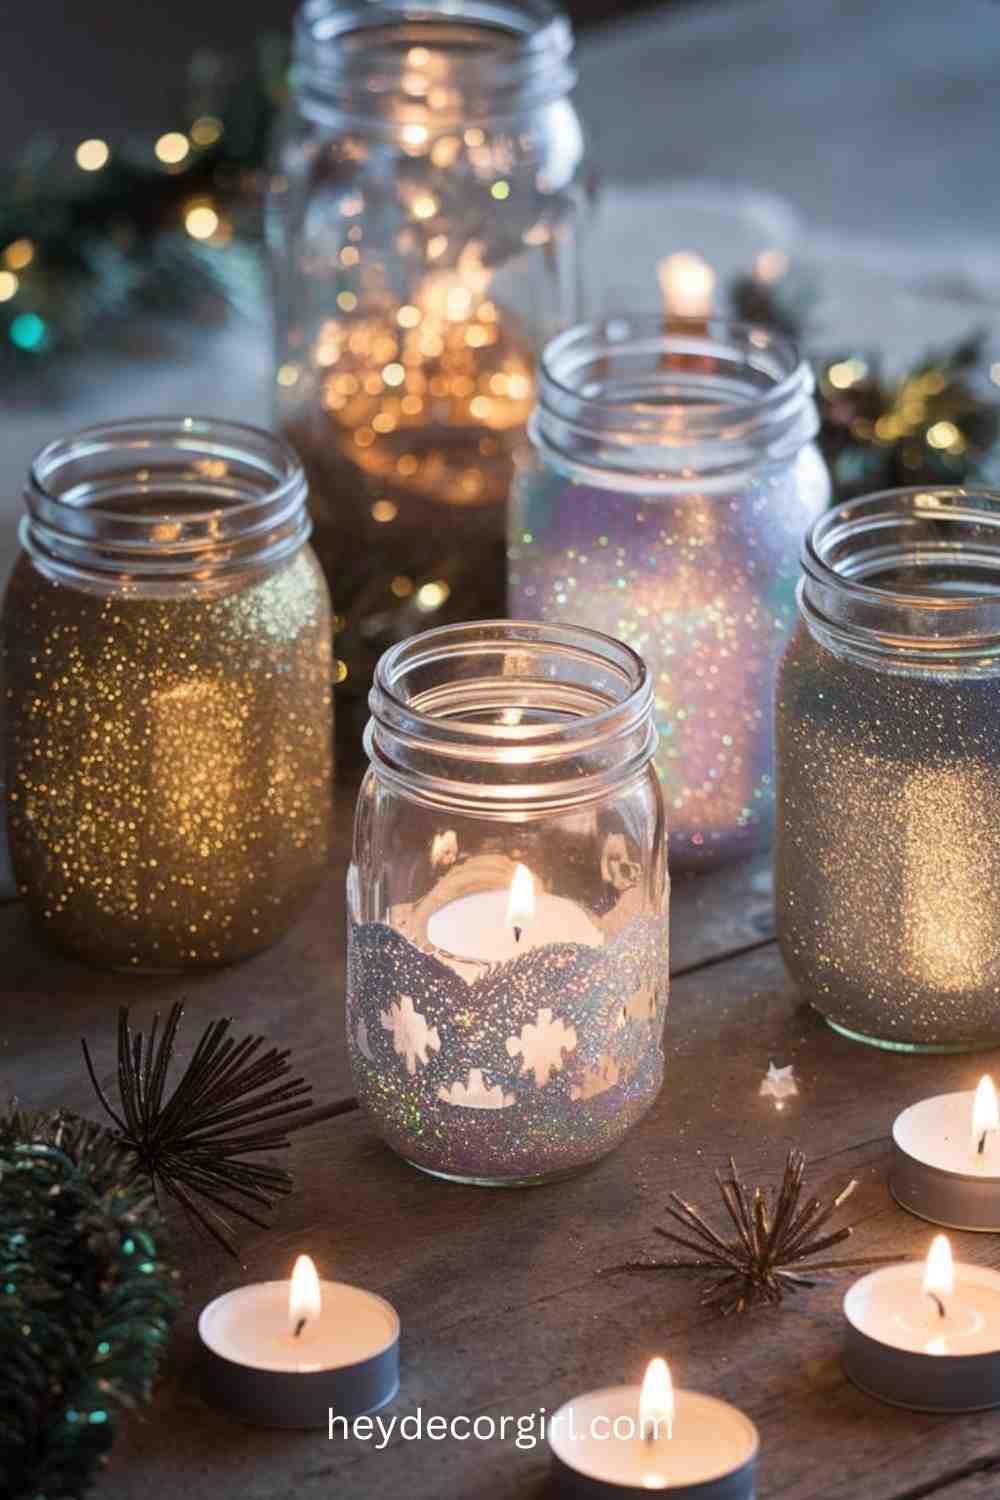
Transforming simple mason jars into glittery candle holders is an easy yet stunning DIY project that brings a festive sparkle to any New Year’s setting. These candle holders create a warm, inviting glow, adding a touch of elegance and charm to your space.
Materials Needed:
- Mason jars (any size works, depending on your preference)
- Fine glitter (gold, silver, or mixed colors for a festive look)
- Mod Podge or clear-drying glue
- Foam brush or paintbrush
- Tea lights or small LED candles
Step-by-Step Instructions:
- Prepare the Mason Jar: Clean and dry the mason jars thoroughly to ensure the glue and glitter stick well.
- Apply Glue: Use a foam brush or paintbrush to coat the outside of the jar with a thin, even layer of Mod Podge or glue. You can cover the entire jar for an all-over glitter effect or apply glue only to the bottom half or in patterns, depending on your design.
- Add the Glitter: Over a piece of paper (to catch excess), generously sprinkle glitter onto the glue-covered jar, rotating it to ensure all areas are evenly covered. Gently tap off any excess glitter, and if needed, sprinkle more glitter over any missed spots.
- Seal the Glitter: Once the glue and glitter layer is dry, add a thin layer of Mod Podge over the glitter to seal it. This will prevent glitter from flaking off and make the jar more durable. Let it dry completely.
- Place the Tea Light: Once the jar is dry, place a tea light or small LED candle inside. When lit, the candle will create a beautiful glow that sparkles through the glitter.
Color Theme Suggestions:
- Gold and Silver: Classic metallic tones give a sophisticated and festive look, perfect for a New Year’s Eve celebration.
- Mixed Colors: Use a combination of glitters (e.g., gold, silver, and rose gold) for a fun, colorful effect.
- All White or Iridescent Glitter: For a frosty, wintery look, consider using white or iridescent glitter for a softer, enchanting ambiance.
These glittery mason jar candle holders are versatile enough to serve as table centerpieces, mantel accents, or outdoor lighting, adding an eye-catching sparkle to your New Year’s décor.
2: DIY Confetti Balloons
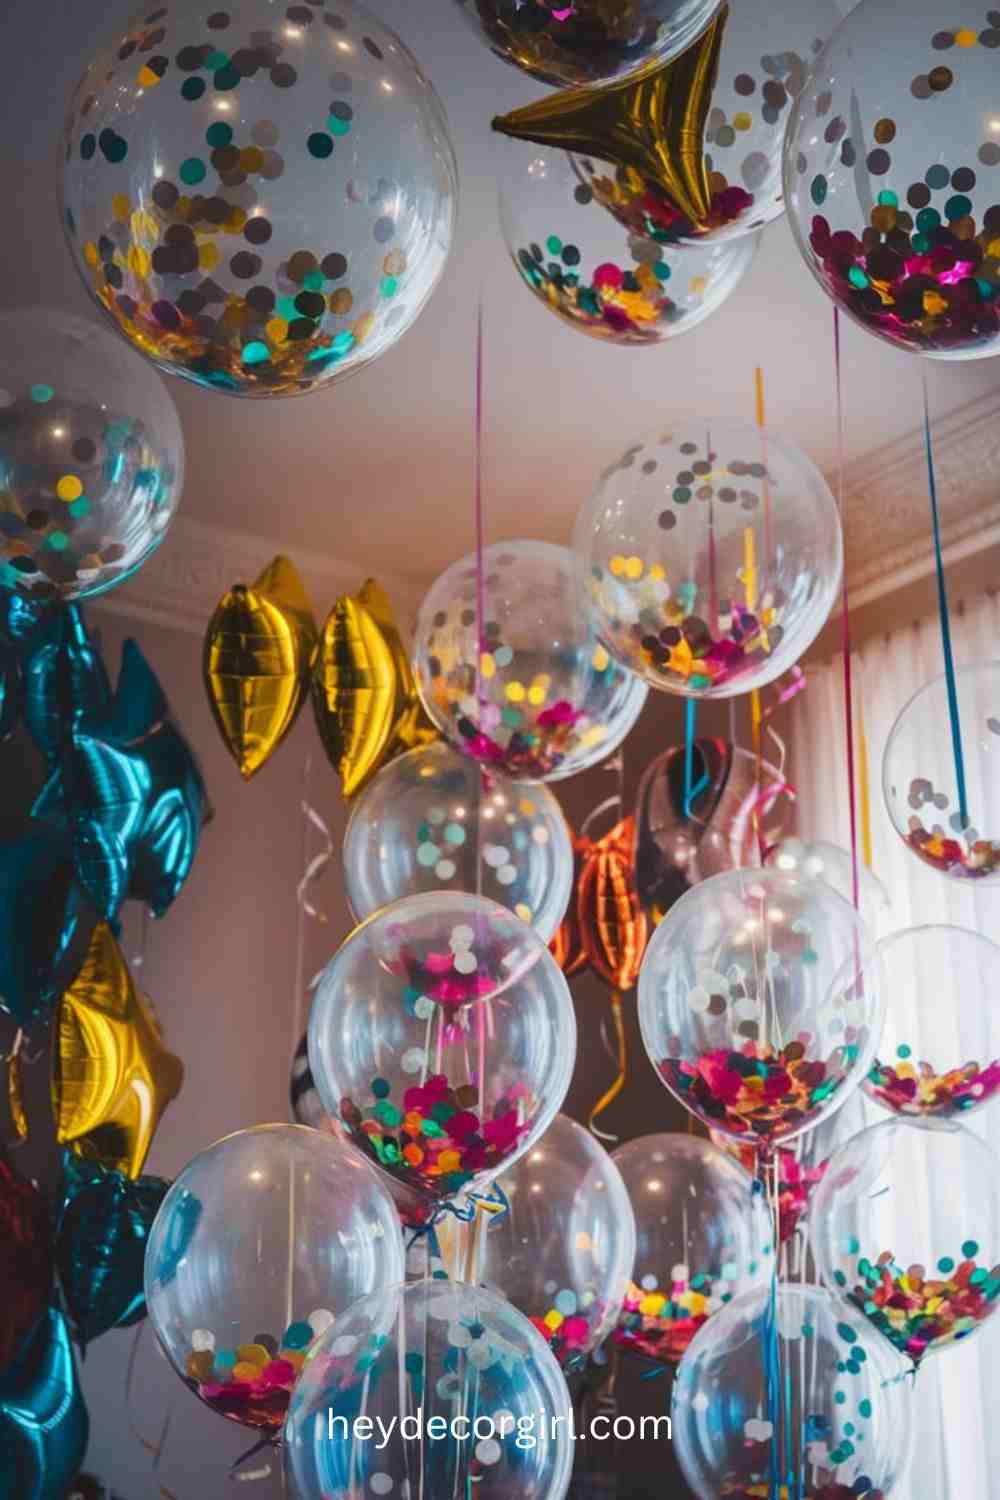
DIY confetti balloons are a quick and fun way to add a pop of color and festivity to any New Year’s celebration. These balloons add a touch of whimsy and look fantastic as part of a party backdrop, centerpiece, or simply scattered around the room.
Materials Needed:
- Clear latex balloons (preferably 12 inches or larger for easier filling)
- Confetti (metallic, colorful, or themed to match your décor)
- Balloon pump
- Optional: Static spray or dry tissue paper
Instructions:
- Prepare the Confetti: Start by selecting your confetti colors. You can go for a monochromatic look with gold or silver, a mix of metallics, or even a colorful confetti that matches your New Year’s theme.
- Add Confetti to the Balloon: Using a funnel or by pinching the confetti, carefully place a small amount into each deflated clear balloon. Add enough confetti to create a festive look, but avoid overfilling as too much can make the balloon heavy and reduce its ability to float.
- Inflate the Balloon: Using a balloon pump, gently inflate the balloon to its full size. This allows the confetti to disperse more evenly throughout the balloon. For a fun tip, rub the outside of the balloon with a dry cloth or tissue to create static, which will help the confetti stick to the sides of the balloon.
- Seal and Arrange: Once filled, tie off the balloon and arrange them as desired. For added visual impact, you can group balloons together or add ribbon or string in complementary colors.
Color Theme Tips:
- Classic Metallics: Gold and silver confetti give an elegant, timeless feel perfect for a New Year’s Eve bash.
- Bright and Bold Colors: For a playful look, choose vibrant colors like pink, blue, and green.
- Match to Your Theme: If you’re going for a specific theme, such as a winter wonderland, use white or iridescent confetti for a frosty effect.
DIY confetti balloons are simple yet make a striking addition to any celebration, filling the space with festive color and a joyful, celebratory atmosphere.
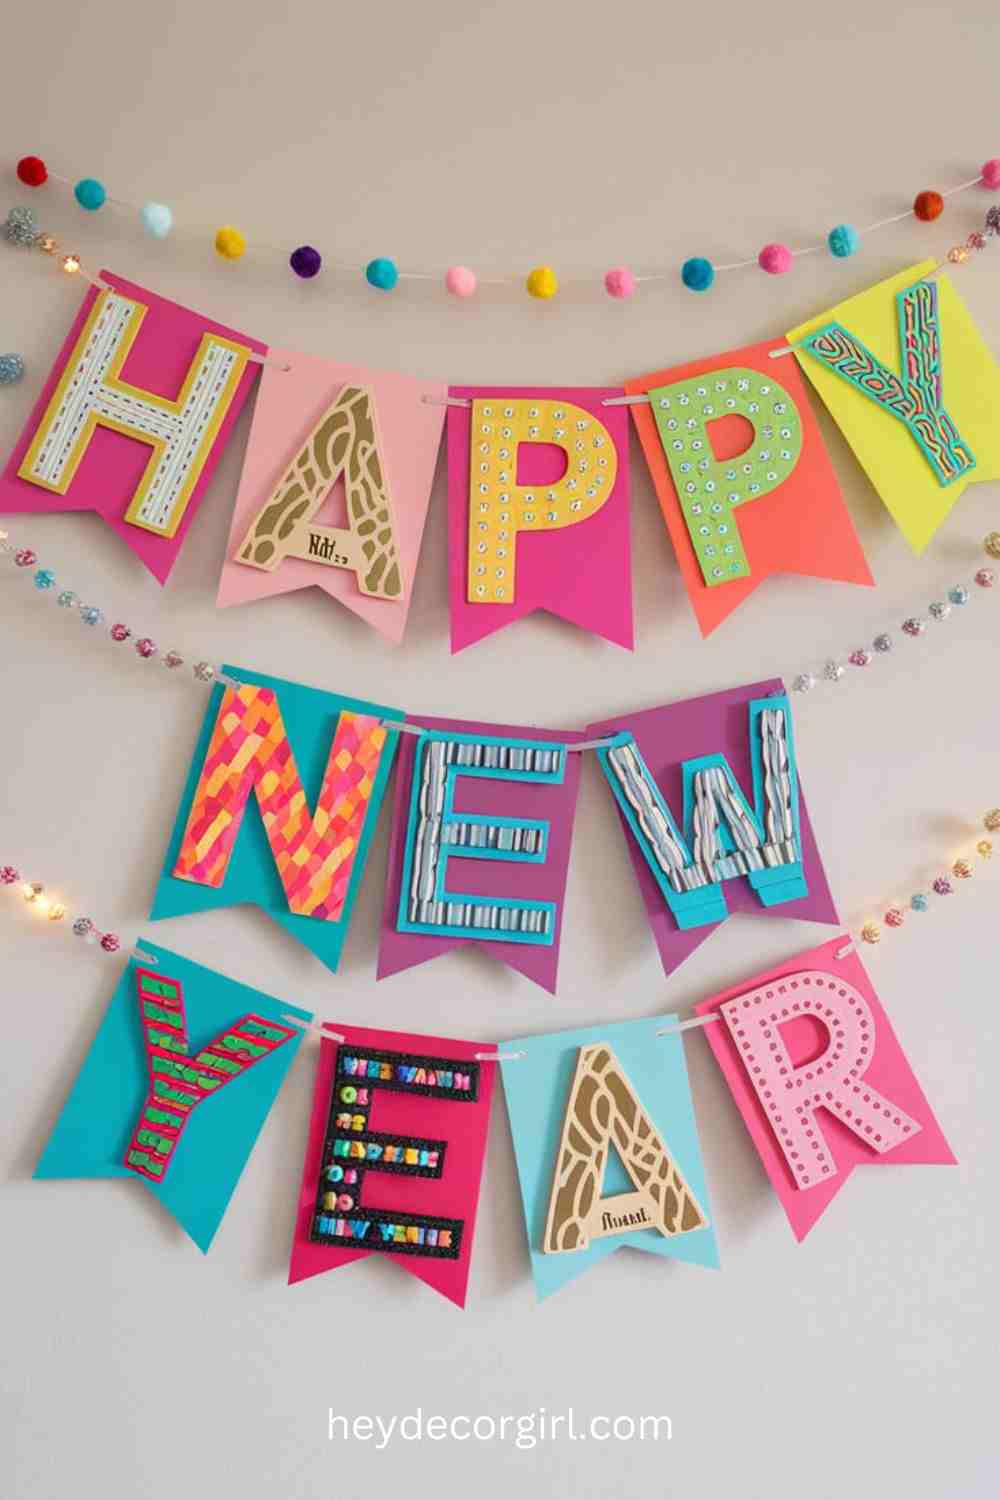
3: Handmade Paper Garland
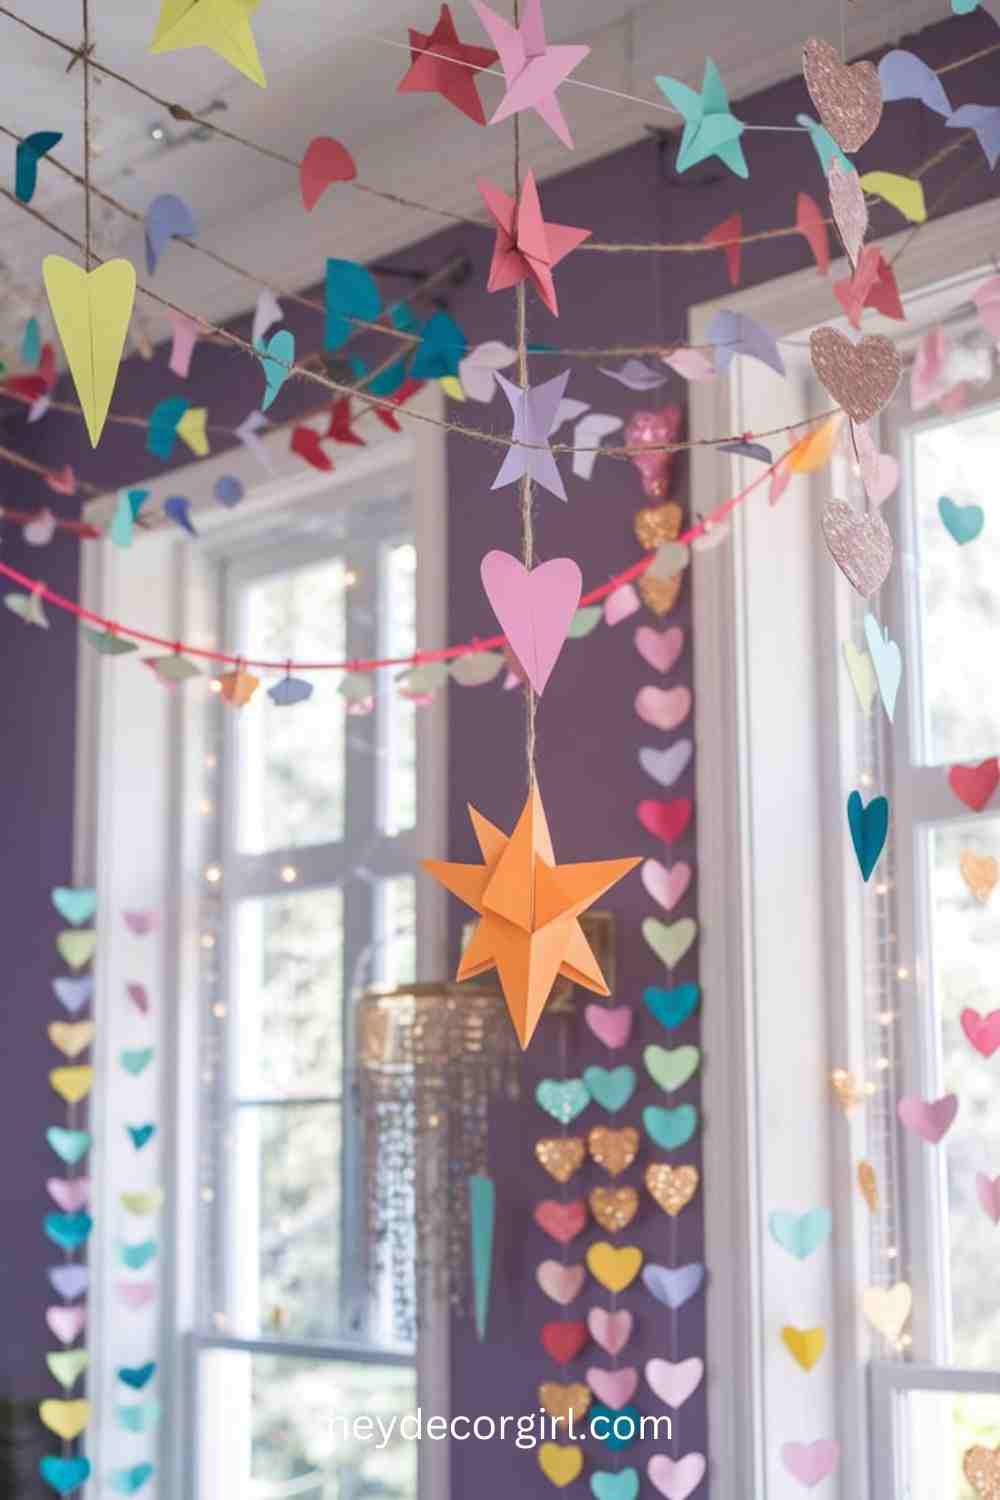
A handmade paper garland is a fun, customizable, and affordable decoration that can instantly transform any space for New Year’s celebrations. Whether you opt for traditional shapes like stars or hearts, or get creative with geometric designs, paper garlands add color and texture to walls, windows, mantels, or party tables.
Materials Needed:
- Colorful paper (construction paper, patterned paper, or any type of decorative paper)
- Scissors
- String, twine, or thread
- Glue or a stapler
Garland Styles:
- Stars: Cut out star shapes from colorful paper and string them together for a shimmering, festive garland that captures the magic of the New Year.
- Hearts: For a more playful or romantic theme, cut paper hearts and string them along a length of twine for a sweet, vibrant look.
- Geometric Shapes: Create modern garlands by cutting out geometric shapes like circles, triangles, or diamonds in a variety of colors. Mix and match shapes for a bold, eclectic effect.
- Tassel Garland: For a more textured look, cut long strips of paper, twist them, and attach them to a string for a fun and dynamic garland.
Instructions for Hanging or Draping:
- Cut the Shapes: Start by deciding on the shape or theme of your garland, then use scissors to cut out the shapes from your paper. You can choose a consistent size or vary them for an eclectic look.
- Prepare the String: Cut a length of string or twine, long enough to drape across your intended space. You can hang multiple garlands, depending on the size of the area.
- Attach the Shapes: Attach the cut-out shapes to the string using glue, tape, or by stapling them at regular intervals. Ensure each shape is spaced evenly for a balanced look. If you’re using more delicate shapes, glue them securely to prevent them from falling off.
- Hang or Draping the Garland: Once your garlands are ready, hang them across walls, along the edges of tables, or drape them around windows, chandeliers, or even the ceiling. You can also layer multiple garlands for added texture and depth.
These handmade paper garlands are not only charming but are also customizable to fit any New Year’s color theme or style. Whether you’re going for a classic gold and silver scheme or a bold mix of bright colors, these garlands will add a personal touch to your celebration.
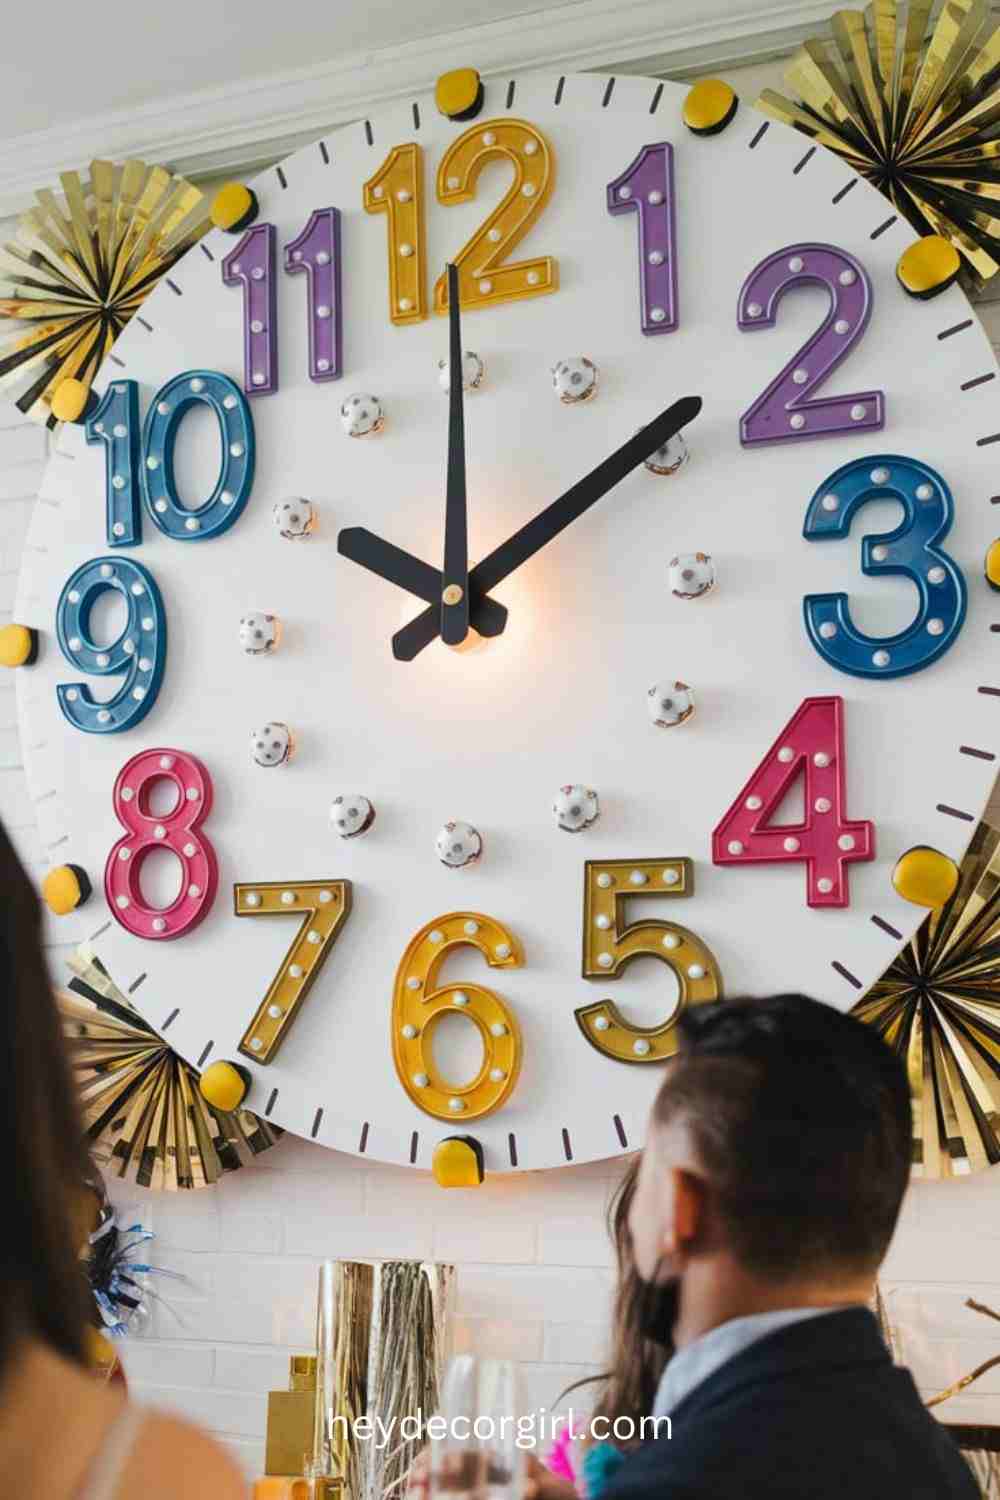
4: Countdown Clock Wall Art
A countdown clock wall art is a fantastic and interactive way to build anticipation for the New Year. This DIY project not only serves as a fun focal point but also adds excitement and energy to the celebration, especially as the clock ticks down to midnight.
Materials Needed:
- Large clock face printout (download a template online or draw one by hand)
- Markers (preferably in bright colors or metallics)
- Foam board or large poster board (for sturdiness)
- Ruler
- Scissors
- Clock hands (can be crafted from paper or a cardboard cutout)
- Push pins or small hooks (for attaching the clock hands)
Instructions to Create the Countdown Clock:
- Prepare the Clock Face: Print out a large clock face template or draw one yourself on a foam board or poster board. Ensure the numbers and hands are large enough to be visible from a distance.
- Decorate the Clock: Use markers or colored pens to make the clock face pop. Bright colors, metallics, or glitter will give the clock a festive, celebratory look. You can use gold for the numbers, silver for the hands, or add a mix of bold hues to match the New Year’s theme.
- Create the Clock Hands: Using a piece of paper or cardboard, cut out two clock hands—one for the minute hand and one for the hour hand. Attach them to the center of the clock using a small push pin or hook, allowing the hands to move freely.
- Set Up the Countdown: On New Year’s Eve, start by manually adjusting the clock hands to the time a few hours before midnight. As the time progresses, move the clock hands closer to midnight, building anticipation. You can also mark each hour with mini notes, fun quotes, or New Year’s resolutions to engage your guests.
Tips for Enhancing the Countdown Clock’s Look:
- Bright Colors: Use vibrant hues like neon pink, electric blue, or bright yellow to create an exciting and energetic vibe for the clock face.
- Metallic Accents: Metallic gold, silver, or holographic markers will reflect light and add a festive touch to the clock, making it more eye-catching as midnight approaches.
- Add Glitter or Sequins: For extra sparkle, glue some glitter or sequins around the clock numbers or edges, so the clock glows with shimmer.
- Use a Bold Font: If you’re drawing your clock, try using bold, dramatic fonts for the numbers to give it a more festive, celebratory vibe.
A countdown clock wall art is a great way to keep the energy up and add a personal touch to the New Year’s celebration. As guests watch the hands move closer to midnight, the excitement will build, creating a memorable experience for everyone involved.
6: Festive Photo Booth Backdrop
A DIY festive photo booth backdrop is a fantastic way to capture memories and add extra fun to your New Year’s celebration. With just a few simple materials, you can create a vibrant and engaging photo area that will make your guests feel like stars, all while adding to the festive atmosphere.
Materials Needed:
- Streamers (metallic, foil, or paper in your preferred colors)
- Balloons (in coordinating colors)
- Fun props (hats, glasses, boas, noisemakers, etc.)
- “2023” or “2024” sign (or custom number cutouts)
- Tape or command hooks
- String or ribbon (for hanging)
Instructions for Setting Up the Photo Booth:
- Select the Photo Booth Area: Choose a corner or wall in your celebration space that can serve as the backdrop for photos. It should be away from high-traffic areas, ensuring guests can pose without interruptions.
- Hang the Streamers: Use metallic, foil, or paper streamers in festive colors (gold, silver, or multicolor) to cover the wall or part of the space. You can hang them vertically for a flowing look, or horizontally to create a curtain effect. For added impact, alternate colors or add some iridescent streamers for sparkle.
- Add Balloons: Cluster balloons of various sizes around the backdrop to create depth and visual interest. Use a mix of helium-filled balloons or attach regular balloons to the wall with tape. Consider using numbers “2023” or “2024” balloons as the focal point of the backdrop.
- Create the Sign: Craft a large, bold sign with “2023” or “2024” (or a custom message) to mark the occasion. You can use cardboard or foam board to create the sign, decorating it with glitter, paint, or stickers. Position the sign at the center or above the photo area so it’s clearly visible in photos.
- Add Fun Props: Place fun, New Year’s-themed props like party hats, glasses, feather boas, or noisemakers nearby for guests to use while posing. This helps add excitement to the photos and encourages everyone to get involved.
- Set Up the Camera: Place a camera on a tripod or designate a spot where guests can easily take their own pictures, or have a friend act as the photographer. You can also provide a selfie stick for extra fun. Make sure the lighting is bright enough to capture great photos.
Tips for Making it Unique:
- Customized “2023” or “2024” Sign: Use large, bold numbers to mark the year prominently in the backdrop. You can even add glitter or string lights to make the sign stand out.
- Themed Props: Match your props with the New Year’s theme, such as sparkly glasses, festive hats, or themed photo booth accessories.
- Twinkling Lights: For added glamour, string some fairy lights or LED lights around the backdrop or around the number sign to create a glowing, celebratory effect.
- Color Coordination: Choose a color theme for the streamers and balloons that matches your overall party decor (e.g., silver and gold for an elegant look, or bright and bold colors for a fun vibe).
A DIY festive photo booth backdrop brings extra excitement to your New Year’s celebration, offering a dedicated spot for your guests to capture the moment. With creative props, vibrant colors, and personalized touches, this photo booth will ensure memorable pictures and a great time for everyone!
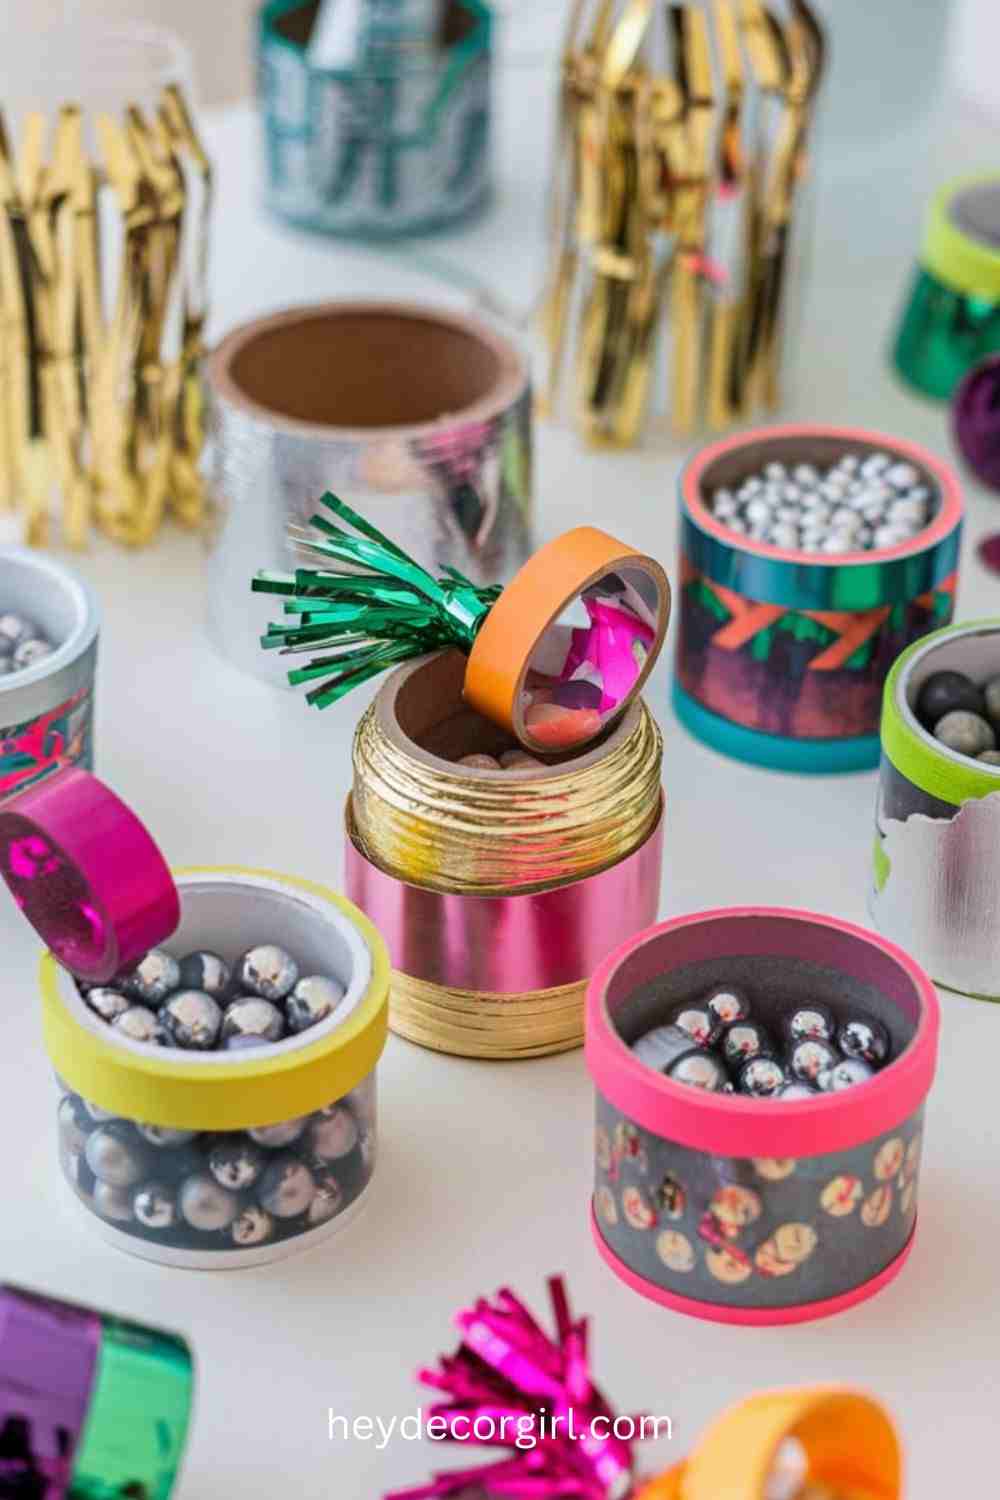
7: DIY Noisemakers
DIY noisemakers are a fun and festive way to add excitement to your New Year’s countdown. These colorful, easy-to-make instruments can be shaken during the final moments of the year, creating a joyful sound as the clock strikes midnight. Personalize them with bright colors and decorative touches to match your celebration’s theme.
Materials Needed:
- Small containers (e.g., empty toilet paper rolls, plastic cups, or small jars)
- Beads, dry rice, or small stones (to create the noise)
- Decorative tape (e.g., washi tape, glitter tape, or metallic tape)
- Stickers or glitter (optional for added decoration)
- Scissors
Instructions to Make the Noisemakers:
- Prepare the Containers: Choose small containers like empty toilet paper rolls, plastic cups, or even small jars. These will serve as the base of your noisemakers. If you’re using paper rolls, you can seal one end with tape to create a sealed tube.
- Add the Noise Maker Filling: Pour a small amount of beads, dry rice, or small stones into the container. You don’t need too much—just enough to make a rattle when shaken. Beads create a crisp sound, while dry rice gives a softer noise.
- Seal the Containers: If you used open containers like paper rolls, seal the other end with tape to prevent the filling from falling out. You can also use decorative tape to seal any open sides or create a fun design around the container.
- Decorate the Noisemakers: Use colorful or metallic tape to wrap around the container. You can choose neon colors, metallic gold and silver, or festive patterns like stripes, polka dots, or zigzags. Add extra flair by gluing on glitter, stickers, or fun embellishments.
- Shake and Celebrate: Your DIY noisemakers are now ready for the countdown! On New Year’s Eve, distribute them to your guests, and get ready to shake them in excitement as the clock nears midnight.
Suggestions for Decorating:
- Metallic Colors: Use metallic gold, silver, or copper tape for a chic, New Year’s Eve look. This gives the noisemakers a festive, glamorous shine.
- Neon Colors: For a more fun, energetic vibe, go for bright neon tape in pink, green, or orange. These colors will stand out and add a playful touch to your celebration.
- Add Extra Sparkle: Decorate your noisemakers with glitter or rhinestones to make them extra festive and sparkly.
DIY noisemakers are simple yet effective in creating a lively, joyful atmosphere for ringing in the New Year. With personalized decorations and unique designs, these noisemakers are sure to get everyone in the celebratory spirit.
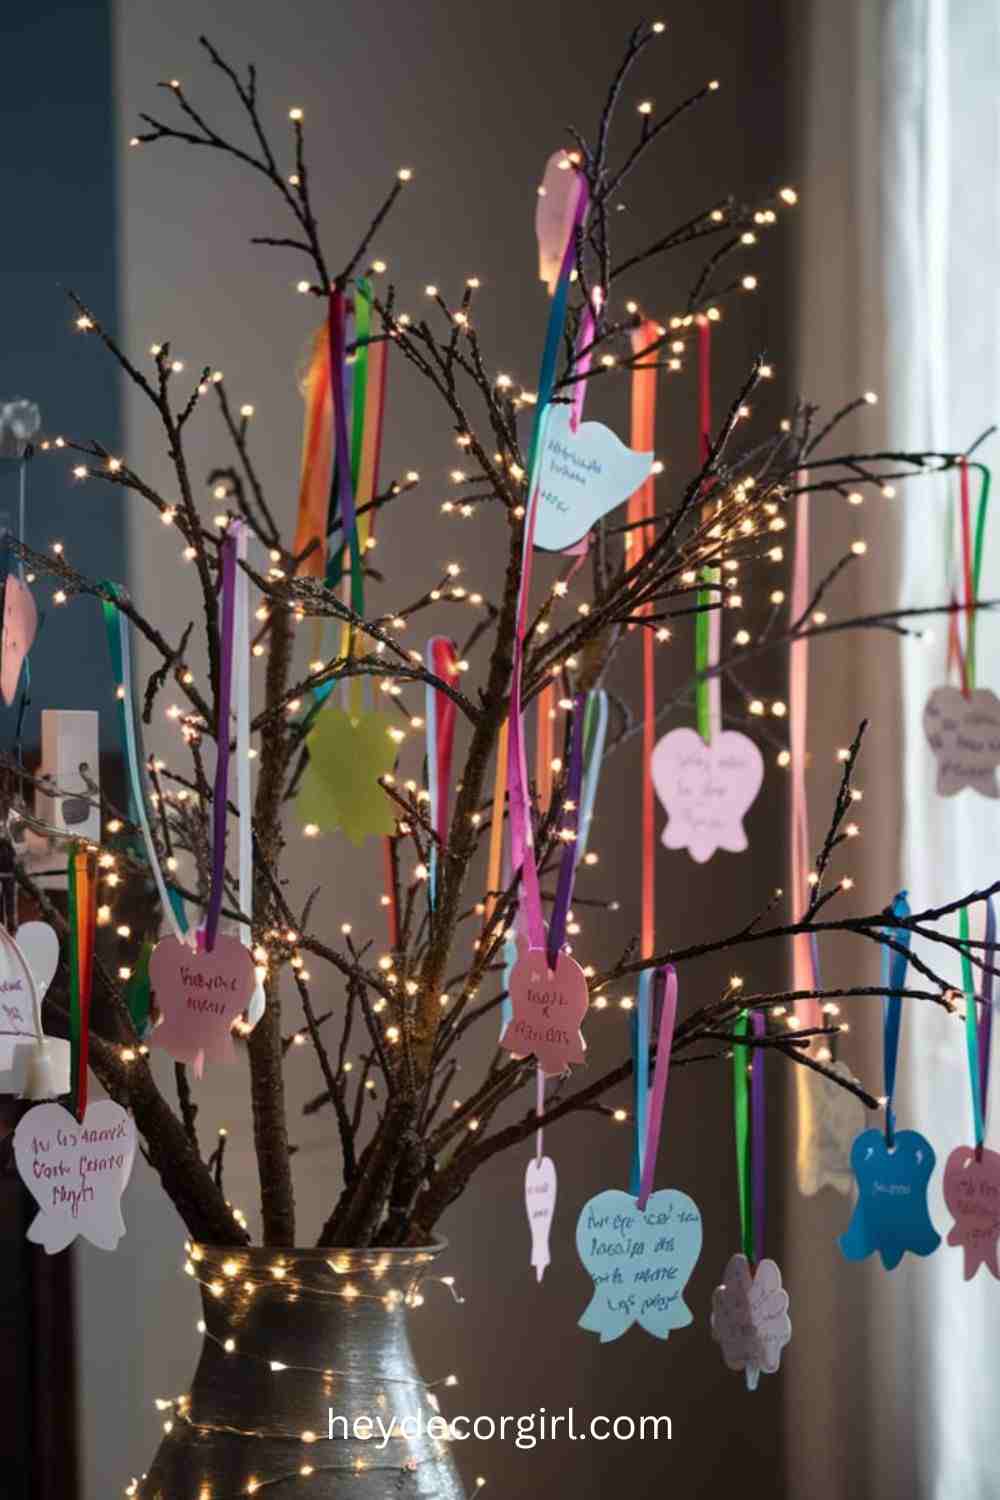
8: New Year Wishing Tree
A New Year wishing tree is a creative and interactive way to engage your guests and bring an extra touch of magic to your celebration. This DIY project allows guests to write down their hopes and wishes for the year ahead, creating a meaningful and personal tradition. As a centerpiece, it adds charm to the decor while encouraging everyone to think about their New Year’s aspirations.
Materials Needed:
- Branches (real or artificial, depending on your preference)
- Paper (preferably in bright, festive colors)
- Pens or markers
- Ribbon (for hanging the wishes)
- A vase, pot, or container (to hold the branches)
- Decorative elements (optional: fairy lights, glitter, or ornaments)
Steps to Create the Wishing Tree:
- Gather the Branches: Collect a few branches, either from your yard or artificial ones from a craft store. The branches should be sturdy enough to hold the wishes, but with enough space for the ribbons to hang freely. If using real branches, make sure they’re clean and dried out.
- Prepare the Base: Place the branches in a container such as a vase, pot, or any sturdy base that will hold the branches upright. Fill the base with stones, sand, or floral foam to ensure the branches stay securely in place.
- Create the Wishes: Cut the paper into small, easy-to-write-on shapes—rectangles, hearts, stars, or circles work well. Provide pens or markers in various colors for guests to write their wishes or resolutions for the New Year. Encourage guests to be creative and personal with their messages.
- Add Ribbon for Hanging: Once the wishes are written, cut small lengths of ribbon and tie each wish to the end, creating a way to hang the notes from the branches. You can either tie the ribbon directly to the wish or use small paper clips to attach the ribbon to the note.
- Hang the Wishes: After attaching the ribbons, hang each wish from the branches, ensuring they’re spaced out evenly for a balanced, whimsical look. Allow guests to add their wishes throughout the evening, adding to the tree’s festive, interactive nature.
Ideas for Setting Up the Tree as a Centerpiece:
- Fairy Lights: Wrap small string lights around the branches to add a warm, glowing effect. The lights will make the tree sparkle and stand out, especially in the evening.
- Decorative Touches: Enhance the tree by adding small ornaments, glitter, or faux snow for a wintery feel. You can even hang small bells or stars for extra festive flair.
- A New Year’s Theme: Tailor the tree’s decorations to match the color scheme or theme of your New Year’s celebration. Use metallic ribbons, silver and gold ornaments, or seasonal decorations like snowflakes.
- Place in a Focal Spot: Set up the wishing tree in a prominent spot where guests can easily access it, such as near the entrance, next to the party table, or as a centerpiece in the living room.
The New Year wishing tree not only serves as a beautiful centerpiece but also creates an interactive and sentimental experience for your guests. It’s a fun and thoughtful way to capture everyone’s hopes and dreams for the coming year, making your celebration even more special.
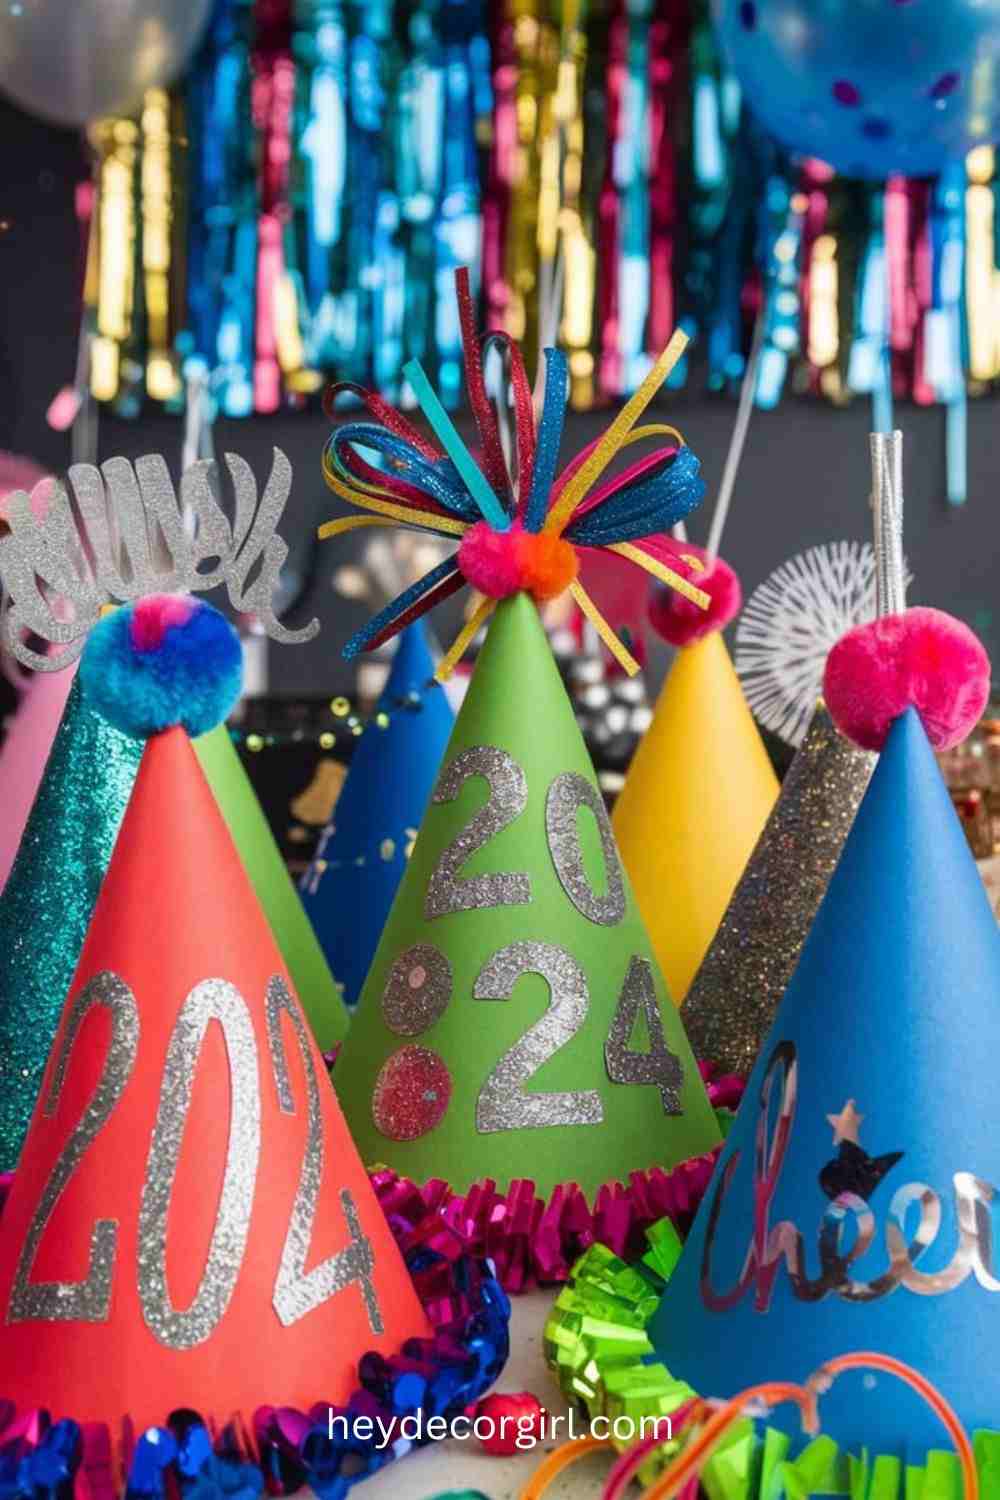
9: Handmade Party Hats
Handmade party hats are a fun and creative way to make your New Year’s celebration even more festive. These custom hats can be easily made with simple materials, allowing you to create unique designs that reflect your party’s theme or add a personal touch to each guest’s look.
Materials Needed:
- Construction paper (bright colors like gold, silver, or neon work well)
- Glue (or glue sticks)
- Glitter (optional for extra sparkle)
- Elastic bands (to hold the hat on)
- Scissors
- Markers, stickers, or decorative items (optional for extra customization)
Instructions for Creating Custom New Year’s Hats:
- Cut the Construction Paper: Start by cutting a strip of construction paper long enough to wrap around the circumference of a person’s head. The width of the strip should be about 3-4 inches to make a sturdy band.
- Form the Cone Shape: Take the strip of construction paper and form a cone shape by bringing the two ends together. Overlap the ends and glue them together to hold the shape.
- Add Elastic Bands: To keep the hat securely on your head, cut a piece of elastic band long enough to fit under the chin. Attach each end of the elastic band to the inside of the hat, using glue or small staples.
- Decorate the Hats: Now comes the fun part—decorating! Use glitter, markers, or stickers to add a festive touch to the hats. You can choose metallic colors like gold or silver, or go for a bright neon look. Add sparkles of glitter to the edges, and consider writing the year (“2024”) in bold numbers to mark the occasion.
- Personalize Each Hat: For a more personalized touch, add guests’ names or fun messages like “Cheers!” or “Happy New Year!” to their individual hats. You can also glue on other decorative elements like pom-poms, sequins, or ribbons to make each hat unique.
- Let the Fun Begin: Once the hats are ready, distribute them to your guests and let them wear them throughout the celebration. The custom hats will be a great conversation starter and add a fun, playful vibe to your party.
Ideas for Adding Extra Festivity:
- Glitter and Sparkles: For a glamorous look, cover the tips of the hats with glitter or glue on rhinestones to give them a sparkling finish.
- Year Numbers: Add the year in large, bold numbers to make the hats even more New Year-specific. You can use metallic numbers, glittery stickers, or even foam cutouts to give them a dimensional effect.
- Theme Decorations: If your party has a specific theme (e.g., black tie, winter wonderland, or a retro vibe), tailor the decorations to match. For a winter theme, use snowflakes or silver accents; for a glam look, go with gold sequins and feathers.
Handmade party hats are a perfect way to add creativity and personal flair to your New Year’s party, giving each guest a fun keepsake from the celebration. These easy-to-make hats not only brighten up your party but also get everyone in the festive spirit!
10: Glitter-Dipped Wine Glasses
Glitter-dipped wine glasses add an elegant and festive touch to your New Year’s celebration, making every toast feel extra special. These sparkling glasses catch the light beautifully, enhancing the celebratory atmosphere as you count down to midnight.
Materials Needed:
- Wine glasses (your choice of size or style)
- Glue (preferably craft or decoupage glue)
- Glitter (fine glitter works best for a smooth, sparkling effect)
- Paintbrush (optional, for applying the glue)
- A disposable plate or tray (to catch excess glitter)
Instructions to Decorate the Glasses:
- Prepare the Glasses: Begin by cleaning the wine glasses thoroughly. Make sure they’re dry and free from any dust or oils that could prevent the glue from sticking.
- Apply the Glue: Using a paintbrush or directly from the bottle, apply a thin, even layer of glue around the base or stem of the wine glass. You can choose to dip just the bottom part or cover the entire stem for a more dramatic effect.
- Add the Glitter: While the glue is still wet, carefully sprinkle the glitter over the glued area. Hold the glass over a disposable plate or tray to catch any excess glitter. You can also gently roll the glass in a shallow dish of glitter for an even coating. Be sure to coat it evenly for a smooth, consistent finish.
- Let It Dry: Allow the glittered area to dry completely. This may take a few hours, so be patient. It’s important that the glue and glitter are fully set before using the glasses.
- Shake Off Excess Glitter: Once the glasses are dry, gently shake off any loose glitter and inspect the finished look. If you want more glitter coverage, you can apply an additional layer of glue and glitter.
Cleaning and Safety Tips:
- Avoid Glittering the Rim: For safety reasons, avoid glittering the rim of the glasses where the drink will be placed. This ensures there’s no risk of glitter getting into the beverage.
- Seal the Glitter: To prevent the glitter from shedding, you can lightly spray the glittered areas with a clear acrylic sealer or varnish. This will lock in the sparkle and keep your glasses looking fresh throughout the night.
- Hand Wash Only: Glitter-dipped glasses should be hand-washed carefully to avoid damaging the glitter. Use a soft sponge and mild soap, avoiding abrasive scrubbing that could peel off the glitter.
- Drink Carefully: Since the glitter can make the glass a little more delicate, be mindful when handling them. Don’t use them for too vigorous shaking or excessive clinking.
Glitter-dipped wine glasses are the perfect way to add a sparkling touch to your New Year’s celebration. These personalized glasses not only serve as functional drinkware but also as eye-catching party decor, ensuring that every toast feels glamorous and festive.
FAQ
-
What materials do I need to start making New Year’s decorations?
- Common materials include construction paper, glitter, glue, mason jars, balloons, scissors, ribbons, and festive markers. Many projects also require basic items like string, paper, and simple craft supplies, all of which are often readily available at craft stores.
-
Can I customize the decorations to match a specific theme?
- Absolutely! Many of the decoration ideas are customizable. Whether you choose metallic colors, neon hues, or a winter wonderland theme, you can adapt these handmade decorations to suit your party’s theme or color scheme.
-
How long does it take to make handmade New Year decorations?
- The time it takes depends on the complexity of the decoration. Simple crafts like glitter-dipped wine glasses or handmade party hats may take about 30 minutes to an hour. More intricate decorations like DIY photo booth backdrops or wishing trees may take a few hours to complete.
-
Are these DIY decorations safe for children to help with?
- Many of the decoration ideas, like creating paper garlands or noisemakers, are child-friendly. However, some materials like glitter or scissors may need adult supervision. Always use non-toxic glue and paint to ensure safety, especially if children are involved.
-
How do I ensure the decorations last for the whole party?
- To make your decorations more durable, use high-quality materials and secure your craft pieces properly. For example, make sure glitter is sealed well with a spray sealant, and use strong adhesive for projects like garlands or party hats. For hanging decorations, ensure they are placed safely so they don’t fall during the festivities.
-
Do I need special skills to make these decorations?
- Most of the projects are beginner-friendly and require no special skills. Simple crafts like paper garlands, DIY confetti balloons, and noisemakers are easy for anyone to try. More advanced decorations like photo booth backdrops or wishing trees may require more effort, but they can still be done with a little patience.
-
Where should I place my handmade decorations?
- The placement depends on the decoration. Hang garlands and banners around doorways or along walls to make the space feel festive. Place the wishing tree as a centerpiece, and use glitter-dipped wine glasses or noisemakers as part of the party table décor. Photo booth backdrops should be set up in an area where guests can easily take pictures.
-
Can I reuse these handmade decorations for future New Year’s celebrations?
- Yes! Many of these decorations, like party hats, garlands, and wine glasses, can be stored and reused for future events. Just make sure to store them properly to avoid damage, and consider updating the designs slightly for a fresh look each year.
-
What should I do if I run out of glitter or other crafting supplies during the project?
- If you run out of materials, check your local craft store or online for quick delivery options. Alternatively, you can get creative and substitute with other supplies you might already have at home—like sequins, metallic markers, or shiny foil.
-
Are there eco-friendly alternatives for some of these decoration ideas?
- Yes! Many of the decoration ideas can be made with eco-friendly materials, like recycled paper for garlands, biodegradable confetti, or repurposed containers for DIY noisemakers. Additionally, using natural items like pinecones or branches for a wishing tree can be a great sustainable option.
Hi, I’m Richa, the creative mind and passionate soul behind Hey Decor Girl. With a bachelor’s degree in Inter-space Design and a deep love for transforming spaces, I’ve dedicated my career to bringing style, comfort, and personality into homes. As an interior designer and architect, I’ve had the pleasure of crafting unique living environments that reflect the individuality of those who live in them.
At Hey Decor Girl, I share my expertise in all things home decor—from cozy living room makeovers to rustic farmhouse designs and everything in between. My mission is to inspire you to create spaces that not only look stunning but also feel like home. Whether you’re looking for the latest trends or timeless classics, I’m here to guide you every step of the way. Let’s make your dream home a reality, one stylish detail at a time.
Decorations Ideas Handmade New Year New Year Decorations New Year Decorations Ideas Handmade
Last modified: November 11, 2024
![Hey Decor Girl [Latest Trending Decor Design Ideas]](https://heydecorgirl.com/wordpress/wp-content/uploads/2024/08/Heygirldecor-Logo.png)

