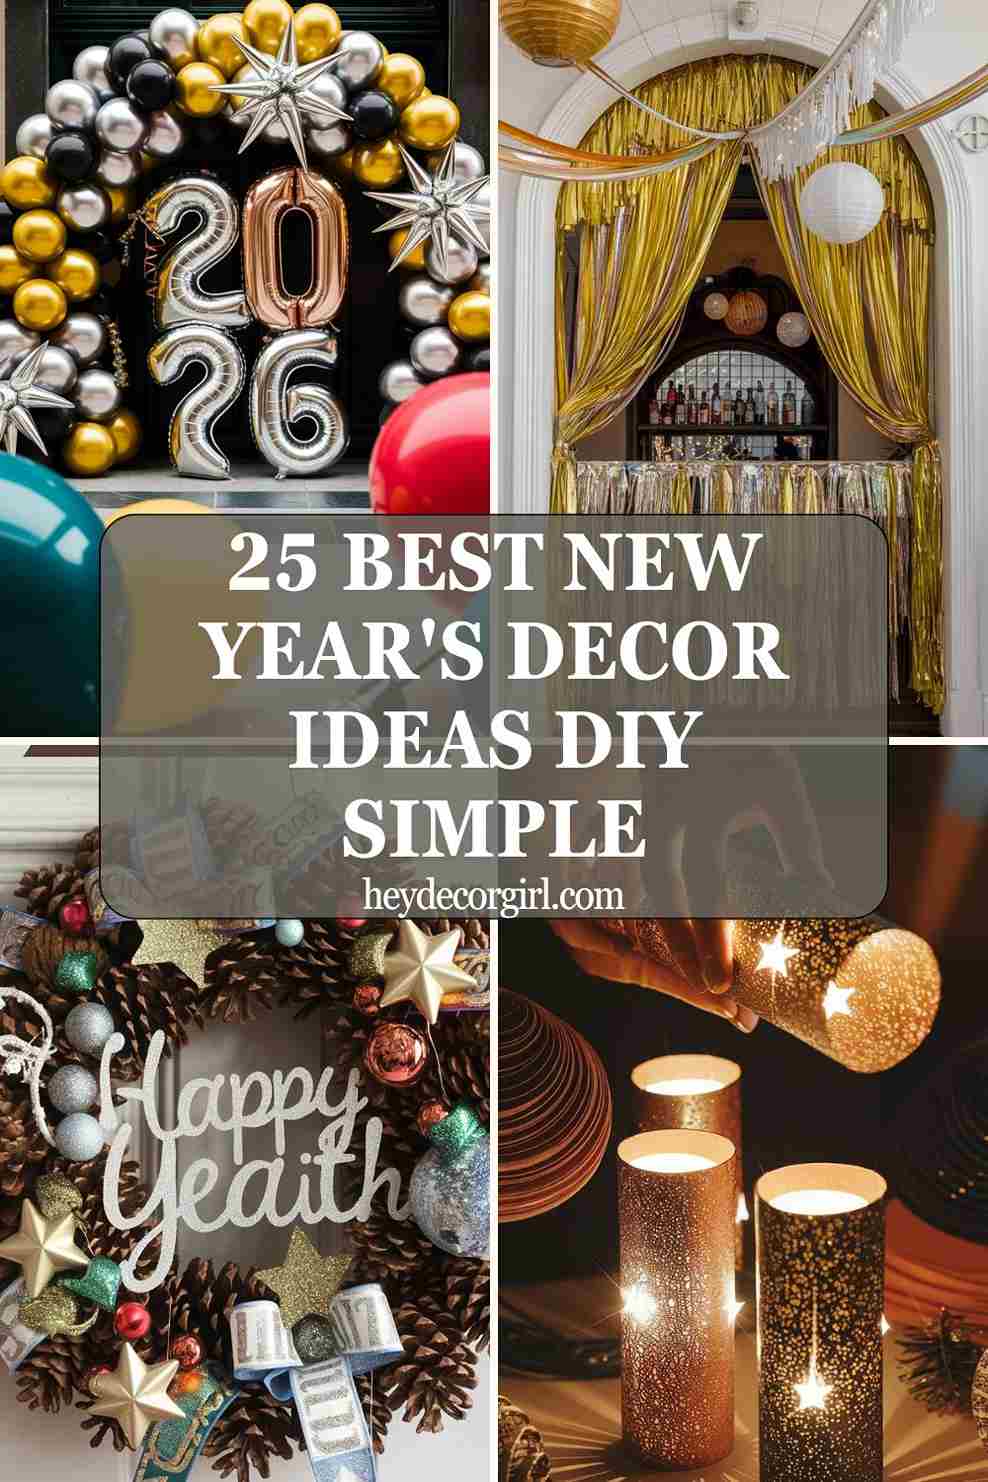
New Year’s Decor Ideas DIY Simple : New Year’s celebrations are all about ringing in a fresh start with joy, hope, and excitement. One of the best ways to set the tone for the festivities is by decorating your space in a way that reflects the energy and optimism of the occasion. While New Year’s Eve often involves elaborate celebrations, you don’t need to break the bank or spend countless hours on extravagant decorations.
DIY decor is a fantastic and easy way to transform your home or party space. These simple, hands-on projects not only let you add a personal touch to your decor but also bring a sense of accomplishment and creativity to your celebrations. Whether you’re creating glittery centerpieces, fun photo booth backdrops, or shimmering party hats, DIY decorations are an affordable and enjoyable way to bring the New Year spirit to life.
Best New Year’s Decor Ideas DIY Simple
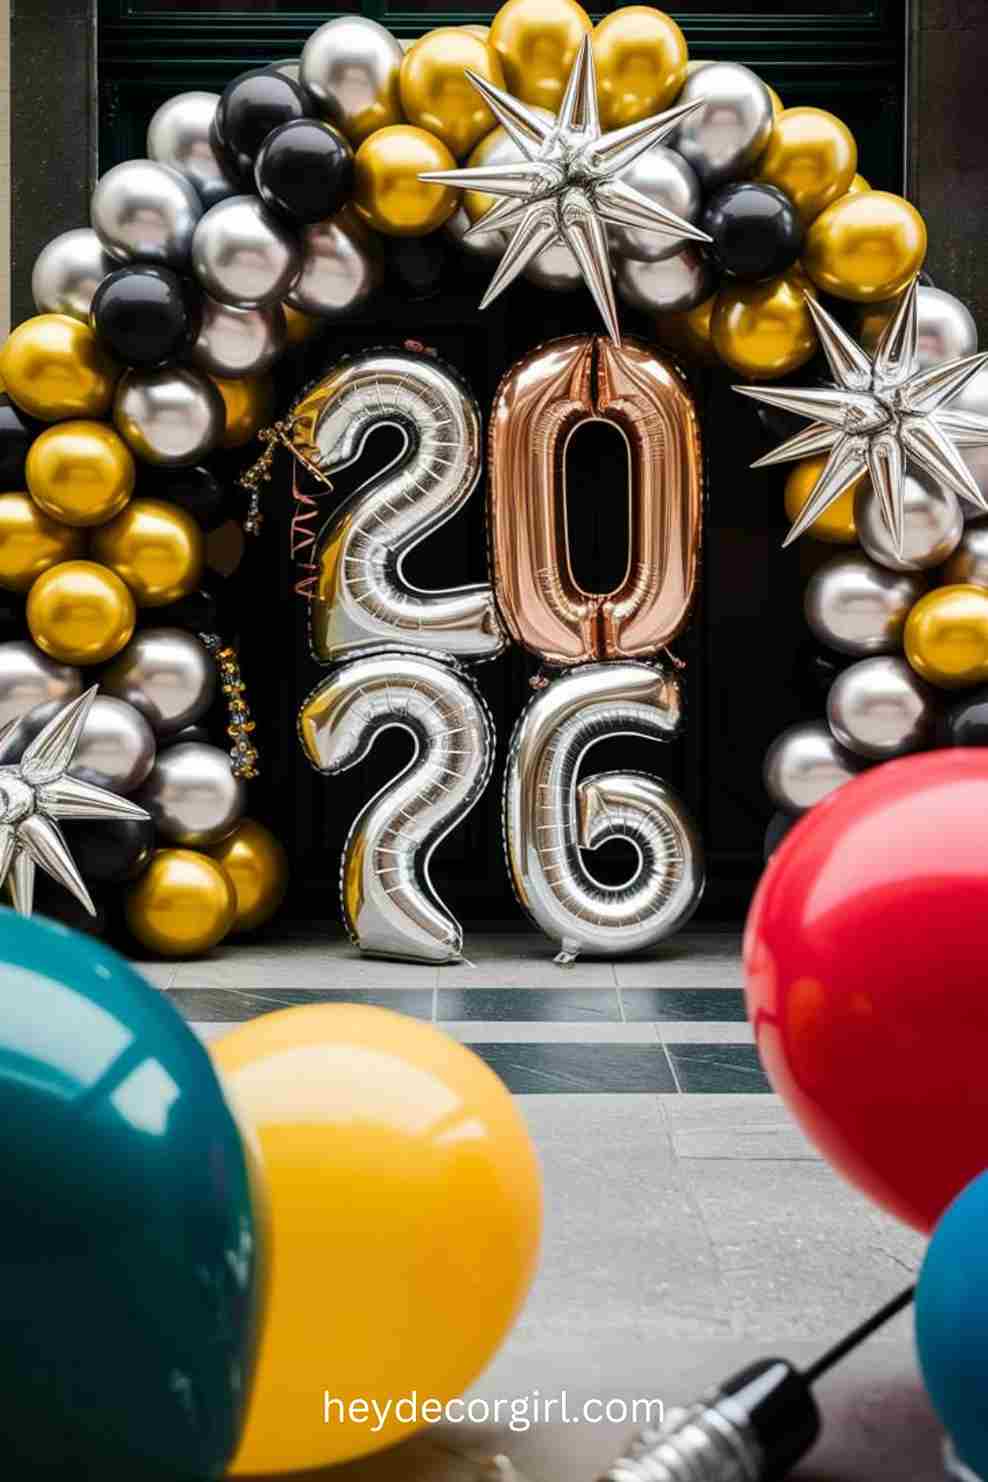
1. DIY Balloon Arch for a Festive Entrance
A balloon arch is a stunning and welcoming way to greet your guests and set the mood for your New Year’s celebration. With just a few materials, you can create an impressive and festive entrance that will make your space feel special. Here’s how to create a DIY balloon arch to add that perfect touch to your party.
Materials Needed:
- Balloons (lots of balloons! A mix of sizes works best)
- Balloon pump
- Fishing line or string (strong enough to hold the balloons)
- Clear tape or balloon arch kit (optional)
- Balloon ties or balloon glue dots
- Scissors
Step-by-Step Instructions:
- Choose Your Balloon Colors
Start by selecting the colors for your arch. For a classic New Year’s look, go with metallic shades like gold, silver, black, or white. You can also choose a festive color scheme that matches your theme (e.g., red and green for a more holiday vibe or bold neon colors for a modern touch). - Inflate the Balloons
Using a balloon pump, inflate your balloons. Vary the sizes for added dimension, with some large balloons and some smaller ones to create a more dynamic look. Be sure not to overinflate them, as balloons may burst if they’re too tight. Once inflated, tie off each balloon securely. - Prepare the Arch Frame
You can either use a pre-made arch kit or create your own frame by tying fishing line or string between two points (like doorways, columns, or a backdrop stand). This will act as the structure for the balloons to be attached to. If you’re creating your own frame, ensure the fishing line or string is taut and stable. - Attach the Balloons to the Frame
Start with the largest balloons and attach them to the fishing line or string. Use balloon ties, tape, or balloon glue dots to secure each balloon in place. Position the balloons in clusters and stagger their placement to create a fuller, more natural look.- Tip: Begin at the base of the arch and work your way up, so you can build a solid foundation and add balloons on top for a more balanced design.
- Fill in with Smaller Balloons
Once the larger balloons are secured, fill in the gaps with smaller balloons. This step will help create a lush, voluminous appearance. You can also mix in some fun accents, such as metallic foil balloons in star or number shapes to reflect the New Year’s theme. - Secure and Shape the Arch
Once all your balloons are attached, step back and assess the arch. You can gently shift the balloons to create the desired shape and make sure there are no visible gaps. If needed, use tape to attach any balloons more securely or to fix them in place. - Finishing Touches
For a more polished look, you can add ribbon or a tulle garland draped around the arch or place some LED string lights in and around the balloons for extra sparkle.
Tips on Color Themes and Placement:
- Color Themes: If you want a more sophisticated and classic feel, go for metallic gold, silver, and black. For a fresh, vibrant look, opt for pastels or bold hues like neon pink, turquoise, or purple. You could also incorporate your party’s theme colors for a cohesive style.
- Placement: Place your balloon arch at the entrance to your home, in front of a photo backdrop, or above a party table to create a dramatic focal point. If you’re hosting a party outdoors, an arch can help frame a garden or patio space beautifully.
- Balance: For a fuller look, cluster the balloons together in groups and allow them to overlap slightly. This ensures that the arch looks lush and voluminous rather than sparse.
A DIY balloon arch is a fun and easy way to create a dramatic entrance that welcomes your guests with style, while also setting the tone for an unforgettable New Year’s celebration.
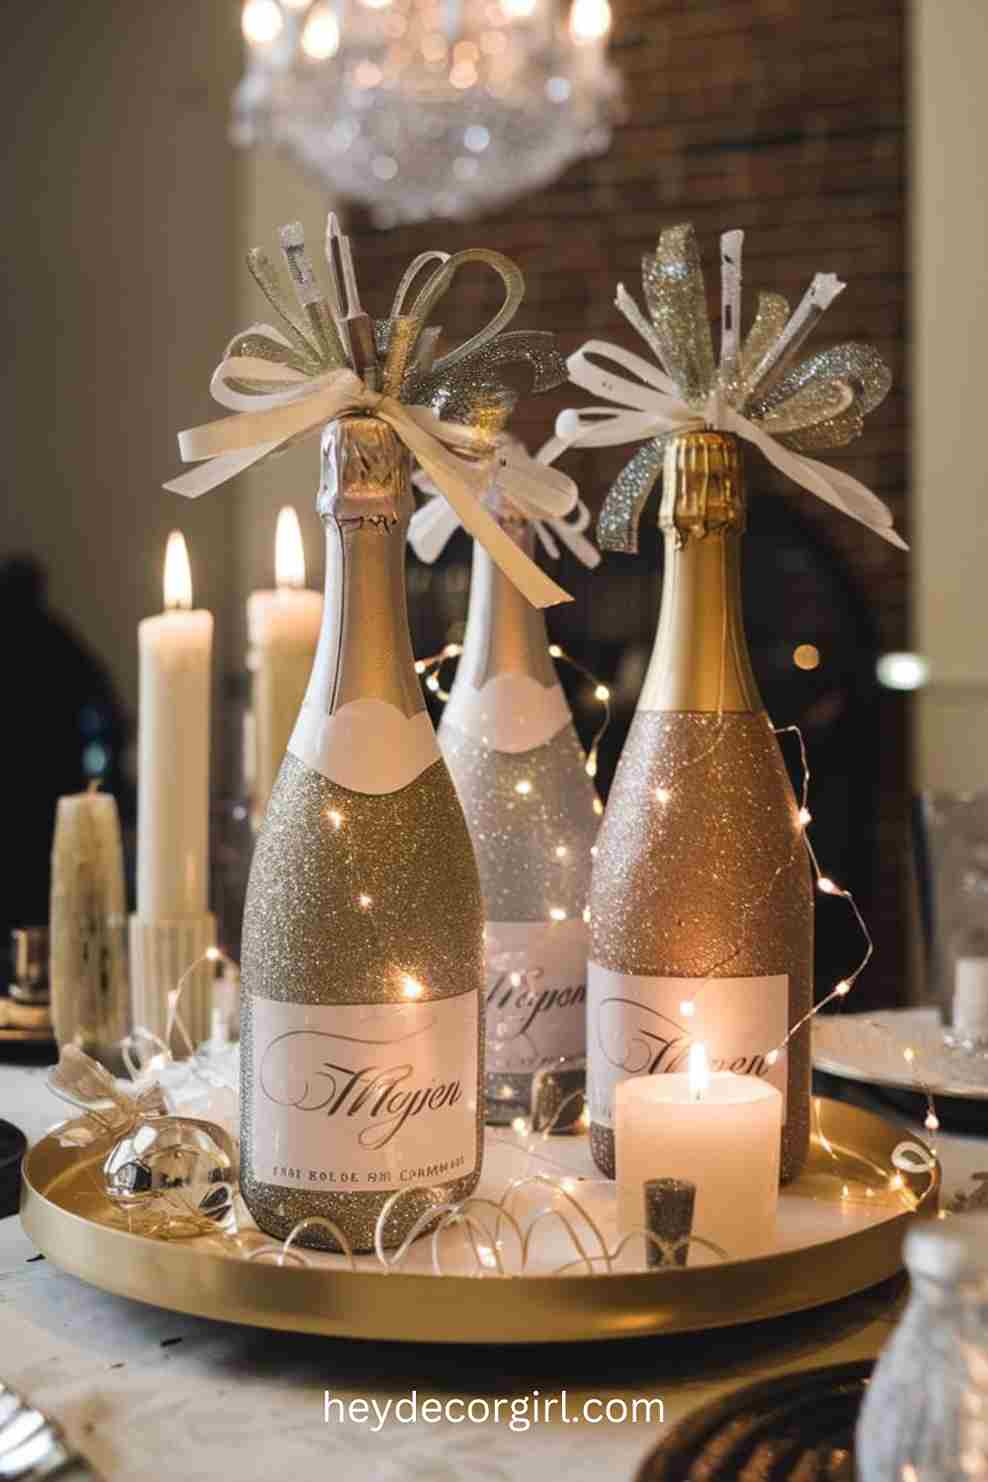
2. Champagne Bottle Centerpieces
Champagne bottle centerpieces are a chic and creative way to add elegance to your New Year’s celebration while reusing materials you already have. These stylish centerpieces are simple to make, and you can customize them to suit any party theme. Here’s how to transform empty champagne bottles into stunning centerpieces for your event.
Materials Needed:
- Empty champagne bottles (cleaned and dried)
- Glitter (silver, gold, or any color that matches your theme)
- Ribbons (metallic, satin, or velvet)
- LED string lights (optional, for added sparkle)
- Hot glue gun or tape
- Craft paint (optional)
- Decorative accents (e.g., sequins, faux flowers, or beads)
Step-by-Step Instructions:
- Prepare the Champagne Bottles
Start by cleaning your champagne bottles thoroughly. Remove any labels using warm water and soap, and let them dry completely. You can also paint the bottles if you want to create a unique color base—white or metallics work particularly well for New Year’s decor. - Add Glitter for Glamour
To create a sparkling effect, cover the lower half or entire bottle with glitter. Apply a layer of glue (a hot glue gun works well) and sprinkle glitter over the area. You can go for silver or gold glitter for a classic look, or choose a color that matches your party theme. Let it dry for a few hours before proceeding. - Wrap the Bottles with Ribbon
After the glitter has dried, add some luxurious ribbons to enhance the bottle’s elegance. Wrap the neck of the bottle with a satin or metallic ribbon, securing it with a knot or a bow. You can also add multiple layers of ribbon for a more textured look. If you prefer, try using velvet ribbons for a soft, romantic feel. - Incorporate LED Lights for Extra Sparkle
For a truly festive and eye-catching centerpiece, incorporate LED string lights into the bottle. Simply place the LED lights inside the bottle, leaving the battery pack tucked under the base or hidden behind the bottle. The lights will glow through the bottle, creating a magical atmosphere for your party. - Add Decorative Accents
To further customize your champagne bottle centerpiece, add small decorative items like faux flowers, beads, or even sequins to enhance the festive feel. You can also glue small number cut-outs, like “2024” for a New Year’s Eve theme, or other embellishments that fit your event’s style. - Assemble the Centerpieces
Place your champagne bottles on your dining table or as a part of a larger centerpiece arrangement. You can group several decorated bottles together for a more impactful display. Adding a few small candles or festive confetti around the bottles can complete the look.
Customization Ideas for Different Party Themes:
- Elegant Gold and Silver Theme: For a sophisticated and timeless look, use metallic gold or silver paint, glitter, and satin ribbons. You can add crystal beads or faux diamonds for an extra touch of glamour.
- Rustic or Boho Theme: Wrap the bottles with burlap or twine and adorn with dried flowers or feathers for a more natural, rustic feel. You can also use warm-toned LED lights to create a cozy, intimate atmosphere.
- Vintage or Retro Theme: Choose pastel ribbons, vintage-inspired lace, or soft, muted colors like blush pink and soft mint. You can also add small vintage figurines or buttons to the bottles for a retro vibe.
- Festive New Year’s Eve Theme: Use black and gold glitter, metallic ribbons, and numbers representing the year (like “2024”) to create a New Year’s Eve-inspired centerpiece. Incorporate small champagne flutes or clock motifs for a countdown feel.
Champagne bottle centerpieces are not only easy to make but also versatile enough to match any New Year’s party theme. With just a few simple materials, you can create elegant, custom centerpieces that are sure to impress your guests and set the mood for a celebration to remember.
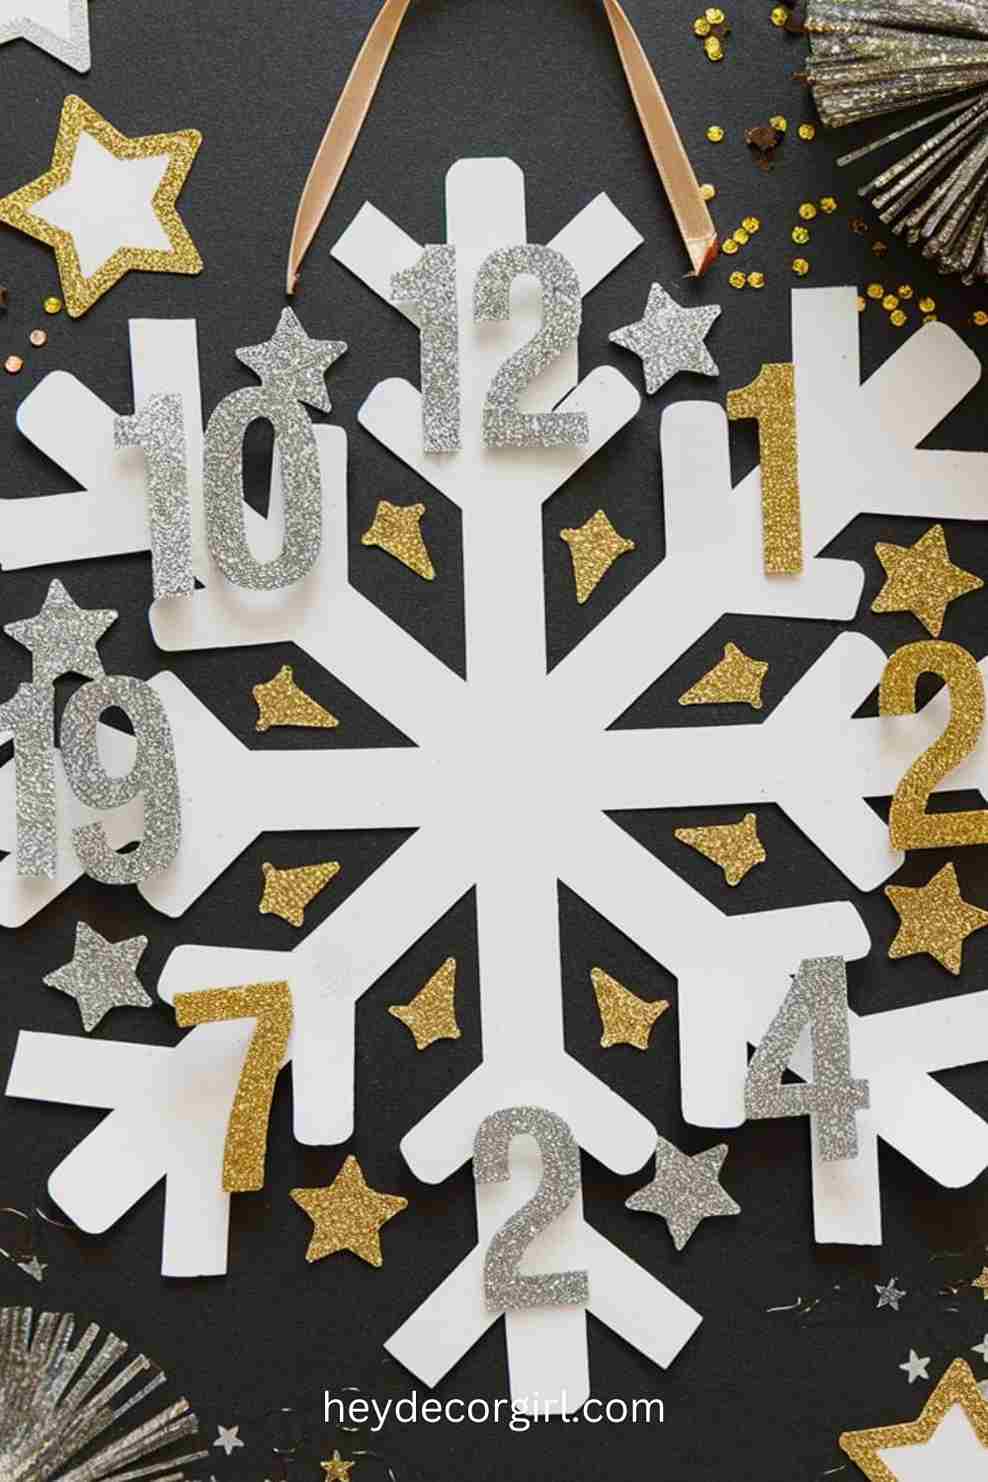
3. Glittery New Year’s Eve Countdown Sign
A glittery New Year’s Eve countdown sign is a fun and interactive decoration that adds excitement to the final moments before midnight. It’s a perfect way to engage your guests while keeping track of time as the year comes to a close. Making this sign is easy and allows for personalization, so it can match your party’s theme. Here’s how to craft a DIY countdown sign using glitter and cardstock that will shine brightly during your celebration.
Materials Needed:
- Cardstock (black, white, or any color that fits your theme)
- Glitter (gold, silver, or any color you prefer)
- Glue or Mod Podge
- Scissors
- Marker or paint pens (for writing numbers)
- Ruler and pencil
- Ribbon or string (optional, for hanging)
- Decorative accents (optional, such as stars, numbers, or themed embellishments)
Step-by-Step Instructions:
- Cut the Cardstock to Shape
Begin by cutting a piece of cardstock to the desired size for your countdown sign. A rectangular or square shape works well, but feel free to get creative with the shape—consider cutting it into a clock shape, star, or other festive outline. Use a ruler to ensure straight edges if you prefer a more structured sign. - Create the Countdown Numbers
Write the numbers for your countdown (e.g., 10, 9, 8, etc.) on the cardstock using a bold marker or paint pen. If you want a cleaner look, use stencils to ensure even numbers. These numbers will be the focal point of the sign, so make them large and prominent. - Add Glitter for Sparkle
Once the numbers are written and dry, apply glue or Mod Podge over each number. While the glue is still wet, sprinkle glitter generously over the numbers to give them a sparkling, festive look. You can use one color for all the numbers or mix different glitter colors for a fun and colorful effect. Allow the glue to dry completely before proceeding. - Add Decorative Accents
If desired, decorate the surrounding area of the sign with stars, small confetti, or New Year’s-themed embellishments like champagne glasses or clock hands. You can use more glitter or even some 3D decorations like foam shapes for extra texture and dimension. - Attach Hanging Ribbon (Optional)
If you want to hang your countdown sign, cut a piece of ribbon or string and glue it securely to the top corners of the sign. This will allow you to hang it on a wall, above the entrance, or as part of a larger display. - Personalize the Countdown
For added fun, consider adding a small clock image or a “Happy New Year!” message at the bottom of the sign. You can also personalize the countdown by writing “10 minutes until 2024” or other creative messages for each segment of the countdown.
Placement Suggestions for Maximum Effect:
- Above the Party Table: Place the countdown sign above the food or drink table to create a festive focal point. Guests can easily spot it as they gather around, keeping an eye on the time as they celebrate.
- Near the Entrance: Hanging the sign near the entrance to your party space helps set the mood for guests as they arrive. It’s a fun way to welcome them to the celebration while also building anticipation for the countdown.
- Next to the Dance Floor: If you have a dance floor or party area, place the sign near it to remind guests of the approaching midnight. This ensures the excitement builds as the countdown nears its end.
- On a Mantel or Shelf: Display the sign on a mantelpiece or shelf as part of your decor, creating a centerpiece that guests can admire while watching the clock tick down.
A glittery New Year’s Eve countdown sign is a simple yet striking decoration that adds energy to your party while keeping everyone engaged. With just a few materials, you can create a personalized sign that will sparkle throughout the night, adding both style and fun to your celebration.
4. Festive Paper Lanterns
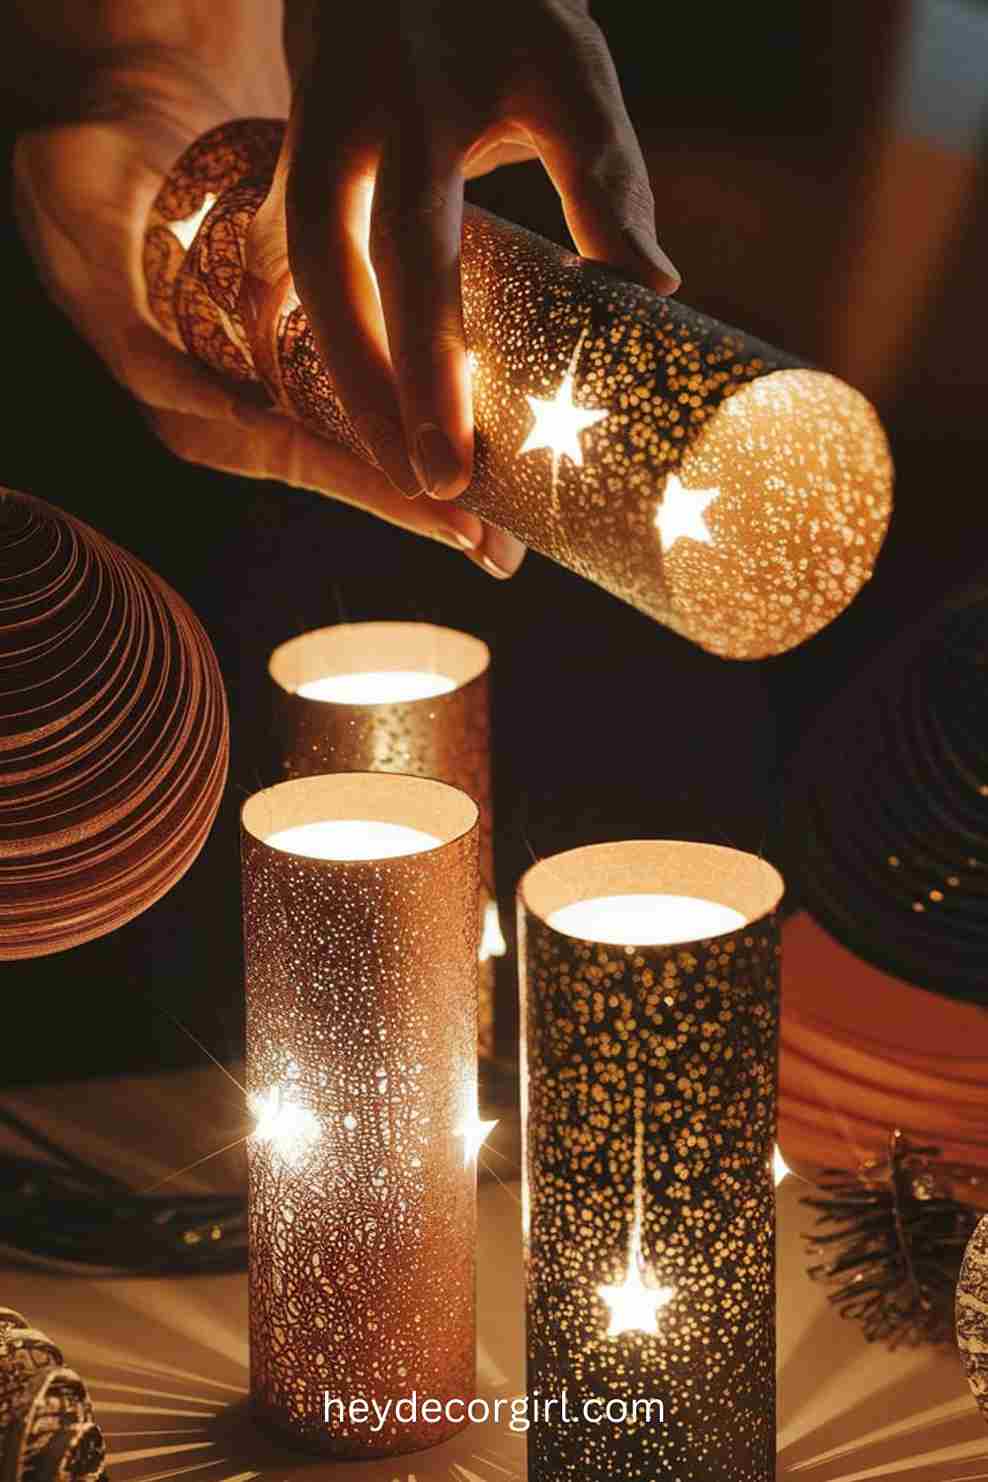
Paper lanterns are an easy, budget-friendly way to add a magical touch to your New Year’s Eve decorations. Whether you’re decorating indoors or outdoors, these lanterns can help set a festive mood and create a beautiful, glowing atmosphere. With just a few materials, you can make stunning lanterns that sparkle and shine when paired with metallic paper and LED lights. Here’s how to craft your own festive paper lanterns for your celebration.
Materials Needed:
- Colored or metallic paper (gold, silver, black, or any colors that fit your theme)
- Scissors
- Ruler and pencil
- Glue stick or tape
- LED tea lights or string lights (battery-operated)
- Hole puncher (optional)
- String or ribbon (optional, for hanging)
Step-by-Step Instructions:
- Prepare the Paper for the Lanterns
Start by choosing the type of paper for your lanterns. Metallic paper (in gold, silver, or other shiny colors) is ideal for creating a sparkling effect, but you can also use regular colored paper if metallic paper isn’t available. Cut your paper to the desired length and width; a typical size is 8.5 x 11 inches, but you can adjust it based on how large you want your lanterns. - Create the Lantern’s Shape
Take the piece of paper and fold it lengthwise, bringing the two short edges together. Use a pencil and ruler to draw a line about 1-2 inches from each edge, leaving the center section open. You can also create different patterns for the lantern’s cut-outs, such as vertical lines or diagonal slits, depending on the look you prefer. These cuts will allow light to shine through when the lantern is lit. - Cut Out the Design
Use scissors to carefully cut along the pencil lines to create slits or a pattern on the paper. If you want a more intricate design, you can punch small holes or use decorative scissors to make the edges look more festive. - Roll the Paper into a Cylinder
Once you have cut the paper, roll it into a cylinder shape, aligning the short edges. Glue or tape the edges together to secure the shape. Make sure the top and bottom are even to create a smooth, uniform lantern. - Add a Top and Bottom (Optional)
For a more finished look, you can create small top and bottom pieces for your lantern by cutting circles from paper that match the size of the rolled cylinder. Glue these circles to the top and bottom of the lantern to give it more structure. - Place LED Lights Inside the Lanterns
For a glowing effect, place an LED tea light or small string of LED lights inside the lantern. These battery-operated lights are perfect since they’re safe and will not overheat. Position the light at the bottom or inside the lantern to create a soft, glowing ambiance. - Hang the Lanterns (Optional)
If you want to hang your lanterns, punch two small holes at the top of each lantern and thread a string or ribbon through the holes. Use these strings to hang the lanterns from the ceiling, on a wall, or even from tree branches if you’re decorating an outdoor space. Ensure they are spaced out for maximum visual effect.
Tips for Using Metallic Paper for a Sparkling Effect:
- Reflective Shine: Metallic paper reflects light beautifully, making it the perfect choice for creating a glowing, shimmering effect. Gold, silver, and copper work especially well for a New Year’s Eve theme, but you can also use any metallic colors to match your party’s color scheme.
- Layering Paper: To add more texture, layer two pieces of metallic paper on top of each other for extra sparkle. You can cut different patterns on each layer for a more complex, layered design.
- Using Glitter Paper: If you want an even more dramatic effect, consider using glittered paper instead of metallic. This will add a dazzling, extra-special touch to the lanterns.
How to Add LED Lights for a Glowing Look:
- LED Tea Lights: Place one or more small LED tea lights inside the lantern. These lights create a soft, flickering glow, perfect for a cozy atmosphere. Choose battery-operated LED tea lights for safety and convenience.
- LED String Lights: If you prefer more light, use a small string of LED fairy lights inside each lantern. Gently drape or coil the lights to create an even glow throughout the lantern.
- Battery Packs: When using string lights, choose a battery-operated set to keep the look clean and hassle-free. Hide the battery pack discreetly behind the lantern or inside a decorative box.
Placement Suggestions for Maximum Effect:
- Hanging from the Ceiling: Arrange the lanterns at different heights for a dynamic and floating effect. You can use fishing wire or ribbon to hang them from the ceiling in a clustered or scattered pattern.
- Along the Walls or Entryway: Line the walls of your party space or the entrance with lanterns to create a welcoming, warm glow. Grouping them in clusters along a hallway can lead guests into the celebration.
- On Tables or Buffet Stations: Place several lanterns in the center of the party table or along buffet stations to add a glowing touch to your dining area.
- Outdoor Spaces: If your New Year’s party is outdoors, hang lanterns from tree branches or fence posts for a magical garden-like atmosphere. You can also place them along the pathway leading to your party to create a glowing entrance.
Festive paper lanterns are an easy and customizable decoration that can instantly brighten up your New Year’s Eve celebration. By using metallic paper and LED lights, you can create a glowing, sparkling atmosphere that will enchant your guests and set the stage for an unforgettable evening.
5. New Year’s Eve Photo Booth Backdrop
A photo booth is one of the most popular and entertaining parts of any party. It’s a place where guests can capture memories, dress up, and have fun! For New Year’s Eve, creating a simple but stunning photo booth backdrop can add excitement to your celebration. By using streamers, balloons, and printable signs, you can easily create a photo space that’s both festive and memorable. Here’s a step-by-step guide to crafting your own DIY photo booth backdrop for the big night.
Materials Needed:
- Streamers (in metallic or festive colors like gold, silver, black, and white)
- Balloons (preferably metallic or in the party’s color scheme)
- Printable New Year’s Eve signs (e.g., “Happy New Year!” or “Cheers to 2024”)
- Photo booth props (hats, glasses, masks, etc.)
- Tape or hooks for securing decorations
- Scissors
- Optional: LED lights, fringe, or tulle for extra flair
Step-by-Step Instructions:
- Choose Your Photo Booth Location
Find an open wall or an area where your guests can stand to take pictures. It’s important to select a space with good lighting, so either set up near a light source or use additional lights to brighten the area. A blank wall, a plain curtain, or even a simple fabric backdrop works great. - Hang Streamers for a Festive Background
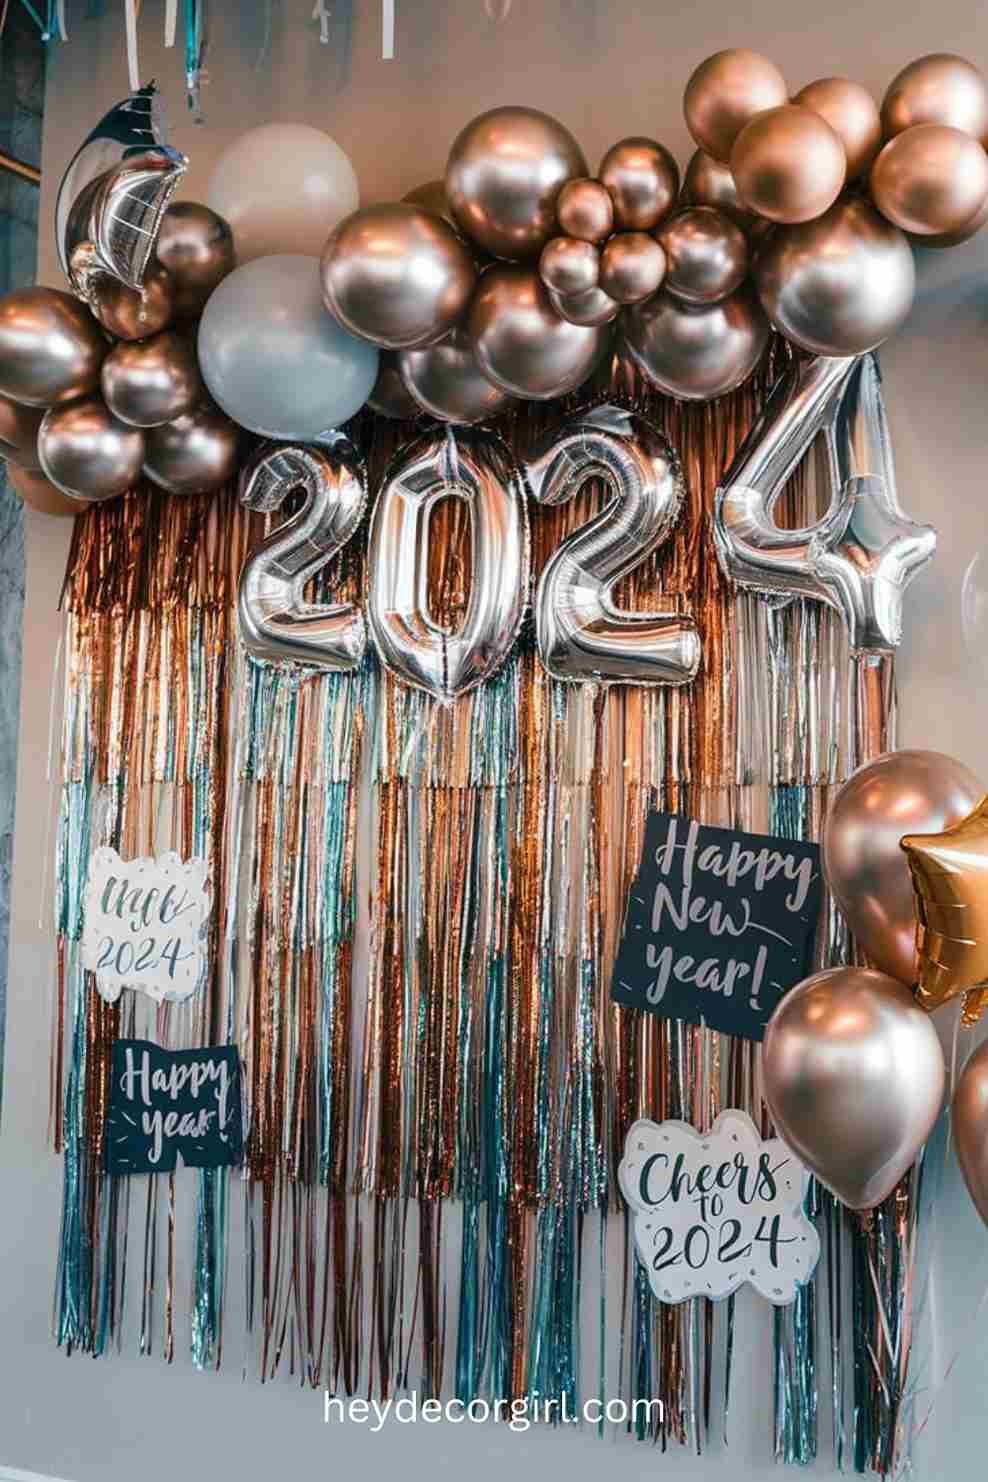
Start by hanging streamers across the wall or space where the photo booth will be. You can use one color or mix multiple colors to create a festive effect. Metallic streamers (gold, silver, or black) work especially well for New Year’s Eve. Hang the streamers vertically from the top or crisscross them for a fun and dynamic look. If you want a more structured appearance, consider creating a curtain-like effect by hanging rows of streamers closely together. - Inflate and Place Balloons
Inflate balloons in your chosen color palette and attach them to the wall or hang them around the photo area. Group the balloons together in clusters or place them in strategic corners of the backdrop for added texture. You can even create a balloon arch above the photo area for an extra pop of color. Mix metallic, matte, and transparent balloons to add variety and dimension. - Print and Display Signs
Print out fun New Year’s Eve-themed signs that your guests can hold up or place in the background. Signs such as “Happy New Year!”, “Cheers to 2024!”, or “Time to Party!” can be printed on cardstock and attached to sticks or hung directly on the backdrop. You can also print the numbers “2024” or “Midnight” to keep the theme consistent. Make sure the signs are large and legible so they stand out in photos. - Add Extra Props for Fun
For even more fun, place photo booth props nearby—things like oversized glasses, party hats, feather boas, and masks. These props help guests get into the spirit of the celebration and create fun, spontaneous photos. Consider also adding New Year’s Eve-themed props like “2024” glasses, champagne bottle cutouts, or confetti cannons. - Enhance the Backdrop with Lights
If you want your backdrop to truly shine, consider adding a string of LED lights around the frame or inside the backdrop. These lights will make the area glow and add a magical touch to the photos. Opt for warm white lights or twinkling fairy lights for a soft, celebratory effect. - Final Touches and Test the Setup
Step back and assess the photo booth. Make sure the decorations are securely fastened and that there’s enough space for people to stand and take photos comfortably. You may want to do a test photo to check the lighting and ensure everything looks great on camera. Adjust any elements if necessary to improve the setup.
Tips on Creating a Memorable Photo Space:
- Themes and Color Scheme: Make sure your backdrop matches the overall theme or color scheme of your New Year’s Eve party. Metallic tones like gold, silver, black, or a combination of bold hues create a festive and glamorous vibe.
- Interactive Elements: Add interactive props like chalkboards, small handheld signs, or countdown timers for guests to hold while posing. This adds an element of fun and personalization to the photos.
- Props for All Ages: Include a variety of props so that people of all ages can join in the fun. For kids, consider adding playful hats, boas, or toy champagne glasses, while for adults, add more sophisticated props like champagne flutes or fancy masks.
- Space for Groups: Ensure there’s enough room for groups of people to fit into the frame. The more people involved, the more memorable the photos will be!
- Photo Ready Lighting: Bright but soft lighting will give your photos the best quality. Position your lights at an angle that prevents shadows on guests’ faces, and make sure the light isn’t too harsh.
Creating a DIY New Year’s Eve photo booth backdrop is a fun and creative way to enhance your celebration. With just a few simple materials like streamers, balloons, and printable signs, you can set up an eye-catching photo space that will make your guests smile and create lasting memories as they ring in the New Year.
6. DIY Sparkling Confetti Popper
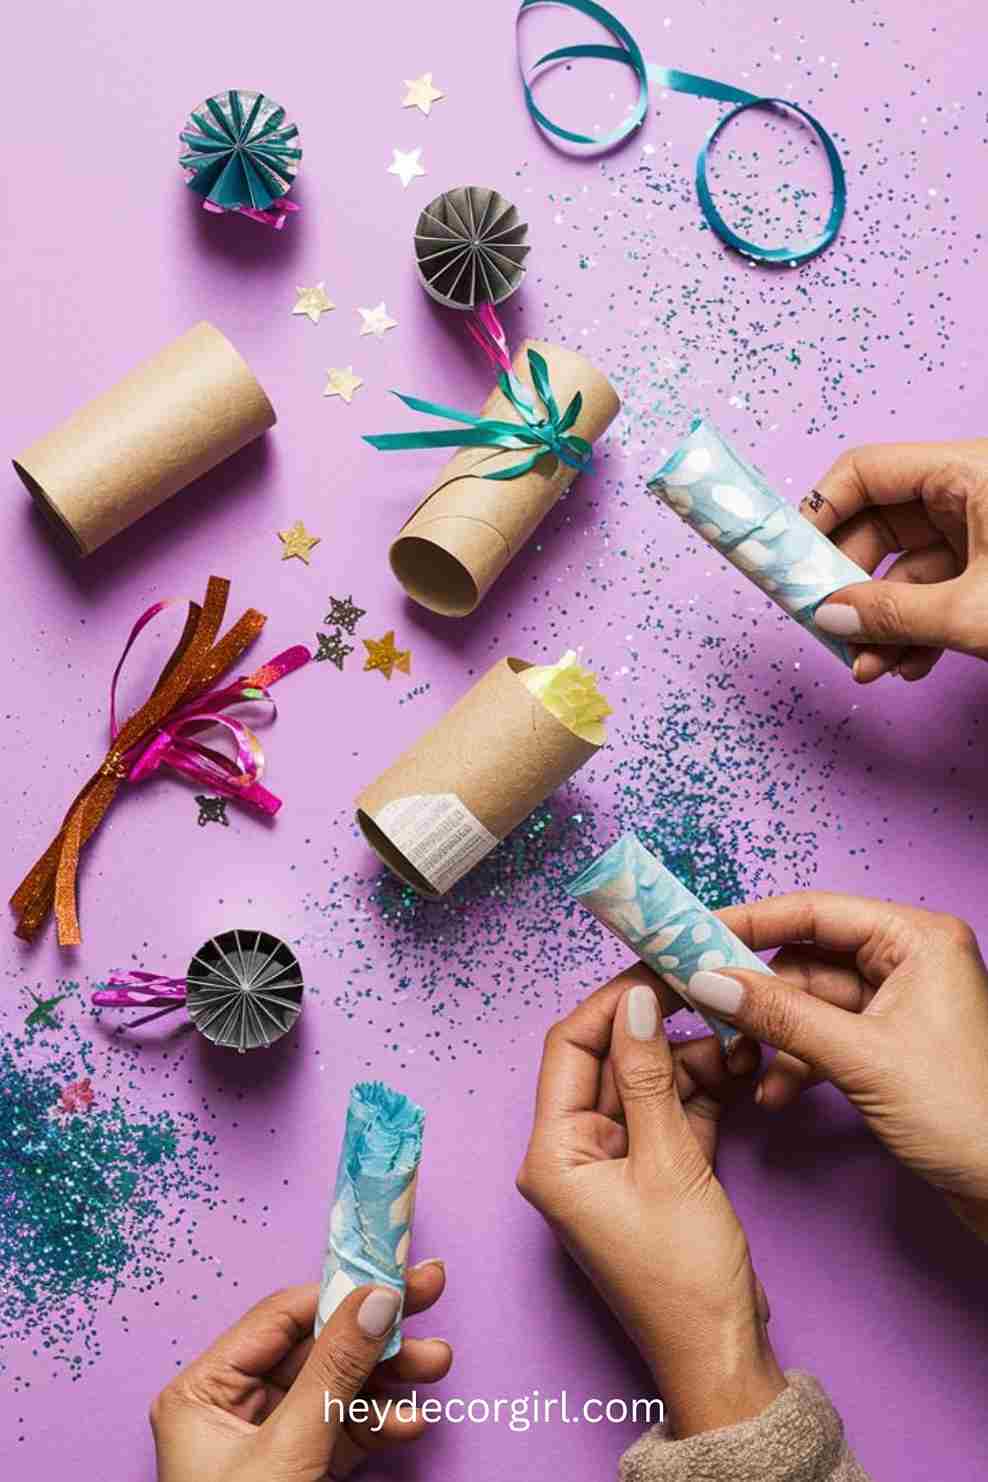
Confetti poppers are a classic New Year’s Eve party essential! They add a burst of excitement and sparkle when the clock strikes midnight. Instead of purchasing pre-made ones, you can easily create your own DIY sparkling confetti poppers using simple materials like toilet paper rolls, glitter, and confetti. These personalized poppers will not only add a fun element to your celebration, but they’ll also make great photo opportunities for guests. Here’s how to craft your own DIY confetti poppers to make your New Year’s Eve extra special!
Materials Needed:
- Toilet paper rolls
- Tissue paper (in metallic or festive colors)
- Glitter (gold, silver, or any color of your choice)
- Confetti (store-bought or homemade by cutting colored paper into small pieces)
- Clear tape or glue
- Scissors
- Ribbon or string (optional for decoration)
- Hot glue gun (optional for secure assembly)
- Small treats or notes (optional, to personalize the poppers)
Step-by-Step Instructions:
- Prepare the Toilet Paper Roll
Start by taking a clean toilet paper roll. This will form the base of your popper. You can cut the roll to a smaller size if you prefer a more compact popper or leave it as-is for a larger, more dramatic effect. - Create the Confetti and Glitter Mix
Take some confetti and combine it with glitter. You can use a variety of shapes and sizes for the confetti to make it more festive. Mixing different colors of glitter will add an extra sparkle to the popper’s contents, making it more eye-catching when it bursts open. - Prepare the Tissue Paper Cover
Cut a piece of tissue paper large enough to cover one end of the toilet paper roll. This will act as the cover for the popper. If you’re using metallic or glittery tissue paper, it will add a glamorous touch to the popper. Secure the tissue paper at one end of the roll with tape or glue, ensuring it is tightly sealed to prevent the confetti from falling out. - Add the Confetti Glitter Mix
Fill the toilet paper roll with your confetti and glitter mixture. Leave about 2-3 inches of space at the open end of the roll. This will give enough room for the confetti to burst out when the popper is used. - Seal the Other End of the Roll
Cut another piece of tissue paper, slightly larger than the opening, and glue or tape it over the other end of the toilet paper roll. Ensure it is tightly sealed to prevent the confetti from spilling out before the popper is triggered. - Decorate the Popper (Optional)
Add some ribbon, string, or festive decorations to the ends of the popper to make it more decorative. You can also personalize each popper with little messages, names, or fun New Year’s wishes written on the side. This adds a personal touch and makes each popper unique. - Activate the Confetti Popper
To use your confetti popper, simply pull on the tissue paper cover at one end of the roll, causing the confetti to shoot out. You can gently pull or twist the roll for a more dramatic effect. If you want more control, you can use a bit of string or ribbon tied around the center of the roll to create a “pull cord” for easier activation. - Enjoy the Moment
At midnight, hand out the confetti poppers to your guests, and when the clock strikes, everyone can pull their poppers for a celebratory, glitter-filled moment! The confetti will fly through the air, creating an exciting burst of sparkle and joy as you ring in the New Year together.
How to Use Them for a Fun New Year’s Eve Moment:
- Midnight Celebration: Have your guests gather around for a big New Year’s countdown. As the clock hits midnight, everyone can pull their poppers at once for a dazzling confetti explosion. It’s a fun and festive way to mark the occasion and capture great memories on camera.
- Photo Opportunities: Encourage guests to pose with their confetti poppers before the big moment. These poppers make for great photo props and will add a sparkly effect to your party pictures. Set up a photo booth area with some themed decorations for guests to take pictures with their poppers.
- Party Favors: Hand out DIY confetti poppers as party favors, letting guests take them home as a keepsake from the celebration. It’s a unique and personalized gift that adds a touch of fun to the evening.
- Interactive Fun: Use the confetti poppers during games or challenges throughout the night. For example, you can have a “confetti toss” challenge or reward guests with a popper when they win a party game.
Tips for a Memorable Confetti Popper Experience:
- Choose Bold Colors: For maximum visual impact, use metallic or bright-colored tissue paper and confetti. Silver, gold, and black are perfect for a glamorous New Year’s Eve party, while bright colors can give a more playful vibe.
- Safety First: Make sure to remind guests to use the poppers in an open area to avoid accidents with furniture or breakables. While they’re fun, they can be messy, so keep the confetti away from areas where it might be difficult to clean up.
- Reusability: If you want to reuse the confetti poppers, simply replace the tissue paper cover and refill them with fresh confetti for the next event.
DIY sparkling confetti poppers are an affordable and fun way to add a little extra magic to your New Year’s Eve celebration. They’re simple to make, customizable, and can be used as both party decor and interactive fun. Make your countdown even more exciting with these DIY confetti poppers that everyone will enjoy!
7. DIY Party Hats
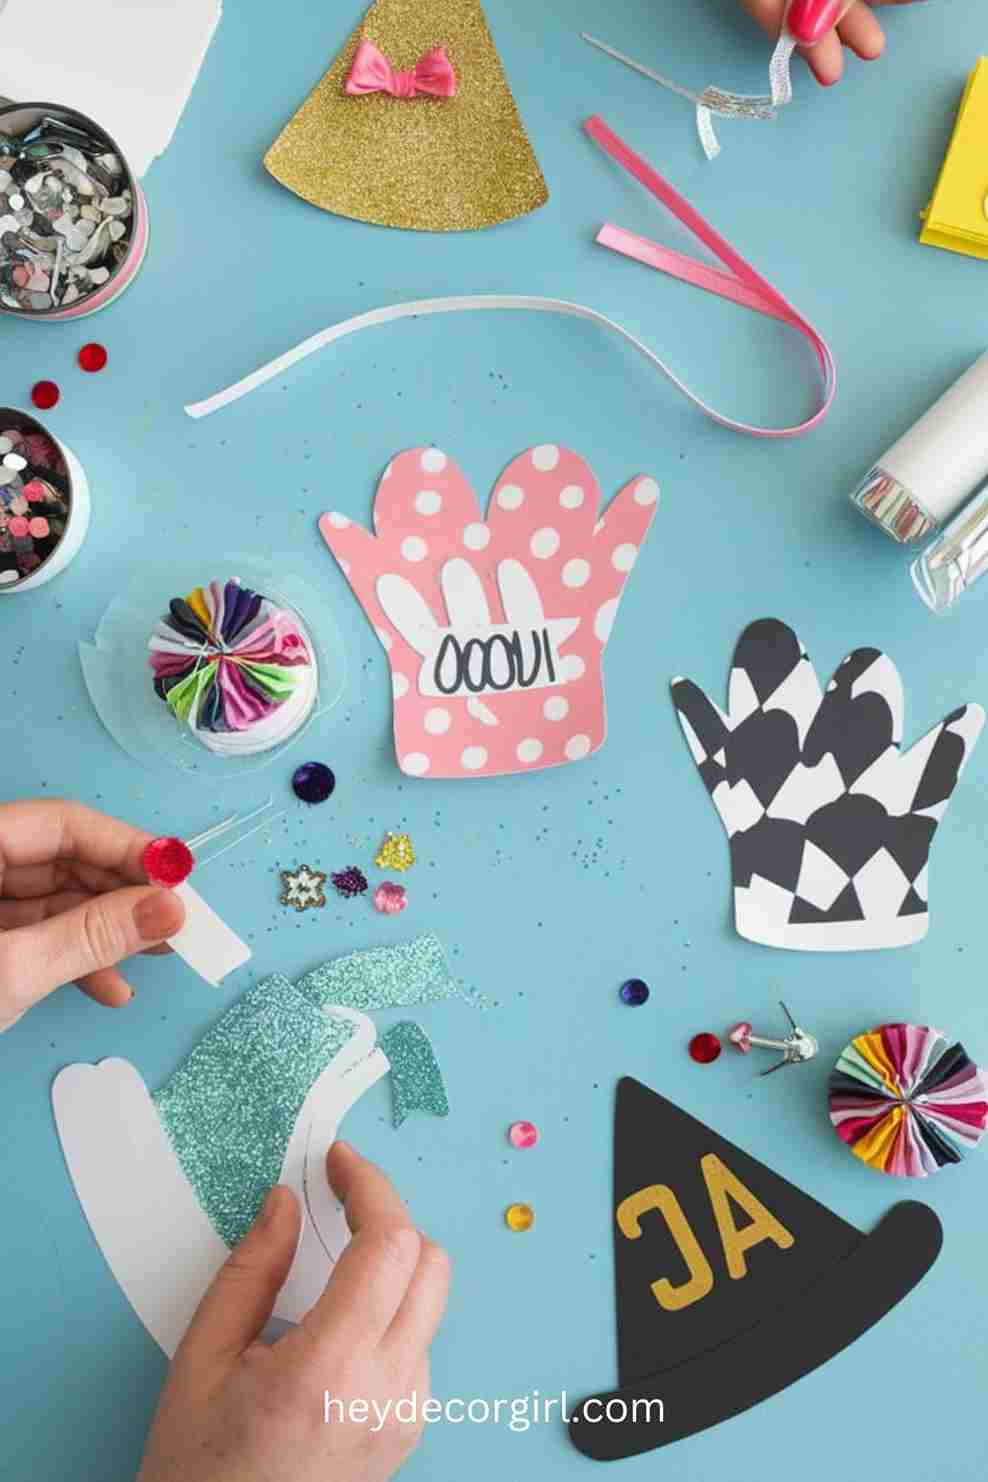
No New Year’s Eve celebration is complete without festive party hats to set the mood for the night! These DIY party hats are easy to make and can be customized to match your party’s theme. Whether you’re using cardstock, glitter, ribbons, or other fun embellishments, crafting unique party hats will add a playful and creative touch to your event. Here’s a step-by-step guide on how to create your own party hats, perfect for your guests, including fun customization ideas for different themes.
Materials Needed:
- Cardstock (colored or patterned)
- Glitter (gold, silver, or any color of your choice)
- Ribbons, sequins, or pom-poms
- Scissors
- Glue or glue gun
- Tape
- Stapler or hole puncher
- Elastic string or headbands (optional)
- Printable templates (optional, for a professional look)
Step-by-Step Instructions:
- Create the Base of the Hat
Start by cutting a piece of cardstock into a triangle shape. The base of the triangle should be large enough to fit comfortably around the wearer’s head. If you prefer a more structured hat, you can use a pre-made template or make your own by drawing a cone shape. The height of the cone will depend on how tall you want the party hat to be. - Form the Cone Shape
Roll the cardstock into a cone shape, making sure the edges align properly. Secure the cone shape by using glue or a stapler. If the cardstock is thick, you may need to use a stapler to hold the edges in place, or you can use tape for a more temporary option. - Add Decorative Elements
This is where you can get creative! Cover the party hat with glitter for a sparkly effect. You can either glue glitter directly onto the cone or apply glue in a pattern and sprinkle the glitter on top. Another option is to use metallic or colored ribbon to decorate the base of the hat or drape it from the top for a festive touch. - Customize the Party Hats
Personalize the hats based on the theme of your New Year’s Eve party. For a glamorous look, use gold and silver glitter and add shiny ribbons. For a more playful party, use bright colored ribbons, pom-poms, or even mini confetti. You can also add numbers, like “2024” or “Midnight,” to the front of the hat for a countdown-themed design. Use a printable template to cut out numbers, stars, or other shapes to glue onto the hats. - Attach the Hat to the Wearer’s Head
To make sure the hats stay on, use elastic string or headbands. You can either glue or tape a piece of elastic string to the inside of the hat or attach a headband for a more comfortable fit. If using elastic string, measure it to fit the wearer’s head and secure it by stapling or tying it inside the hat. - Additional Fun Touches
If you want to add even more flair, attach mini pom-poms, feathers, or sequins to the top of the hat for extra sparkle and dimension. Consider using a hot glue gun for sturdier decoration if you’re adding heavier embellishments. You can also add a fun “Happy New Year!” banner or small streamers to the hat to make it pop!
Customization Ideas Based on Your Party’s Theme:
- Glamorous New Year’s Eve Theme: Use metallic gold, silver, or black cardstock. Add sequins, glitter, and mini champagne glass cutouts to make the hats look elegant and chic.
- Vintage or Retro Theme: Use classic black and white cardstock with gold accents. Add feathers, lace, or vintage-inspired embellishments to capture the retro look.
- Confetti or Sparkle Theme: Cover the hats entirely with glitter or sequins for a party look that screams celebration. Add mini confetti pieces on top of the glitter for an extra burst of color.
- Whimsical or Playful Theme: Use bright colors like pink, blue, or purple cardstock. Add pom-poms, streamers, and even tiny figurines or party horns to the hats for a fun vibe.
- Countdown Theme: Personalize the hats by adding numbers “2024” or “Happy New Year” on the front. You can also make mini countdown clocks on each hat to get guests into the celebratory mood.
Quick Tips for Making These Hats with Kids or Guests:
- Prepare the Base in Advance: If you’re making these hats with kids or guests, prepare the cones ahead of time so that they only need to decorate. Pre-cutting the cardstock and having glitter and ribbons ready will save time.
- Keep the Decorations Simple: For kids, keep the decorations simple and safe—use glitter glue, colorful markers, or stickers. Older guests can add more complex elements like sequins or tiny ornaments.
- Group Activity: Set up a crafting station where guests can make their own hats. Provide a variety of decorations, such as glitter, ribbons, markers, and cut-out shapes. This is a fun interactive activity that adds to the celebration and lets guests get creative.
- Use Templates for Neat Designs: If you want professional-looking hats, print out templates for numbers, shapes, or images that guests can glue onto the hats. This ensures that everyone’s creations have a consistent look while allowing for customization.
8. Metallic Streamers and Curtains
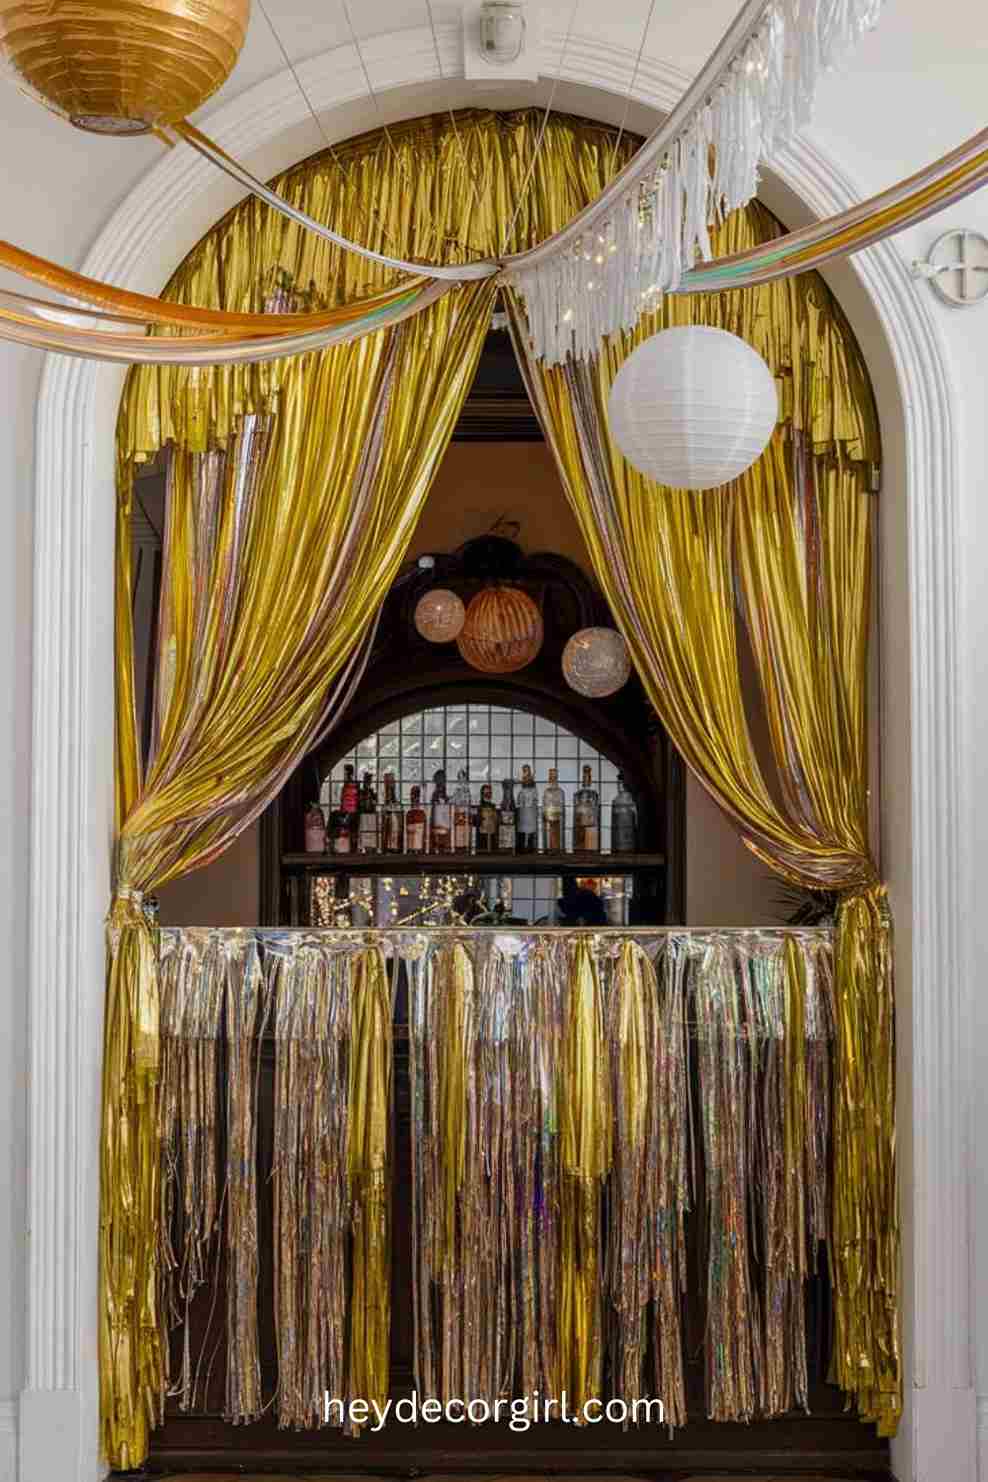
Metallic streamers and curtains are a simple yet impactful way to transform your space into a glamorous New Year’s Eve celebration. The shimmering effect of metallic materials creates a stunning visual that elevates the party atmosphere, making it feel festive and exciting. Whether you’re aiming for a sparkling backdrop, an elegant entryway, or a dynamic photo booth area, metallic streamers and curtains can add instant drama and style. Here’s how to use them effectively for the perfect shiny New Year’s look.
Materials Needed:
- Metallic streamers (in gold, silver, or black)
- Metallic curtains or foil backdrop (optional)
- Tape or hooks for hanging
- Scissors (for trimming streamers to desired length)
- Command strips (for easy installation without damage)
- Tension rods (for curtain installation, optional)
- String lights (optional, for extra sparkle)
Step-by-Step Instructions:
- Choose Your Metallic Streamers or Curtains
Metallic streamers come in various colors like gold, silver, rose gold, or iridescent. You can also use metallic curtains or foil backdrops, which offer a thicker and more polished appearance. Select colors that align with your party’s theme or New Year’s Eve aesthetic. Gold and silver are classic choices for a luxurious look, while rainbow-colored metallic streamers can bring a playful energy to the celebration. - Prepare the Hanging Area
Decide where you want to create the dramatic metallic effect. Streamers can be hung on walls, across doorways, or as a backdrop behind a photo booth. Metallic curtains can be installed along a wall or used to cover a less attractive area in your space, such as an open closet or window. - Hanging the Metallic Streamers
For a stunning visual, metallic streamers can be hung vertically or horizontally.- Vertical Installation: Cut the streamers to your desired length and tape them along a wall from ceiling to floor. Space them closely together for a dense, shiny look, or leave some gaps for a more open appearance.
- Horizontal Installation: To create a more dynamic design, tape the streamers across the ceiling or along a table for a cascade effect. This works especially well for dramatic entrances or over a dining area.
- Install Metallic Curtains
Metallic curtains can create a more luxurious and bold visual. Use tension rods to hang metallic curtains across doorways, windows, or along walls to instantly transform the space. If you don’t have tension rods, secure the curtains with hooks or nails for a more permanent setup. Metallic curtains work wonderfully behind the bar area, serving as a backdrop for photos or even behind a stage if you’re having a performance or live music at your party. - Create a Shiny New Year’s Look
Metallic streamers and curtains work best when paired with other shiny elements to enhance the effect.- Incorporate String Lights: For an added sparkle, consider stringing fairy lights along or behind the metallic streamers. This will illuminate the metallic materials, creating a twinkling effect that’s perfect for midnight celebrations.
- Combine with Balloons or Confetti: Adding balloons or scattered confetti near metallic streamers or curtains will complement the shine and create a festive, celebratory look. Consider hanging metallic balloons near your streamer displays for extra shimmer.
- Backdrops for Special Moments: Set up metallic curtains as a backdrop for your photo booth, the bar area, or the countdown clock. These shiny materials will create a picture-perfect setting for guests to capture their New Year’s memories.
- Make the Metallic Installation Unique
If you want to take it up a notch, consider combining metallic streamers with other materials like tulle or fabric in contrasting colors to create depth. Layering the metallic streamers over a solid backdrop will add texture and enhance the shiny effect. For an interactive element, you could even have metallic curtains that guests can walk through as they enter the party area, creating a grand, glamorous entrance.
Best Places to Install Metallic Streamers and Curtains:
- Entryways and Doors: Create an entrance worthy of a celebration by hanging metallic streamers or curtains on either side of the door. This adds an immediate festive touch as guests arrive.
- Photo Booth Area: Use metallic streamers or curtains as the backdrop for a photo booth to create an exciting and glamorous spot for guests to take memorable pictures.
- Ceilings and Walls: Hang streamers or metallic curtains along the ceiling to create an overhead canopy of shine. You can also cover entire walls for a sparkling effect.
- Around the Dance Floor: If you have a dance floor area, hang metallic streamers or curtains around the perimeter to add a dramatic vibe to the party. As the lights hit the shiny surfaces, the effect will be mesmerizing.
- Bar Area: Installing metallic curtains behind the bar creates a shimmering effect that complements the sparkling drinks and adds a touch of glamour.
Quick Tips for Maximum Impact:
- Density and Layering: If you want a bold, eye-catching effect, use dense metallic streamers that cover large sections of your space. For a subtler look, leave gaps between streamers or layer with other materials.
- Mix Colors: Don’t be afraid to mix and match metallic colors. Combining gold, silver, and iridescent streamers or curtains can create a more dynamic, festive look, perfect for New Year’s Eve.
- Easy Cleanup: If you’re concerned about cleanup after the party, consider using removable command hooks or adhesive tape to hang the streamers. This way, you won’t have to worry about damaging walls or leaving behind residue.
- Elevate the Glam with Lights: Place LED string lights behind or around the metallic streamers or curtains for a glowing effect that enhances the shine. The combination of metallic shine and soft lighting will create a sparkling, festive atmosphere.
9. Champagne Cork Place Cards
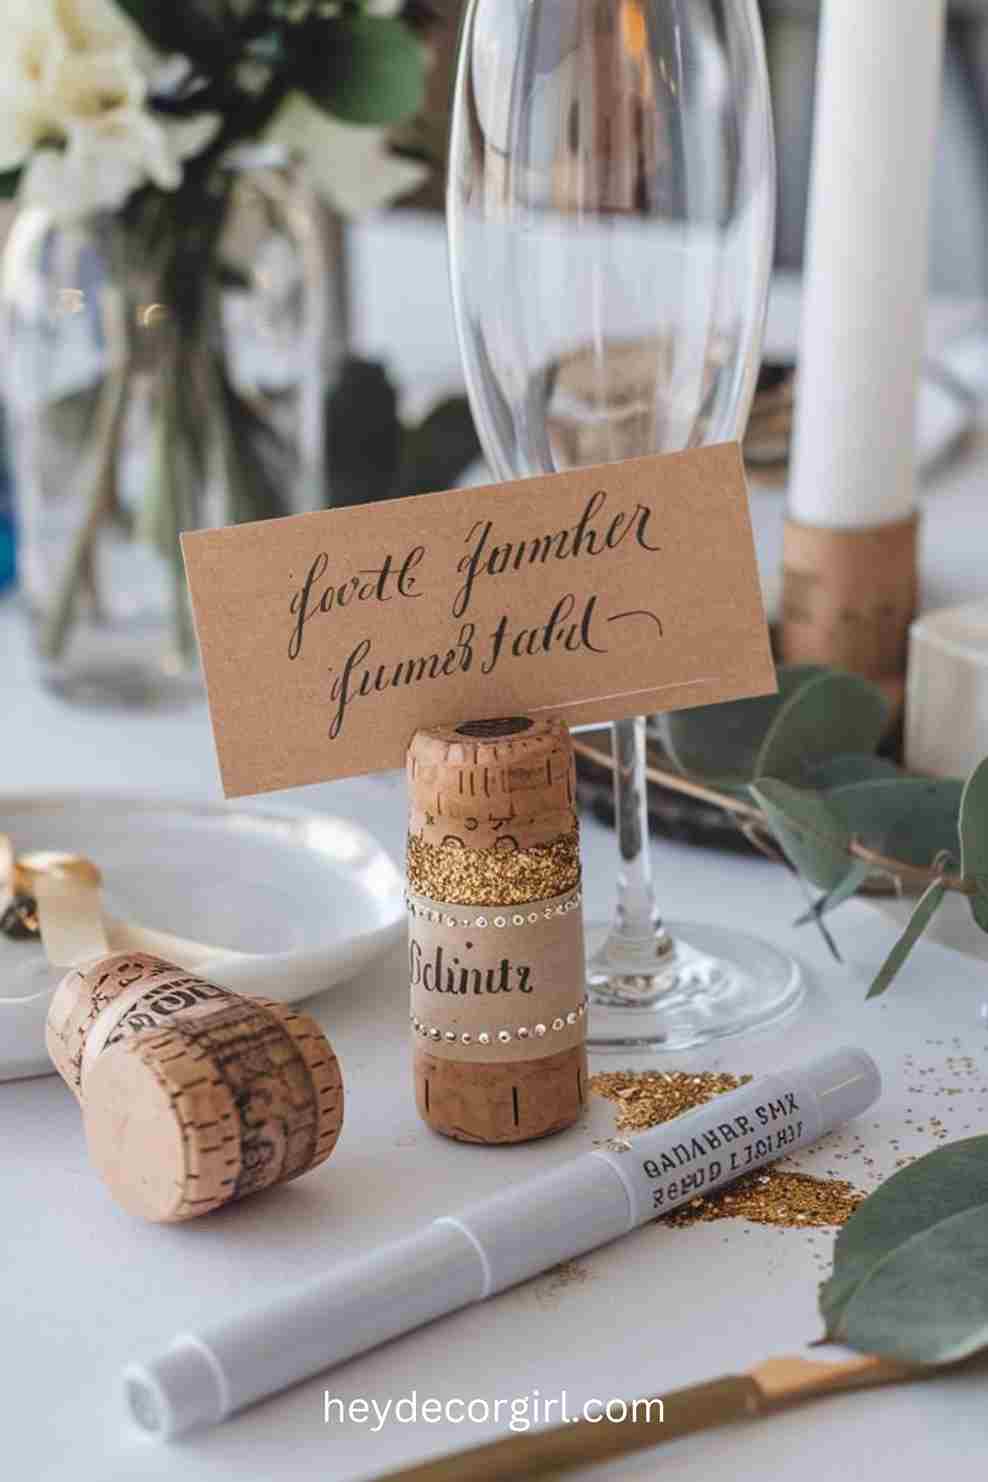
Champagne corks can be transformed into charming and elegant place cards that add a unique touch to your New Year’s Eve dining table. Not only are they perfect for a celebratory event, but they also provide a delightful way to personalize each guest’s seat. These simple yet creative place cards can be customized with guests’ names and adorned with a bit of sparkle, making your table setting feel extra festive and refined. Here’s how to turn champagne corks into stylish place cards that will impress your guests.
Materials Needed:
- Champagne corks (one for each guest)
- Small cards or cardstock (cut to fit)
- Glitter, sequins, or metallic markers for decoration
- Small hole punch or penknife (to create a slot)
- Ribbon or twine (optional, for added decoration)
- Glue (for adding extra embellishments)
- Scissors
Step-by-Step Instructions:
- Prepare the Corks
Begin by collecting enough champagne corks for each guest. If you’re using corks from different bottles, try to choose ones that are in good condition. Champagne corks are typically used once, so this is a great way to recycle them into a stylish, functional piece for your table setting. - Create the Name Tags
Cut small cards or cardstock into rectangles that fit the top of the cork. The size of the card will depend on the size of your cork, but aim for a small, rectangular shape that will fit comfortably on top. Write or print the names of your guests on the cards using a metallic pen, calligraphy marker, or fine-tipped marker. You can also use printed labels if you want a cleaner, more uniform look. - Attach the Cards to the Cork
Using a small hole punch or a penknife, carefully create a small slit at the top of the champagne cork. The slit should be just wide enough to insert the name card. Insert the card into the slit, securing it in place. If you’d like extra stability, you can apply a small amount of glue to the back of the card to hold it securely. - Personalize and Add Sparkle
To give your place cards an elegant New Year’s touch, add a little sparkle to them. Consider dusting the edges of the cards with glitter, or use a metallic marker to outline the name or card. You can also add small sequins or rhinestones to the card or along the cork for extra visual appeal. For a cohesive look, consider using colors like gold, silver, or a classic black-and-white combo. - Decorate the Corks
You can enhance the appearance of the champagne corks by tying small ribbons or twine around the base of the cork. Consider using metallic or festive colors like gold, silver, or red to tie them off for a chic, celebratory look. Another option is to add tiny embellishments like faux pearls, tiny flowers, or other decorative items to the cork itself for a more personalized, luxurious effect. - Display the Place Cards
Once your place cards are ready, arrange them on the dining table in front of each guest’s seat. Position them so that the name card is visible, making sure each guest can easily find their place. The champagne corks can be spaced out evenly along the table or clustered together in a creative pattern. You can also use them to mark specific seating arrangements for a more organized setup. - Optional: Create a Cork “Garden” or Centerpiece
If you have extra corks, you can create a decorative cork “garden” in the center of your dining table. Simply stack several corks together or arrange them creatively to form a centerpiece. You can add candles or fairy lights around the corks to make the display even more festive.
Quick Tips for a Perfect Set-Up:
- Color Coordination: Coordinate the color scheme of the name cards and ribbons with your overall party theme. If you’re going for a gold and silver theme, match your cork decorations to reflect this.
- Use Calligraphy for Elegance: For a more sophisticated look, write your guests’ names in elegant calligraphy or have someone do it for you. This adds an extra personal and refined touch to the place cards.
- Consider Adding a Message: In addition to guests’ names, you can add a fun New Year’s Eve message, such as “Cheers to 2024!” or a quote, to make the place cards feel even more festive.
- Add Natural Touches: If you want a rustic feel, you can leave the corks in their natural state without too many added embellishments. A simple handwritten card and a bit of twine can create a charming, laid-back atmosphere.
10. DIY New Year’s Wreath
A DIY New Year’s wreath is a perfect way to add a touch of festive elegance to your home, welcoming the new year with style and sparkle. Creating your own wreath using simple materials like pinecones, glitter, and a wreath base allows for endless creativity, and it’s a fun, hands-on project that you can enjoy with friends or family. Here’s how to make a stunning wreath that fits the New Year’s vibe while adding a personal touch to your décor.
Materials Needed:
- Wreath base (either foam, wire, or grapevine)
- Pinecones (real or artificial)
- Glitter (gold, silver, or iridescent)
- Hot glue gun and glue sticks
- Ribbons (preferably metallic or sparkly)
- Faux flowers or ornaments (optional)
- Paint (optional, for painting pinecones or adding accents)
- Small numbers or letters (to customize with the year)
- Battery-operated LED lights (optional, for a glowing effect)
Step-by-Step Instructions:
- Prepare the Wreath Base
Begin by selecting your wreath base. You can use a pre-made foam, wire, or grapevine wreath, depending on the look you want to achieve. Foam or wire wreath bases are great for creating a smooth, structured look, while a grapevine base provides a more natural, rustic appearance. - Gather and Prep the Pinecones
Pinecones are a wonderful base for adding texture and dimension to your wreath. If you’re using real pinecones, you can spray them with a little glue and dust them with glitter to make them sparkle. Alternatively, you can purchase artificial pinecones that are already glittered. For a personal touch, consider painting the tips of the pinecones in metallic gold or silver to add shine. - Attach Pinecones to the Wreath
Use a hot glue gun to attach the pinecones to your wreath base. Start by gluing the larger pinecones around the outer edge, then fill in the spaces with smaller pinecones towards the center. The arrangement should look balanced, but don’t be afraid to leave some space to add other elements later. - Add Sparkle and Shine
Glitter is a key element for creating that New Year’s shimmer. Dust the pinecones with more glitter or sprinkle glitter over the wreath itself for extra shine. For a bit of additional sparkle, you can glue on some sequins or rhinestones in the gaps between the pinecones. - Incorporate Personalization
Personalize the wreath by adding the year in a creative way. You can use wooden or metallic numbers, glittery cutouts, or even create your own using painted cardstock. For a more subtle approach, incorporate the year into a ribbon banner that wraps around the wreath. Another fun idea is to add custom initials or names for each family member, making it a wreath that celebrates your home as a whole. - Decorate with Ribbons and Accents
Ribbons add elegance to your wreath, and you can use metallic, glittery, or velvet ribbons to tie bows or weave them throughout the wreath. You can also add decorative elements like faux flowers, small ornaments, or even mini champagne bottles for a whimsical New Year’s theme. Attach the ribbon in loops or long flowing pieces to add visual interest. - Add Lights for Extra Magic
For a glowing effect, you can incorporate battery-operated LED string lights into the wreath. Tuck the lights in between the pinecones and behind the decorations so they subtly illuminate the wreath, making it look even more festive. This step is optional but creates a wonderful ambiance in the evening. - Finishing Touches
Once everything is glued in place and the wreath looks how you want it, consider adding a decorative hook or ribbon at the top for easy hanging. You can also lightly spray the whole wreath with glitter spray for an even more luxurious finish. The wreath can be hung on your front door to welcome the new year or displayed inside on a wall or mirror for added holiday cheer.
Creative Ideas for Personalization:
- Custom Ribbon Banner: Write “Happy New Year” or the year on a piece of fabric or ribbon and tie it around the wreath. You can use fabric paint or transfer letters for a personalized touch.
- Family Names: Add small tags with each family member’s name or initials, either hanging from the wreath or placed around the base.
- Photo Ornaments: Include small photo ornaments featuring your family or pets to add a more personal, sentimental element.
- Yearly Tradition: Every year, you can add a new ornament or element to the wreath that represents something special about that year, like a memorable event, place, or achievement.
Quick Tips:
- Symmetry vs. Asymmetry: You can choose to create a symmetrical wreath with evenly spaced pinecones and decorations, or go for a more organic, asymmetrical look for a modern touch.
- Matching the Theme: Tailor the color palette of your wreath to match your party or home’s New Year’s theme. Gold, silver, black, and white are classic, but you can use bold colors like blue or red for a more festive pop.
- Reuse and Refresh: If you make a wreath each year, you can reuse the base and change the embellishments to keep the look fresh and exciting.
FAQ
What are some easy DIY New Year’s decor ideas?
Simple DIY ideas include creating balloon arches, champagne cork place cards, glittery countdown signs, festive paper lanterns, and DIY party hats. These projects are easy to assemble with minimal materials and can be tailored to fit your style and theme.
How can I create a memorable atmosphere with DIY decorations?
To create a memorable atmosphere, focus on using elements that reflect the excitement of New Year’s Eve, such as sparkling lights, glitter, and metallic accents. DIY decorations like confetti poppers, custom wreaths, and a fun photo booth backdrop can all add personality to your celebration and set the festive mood.
What materials do I need for simple DIY New Year’s decorations?
Common materials include balloons, glitter, paper, ribbons, champagne corks, pinecones, cardstock, glue guns, and paint. You can easily find these materials at craft stores, and many of them are inexpensive and reusable.
Can I personalize DIY New Year’s decorations?
Absolutely! Many DIY projects can be personalized to suit your style. For example, you can customize champagne cork place cards with guests’ names, add your favorite colors to a wreath, or use calligraphy to create elegant countdown signs. Adding personal touches like family initials or the year makes your decor unique.
How much time do DIY New Year’s decorations take to make?
Most DIY projects are designed to be quick and simple, taking anywhere from 30 minutes to a few hours depending on the complexity. For example, making a balloon arch might take longer than creating personalized party hats, but both can be done in one afternoon.
Are these DIY decorations budget-friendly?
Yes, DIY decorations are often budget-friendly since many projects use common household materials or inexpensive craft supplies. For example, creating a photo booth backdrop with streamers, or making confetti poppers from toilet paper rolls, costs very little compared to buying pre-made decorations.
Can kids help with New Year’s DIY decorations?
Definitely! Many DIY New Year’s decorations are simple enough for kids to help with. They can assist with gluing glitter on items, decorating party hats, or adding sequins to paper lanterns. Supervision is key for tasks like using hot glue guns, but kids can enjoy the fun of making their own decorations.
What are some tips for arranging New Year’s decorations?
For a cohesive look, use a consistent color palette like metallic gold and silver or a black and white theme. Consider focusing on one area, like a photo booth, and making it stand out with eye-catching decorations. Scatter smaller DIY items like confetti poppers or place cards around the party space for a festive vibe.
How do I ensure my decorations last throughout the night?
To make sure your decorations last, reinforce them with extra glue if needed and keep delicate items like paper lanterns or wreaths in areas where they’re less likely to be bumped. If using balloons or confetti, be mindful of potential air leaks or spills and have backup supplies on hand.
How can I store my DIY decorations for next year?
To reuse your decorations, store them in plastic bins or sturdy boxes to keep them organized and intact. For items like balloons, confetti poppers, and party hats, store them in airtight bags or boxes to protect them from dust and moisture, so they’re ready for next year’s celebration!
Hi, I’m Richa, the creative mind and passionate soul behind Hey Decor Girl. With a bachelor’s degree in Inter-space Design and a deep love for transforming spaces, I’ve dedicated my career to bringing style, comfort, and personality into homes. As an interior designer and architect, I’ve had the pleasure of crafting unique living environments that reflect the individuality of those who live in them.
At Hey Decor Girl, I share my expertise in all things home decor—from cozy living room makeovers to rustic farmhouse designs and everything in between. My mission is to inspire you to create spaces that not only look stunning but also feel like home. Whether you’re looking for the latest trends or timeless classics, I’m here to guide you every step of the way. Let’s make your dream home a reality, one stylish detail at a time.
DIY Simple New Year's New Year's Decor Ideas New Year's Decor Ideas DIY Simple
Last modified: November 11, 2024
![Hey Decor Girl [Latest Trending Decor Design Ideas]](https://heydecorgirl.com/wordpress/wp-content/uploads/2024/08/Heygirldecor-Logo.png)

