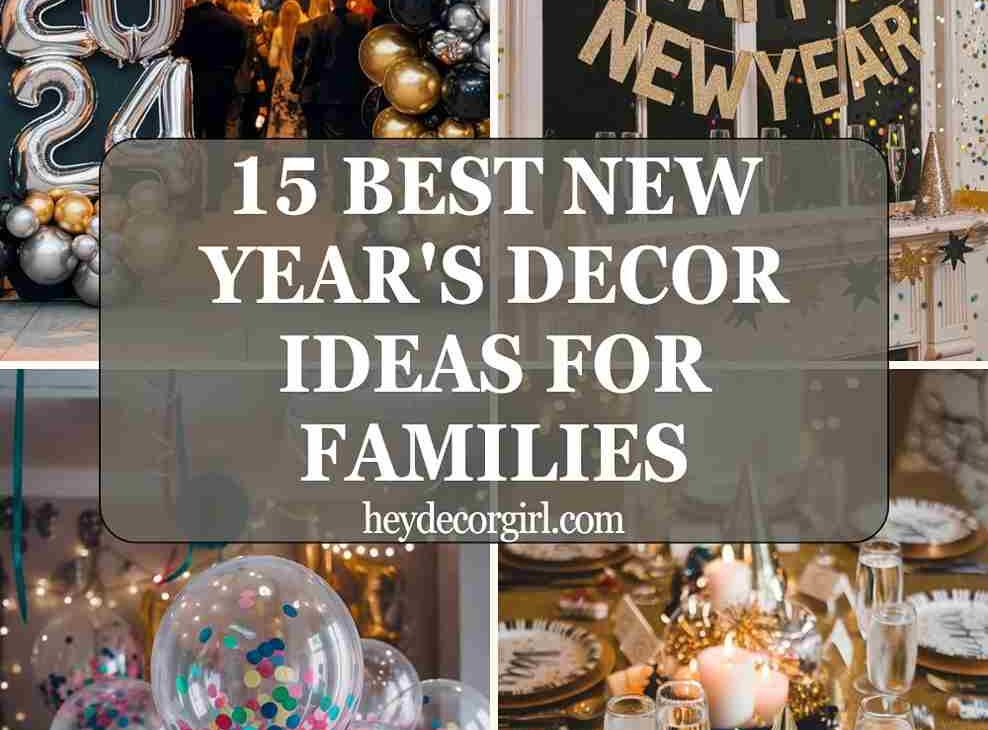
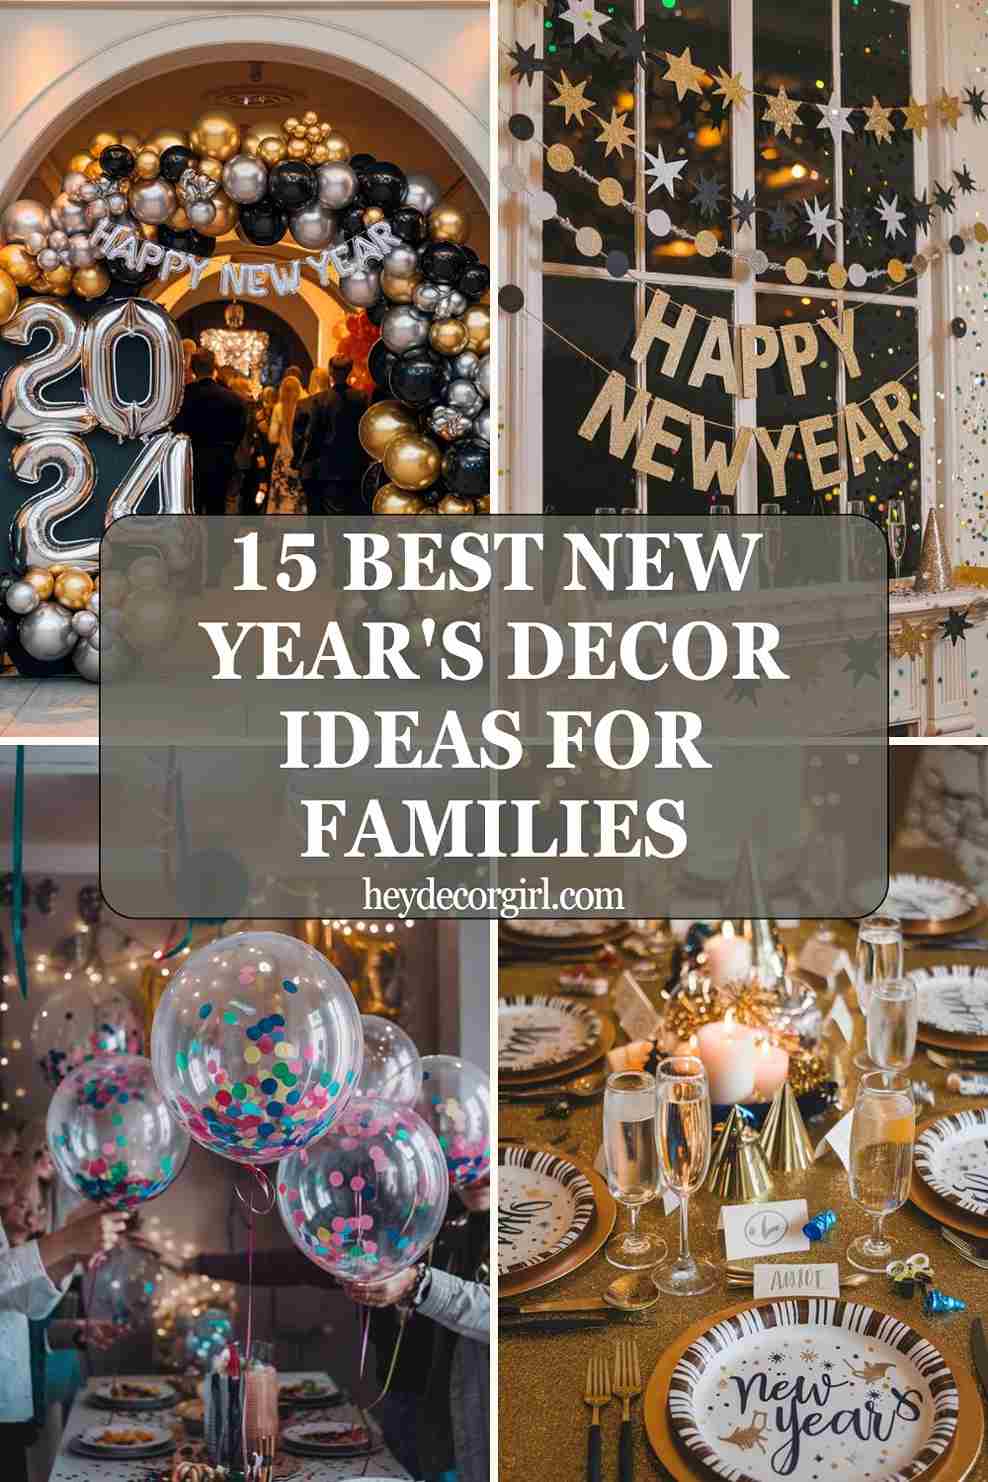
New Year’s Decor Ideas for Families : New Year’s Eve is a time for celebration, reflection, and fresh starts, and for families, it’s the perfect opportunity to create lasting memories together. One of the most enjoyable aspects of ringing in the new year is decorating your home to set a festive and joyful tone for the evening. New Year’s decorations not only add a sense of excitement to the event, but they also bring families closer by involving everyone in the process of making the space special. From fun DIY projects to family-friendly themes, the right decorations can transform your home into a lively and welcoming space for both kids and adults.
These New Year’s decor ideas are designed to be fun, simple to execute, and perfect for families. Whether you’re planning a cozy gathering or a grand celebration, these decorations will make the evening unforgettable. By incorporating interactive elements, colorful designs, and festive touches, these ideas will help create a warm and joyful atmosphere where every family member can feel part of the celebration.
Best New Year’s Decor Ideas for Families
1. DIY Confetti Balloons
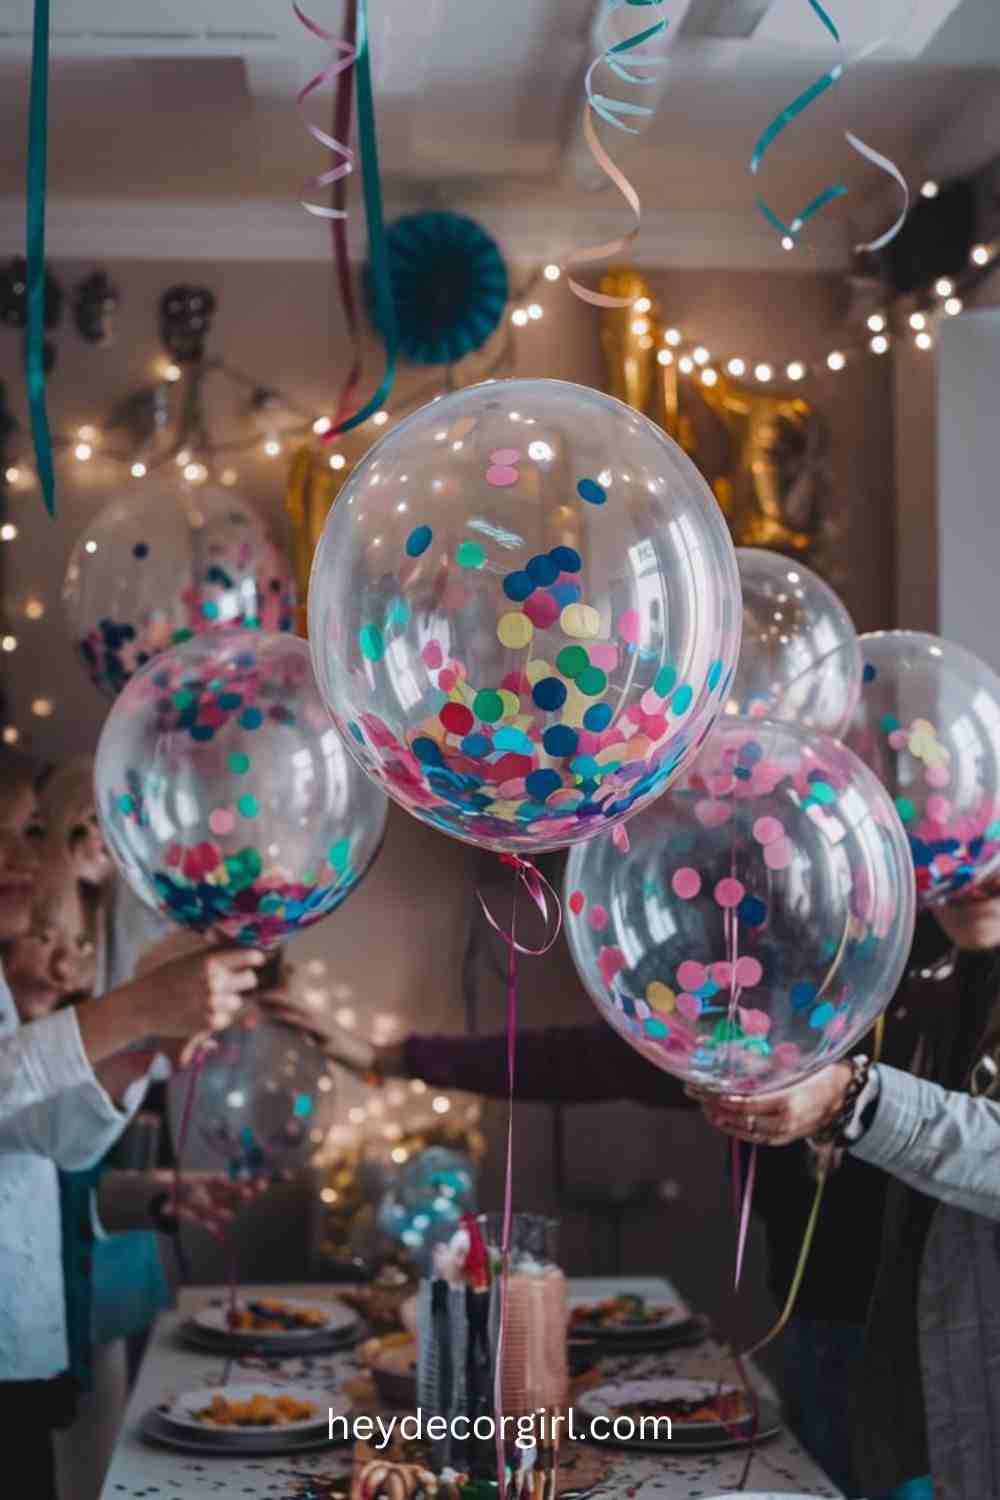
Creating colorful confetti-filled balloons is a simple and fun way to add a pop of color and excitement to your New Year’s decorations. These balloons not only brighten up the space but also provide a playful and interactive element for your family to enjoy. Here’s how you can create them:
Instructions:
- Gather Supplies:
- Balloons (clear balloons work best to showcase the confetti)
- Confetti (store-bought or homemade from cut-up paper, glitter, or metallic foil)
- Balloon pump (optional, but helps to inflate quickly)
- Funnel (or a piece of paper rolled into a cone to guide the confetti into the balloon)
- Fill the Balloons:
- Use the funnel to pour the confetti into the balloon. Start by placing the funnel into the opening of the balloon and carefully adding small handfuls of confetti. You can mix different colors or use a specific color scheme to match your New Year’s theme.
- Once you’ve added the desired amount of confetti, inflate the balloon with air or helium, depending on your preference. If you’re using helium, the balloons will float, creating a whimsical effect.
- Seal the Balloons:
- Tie the balloon securely to ensure the confetti stays inside. If using helium, you can attach a string to each balloon for easy handling.
- Optional: Add Lights
- For an extra touch, you can place a small string of battery-powered fairy lights inside the balloon before inflating it. This creates a glowing effect, making the balloons even more festive as they light up the room.
Fun Uses:
- Photo Opportunities: Confetti balloons are perfect for family photos. Have everyone gather around, and at the stroke of midnight, pop the balloons for a burst of colorful confetti. These moments make for fun, vibrant photos that capture the energy of the celebration.
- Interactive Decor: Kids (and adults) will love the excitement of popping the balloons. Set a countdown for when the confetti will rain down, or use them as part of a game or activity during the celebration.
- Festive Ambiance: Hang the balloons from the ceiling or create a cluster in a corner for a festive atmosphere. You can even scatter a few balloons around the room to make the space feel extra celebratory.
These DIY confetti balloons are a simple, budget-friendly way to elevate your New Year’s Eve decor, and their interactive nature will keep the whole family engaged throughout the evening.
2. New Year’s Eve Countdown Clock
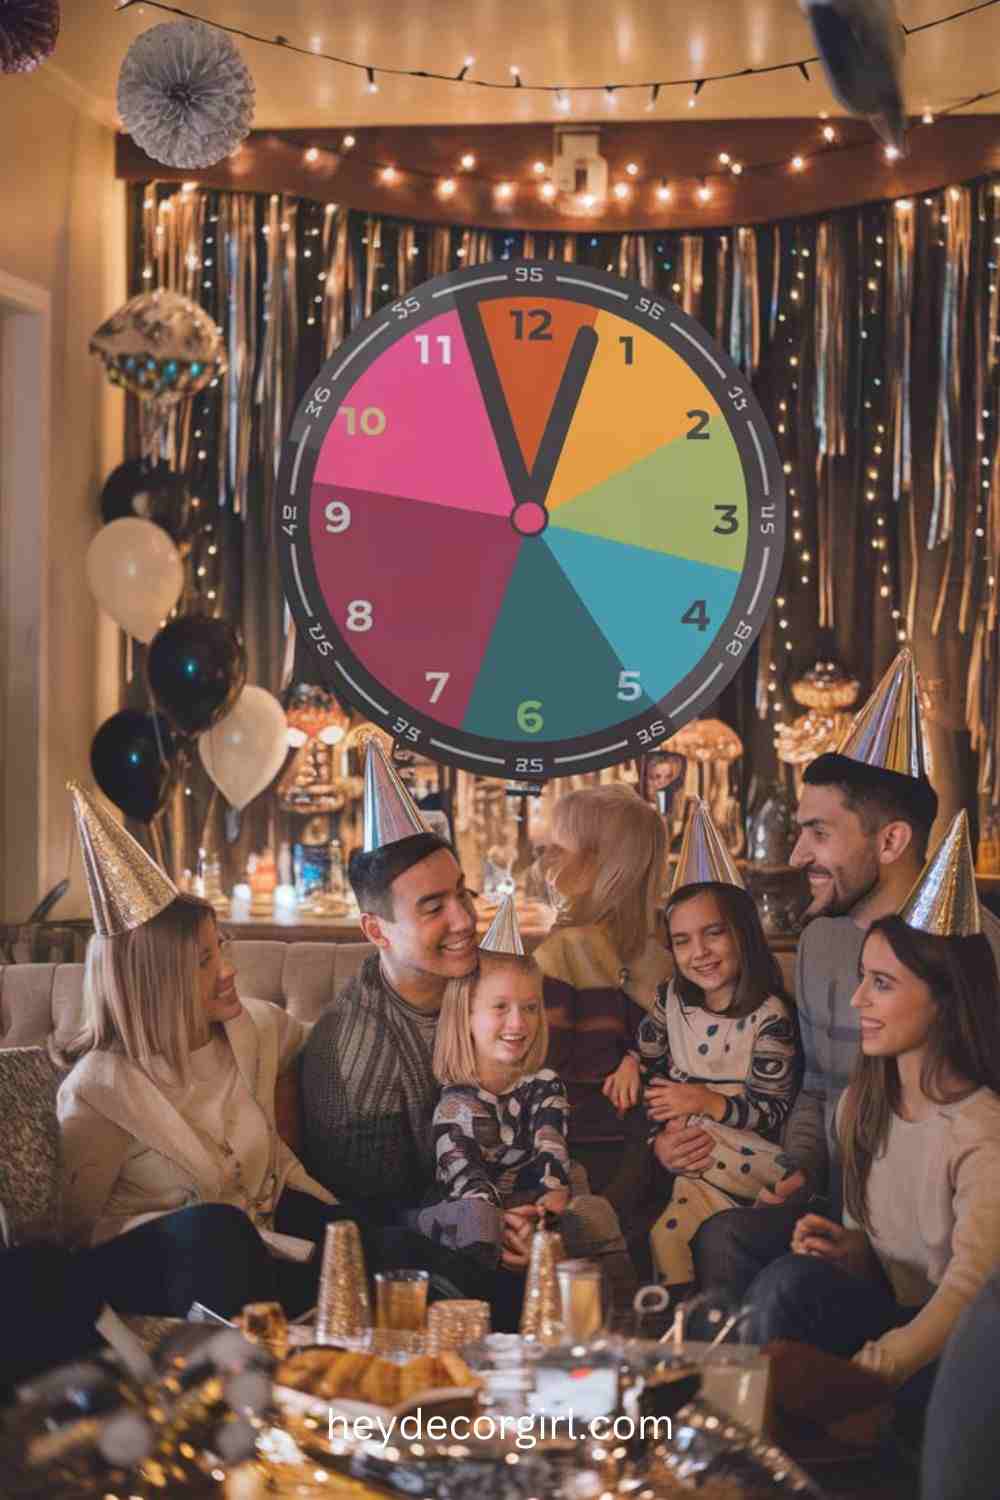
A New Year’s Eve countdown clock is an exciting centerpiece that adds anticipation and energy to your family celebration. Whether you choose to create a DIY version or buy a decorative one, this clock serves as both a functional and festive decoration, keeping everyone engaged as the big moment approaches. Here’s how to make or incorporate a countdown clock into your family celebration:
Instructions:
- DIY Countdown Clock:
- Materials Needed:
- Large poster board or foam board (for the clock face)
- Markers or paint to create the numbers
- Craft supplies like glitter, stickers, or ribbon for decoration
- Clock hands (you can use paper, foam, or even actual clock parts from a store-bought clock)
- A working clock mechanism (or simply create a movable hand for the countdown)
- How to Make:
- Draw or paint a large clock face on the board, dividing it into 12 sections as you would see on a traditional clock.
- Use markers or stencils to create bold, clear numbers.
- Attach movable clock hands that can be adjusted every hour (or in 15-minute increments) leading up to midnight.
- Decorate the clock with festive elements like sparkles, streamers, or a “Happy New Year!” banner at the top.
- Materials Needed:
- Buying a Countdown Clock:
- There are many stores that offer decorative countdown clocks specifically designed for New Year’s Eve. These may come in a variety of styles, including vintage, modern, or themed designs like champagne bottles or fireworks.
- Look for a clock that allows you to adjust the time manually, or one with a digital display that counts down in real-time.
- Choose a clock that fits your party’s color scheme or overall theme to ensure it complements your decor.
Incorporating the Countdown Clock into Your Family Celebration:
- Setting the Scene:
- Place the countdown clock in a central location where everyone can easily see it—perhaps above the fireplace, next to the food table, or in a cozy corner where family members will gather.
- If you have younger children, explain how the clock works and involve them in moving the hands closer to midnight each hour. This makes it an interactive activity that adds to the excitement.
- Countdown Games:
- Use the clock to lead into special family games or activities as the time draws closer to midnight. For example, every hour on the hour, play a quick game like “New Year’s Eve Bingo” or “Minute to Win It” challenges. This keeps the energy high and everyone engaged.
- You can also create a small ceremony at each hour’s “countdown” with cheers, snacks, and family photos.
- New Year’s Eve Ritual:
- As midnight approaches, gather the whole family around the clock. Create a tradition where everyone makes a wish or shares a goal for the New Year as the clock counts down the final minutes. This creates a meaningful moment and builds excitement leading into the new year.
The New Year’s Eve countdown clock is not only a fun decor piece but also a way to keep the whole family involved and counting down to the big celebration, making the night even more memorable and interactive.
3. Festive Table Settings
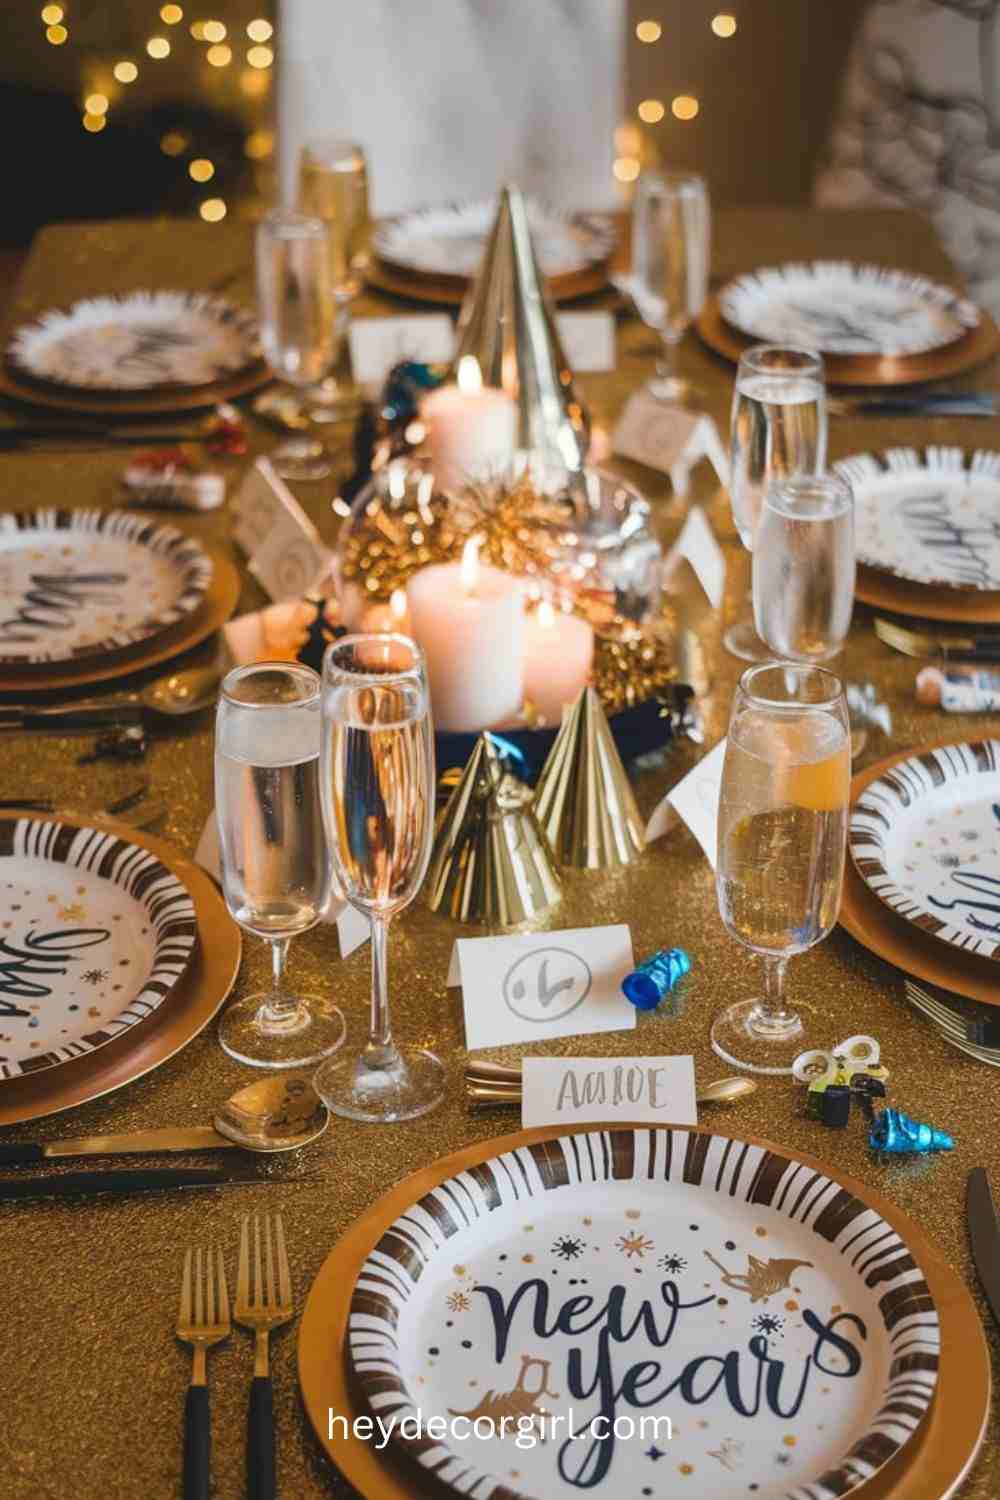
A well-decorated dining table can elevate the entire New Year’s Eve experience, making the meal feel special and exciting for the whole family. Whether you’re hosting a formal dinner or a casual buffet, creating a festive table setting is an easy way to add charm and anticipation to the celebration. Here are some simple tips to make your family dining setup both stylish and fun:
Tips for Creating a Special Family Dining Setup:
- Glitter Tablecloths:
- Start with a base tablecloth in a neutral color (white, black, or gold) and add a layer of glittery fabric or table runner to create a festive atmosphere. Gold, silver, or metallic colors are perfect for New Year’s Eve and will catch the light, making the table sparkle.
- Alternatively, you can use a simple cloth tablecloth and sprinkle some glitter on top for a DIY touch that’s easy to clean afterward.
- Champagne Glasses for the Kids:
- Let the kids feel included by giving them their own “champagne” glasses filled with sparkling water, juice, or non-alcoholic bubbly drinks. You can even buy plastic champagne flutes or colorful cups to add a fun touch to the table.
- For an added flair, serve the drinks with festive straws, drink stirrers, or fruit garnishes like strawberries or oranges for a playful and sophisticated look.
- Themed Plates and Utensils:
- Use themed plates that tie into the New Year’s Eve celebration, such as plates with “Happy New Year” written on them or designs featuring fireworks, stars, or clocks. You can easily find disposable, festive plates, or choose a reusable set with a New Year’s theme for an eco-friendly option.
- Incorporate metallic napkins or napkin rings to add a touch of elegance. Consider folding napkins into shapes like champagne glasses or party hats for extra creativity.
- Sparkling Centerpiece:
- Add a beautiful centerpiece to the table using candles in gold or silver holders, or a floral arrangement mixed with metallic accents like glittery branches or sequins.
- For a family-friendly twist, you can use small party hats, noise makers, or mini New Year’s Eve countdown clocks as part of the centerpiece. This keeps the energy high and interactive while also looking festive.
- Personalized Place Cards:
- Personalize the table by creating fun place cards for each guest. You can write family members’ names on small cards and attach them to mini party hats or even small decorative balloons to make each seat feel special.
- Alternatively, you can incorporate small messages or wishes for the new year to add a personal touch.
- Mini Party Favors:
- Place mini party favors, such as noise makers, confetti poppers, or small toys, at each setting. These can serve as both decor and fun surprises for everyone to enjoy during the evening.
Incorporating the Festive Touches:
- As the meal progresses, let the countdown clock, festive table settings, and party favors all become part of the celebration. The table should feel like a lively and engaging space where everyone feels included, whether they’re eating, chatting, or getting ready for the New Year’s countdown.
- Add twinkling fairy lights or a few decorative lanterns to enhance the mood and create a cozy, yet festive environment.
A well-designed festive table setting will not only make your New Year’s Eve meal memorable but also create a cheerful atmosphere that the whole family can enjoy together. With just a few simple elements, you can transform your dining area into a fun, elegant space where everyone feels excited to celebrate.
4. Customizable Party Hats
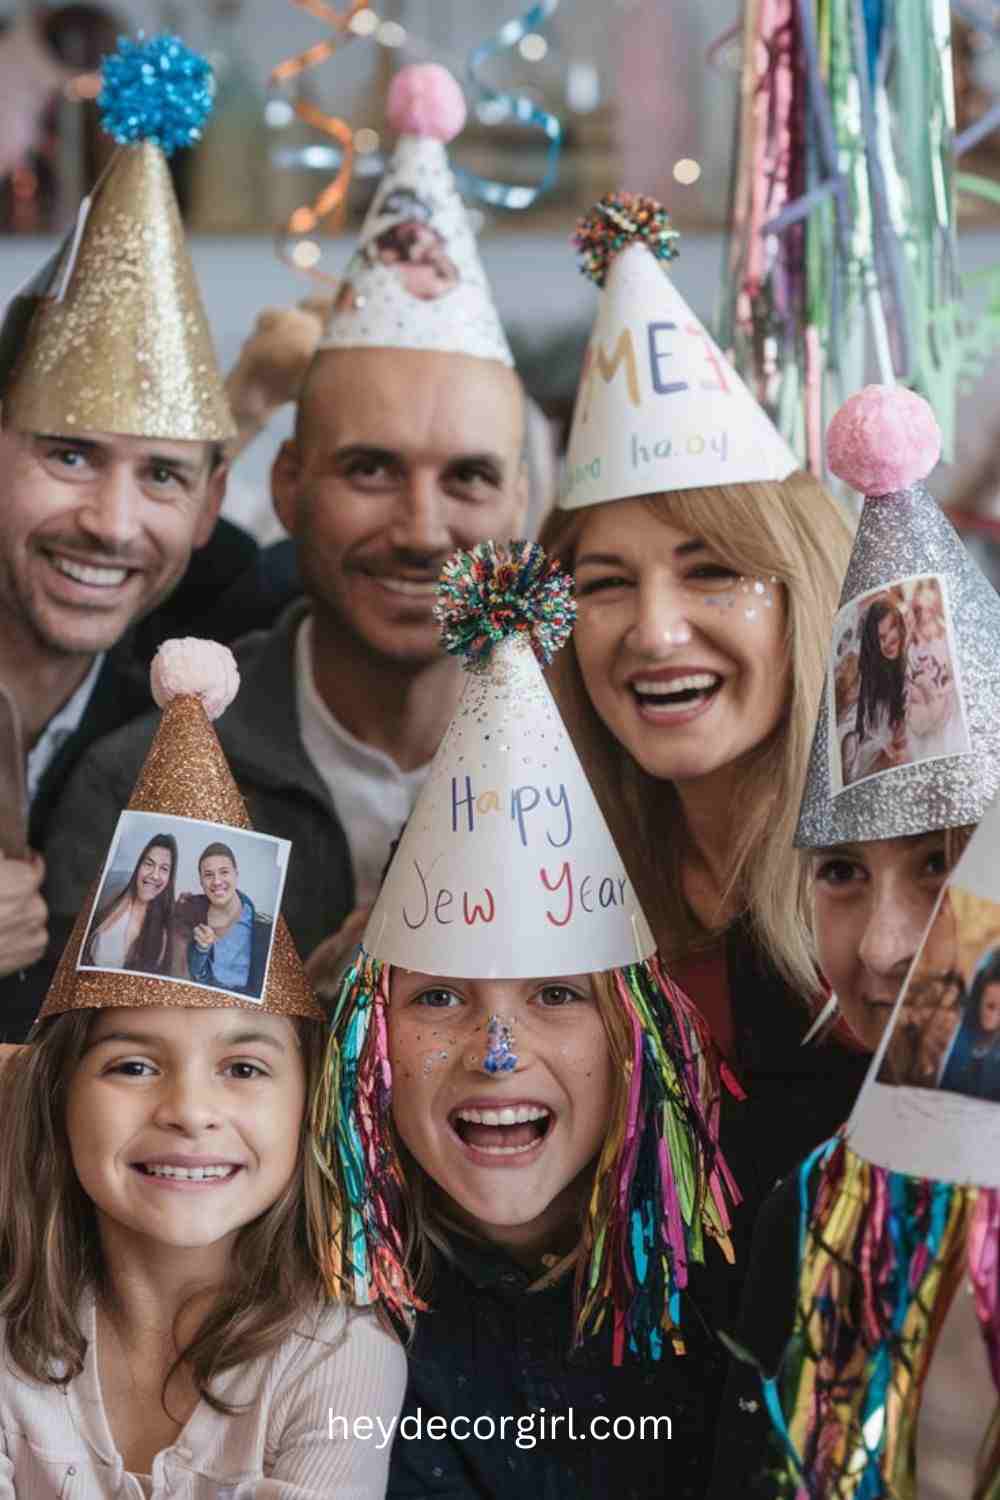
Party hats are a staple of any New Year’s celebration, and creating personalized ones for each family member adds a special and fun touch to the festivities. Not only can you customize the hats to match your New Year’s theme, but they also make for memorable keepsakes. Here are some DIY ideas to help you create unique, family-oriented party hats that everyone will enjoy:
DIY Options for Creating Unique and Personalized Party Hats:
- Materials Needed:
- Plain cone-shaped party hats (available at craft stores or made from cardstock)
- Glitter, stickers, and sequins for decoration
- Glue, scissors, and tape
- String or elastic to secure the hats
- Family photos (printed on small cards)
- Colored paper, markers, or paint for adding personal messages
- How to Make the Hats:
- Basic Structure: Start with a simple cone-shaped party hat. You can buy ready-made cones or easily create your own by cutting a triangle from cardstock and rolling it into a cone shape.
- Decorate with Glitter and Colors: Cover the hat with glitter, sequins, or metallic paint for a sparkling, festive look. Use the party’s theme colors (e.g., gold and silver, or black and white) to keep it cohesive.
- Add Family Photos: Print out small photos of family members, pets, or memories from the past year and glue them onto the hats. These personal touches make each hat one-of-a-kind and create a conversation starter during the celebration. You can also create a collage of family photos across all the hats for a unified look.
- Personalized Messages: Use markers, pens, or stickers to write short, fun messages on each hat, such as “Happy New Year!” or a family member’s name or goal for the upcoming year. Let kids write their own creative messages for a personalized touch.
- Extra Details: For a whimsical look, add pom-poms to the top of the hats or even small streamers around the base. Attach elastic or string to each hat so it stays in place, or use a headband base for added comfort.
- Incorporating the Hats into the Celebration:
- Photo Op: Once everyone has their customized hats, gather for family photos. The hats will make for a fun and festive backdrop and will help preserve the memory of the night.
- Party Hat Contest: Turn the customization into a game by hosting a “best hat” contest. Let everyone vote on the most creative or funny hat, and offer a small prize for the winner.
- Interactive Activity: As the clock nears midnight, have each family member share a special wish or goal for the new year while wearing their personalized hats. This adds a sentimental touch to the celebration, making it more meaningful.
Customizable party hats are an easy and affordable way to add a personal and creative flair to your New Year’s Eve celebration. Whether you make them together as a family activity or surprise everyone with their personalized creations, these fun hats will definitely enhance the joy and excitement of ringing in the new year.
5. Balloon Arch Entrance
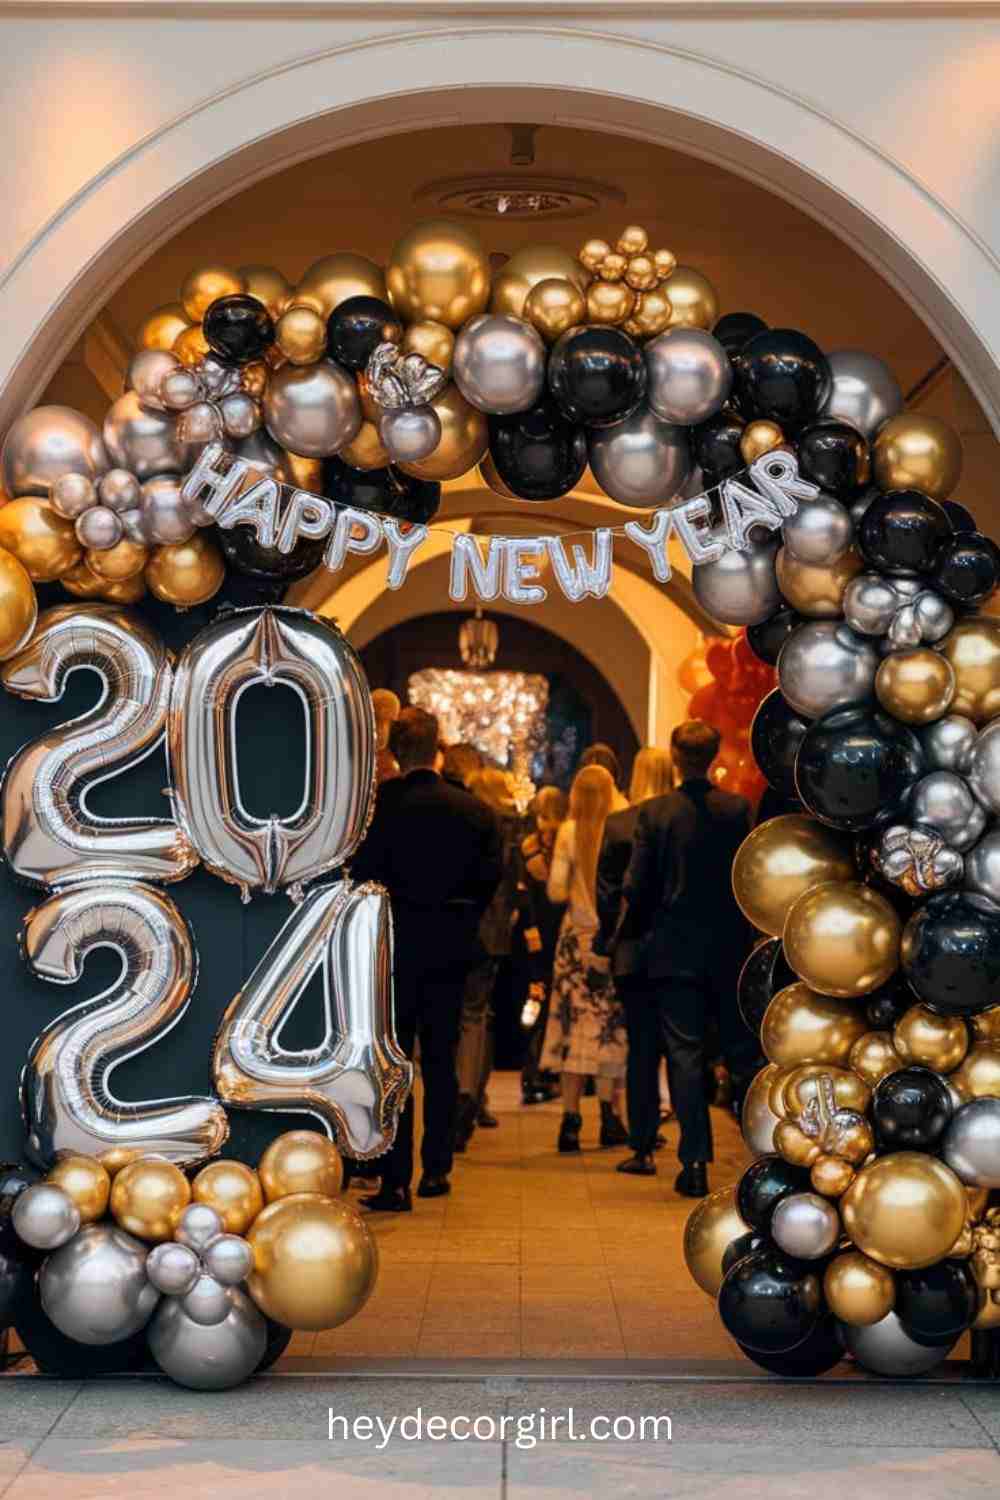
A balloon arch entrance is a perfect way to create a grand, welcoming entrance for your New Year’s Eve celebration. It adds instant charm and excitement to your party space, setting the tone for the festivities as guests walk through. Plus, it’s an easy, customizable decor element that works for both indoor and outdoor events. Here’s how to create your own colorful and festive balloon arch:
How to Create a Colorful and Welcoming Balloon Arch:
- Materials Needed:
- Balloons in various colors (choose New Year’s themed colors like gold, silver, black, or a fun mix of bright colors)
- Balloon arch frame (you can purchase a pre-made frame or create your own using PVC pipes or flexible wire)
- Balloon pump (to inflate the balloons quickly)
- Fishing line or clear nylon string (for attaching the balloons)
- Balloon clips or tape (to secure the balloons to the frame)
- Optional: Number cutouts or “Happy New Year” banners for decoration
- Step-by-Step Instructions:
- Frame Setup: Begin by assembling the arch frame. If you are making your own, use PVC pipes or bendable wire to form an arch shape. Secure the frame to the floor or surrounding structure using heavy-duty tape or stakes (if outdoors).
- Inflate the Balloons: Inflate a variety of balloons, mixing sizes (large, medium, and small) to create depth and texture. You can also use some metallic or confetti-filled balloons for extra sparkle.
- Attach the Balloons: Begin by attaching balloons to the frame using fishing line or balloon clips. Start from the bottom of the arch and work your way up, securing clusters of balloons together to form a full, rounded arch. For a fuller look, layer balloons in different sizes and colors, mixing them to create a balanced, vibrant effect.
- Add Special Touches: As you move forward, you can incorporate special elements like number cutouts for the year (e.g., “2024”), glittery stars, or a “Happy New Year” banner strung across the top or draped along the arch. This adds personalization and makes the entrance feel festive and unique to the celebration.
- Customizing the Arch:
- Numbers for the New Year: Use large foam or cardboard numbers (e.g., “2024”) to hang from the top or sides of the arch. You can cover them with glitter, paint, or metallic foil to tie them into the theme.
- “Happy New Year” Banner: Hang a “Happy New Year” banner across the arch to emphasize the theme. You can find pre-made banners or make your own with bold letters, glitter, and ribbon to match your decor style.
- Themed Additions: Consider adding New Year’s symbols like clocks, champagne bottles, or fireworks cutouts to further enhance the celebratory feel of the arch.
- Finishing Touches:
- Once the arch is assembled, step back and make sure it looks balanced. Adjust the balloons and decorations to ensure the arch has a full, rounded look. If any areas appear sparse, add more balloons to fill in the gaps.
- Place your balloon arch at the entrance to the main party area, or use it to frame a photo booth for a fun photo opportunity.
Why It Works:
- A balloon arch serves as an eye-catching focal point, greeting guests as they arrive and creating a festive first impression. It’s also a great backdrop for family photos, adding excitement to the night’s celebration.
- The arch can easily be customized to suit your New Year’s theme, whether you’re going for a classic, elegant look with gold and silver or a vibrant, playful design with multicolored balloons.
A balloon arch entrance is an affordable and impactful way to transform your party space and create an unforgettable New Year’s Eve atmosphere. It’s a fun project that brings the whole family together and adds a memorable visual element to the celebration.
6. New Year’s Eve Family Photo Booth
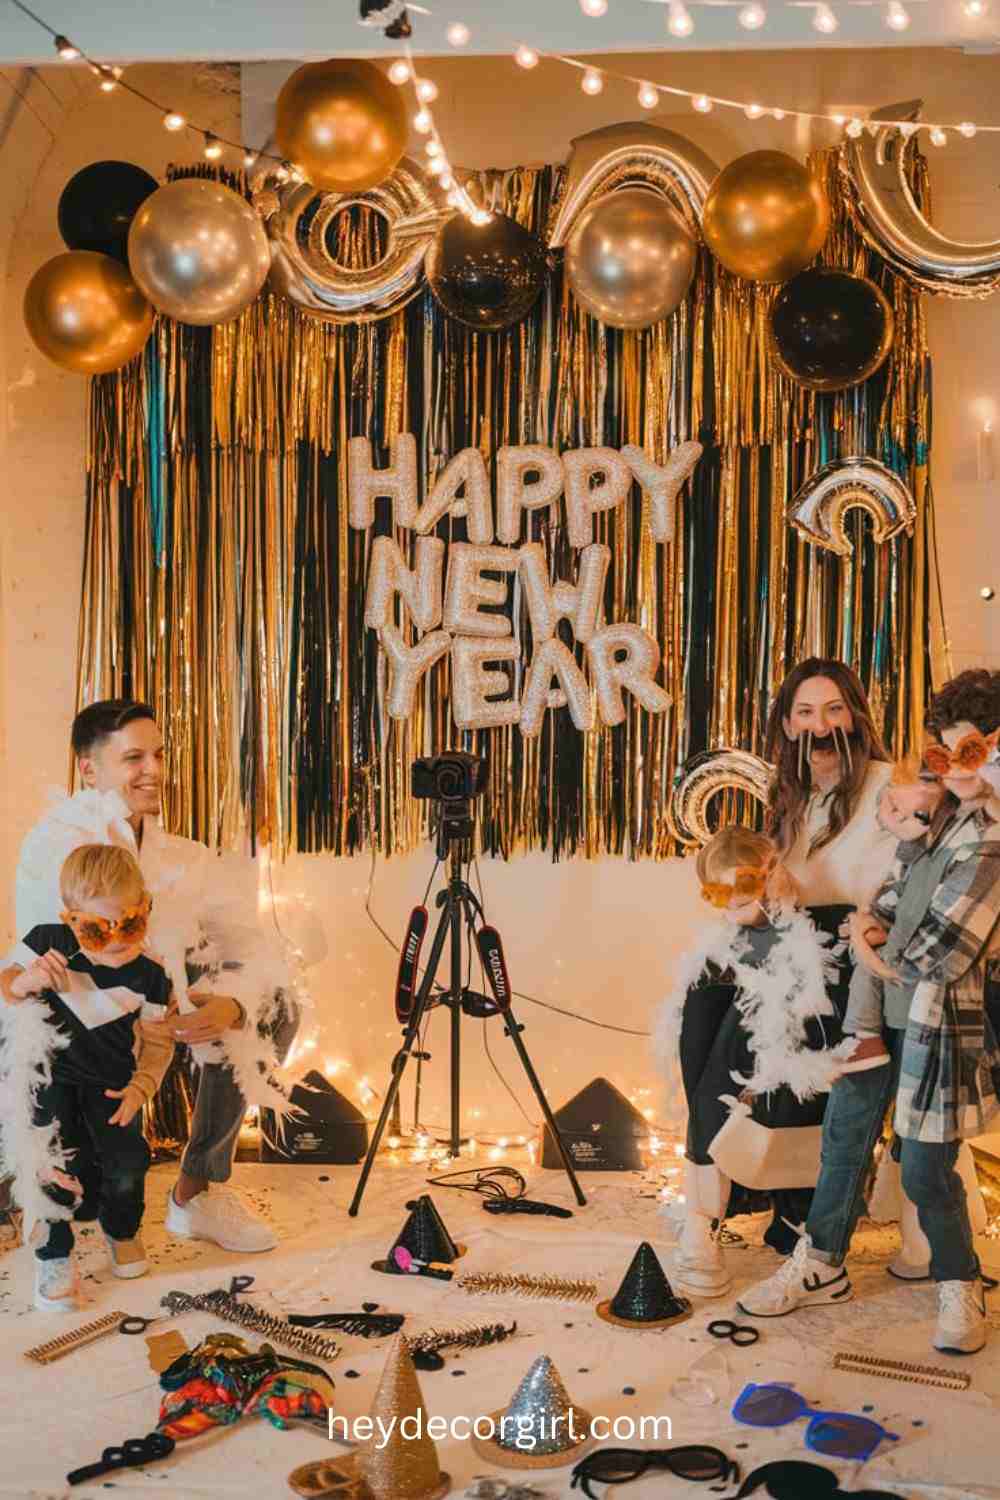
A family photo booth is a fantastic way to capture memories and bring extra fun to your New Year’s Eve celebration. It’s an interactive space where everyone can dress up in fun props, strike silly poses, and take timeless photos that will last long after the party is over. Here’s how you can easily set up a memorable and festive photo booth:
Instructions for Setting Up a Photo Booth with Fun Props:
- Materials Needed:
- A designated space or backdrop area for the photo booth (can be against a wall, curtain, or in front of a backdrop stand)
- Gold, silver, and black decorations (balloons, streamers, sequins, and metallic paper)
- Fun props like party hats, feather boas, oversized sunglasses, champagne glasses (real or toy), confetti poppers, and noisemakers
- A camera or smartphone on a tripod (with a remote or self-timer feature for easy group shots)
- A sign or chalkboard for personalized messages (e.g., “Happy New Year!” or “Cheers to 2024”)
- A few chairs or stools for seating (optional, for group photos)
- Step-by-Step Instructions:
- Create the Backdrop:
- Start by selecting a space where everyone will be able to stand comfortably. You can use a blank wall, or hang a curtain, large piece of fabric, or backdrop paper to create a clean and neutral space for photos.
- Decorate the backdrop with gold, silver, and black accents. This could include metallic streamers, a backdrop curtain with sequins, or a DIY “Happy New Year” sign made from glittery letters.
- For added glamour, use a few large balloons or a balloon arch framing the backdrop. You can also hang some string lights or fairy lights around the booth to create a warm, glowing effect.
- Add Fun Props:
- Provide an assortment of party props for everyone to enjoy. These could include colorful party hats, fake mustaches, feather boas, oversized glasses, and even inflatable champagne bottles or confetti poppers.
- For extra personalization, create or buy themed props that tie into the New Year’s celebration. You could have numbered signs for “2024,” small chalkboards with fun messages, or tiaras with the words “Happy New Year.”
- Place a few stools or small chairs in front of the photo booth for seated group shots if desired.
- Set Up the Camera:
- Position your camera or smartphone on a tripod at a height that captures everyone’s faces. Ensure there is enough lighting to avoid dark or blurry photos.
- If you’re using a phone, there are many photo booth apps that allow you to use your phone’s timer or take remote shots. If using a digital camera, set it up with a timer or remote control for easy access.
- Make sure everyone knows how to trigger the camera, and encourage them to get creative with their poses and expressions.
- Create the Backdrop:
- Personalized Touches:
- Consider adding a fun twist to the photo booth by incorporating a chalkboard or sign with a New Year’s message. This could be something as simple as “Cheers to 2024!” or “Best Memories of 2023.”
- Set up a “New Year’s Resolution” area where family members can write or share their goals for the upcoming year and take a photo with it. This adds a personal, interactive element to the photos.
- Lighting and Final Touches:
- Use a ring light or some soft lighting to ensure that everyone is well-lit in the photos. A gentle glow will make the photos look more professional and warm.
- Add sparkly props like glittery confetti or metallic streamers around the area to make the photos even more festive.
Why It Works:
- The New Year’s Eve family photo booth creates a fun, interactive space where everyone can get creative, dress up, and share memories. It’s a great way to keep the party light-hearted while also capturing timeless, funny, and sentimental photos that you’ll cherish.
- With the gold, silver, and black theme, the photos will have a chic, timeless feel that reflects the elegance and excitement of ringing in the new year.
By setting up a photo booth with fun props and a festive backdrop, you ensure that your family has a blast taking memorable photos that will last long after the clock strikes midnight. It’s an activity that brings everyone together and adds an extra layer of fun to your New Year’s Eve celebration.
7. Glittering Garland and Banners
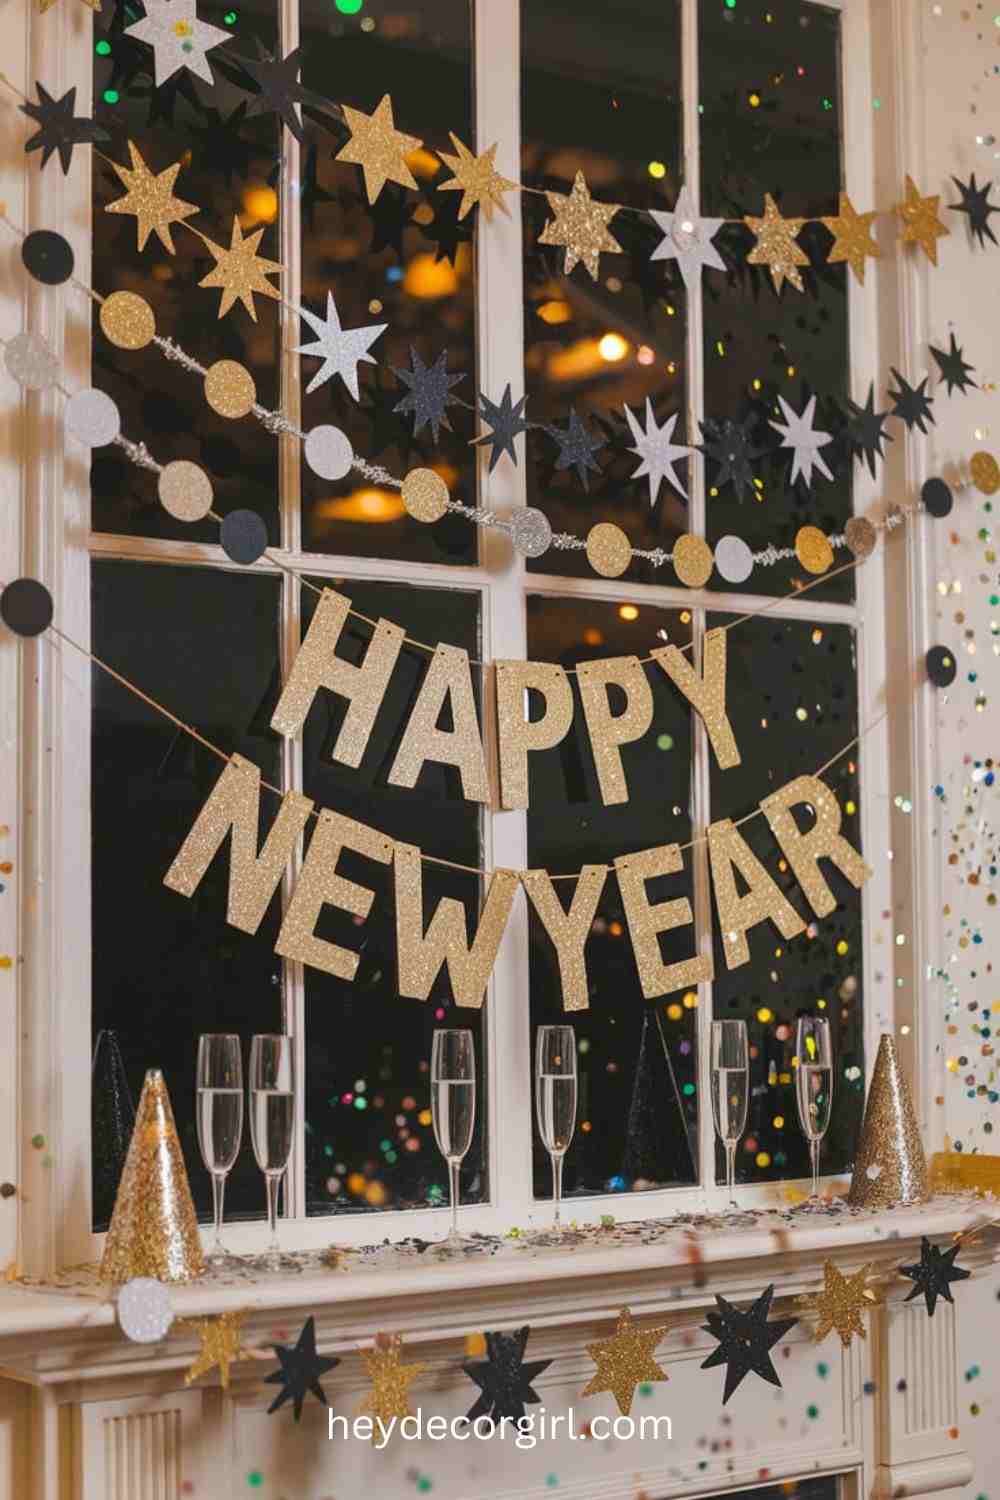
Glittering garlands and banners add a touch of sparkle and elegance to your New Year’s Eve celebration. These decorations are simple to create, yet they make a big impact when draped across walls, windows, or mantels. Whether you choose to purchase ready-made garlands or make your own, these glittery accents will fill your space with festive cheer. Here are some easy tips for creating your own glittering garlands and banners:
Tips for Decorating with Glittery Garlands and Banners:
- Materials Needed:
- Craft paper (gold, silver, black, or other festive colors)
- Glitter (loose glitter or glitter glue)
- Scissors
- Ribbon, string, or twine
- Hole puncher
- Stickers, sequins, or foam shapes for extra decoration
- Double-sided tape or glue
- How to Make Glittering Garlands:
- Simple Paper Shapes: Start by cutting out simple shapes from glittery craft paper or cardstock. You can make stars, circles, hearts, or even New Year’s themed shapes like clocks or champagne glasses. Use a template or freehand cut the shapes to your desired size.
- Add Extra Sparkle: Once the shapes are cut out, apply glitter glue or loose glitter to add extra sparkle. This will make your garland shine when the light hits it, adding a festive effect. You can also use sequins for a more textured, bold look.
- Stringing the Shapes: Use a hole puncher to make holes at the top of each shape, and then thread them onto a ribbon, twine, or string. Leave equal spaces between each shape to create a balanced look. For a longer garland, you can repeat the shapes and colors to fill your space.
- Hang Your Garland: Once your garland is complete, drape it across mantels, windows, or walls. You can also hang multiple strands to create layers of shimmering decorations. Secure the garland with double-sided tape or small adhesive hooks.
- How to Make Glittery Banners:
- Design Your Banner: For a more personalized decoration, create a banner that spells out “Happy New Year,” “2024,” or any other phrase you’d like to use. Cut letters from glittery cardstock or craft paper and arrange them in a line to form the words.
- Add Decorative Elements: For a festive touch, add embellishments to your banner, such as glittery stars, confetti, or small themed cutouts (like champagne glasses or party hats). This will tie the banner into the overall party theme.
- Assemble the Banner: Attach the lettered cutouts to a ribbon or string using double-sided tape or glue. Leave enough space between each letter to make it readable, and ensure that the banner will fit the space you’re decorating.
- Hanging the Banner: Hang your banner across your mantel, along a window, or as a focal point on a wall. Use clear pushpins or hooks to secure the banner in place and make sure it hangs neatly.
- Additional Glittery Decor Ideas:
- Glittery Window Accents: Use glittery garlands or paper snowflakes to frame your windows. For a fun DIY, cut out festive shapes from glittery craft paper and tape them to the windows for a dazzling effect that can be seen from the outside.
- Mantel Magic: Drape a glittery garland along your mantel and add small decorative items like candles, New Year’s ornaments, or a mini countdown clock to complete the look. The garland will sparkle in the light, making the mantel the centerpiece of the room.
- DIY Glittery Wall Decor: Use glittery paper or adhesive wall decals to create a statement wall in your living room or entryway. You could make a large “2024” sign using glittery letters or hang a shimmering garland across the wall to set the mood for the evening.
Why It Works:
- Glittering garlands and banners are simple yet effective ways to transform any space into a festive wonderland. They add visual interest to walls, mantels, and windows, making your home feel warm and celebratory.
- Making your own garlands and banners is not only cost-effective, but it also gives you the freedom to personalize them with your favorite colors, shapes, and designs.
By incorporating glittering garlands and banners into your New Year’s Eve decor, you bring an element of sparkle and magic to your celebration. These DIY decorations are an easy, creative way to enhance the festive atmosphere and add a personal touch to your home.
8. Family Resolution Board
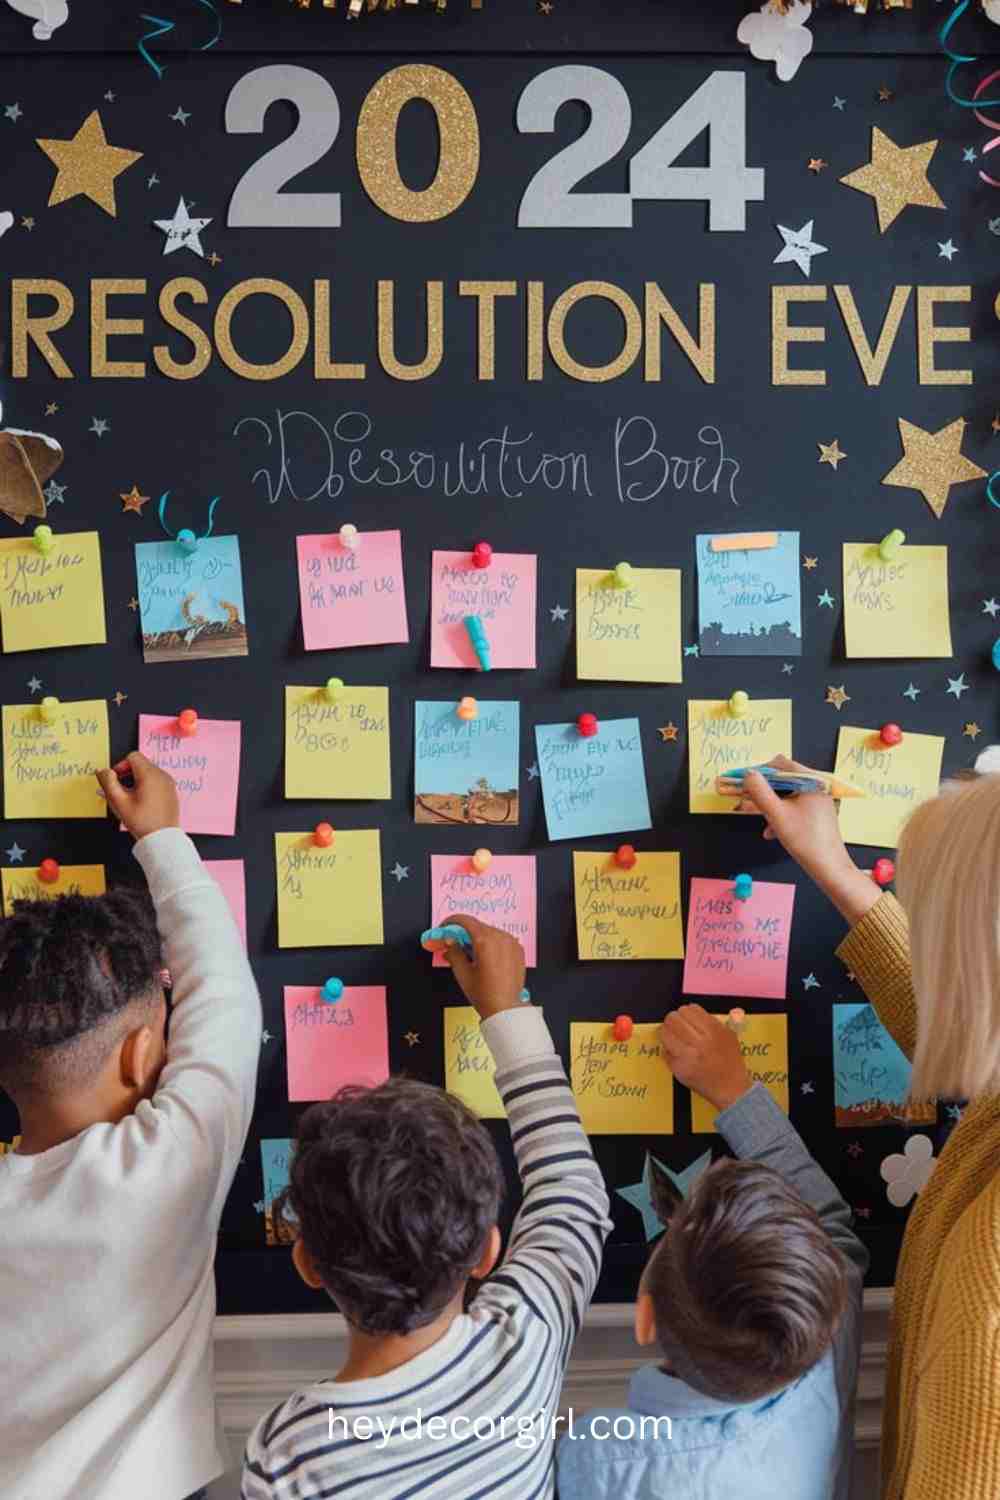
A Family Resolution Board is a fun and meaningful way to involve everyone in reflecting on the past year and setting intentions for the new year ahead. This interactive activity encourages family members to think about their personal goals, dreams, and hopes for the coming year, while also bringing everyone together for a shared experience. Here’s how to set up a creative and engaging Family Resolution Board for your New Year’s celebration:
How to Set Up a Creative Family Resolution Board:
- Materials Needed:
- A large board or poster (foam board, corkboard, chalkboard, or dry-erase board)
- Markers, pens, or chalk for writing
- Decorative stickers, washi tape, or markers for personalization
- Post-it notes, small cards, or paper for writing resolutions
- String, ribbon, or clothespins (optional for hanging resolutions)
- Photos, magazine cutouts, or printed inspirational quotes (optional)
- Step-by-Step Instructions:
- Choose the Board Type: Start by selecting the type of board that will suit your family’s style. A corkboard allows you to attach individual resolutions with pins or clips, while a dry-erase board can be easily updated throughout the year. If you want a more hands-on project, create a large poster with plenty of space for everyone’s resolutions.
- Set Up a “Resolution Zone”: Create a designated space on the board for each family member’s resolutions. You can divide the board into sections or leave it open-ended, depending on how many people are participating. If you use cards or Post-its, you can arrange them in clusters or rows.
- Decorate the Board: Use fun, festive decorations to make the board visually appealing. Add a “2024” label at the top, along with some New Year’s-themed decorations like stars, fireworks, or confetti. Consider adding a motivational quote about New Year’s resolutions, like “New year, new goals” or “Believe in yourself.”
- Write the Resolutions: Provide everyone with markers, pens, or sticky notes, and ask each family member to write down their resolutions for the year. Encourage both personal and family goals. For example, “Learn how to bake cookies,” “Exercise three times a week,” or “Take a family vacation.” Make sure there’s enough space for everyone to add their thoughts, and don’t forget to have fun with it!
- Personalize with Photos or Images: For a more creative touch, family members can decorate their resolutions with pictures, magazine cutouts, or drawings that represent their goals. This could be a picture of a beach for a vacation goal, or a drawing of a basketball for an athletic goal.
- Make It Interactive and Fun:
- Resolution Wall of Fame: Once everyone has written their resolutions, create a “Resolution Wall of Fame” where each family member pins or sticks their resolution to the board. This makes the process feel like a celebration of each individual’s goals.
- Goal-Tracking Chart: To keep everyone motivated, consider adding a goal-tracking section where progress can be marked throughout the year. For example, you could use small boxes to check off progress, or leave space for family members to write down steps they’ve taken toward achieving their resolutions.
- Interactive Challenges: Add a challenge or activity related to the resolutions. For example, if one family member resolves to read more books, everyone could join a “family reading challenge” and mark their progress together. Create fun, mini milestones that everyone can celebrate as a family.
- Resolution Reflection: At the end of each month or season, gather the family and reflect on how everyone is doing with their goals. This keeps the board dynamic and interactive, allowing everyone to share their progress and celebrate small wins along the way.
- Display the Resolution Board:
- Hang the Family Resolution Board in a central place where everyone can easily see it, like the living room, kitchen, or hallway. This way, it remains visible as a reminder of everyone’s commitments and serves as a constant source of inspiration.
- Encourage family members to review the board often and update their resolutions as the year progresses.
Why It Works:
- The Family Resolution Board brings everyone together and makes goal-setting fun and interactive. It turns resolutions into a shared activity that can be celebrated as a family.
- It encourages both individual and collective growth, as everyone can see each other’s resolutions and support each other in achieving them.
- The act of decorating and personalizing the board makes the process creative and engaging, and keeps everyone motivated to stick to their goals throughout the year.
By setting up a Family Resolution Board, you create a tradition that celebrates both personal growth and family togetherness. It’s a meaningful way to start the year off with intention, while also adding a fun and interactive activity to your New Year’s Eve celebration.
9. Firework-Themed Decor
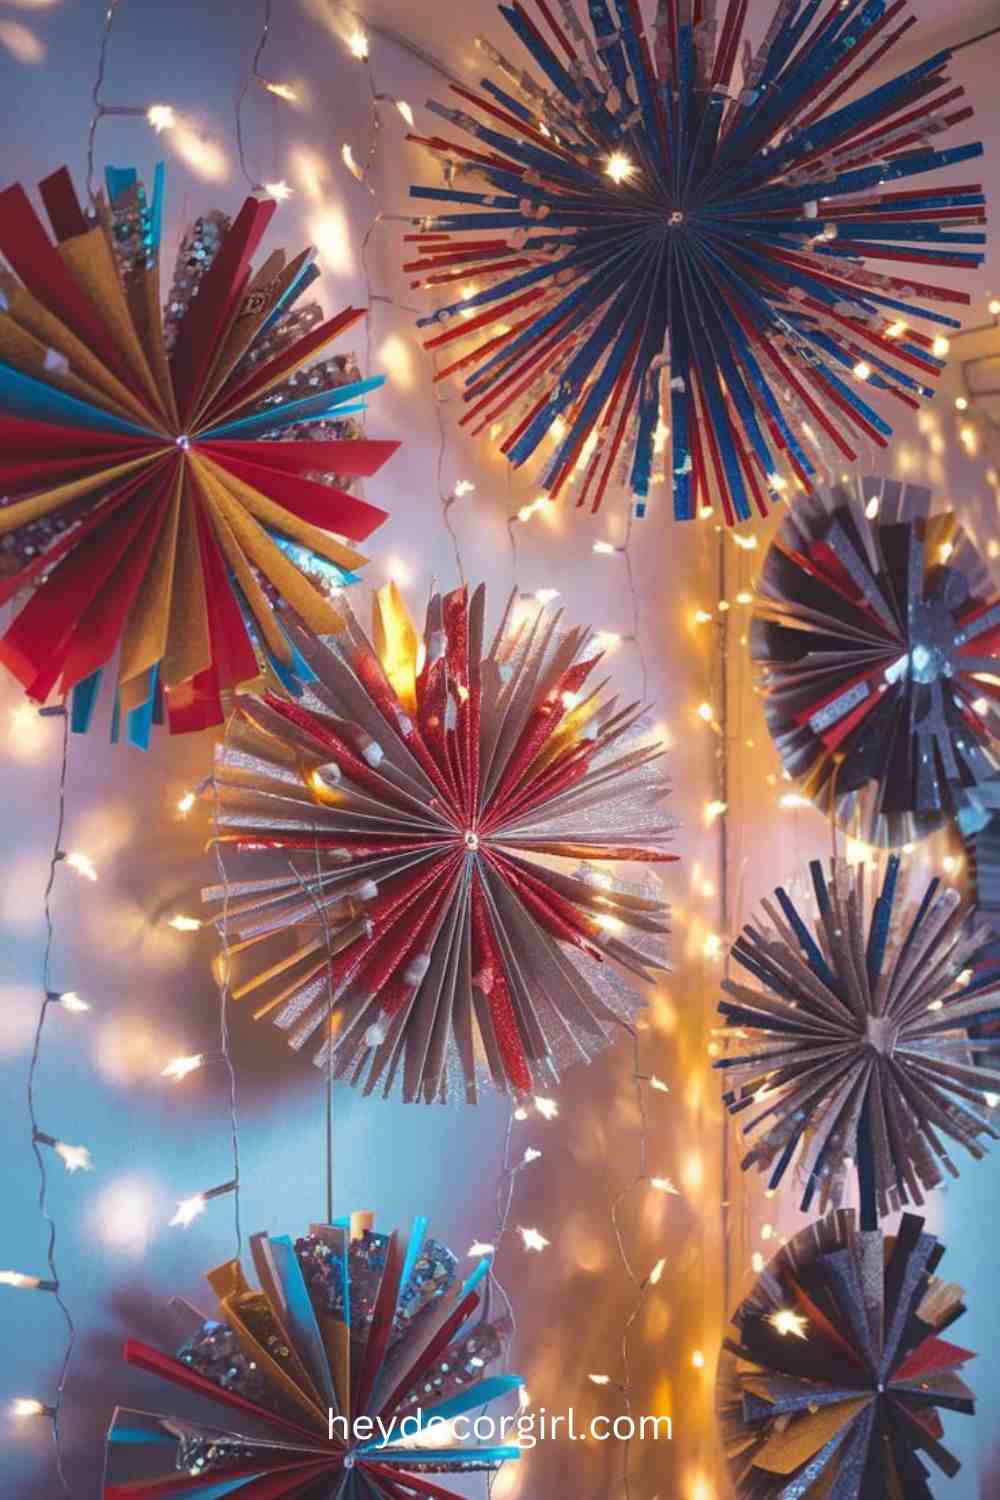
Firework-themed decor adds a dazzling and celebratory touch to any New Year’s Eve party. With a little creativity, you can easily craft your own firework-inspired decorations using paper or foam to mimic the look of fireworks exploding in the sky. Whether you hang them on your walls, ceiling, or even place them as centerpieces, these DIY firework decorations will bring an extra burst of sparkle to your family celebration. Here’s how to create your own firework-themed decor:
How to Make DIY Firework Decorations:
- Materials Needed:
- Colorful craft paper or foam sheets (red, blue, silver, gold, or any vibrant color)
- Scissors
- Hot glue gun or craft glue
- LED string lights or fairy lights
- Glitter, sequins, or metallic markers (optional)
- Stapler or tape (optional for assembly)
- Creating Paper Firework Decorations:
- Cutting the Shapes:
Start by cutting craft paper or foam into thin strips, about 1-2 inches wide. The strips will represent the “sparks” of the fireworks. You can cut strips in various lengths to create different sizes of fireworks. - Assembly:
Take a few of the strips and fan them out in a circular pattern to form the “burst” of the firework. Arrange them so they radiate from a central point, resembling the explosion of a firework. Secure the center of the fan with hot glue or a staple. - Decorating the Fireworks:
To make your fireworks more festive, add extra embellishments such as glitter, sequins, or metallic markers along the edges of the strips to make them sparkle. You can also glue small stars or other decorations to enhance the look.
- Cutting the Shapes:
- Creating Foam Firework Decorations:
- Cutting Foam Sheets:
If you want a more durable firework design, use foam sheets in various colors. Cut foam into strips or shapes to form the firework explosion. You can layer different colors of foam to create a multi-colored, textured effect. - Layering and Assembling:
Similar to the paper version, arrange the foam strips in a fan shape. Use glue to attach the strips together, and consider layering some strips on top of others for a fuller, more dynamic look.
- Cutting Foam Sheets:
- Adding Lights for Extra Sparkle:
- Incorporating LED String Lights:
To really make your fireworks shine, weave a strand of LED lights or fairy lights through the paper or foam strips. If using paper strips, gently poke holes in the center of each one and thread the lights through to create glowing sparks. If using foam, you can tape or glue the lights onto the back of the foam for an elegant, glowing effect. - Placement of Lights:
Arrange the lights in a way that mimics the randomness of a firework explosion, making sure the lights are spread out evenly across the strips. The lights will add a magical, sparkling touch to your decorations, especially as the room gets darker.
- Incorporating LED String Lights:
- Hanging the Fireworks:
- Wall or Ceiling Placement:
Hang your DIY firework decorations on your walls or from the ceiling using fishing wire or clear hooks. If hanging from the ceiling, you can attach the strips to a circular base (like a paper plate or foam disc) to create a 3D firework effect. Arrange them in clusters or scattered around the room for a fireworks display feel. - Tabletop Fireworks:
For a centerpiece, create a smaller version of the firework using the same paper or foam technique. Add LED lights to the base, and place it in the center of your party table for a glowing effect.
- Wall or Ceiling Placement:
- Alternative Ideas:
- Firework Wall Art:
Create a larger firework design on a piece of poster board or canvas. Use multiple layers of paper or foam to make a more intricate, oversized firework. You can even paint a firework burst on a canvas and add sequins or glitter for a fun, textured finish. - Hanging Firework Lanterns:
Create lanterns that mimic fireworks by cutting out firework shapes from cardboard, adding a layer of glitter or metallic paint, and inserting an LED tea light inside for a glowing effect. Hang them from the ceiling or place them around the room for added ambiance.
- Firework Wall Art:
Why It Works:
- DIY firework decorations are a fun and creative way to bring the excitement of fireworks indoors. By using paper, foam, and lights, you can create a sparkly, festive atmosphere that feels just like a firework show.
- The added LED lights give these decorations an extra level of glow, perfect for a New Year’s Eve celebration when you want everything to shine and sparkle as the year turns.
With DIY firework-themed decor, you can turn your space into a dazzling, party-ready environment, and the interactive nature of creating the decorations together makes it a fun family activity. These firework-inspired designs will light up your celebration and create lasting memories as you ring in the new year.
10. Sparkling Drink Station
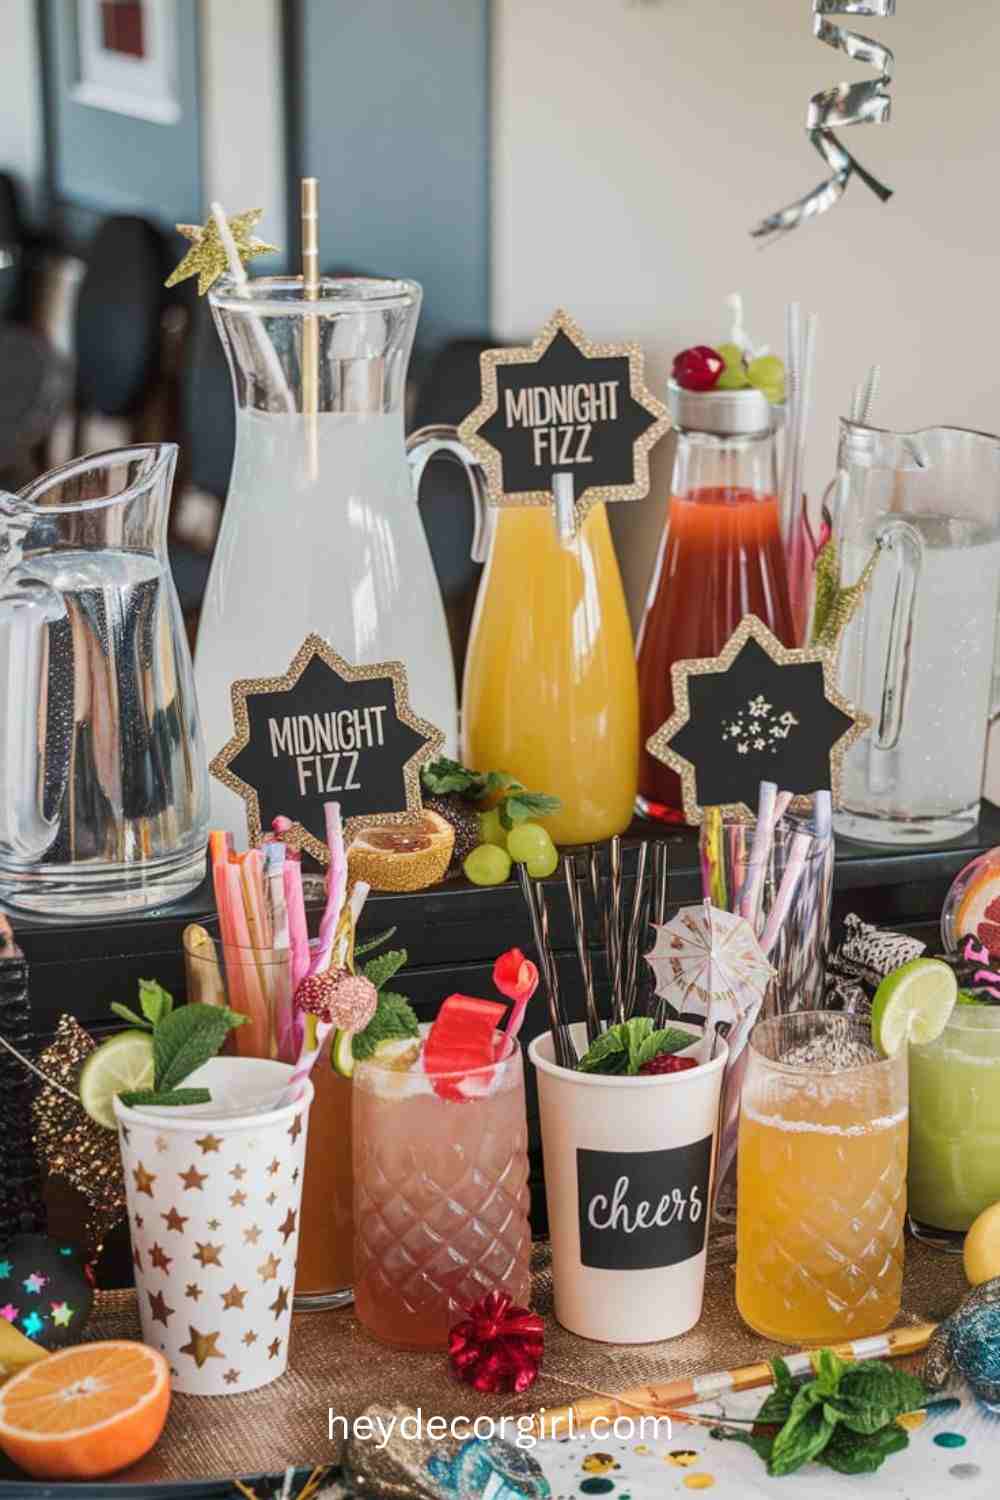
A Sparkling Drink Station is a delightful addition to your New Year’s Eve celebration, offering family-friendly, non-alcoholic beverages that are as fun to look at as they are to drink. This station allows everyone—kids and adults alike—to enjoy a refreshing, sparkling drink while keeping the vibe festive and celebratory. Here’s how to set up a themed drink station that’s sure to impress:
How to Set Up a Sparkling Drink Station:
- Materials Needed:
- Sparkling water, flavored sparkling water, or club soda
- Assorted fruit juices (like cranberry, orange, apple, or pomegranate)
- Fresh fruits (lemons, limes, berries, mint)
- Ice buckets or trays to chill drinks
- Colorful drink dispensers or pitchers
- Sparkling drink glasses (plastic or glass)
- Themed cups or mugs
- Glittery straws, drink stirrers, or cocktail umbrellas
- Garnishes such as fruit slices, edible glitter, or fresh herbs
- Small bowls or containers for snacks (optional)
- New Year’s decorations (like confetti, balloons, or streamers)
- Setting Up the Drink Station:
- Create a Themed Display:
Set up your drink station on a table or bar area where it’s easily accessible to everyone. Add New Year’s decorations like metallic streamers, confetti, or small “Happy New Year” banners around the station. Use a tablecloth in shimmering colors like gold, silver, or black to make the setup pop. - Use Drink Dispensers or Pitchers:
For convenience, use large drink dispensers or pitchers to hold the sparkling water, flavored waters, or mocktails. Label each one with a fun, festive name like “Midnight Fizz,” “Sparkling Celebration,” or “New Year’s Refresher.” This gives the station a whimsical touch and helps guests choose their favorite drink. - Prepare Kid-Friendly Options:
Make sure to include several kid-friendly options, such as sparkling apple juice, berry punch, or fizzy fruit sodas. You can also add bright fruit slices like oranges, lemons, or berries to make the drinks look more colorful and appetizing. For added fun, use ice cube trays with fruit or glittery ice cubes for a magical effect.
- Create a Themed Display:
- Decorating the Drink Station:
- Glittery Straws and Drink Stirrer:
Use glittery or metallic straws to add sparkle to each drink. You can also add fun drink stirrers or cocktail umbrellas to make the drinks feel extra festive. For a personal touch, create your own drink stirrers by attaching mini ornaments or beads to wooden skewers. - Themed Cups or Mugs:
Serve the drinks in cups with festive designs like gold stars, “Cheers” printed on them, or cups shaped like champagne flutes for a fun, glamorous effect. If you want to add a creative spin, customize the cups by using temporary decals or writing the names of guests on them with a marker for a personalized touch. - Garnishes and Toppings:
Garnish the drinks with fresh herbs (like mint or rosemary), edible glitter, or colorful fruit slices. For a fun twist, use a sugar rim on the glasses by dipping them in syrup and then rolling them in sparkling sugar. You can also offer guests the option to add a splash of flavored syrups like raspberry or vanilla for a personalized taste.
- Glittery Straws and Drink Stirrer:
- Add Interactive Elements:
- Mocktail Mix Station:
Set up a small area with various mixers, fruits, and syrups where guests can create their own mocktail blends. Provide recipe cards with simple ideas for fun drinks, like a “Berry Blast” (sparkling water with blueberry syrup, lemon, and mint) or “Citrus Sparkle” (orange juice with sparkling water and lime). This interactive station will keep everyone engaged and allow them to create a drink to suit their taste. - Create Drink “Stations” for the Kids:
For children, set up a mini “mocktail” bar with sparkling fruit juices and fun toppings. They can choose from a variety of colorful drink combinations, with options to add edible glitter, flavored straws, and fun fruit garnishes. This gives the kids a chance to feel involved and excited about their drink choices.
- Mocktail Mix Station:
- Snack Pairing:
- You can complement your sparkling drink station with light snacks or appetizers nearby. Consider offering bowls of popcorn, fresh fruit, or small New Year’s-themed snacks like cheese cubes, crackers, or mini cupcakes. This adds an extra layer of fun to the drink station and keeps everyone satisfied throughout the night.
Why It Works:
- A Sparkling Drink Station is a fun and interactive way to include everyone in the celebration, regardless of age. The combination of sparkling beverages and creative decorations adds an extra sparkle to the festivities.
- Decorating the drink station with New Year’s-themed accents helps create a party atmosphere, while offering a variety of drink options ensures that everyone can find something they’ll love.
- Adding interactive elements such as a mocktail mix station or a DIY garnish bar makes the drink station not only functional but also an activity that guests can enjoy, making it memorable for all.
By setting up a Sparkling Drink Station, you provide a festive and engaging part of your New Year’s Eve celebration that all ages can enjoy. Whether it’s a simple sparkling water or a fancy mocktail, these drinks will add to the festive atmosphere while allowing guests to create their own sparkling concoctions.
FAQ
-
What are some easy New Year’s decor ideas for families?
- Some easy and fun decor ideas for families include DIY confetti balloons, festive table settings, customizable party hats, and creating a family resolution board. These ideas are simple to execute and add a personal touch to your celebration.
-
How can I make my New Year’s Eve decorations kid-friendly?
- To make New Year’s Eve decorations kid-friendly, focus on non-breakable items, fun crafts, and interactive setups. DIY party hats, colorful garlands, firework-themed decor, and a sparkling drink station are all great family-friendly options that kids will enjoy helping create.
-
What are some budget-friendly New Year’s decor ideas for families?
- Budget-friendly ideas include DIY confetti balloons, homemade garlands from paper or foam, and using everyday items like mason jars for a drink station. You can also create a resolution board with inexpensive supplies like a large poster or corkboard, and colorful markers or sticky notes.
-
How do I incorporate family traditions into New Year’s Eve decor?
- Incorporate family traditions by creating personalized decorations such as a Family Resolution Board where everyone writes down their goals, or designing a photo booth with props that reflect family memories. Consider displaying old photos from previous New Year’s celebrations to make it more personal and nostalgic.
-
Can I include both adults and kids in the New Year’s decorations?
- Absolutely! New Year’s decorations can be fun for both kids and adults. Activities like decorating a photo booth, making DIY confetti balloons, and assembling a festive table setting allow all ages to get involved. Add kid-friendly drink stations or create family-friendly games to keep everyone entertained.
-
How can I make my New Year’s Eve decor sparkle without using expensive items?
- Use glittery craft materials like washi tape, glitter glue, and metallic paper to add sparkle to your decorations. DIY projects like firework-themed decor, glittering garlands, and LED string lights can all give your decor a touch of glam without breaking the bank.
-
What is a fun and interactive decor idea for a family New Year’s celebration?
- A Family Resolution Board is a great interactive decor idea. Everyone writes their goals for the new year, and you can make it even more engaging by adding a goal-tracking chart or mini challenges that the whole family can participate in throughout the year.
-
What type of decorations are best for a New Year’s Eve photo booth?
- For a New Year’s Eve photo booth, use gold, silver, and black decorations to create a timeless look. Props like glittery hats, party blowers, and fun signs (“Cheers!” or “Happy New Year!”) work well. A sparkly backdrop with balloons or garlands and LED lights can add to the festive atmosphere.
-
How can I set up a festive table setting for the whole family?
- A festive table setting can include simple but impactful elements like glittery tablecloths, themed plates, and champagne glasses for the kids. Add some New Year’s flair with confetti, party hats for everyone, and a centerpiece like a family-themed candle or a DIY fireworks display in the middle.
-
What are some creative ways to make New Year’s Eve extra special for kids?
- Make New Year’s Eve extra special for kids with fun activities like creating customizable party hats, setting up a photo booth with silly props, and letting them decorate their own drinks at a sparkling drink station. You can also create a countdown clock where everyone can mark the passing time leading to midnight.
Decor Ideas for Families New Year's Decor New Year's Decor for Families New Year's Decor Ideas for Families
Last modified: November 12, 2024
![Hey Decor Girl [Latest Trending Decor Design Ideas]](https://heydecorgirl.com/wordpress/wp-content/uploads/2024/08/Heygirldecor-Logo.png)
