DIY New Year Decor Ideas offer the perfect opportunity to kick off the new year in style by transforming your space with personal, creative touches. As the calendar flips, there’s no better time to refresh your home with festive decorations that capture the excitement and joy of ringing in a new beginning. Decorating your space for New Year’s Eve doesn’t have to be complicated or expensive—simple DIY projects can instantly elevate your atmosphere and make the celebration feel extra special.
Festive decorations are key in setting the mood for any celebration, and New Year’s Eve is no exception. The right décor creates a vibrant, welcoming ambiance that gets everyone into the spirit of the season. Whether it’s sparkling lights, shiny garlands, or fun party hats, decorations help to create a celebratory mood that brings friends and family together to celebrate the year’s end and the fresh start ahead.
One of the best parts of DIY New Year decor is that it allows for creativity and personalization. You can tailor every decoration to your specific style, color scheme, or theme, making your space uniquely yours. Plus, DIY projects are often budget-friendly, allowing you to create stunning decorations without breaking the bank. Whether you’re crafting an elegant balloon arch, designing a chic photo booth backdrop, or making homemade party favors, DIY projects bring a personal touch that adds warmth and charm to your festivities.
Amazing DIY New Year Decor Ideas
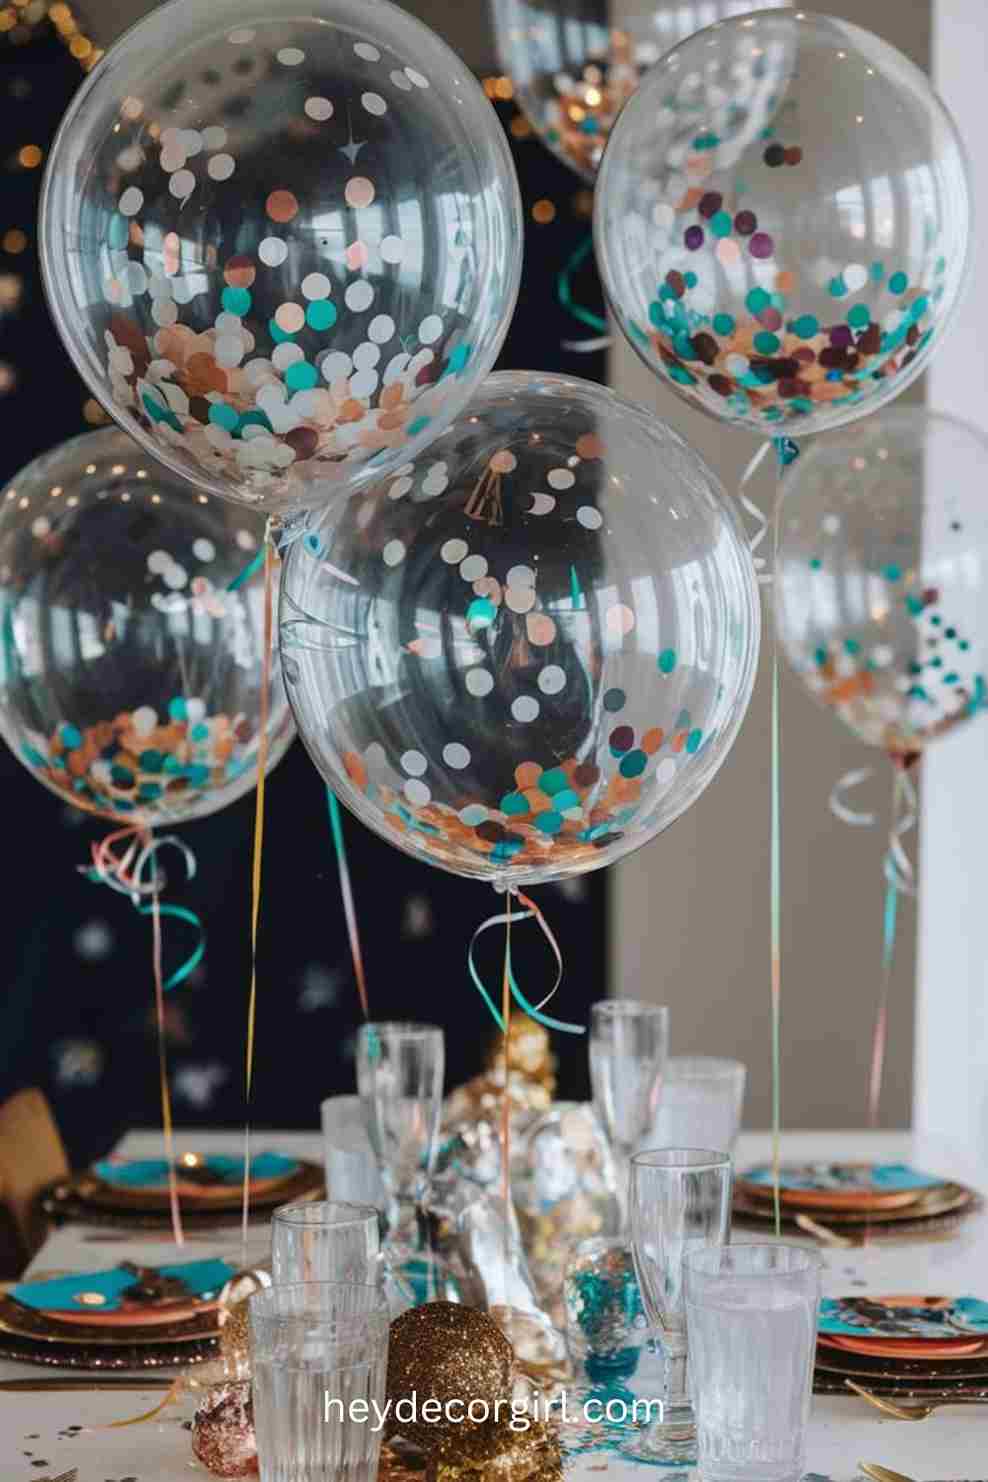
1. Sparkling Confetti Balloons
Materials Needed:
- Balloons (clear or transparent work best)
- Confetti (you can use store-bought or make your own by cutting colored paper)
- Glue or glue dots
- String or ribbon for hanging or tying balloons
Step-by-Step Guide:
- Prepare the Confetti:
- If you’re making your own confetti, cut small pieces of colorful paper into circles, squares, or stars. You can also use glitter or metallic foil for extra sparkle.
- Alternatively, you can buy pre-made confetti from party stores or online for convenience.
- Inflate the Balloons:
- Choose balloons in a color that complements your New Year’s theme—clear balloons are ideal for showing off the confetti inside.
- Inflate the balloons with air or helium, depending on whether you want them to float or simply stay in place.
- Apply Glue to the Balloon:
- Lightly apply small dots of glue or glue tape around the inside of the balloon. You don’t need a lot—just enough to hold the confetti in place.
- If you’re using glue, you can also spread it along the inner surface of the balloon, focusing mainly on the lower half, where the confetti will settle.
- Fill the Balloons with Confetti:
- Gently pour the confetti into the balloon, making sure it’s evenly distributed inside. Shake the balloon a bit to get the confetti to spread throughout.
- You can add a variety of confetti colors and sizes for a fun, multi-dimensional look.
- Seal and Tie the Balloons:
- Once the confetti is inside, tie the balloon securely with a string or ribbon. If you’ve used helium, ensure that the balloon is tightly sealed to prevent any air from escaping.
- For a dramatic effect, you can tie several balloons together using ribbon to create a floating cluster of sparkling confetti.
- Hang or Display the Balloons:
- If you’re using helium balloons, allow them to float freely in the room, or tie them to a weight to keep them in place.
- For regular air-filled balloons, hang them from the ceiling using string or attach them to walls as fun, decorative accents.
Perfect for a Fun and Festive Vibe: Sparkling confetti balloons add an instant touch of whimsy and glam to any New Year’s Eve celebration. The confetti inside the balloons will shimmer and shine as they catch the light, creating a joyful, celebratory atmosphere. Whether you hang them as part of a balloon arch, use them as table centerpieces, or scatter them around the party space, these balloons are sure to bring excitement and a touch of sparkle to your New Year’s decor.
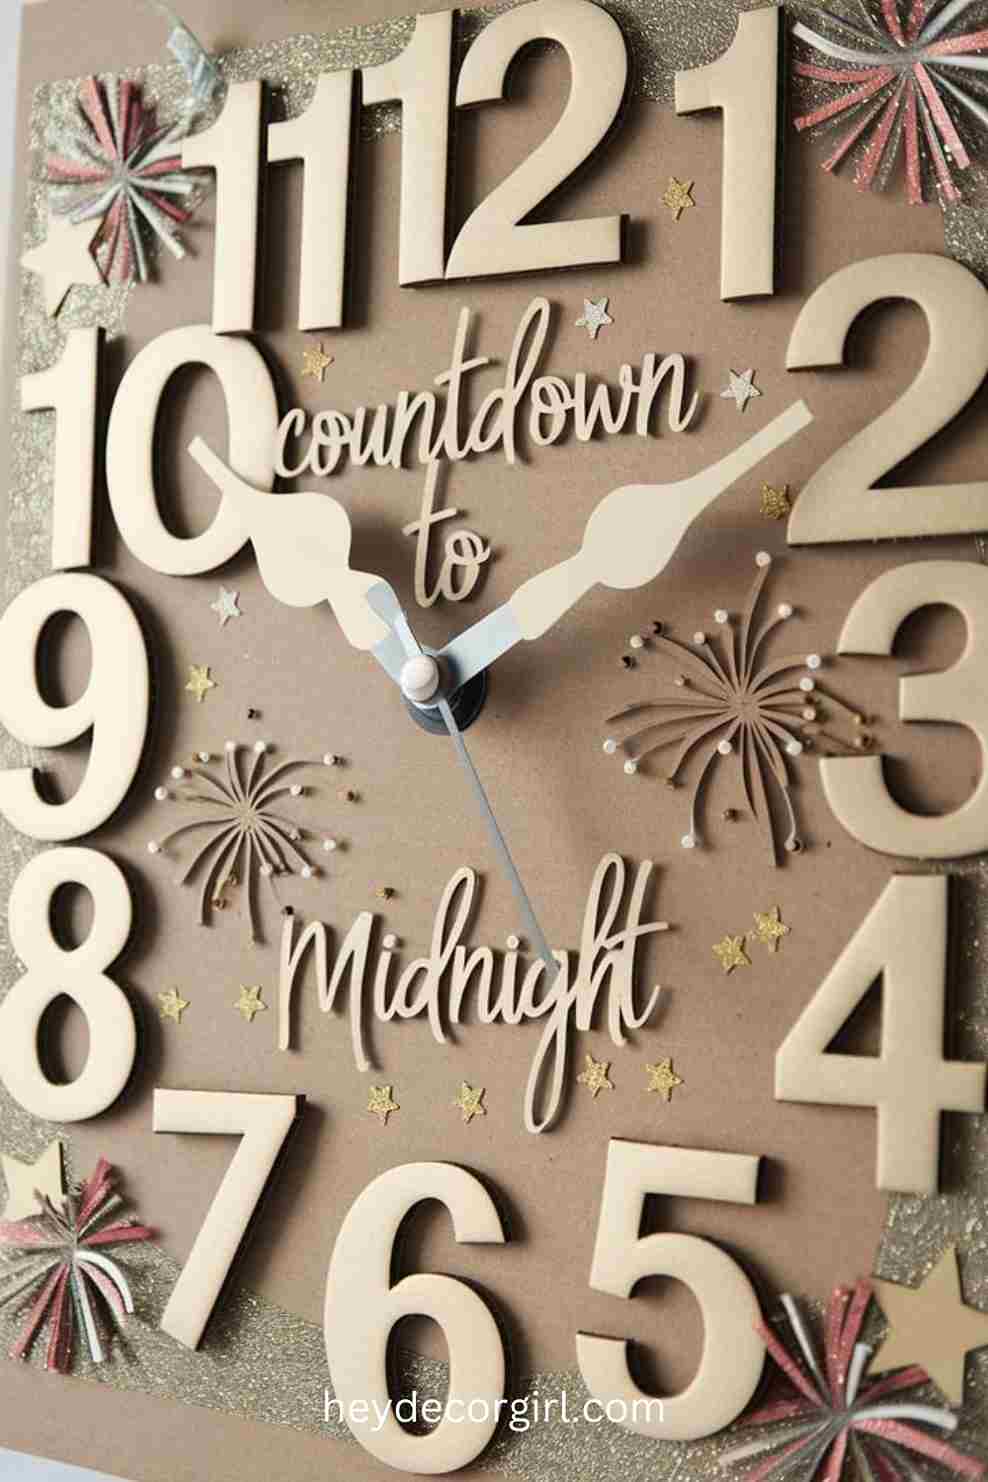
2. New Year’s Eve Countdown Clock
Materials Needed:
- Cardboard (for the clock face)
- Markers, paint, or stickers (to decorate the clock)
- Clock hands (which can be purchased from a craft store or repurposed from an old clock)
- A board or sturdy backing (to attach the clock face)
- Scissors, ruler, glue, and tape
Step-by-Step Guide:
- Create the Clock Face:
- Start by cutting a large circle out of the cardboard. The size of the clock depends on your preference, but a diameter of around 12-16 inches is ideal for visibility.
- Use a ruler to draw an even circle, and then carefully cut it out with scissors. If you want a perfectly round clock, consider using a round object, like a plate or bowl, as a template.
- Mark the Hours:
- Using a marker or pen, divide the clock face into 12 equal sections, just like a standard clock. Write the numbers 1 through 12 along the edges of the circle to represent the hours.
- For a personalized touch, you can decorate the numbers with glitter, stickers, or paint them in metallic colors to give it a festive vibe. Add a border of stars, fireworks, or New Year’s Eve motifs around the clock for extra flair.
- Design the Hands of the Clock:
- You can use clock hands from an old, unused clock or make your own by cutting out arrows or shapes from cardboard.
- Attach the hands to the center of the clock face, making sure they are able to move. You can use a brad fastener or a small nail to secure the center point where the clock hands rotate.
- If you’re crafting the hands from scratch, paint them in bold colors like gold or silver to match the festive theme. If desired, you can even add numbers to the clock hands to track the final countdown.
- Personalize the Clock:
- Beyond the basic numbers and design, make your clock truly one-of-a-kind by adding personal touches like small photos, quotes, or messages around the clock. For example, include “Happy New Year!” at the top or “Countdown to Midnight” at the bottom of the clock.
- You could also use decorative washi tape, rhinestones, or glitter glue to add extra sparkle and shine to the clock, reflecting the excitement of New Year’s Eve.
- Mount the Clock:
- Once your clock is decorated and the hands are secured, attach it to a sturdy board or backing. This can be a piece of foam board, wood, or even a framed piece of cardboard.
- If you’re using the clock for display only, simply hang it on a wall or place it on a table where everyone can see the countdown as it nears midnight.
- Countdown to Midnight:
- As the clock reaches the final hours before midnight, gather your guests around to watch the countdown in action.
- To add a fun touch, you can manually move the clock hands as time passes, or even use a small dry-erase marker to mark the hours leading up to the celebration.
Perfect for a Fun and Interactive Celebration: Creating your own New Year’s Eve countdown clock is not only a fun DIY project but also an interactive decoration for your party. As the night draws nearer, it serves as a reminder of the exciting moment to come, building anticipation among guests. It also makes for an exciting photo op as everyone gathers to watch the clock’s hands inch closer to midnight. With this personalized, homemade clock, you can add a unique and meaningful touch to your New Year’s celebration.
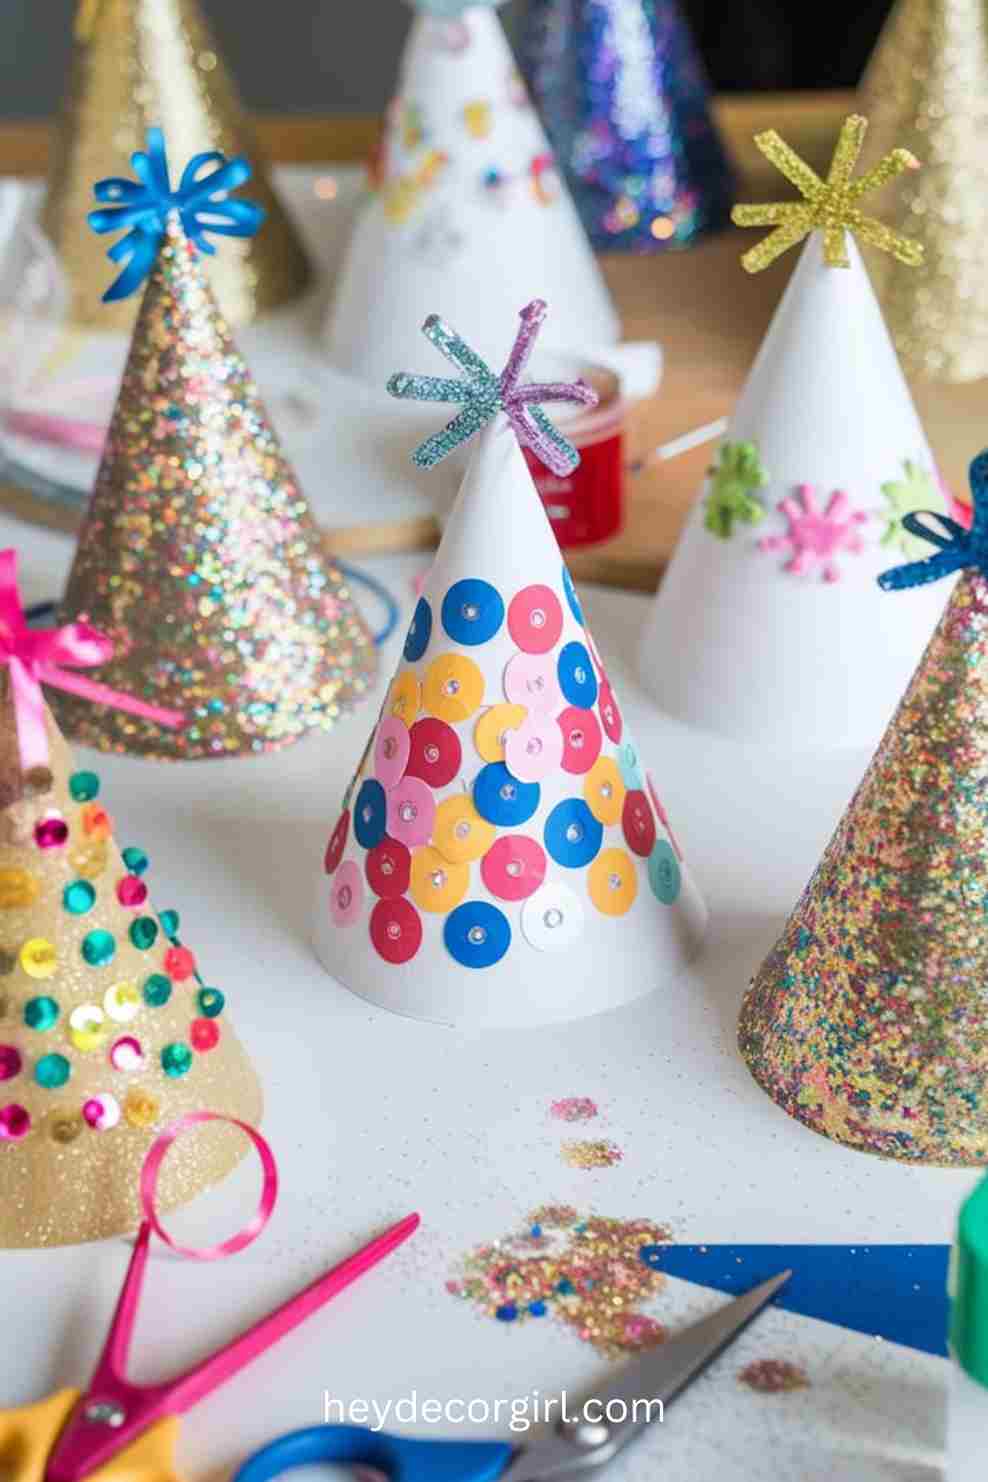
3. DIY Glittery Party Hats
Materials Needed:
- Plain party hats (paper or plastic)
- Glitter (gold, silver, or multicolored)
- Glue (craft glue or glue stick)
- Ribbons (in festive colors)
- Sequins, beads, or gems for extra sparkle
- Scissors
- Craft tape (optional)
Step-by-Step Guide:
- Start with Plain Party Hats:
- Begin with basic party hats that can be found at any party supply store. You can use cone-shaped paper hats or plastic ones, depending on your preference.
- If the hats are plain, you have the perfect base to get creative with your own designs and colors.
- Apply Glue to the Hat:
- Take your glue and apply a thin layer to the areas of the party hat where you want to add glitter. You can cover the entire hat or just certain sections, such as the rim, top, or base.
- For a more precise application, use a glue stick or craft glue to control the spread.
- Add Glitter:
- Sprinkle glitter generously over the glued areas, ensuring it sticks to the glue. You can use one color of glitter for a simple design or combine multiple colors for a more vibrant, festive look.
- Tap off any excess glitter, then set the hat aside to dry for a few minutes.
- Decorate with Sequins and Beads:
- Once the glitter has dried, take your sequins, beads, or other small embellishments and glue them onto the hat in patterns. You can create a border at the base, a random design all over the hat, or a fun geometric shape for a playful touch.
- Sequins or beads add an extra dimension of sparkle, making your party hats pop with light as they catch the glow of the party.
- Attach Ribbons:
- Cut ribbons to your desired length and glue them along the bottom edge of the hat or the top for added flair.
- You can also create a fun fringe effect by cutting the ribbons into strips before gluing them. Tie them in bows or allow them to hang down for a festive, flowing look.
- Personalize the Hat:
- Add personalized touches like a guest’s name or a New Year’s message using markers or stickers.
- For a themed party, you can customize the hats with stars, moons, or other symbols that reflect your party’s style or color scheme.
- Let It Dry:
- Allow your party hats to fully dry before wearing them. Make sure the glue is set and the glitter is secure so that you won’t have any mess when wearing them.
A Creative Activity for Both Kids and Adults: DIY glittery party hats are not only a fun decoration but also a fantastic craft activity for guests of all ages. Whether you’re hosting a family-friendly New Year’s Eve gathering or a more adult-focused celebration, crafting these sparkly hats brings out everyone’s creativity. Kids will love personalizing their hats with their favorite colors, while adults can design sophisticated, glittering creations to ring in the New Year in style. These handmade hats are sure to add a playful touch to your festivities and make everyone feel part of the celebration.
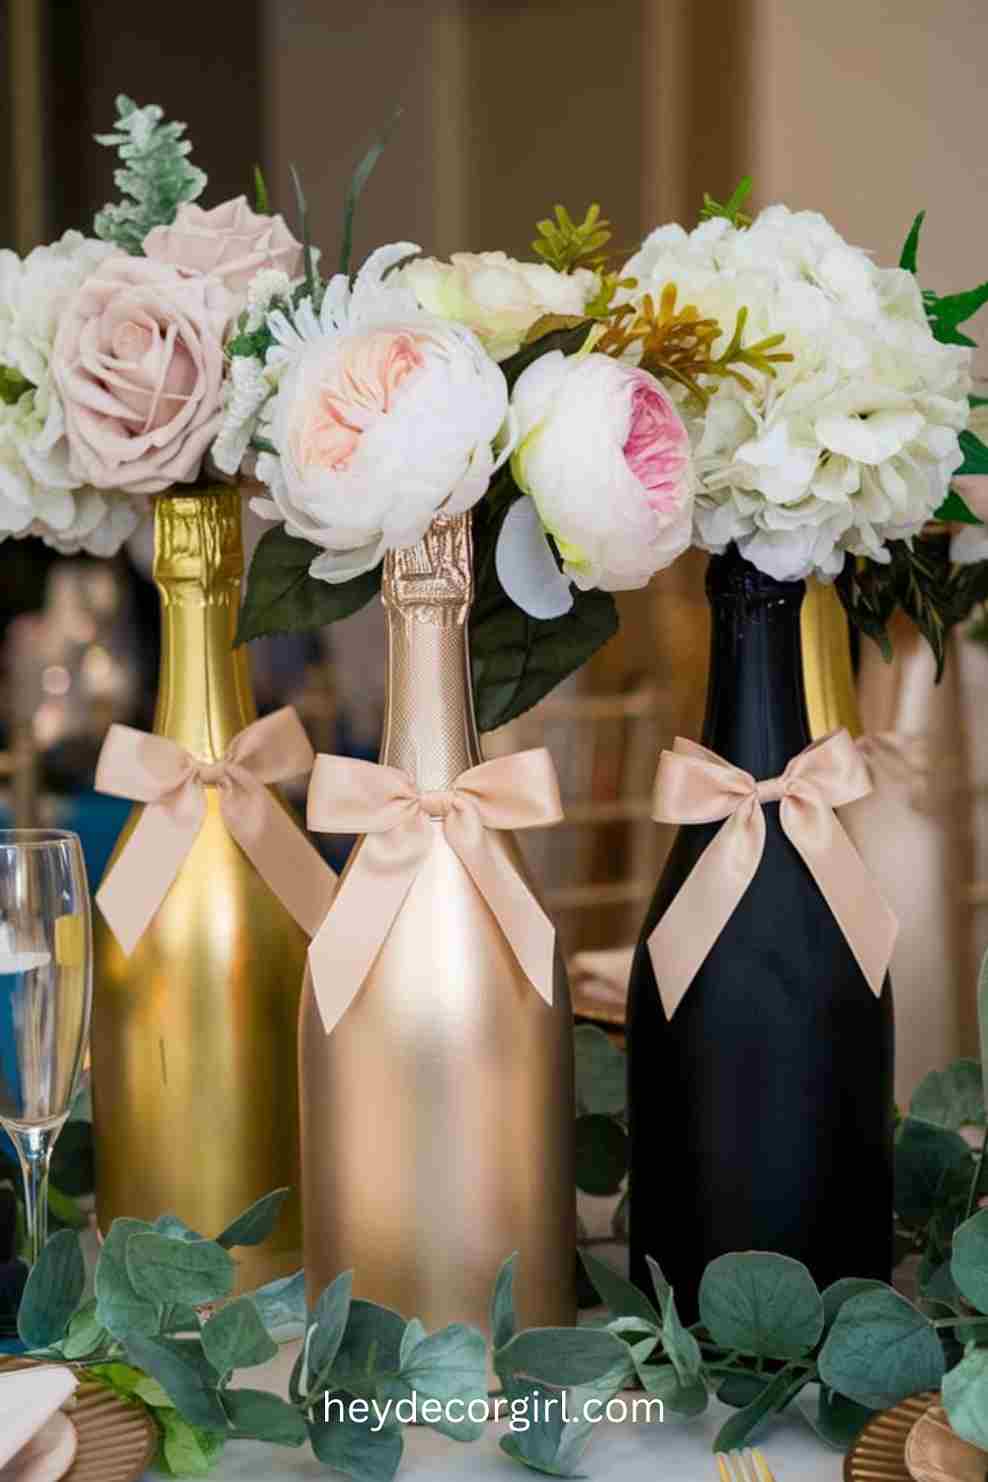
4. Champagne Bottle Centerpieces
Materials Needed:
- Empty champagne bottles (cleaned and labels removed)
- Spray paint (in colors like gold, silver, or black for a chic look)
- Decorative ribbons (in metallic or complementary party colors)
- Faux flowers (such as roses, hydrangeas, or seasonal blooms)
- Scissors and floral wire (for arranging the flowers)
- Craft glue or a hot glue gun
Step-by-Step Guide:
- Prepare the Champagne Bottles:
- Start by thoroughly cleaning the champagne bottles, removing any labels or stickers. You can soak the bottles in warm, soapy water to make label removal easier. Dry them completely before proceeding.
- If desired, wrap the necks of the bottles with painter’s tape to keep the spray paint from covering unwanted areas.
- Spray Paint the Bottles:
- Choose a spray paint color that fits your New Year’s Eve theme. Metallic colors like gold, silver, or rose gold are ideal for creating a chic, glamorous look. You could also opt for black or white for a more minimalist, elegant style.
- In a well-ventilated area or outside, spray a light, even coat of paint over the bottle. Hold the can about 6-8 inches away from the bottle to avoid drips. Let the paint dry completely before applying a second coat if necessary.
- Decorate with Ribbons:
- Once the paint is dry, take decorative ribbons and wrap them around the necks of the champagne bottles. You can tie them in a bow or let them flow freely for a more dynamic look.
- Use ribbons that match your party’s color scheme or go for metallic tones to enhance the festive, glamorous feel of the centerpiece.
- Add Faux Flowers:
- To turn your painted champagne bottles into elegant centerpieces, fill the bottle’s opening with faux flowers. You can use a single large flower, like a faux rose or peony, or create a fuller look by arranging multiple smaller flowers.
- Trim the flowers to the desired length and use floral wire or craft glue to secure them inside the bottle. For a more dynamic look, you can also add greenery or ivy for texture.
- Personalize the Bottles:
- Personalize each champagne bottle centerpiece to reflect your party theme. For example, add small tags with “Cheers to the New Year” or “Welcome 2024” written on them, or decorate with glitter for extra sparkle.
- For a more luxurious touch, consider adding small LED fairy lights inside the bottles for a soft, glowing effect.
- If you’re hosting a themed New Year’s party (such as a black-and-white ball or a gold-and-silver soirée), tailor the colors of your spray paint, ribbons, and flowers to match the overall aesthetic.
- Arrange the Centerpieces:
- Once you’ve decorated the bottles, place them on your tables or around your event space as stunning centerpieces. You can group them together in clusters or place them individually for a more modern, sleek look.
Perfect for a Glamorous and Elegant Celebration: Champagne bottle centerpieces are an elegant and budget-friendly way to add sophistication to your New Year’s Eve celebration. They combine style and festivity, and because they are personalized, they can perfectly reflect your party’s unique theme. These chic centerpieces are not only a great addition to any table setting but also serve as conversation starters that add an extra touch of sparkle and glamour to your evening.
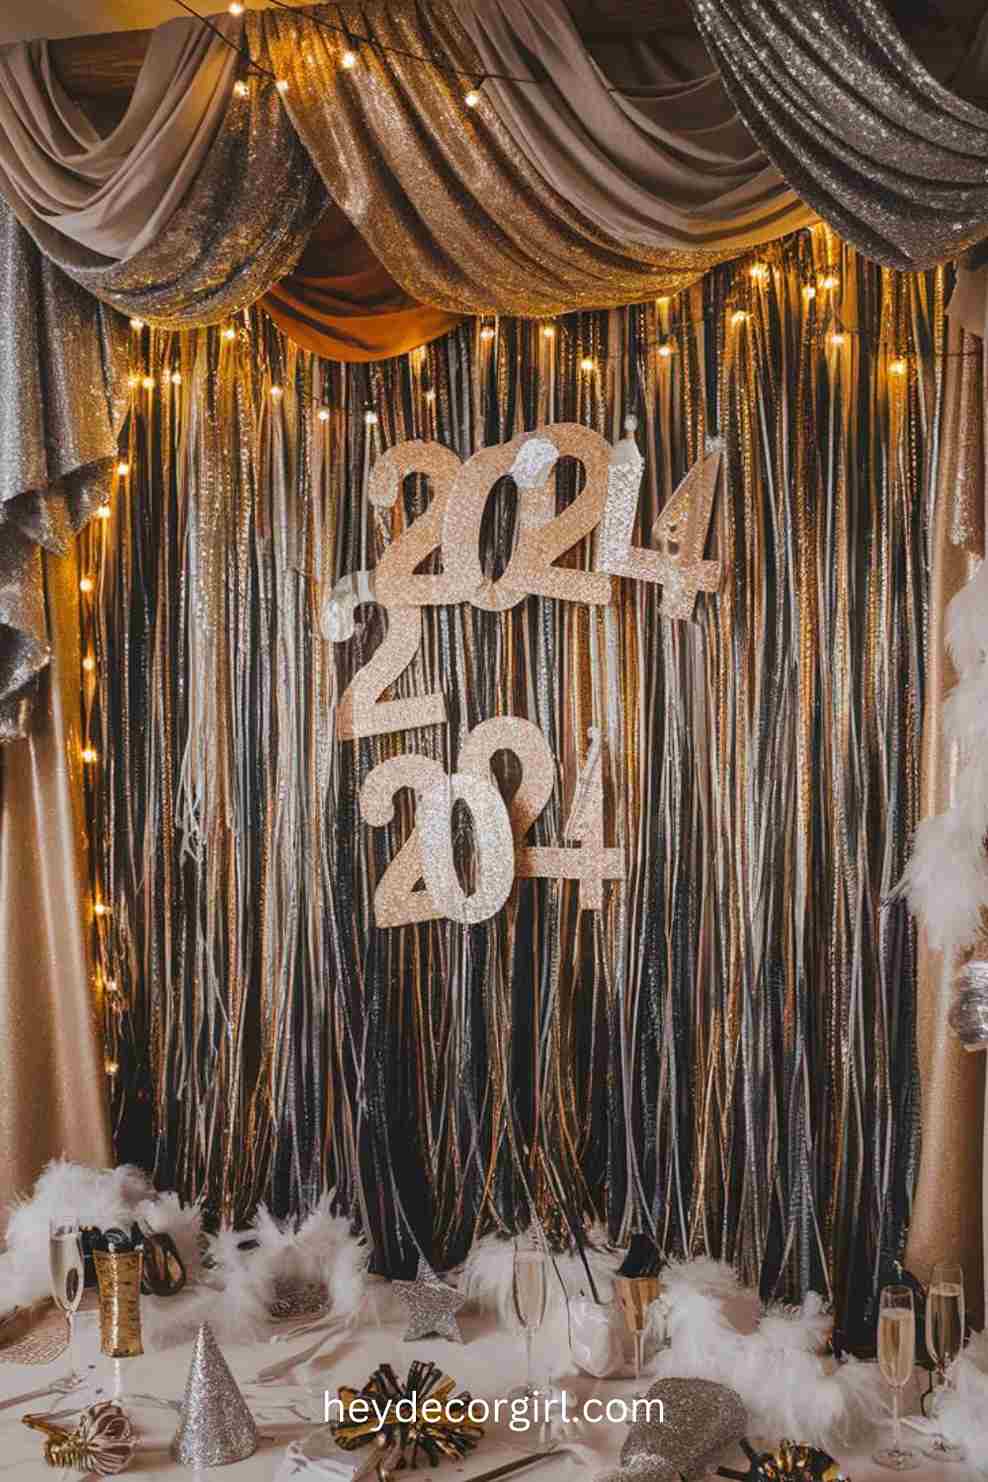
5. New Year’s Eve Photo Booth Backdrop
Materials Needed:
- Metallic streamers (in silver, gold, or black)
- Fabric (sequined or velvet for a luxurious feel)
- Fun props (such as party hats, boas, glasses, champagne flutes)
- Photo booth frame or backdrop stand (optional)
- String lights (for added sparkle)
- Tape or thumbtacks (to hang the backdrop)
Step-by-Step Guide:
- Choose the Location:
- Find a suitable wall or space in your party area where guests can gather for photos. This should be a well-lit area with enough space for people to stand in front of the backdrop comfortably.
- If you have a dedicated photo booth frame or backdrop stand, set it up in the desired spot.
- Create the Backdrop:
- Start by hanging metallic streamers across the wall to create a shiny, festive background. You can use tape or thumbtacks to attach the streamers. If you want a fuller look, layer the streamers vertically or horizontally, allowing them to cascade down to the floor.
- For a more sophisticated or elegant vibe, use sequined or velvet fabric as the base of your backdrop. Drape the fabric over the streamers or directly on the wall to add texture and luxury to the setting.
- Consider adding string lights to your backdrop for a glowing, sparkling effect. You can weave the lights through the metallic streamers or place them around the edge of the backdrop for added drama.
- Enhance with Fun Props:
- Props are key to creating a fun and memorable photo booth experience. Prepare a selection of New Year’s Eve-themed props such as:
- Party hats or tiaras
- Feather boas
- Oversized glasses (e.g., shaped like numbers “2024”)
- Champagne flutes (real or plastic for photos)
- Sparkling confetti or fake mustaches
- New Year’s Eve signs like “Cheers” or “Happy New Year!”
- Noise makers, tiaras, and even fun glasses in shapes of fireworks or stars.
- Organize the props nearby in baskets or trays for easy access.
- Props are key to creating a fun and memorable photo booth experience. Prepare a selection of New Year’s Eve-themed props such as:
- Set Up the Photo Booth:
- Place a sign or a fun, New Year’s Eve-themed frame (like a giant picture frame) near the backdrop so guests know it’s a photo booth station.
- If you’re using string lights, position them in a way that highlights the backdrop without making the area too bright or too dark.
- You can add a few floor props as well, such as champagne bottles, large foam numbers (2024), or other decorative items that tie in with your party theme.
- Personalize the Space:
- To make the backdrop more personalized, incorporate colors or symbols related to your New Year’s Eve theme. For example, if you’re going for a black-and-gold color scheme, stick to those hues for the props and backdrop materials.
- Consider adding a themed sign above the booth that says “Strike a Pose” or “Cheers to 2024!” to further engage guests.
- Test the Setup:
- Before guests start arriving, do a test shot to make sure the lighting is perfect and the props are easily accessible. Make any necessary adjustments to the backdrop to ensure it’s camera-friendly.
Perfect for Fun Photos and Memories: A New Year’s Eve photo booth with a shimmering backdrop creates the perfect environment for guests to capture fun, memorable moments as they ring in the new year. It’s an interactive addition to your party that everyone can enjoy, from kids to adults, and it offers a great way to look back on the celebration with cheerful photos. With the right props and a creative backdrop, your guests will feel like stars in their own New Year’s Eve photo shoot.
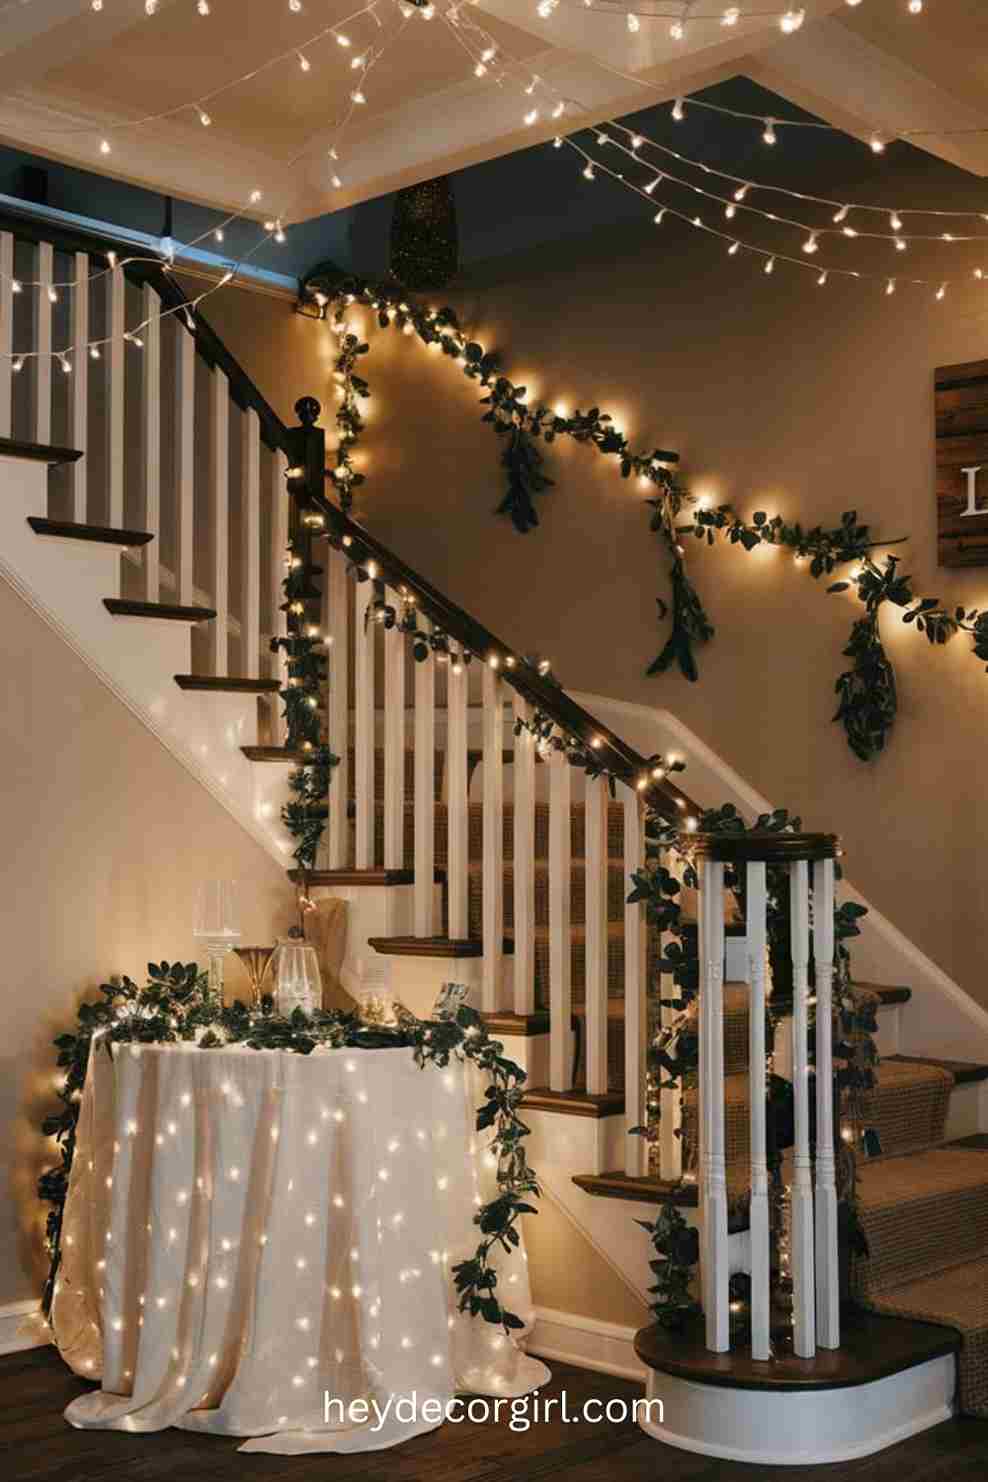
6. DIY Hanging String Lights
Materials Needed:
- String lights (fairy lights or any soft, warm lights)
- Tape (decorative tape or masking tape)
- Command hooks (for easy removal without damage)
- Extension cords (if necessary)
- Scissors (for trimming excess string or adjusting lengths)
Step-by-Step Guide:
- Choose Your String Lights:
- Begin by selecting the right type of string lights for your New Year’s Eve celebration. Soft, warm white lights or colored fairy lights work beautifully for creating a festive and elegant atmosphere. You can even opt for twinkling or blinking lights for an extra magical touch.
- Ensure that the lights are long enough to cover the areas you want to decorate, and check that they’re in good working order before you begin.
- Plan the Layout:
- Before you start hanging the lights, plan out where you want them to go. Think about areas like the ceiling, walls, windows, or even along the edges of furniture. String lights work well draped over curtains, hung in the corner of a room, or wrapped around columns and railings for a romantic, glowing effect.
- You can also hang the lights in creative ways, such as forming shapes or patterns (like stars, hearts, or the number “2024”) along the walls or ceiling.
- Use Tape or Command Hooks:
- For temporary, damage-free hanging, command hooks are ideal for attaching string lights to walls or ceilings. Place the hooks evenly along the area where you want the lights to hang and use them to secure the wire in place.
- If you prefer a simpler method, decorative tape or masking tape can also be used to stick the lights to the wall or ceiling, but be sure to use clear or matching tape to keep the focus on the lights themselves.
- Create a Draped Effect:
- For an elegant and whimsical feel, drape the string lights across the room, allowing them to hang loosely in certain areas. You can create a canopy effect by placing the lights across the ceiling or letting them fall down the walls in gentle swags.
- To enhance the visual appeal, you can add some greenery or artificial flowers to the string lights, weaving them through the wires for a more organic, festive look.
- Wrap the Lights Around Objects:
- Another creative way to arrange the lights is by wrapping them around furniture, stair railings, or even along the backs of chairs or tables. This adds a touch of elegance to everyday items and brings a soft glow to your space.
- For a romantic, intimate vibe, consider wrapping the lights around a mantelpiece, a mirror frame, or a set of glass vases.
- Highlight Key Areas:
- Use the string lights to highlight important areas of the room, such as a drinks table, the entryway, or the photo booth backdrop. This not only adds a festive glow but also helps direct guests’ attention to key features of your New Year’s celebration.
- Safety Tips:
- When hanging lights, make sure they’re securely attached to prevent them from falling. If you’re using extension cords, ensure they’re placed safely, away from high-traffic areas, and avoid overloading electrical outlets.
Perfect for Creating an Elegant, Festive Atmosphere: DIY hanging string lights are an easy, affordable way to elevate the ambiance of your New Year’s Eve party. Whether you choose to hang them elegantly from the ceiling, wrap them around furniture, or drape them across the room, these lights create a cozy and festive atmosphere that adds charm and warmth to any space. The soft glow they cast will set the perfect mood for ringing in the new year and make your celebration feel magical.
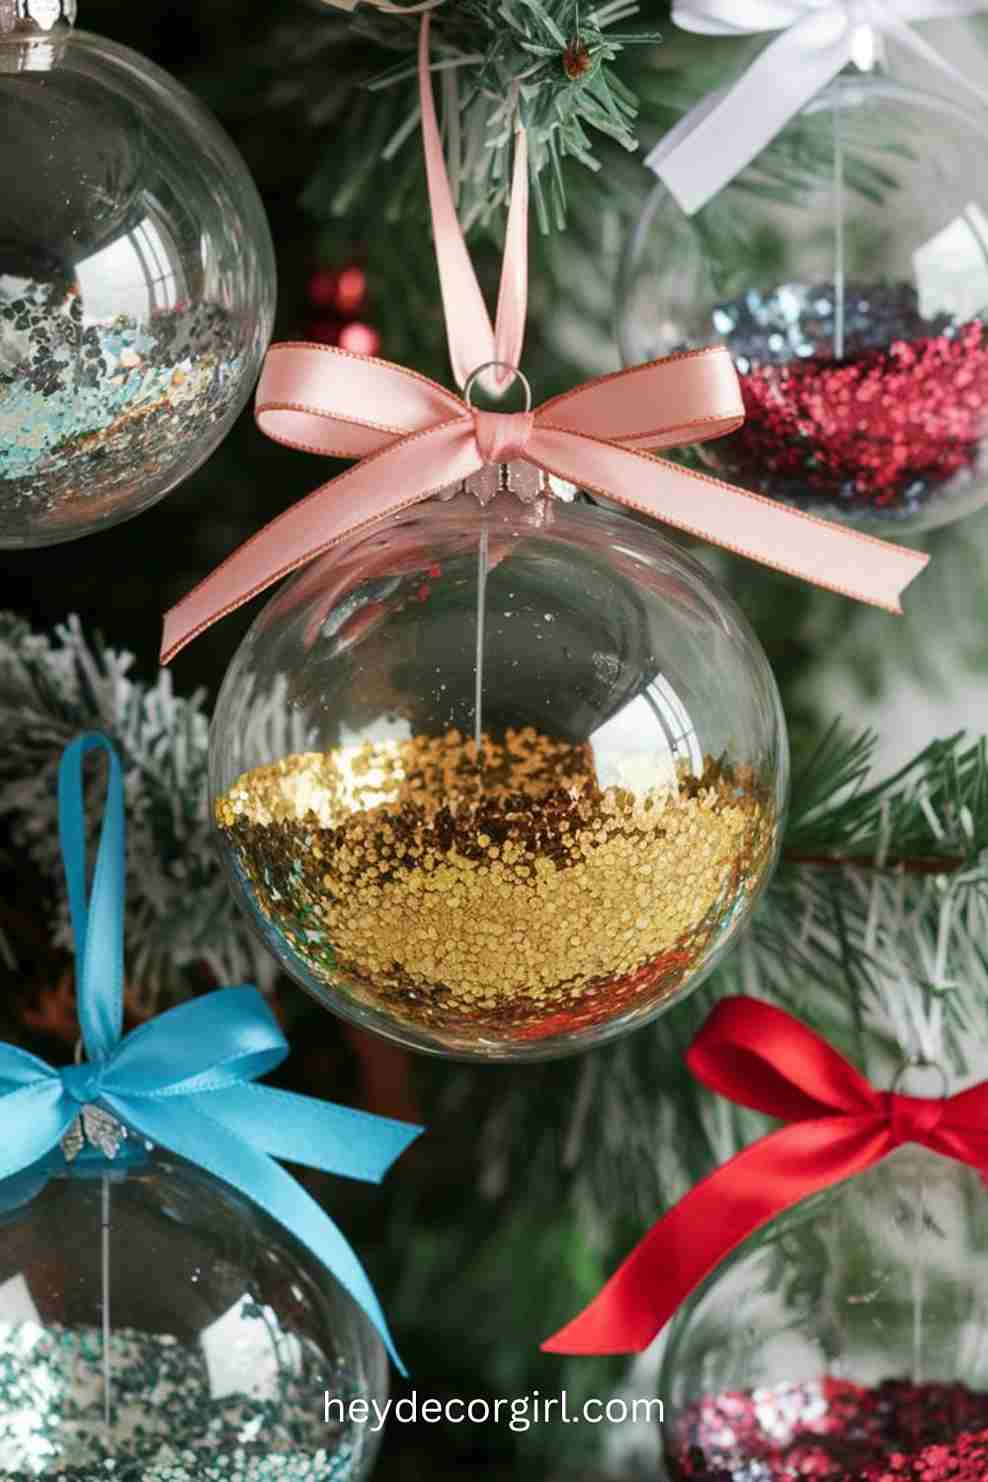
7. DIY Glitter Ball Ornaments
Materials Needed:
- Clear plastic or glass ornaments (the ball-shaped variety)
- Glitter (in various colors such as gold, silver, red, or multicolored)
- Glue (craft glue or clear-drying glue)
- Ribbon (in coordinating colors for hanging)
- Funnel (optional, for easy glitter filling)
- Scissors
Step-by-Step Guide:
- Prepare the Ornaments:
- Start with clear plastic or glass ball ornaments, which are available at most craft stores. You can choose any size, but larger ornaments will allow for more glitter and a bolder effect.
- Remove the tops of the ornaments carefully and set them aside for later.
- Apply Glue Inside the Ornament:
- Pour a small amount of clear-drying glue into the ornament. Swirl the glue around so it covers the inside of the ornament completely. This will serve as the adhesive for the glitter to stick to.
- If needed, use a funnel to pour the glue in without making a mess.
- Add Glitter:
- Once the glue is evenly spread inside the ornament, it’s time to add the glitter. Choose a single color for a simple, elegant look or mix several colors for a more dynamic, exciting effect.
- To fill the ornament with glitter, use a funnel again, or simply sprinkle the glitter inside and shake the ornament gently to coat the entire interior.
- For a fun, multi-dimensional effect, you can layer different colors of glitter by letting one color settle before adding the next.
- Shake and Set:
- After adding the glitter, cover the opening of the ornament and shake gently to ensure the glitter sticks evenly to the glue-covered interior. You can tilt and turn the ornament as needed to get an even coating.
- Once the glitter has adhered, allow the ornament to dry completely.
- Attach Ribbon for Hanging:
- Once the ornament is dry, cut a piece of ribbon in a color that complements your glitter. Tie the ribbon around the neck of the ornament or reattach the cap if you’re using the metal kind.
- If you want the ornament to hang from a tree, tie the ribbon into a loop for easy hanging.
- Personalize and Arrange:
- Personalize your glitter ball ornaments by adding a small tag with a New Year’s message or by incorporating additional embellishments like tiny stars, beads, or even rhinestones on the outside.
- You can create a collection of glitter ornaments in various sizes and colors to hang on the Christmas tree, string them along a garland, or even hang them from the walls to add festive sparkle throughout the room.
Perfect for Sparkly Tree or Wall Decor: DIY glitter ball ornaments are a fun, simple craft that adds a dazzling touch to your holiday or New Year’s decorations. Whether you create a few special ornaments for your tree or use them as shimmering accents throughout your space, these glitter-filled ornaments are sure to catch the light and make your celebration sparkle. With endless possibilities for color combinations, you can customize these ornaments to match any New Year’s Eve theme or create a joyful, colorful display for the new year.
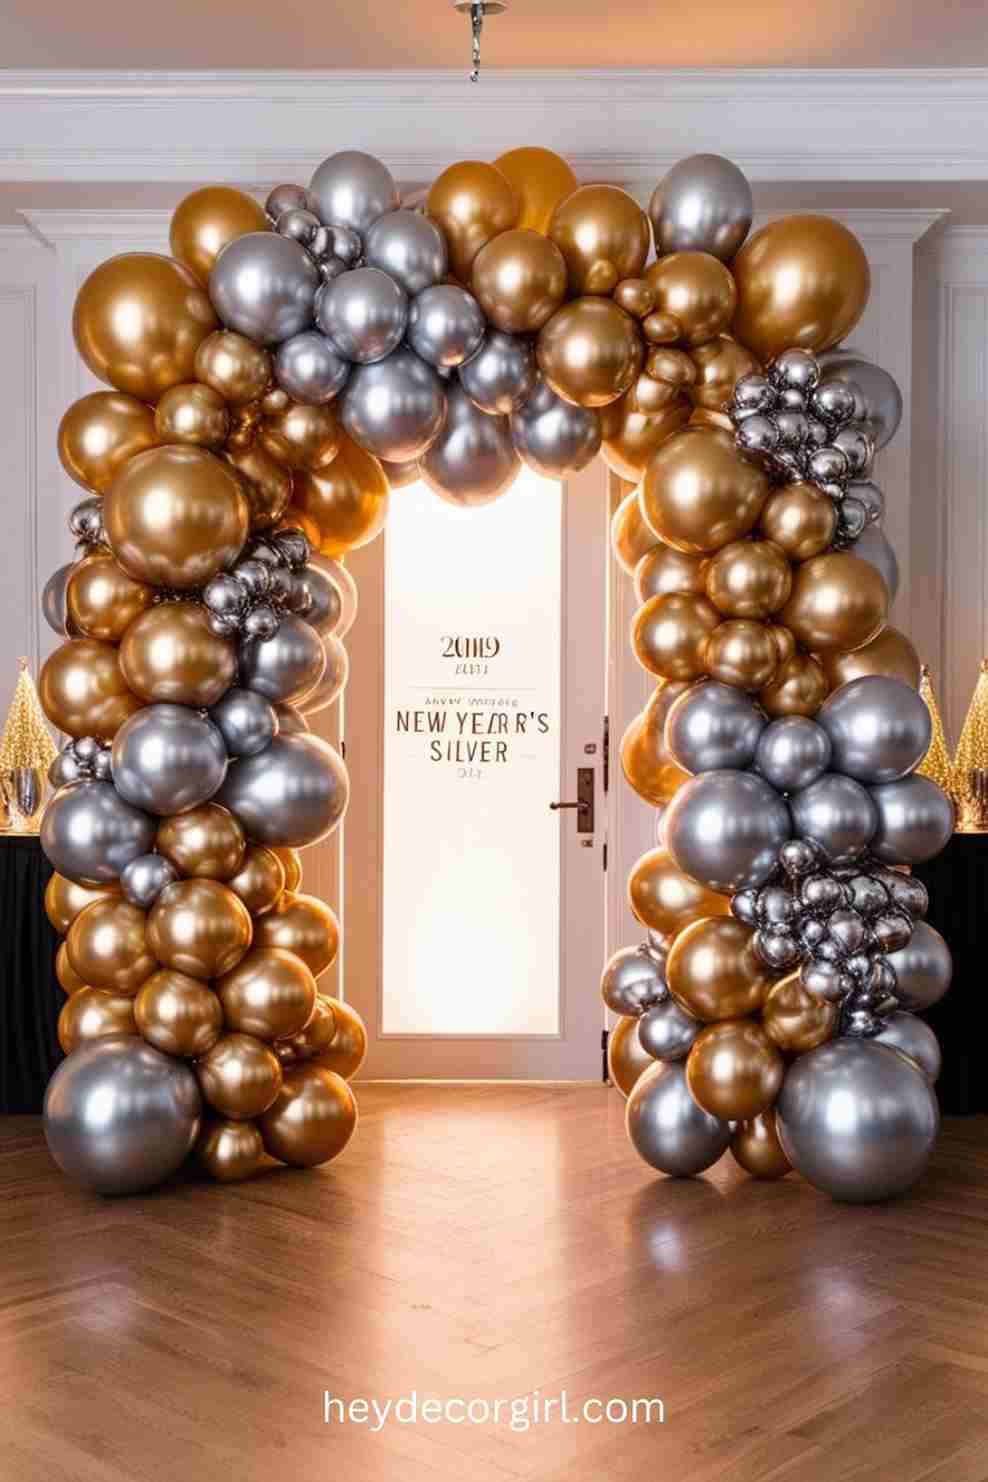
8. Gold and Silver Balloon Arch
Materials Needed:
- Gold and silver balloons (in various sizes)
- Balloon arch kit (with frame or string for support)
- Balloon inflator or pump
- String (to tie and secure balloons in place)
- Tape or balloon glue dots (for extra stability)
- Scissors
- Balloon weights (optional, to keep the arch in place)
Step-by-Step Guide:
- Prepare Your Balloons:
- Begin by inflating a mix of gold and silver balloons. Use larger balloons for the base of the arch and smaller ones for the top or accents. You can also mix in a few clear balloons with metallic confetti for added sparkle.
- Make sure to inflate the balloons to different sizes to create a varied and visually dynamic effect. You can use a balloon inflator or pump for faster results.
- Set Up the Balloon Arch Frame:
- If you’re using a balloon arch kit, assemble the frame according to the instructions. The kit will typically include a flexible frame or string that can be shaped into an arch.
- If you’re making a free-standing arch, use string to hang the balloons from a support structure, such as a door frame or a wall. Alternatively, you can attach the balloons directly to a string tied between two points.
- Arrange the Balloons:
- Start by attaching the largest balloons to the base of the arch, anchoring them to the frame or string. You can use balloon glue dots or tape to keep them in place.
- Arrange the balloons in clusters, grouping the gold and silver colors together or alternating them for a balanced look. Create a flowing pattern, with the balloons cascading outward from the center for a symmetrical effect.
- Place smaller balloons between the larger ones to fill in gaps and add dimension to the arch. Play with the placement of different balloon sizes to create a lush, full appearance.
- Add a Twisted Effect:
- For extra flair, twist some of the balloons together to create a spiraling effect along the arch. This will give the arch a more dynamic and sophisticated look.
- Secure the Arch:
- Once you’ve arranged the balloons, use string or tape to secure them tightly to the frame or support structure. Make sure the arch is stable and won’t shift during the celebration.
- If the arch is freestanding, attach balloon weights to the base of the arch for added stability and to prevent it from toppling over.
- Perfect for a Photo Backdrop:
- The balloon arch makes a stunning photo backdrop, so consider the positioning carefully. Place it in an area where your guests will gather for photos—near the entrance, a drinks table, or the main party area.
- Ensure that the arch is well-lit to enhance the shine of the gold and silver balloons and make the photo area inviting.
- You can even customize the arch with a “Happy New Year” banner, glittery stars, or a New Year’s sign for an extra celebratory touch.
Perfect for a Grand Entrance: A gold and silver balloon arch is an impressive addition to your New Year’s Eve celebration, creating a grand entrance that guests will remember. It’s the perfect way to welcome your guests in style and set the tone for the festivities ahead. Whether placed over a doorway, as a photo booth backdrop, or as a focal point in your space, this balloon arch will add elegance and excitement to your celebration.
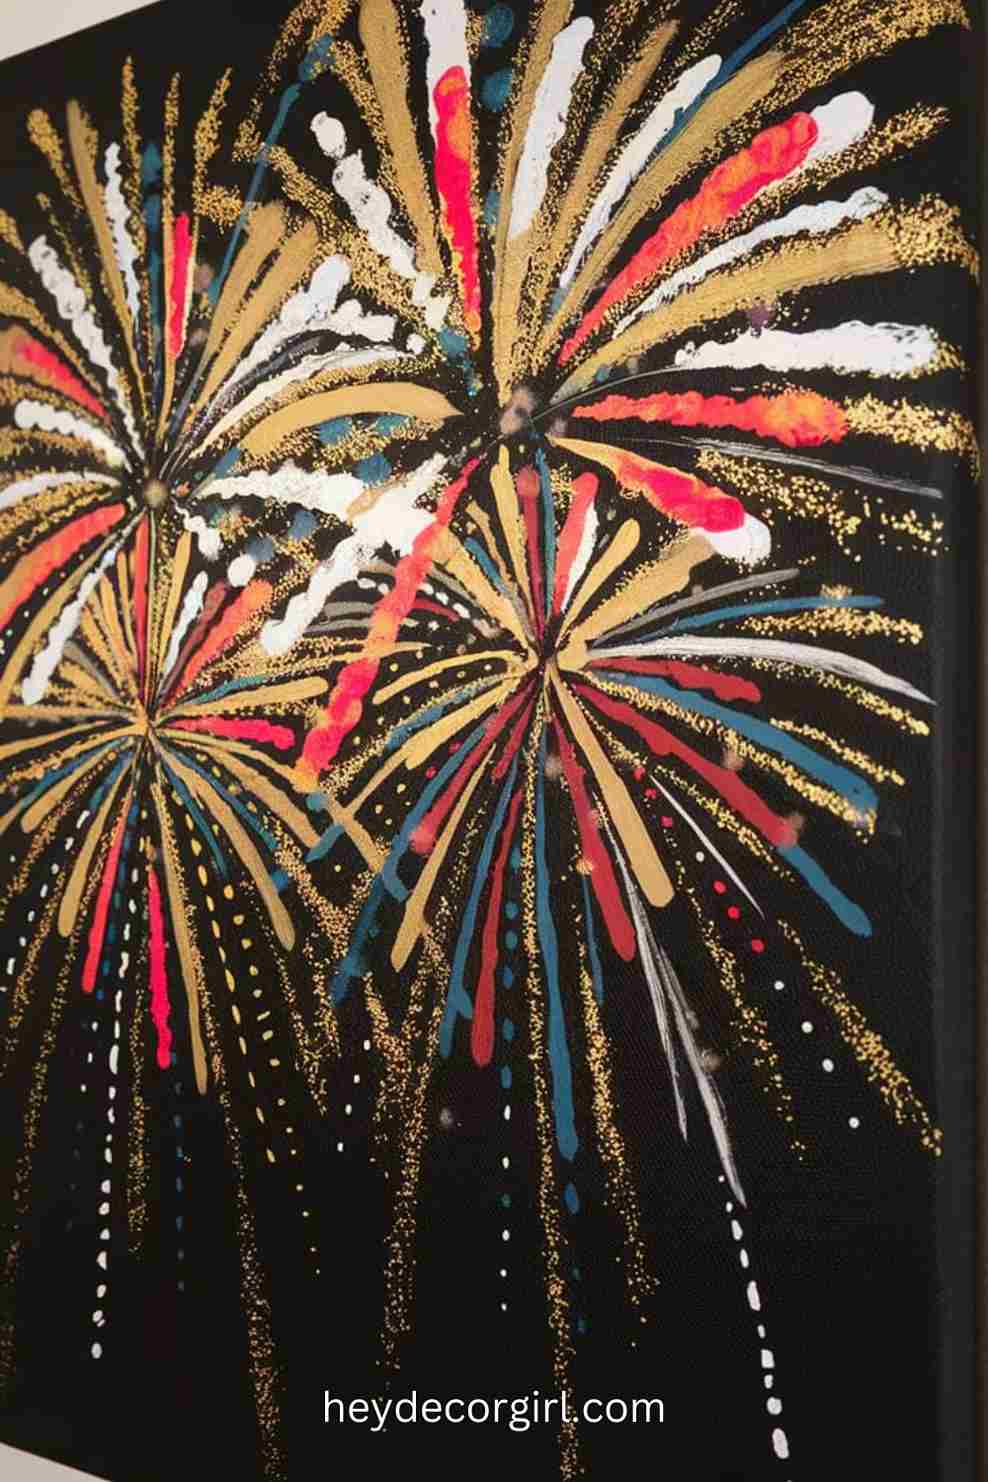
9. Firework-Inspired Wall Art
Materials Needed:
- Black canvas (or black poster board)
- Firework images for reference (either printed or digital)
- Acrylic paints (bright colors like red, gold, silver, blue, and white)
- Paintbrushes (different sizes for fine details and larger strokes)
- Palette or mixing tray
- Water (for cleaning brushes)
- Painter’s tape (optional, for clean edges)
Step-by-Step Guide:
- Prepare Your Canvas:
- Start by setting up a black canvas as your base. The dark background will allow the bright, vibrant colors of the fireworks to pop and look more dramatic.
- If you don’t have a black canvas, you can use black poster board as a more budget-friendly option.
- Plan Your Firework Design:
- Use images of fireworks as inspiration for your design. You can either print out pictures or search for digital images online to guide your creative process.
- Consider using abstract firework designs, focusing on bursting patterns and starbursts that mimic the beauty of fireworks. Plan the layout of the fireworks on your canvas, keeping in mind that less is more when aiming for a dramatic look.
- Start Painting the Fireworks:
- Begin by painting the central bursts of the fireworks with bright, vivid colors. Use white or gold for the core of the firework, then add other colors like red, blue, or silver around the edges to create a glowing, explosive effect.
- To create texture and dimension, use different sizes of paintbrushes. A larger brush can be used for broad strokes to form the outer bursts, while a smaller brush can be used for fine details and adding smaller bursts or sparkles.
- For a more dynamic look, use a stippling or dabbing technique to create the effect of sparks flying off the firework.
- Layer and Add Movement:
- Fireworks often appear as if they are moving and exploding in all directions, so be sure to layer your colors and allow them to blend. You can also create trails of light or sparks coming off the firework bursts by adding delicate lines or dots with a fine-tipped brush.
- If you want to make your fireworks look even more realistic, you can add layers of transparent paint or water to give the design more depth.
- Use Painter’s Tape (Optional):
- If you want clean edges for your design, consider using painter’s tape around the edges of the canvas or along sections where you want a defined shape or boundary.
- This technique helps give the artwork a more polished look, especially if you are aiming for a modern and sleek design.
- Allow to Dry:
- Once you’ve completed your firework-inspired artwork, let the paint dry completely. Acrylic paint dries relatively quickly, but ensure that all layers are fully set before displaying the artwork.
- Display Your Art:
- Once the painting is dry, hang it up as a centerpiece for your New Year’s Eve celebration. It can be placed on a wall near the party’s main event area, such as the photo booth, the entrance, or above the drinks table.
- The vibrant, abstract firework design will set a celebratory, energetic tone for the evening.
Perfect for Setting the Tone: This DIY firework-inspired wall art is a perfect way to bring the excitement and sparkle of New Year’s Eve celebrations indoors. Whether you hang it above a mantel, as a backdrop for your party, or as a focal point in your decor, this vibrant and artistic piece will help set a festive and joyful atmosphere. The bright bursts of color and abstract design evoke the feeling of fireworks lighting up the sky, making it the ideal addition to your New Year’s festivities.
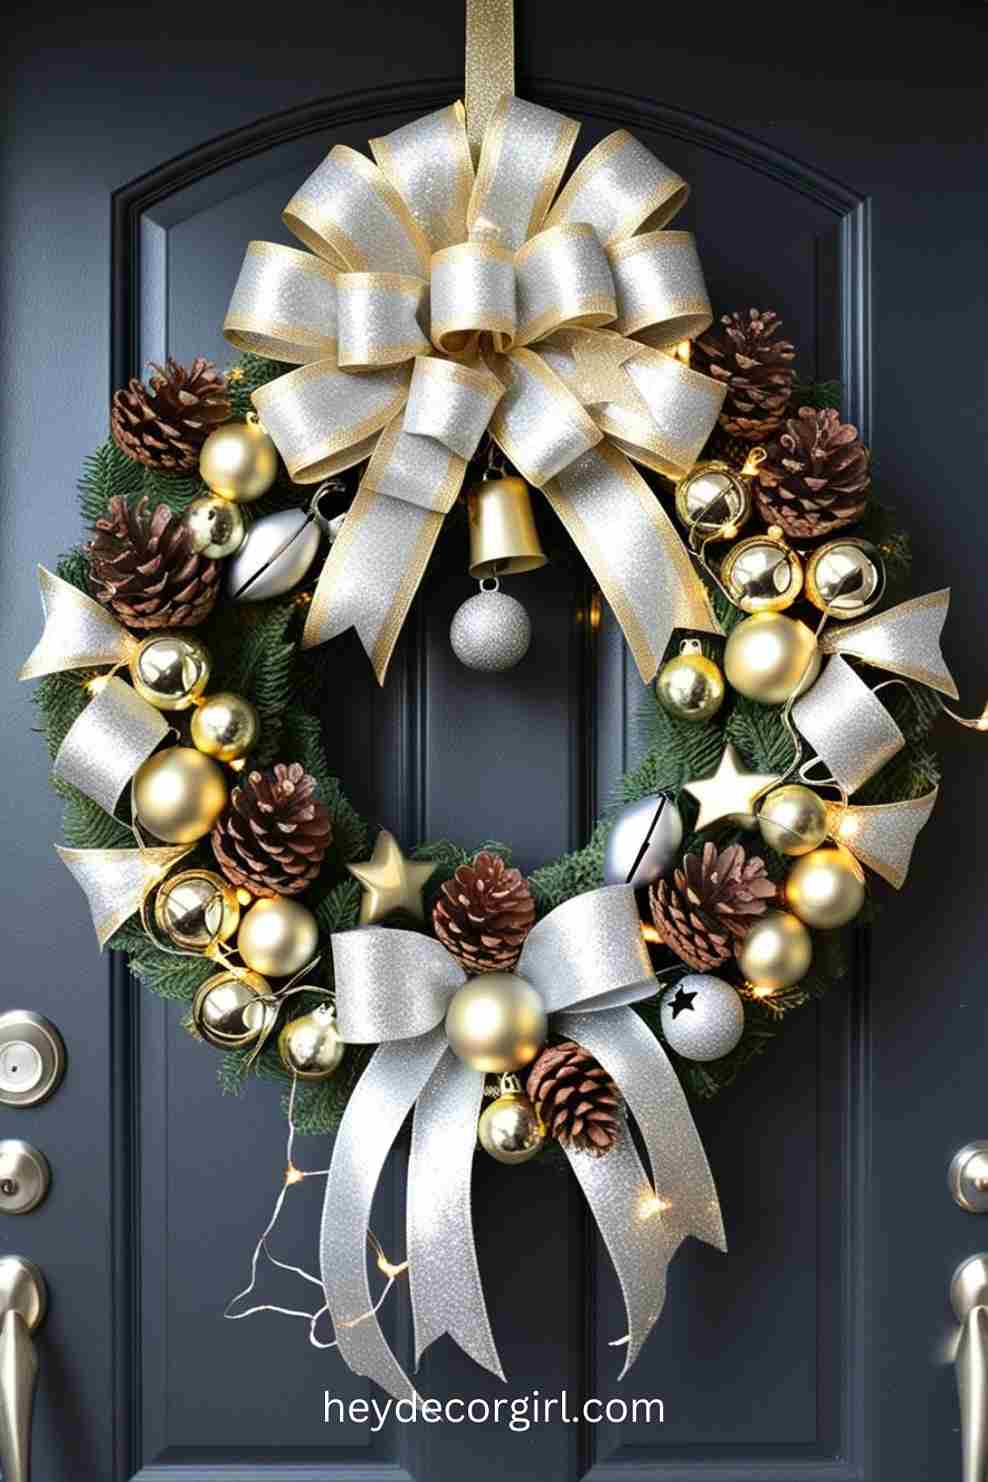
10. Festive Wreath for the Front Door
Materials Needed:
- Wreath base (grapevine, foam, or wire)
- Metallic ribbons (gold, silver, or a combination)
- Small ornaments (such as gold balls, stars, or bells)
- Pinecones (real or artificial)
- Hot glue gun or floral wire (for attaching decorations)
- Scissors
- Optional: Glitter, faux greenery, or mini fairy lights for added sparkle
Step-by-Step Guide:
- Prepare the Wreath Base:
- Start by choosing a wreath base. A grapevine or foam wreath works well for attaching decorations, but you can also use a wire base if you prefer.
- If you’re using a plain base, you can wrap it with a layer of faux greenery or metallic ribbon to create a more festive foundation for your decorations.
- Add Metallic Ribbon:
- Cut long strips of metallic ribbon in gold, silver, or a combination of both. These ribbons will add an elegant touch to the wreath.
- Wrap the ribbon around the wreath, either in loops or cascading down in swags, securing the ends with hot glue or wire. This will give the wreath a shiny, festive look perfect for welcoming the New Year.
- Attach Small Ornaments:
- Use a hot glue gun to attach small ornaments like gold or silver balls, stars, or even mini bells. These ornaments add sparkle and texture, contributing to the New Year’s Eve theme.
- Arrange them in clusters for a balanced design, or scatter them randomly across the wreath for a more dynamic, playful look.
- Incorporate Pinecones:
- Pinecones add a natural touch to the wreath, contrasting beautifully with the metallic decorations. If using real pinecones, make sure they are clean and dry.
- Secure the pinecones around the wreath, using hot glue or floral wire to attach them. They can be placed symmetrically or off-center for a more rustic or whimsical feel.
- Optional Embellishments:
- For extra sparkle, consider adding a dusting of glitter to the pinecones or ornaments. This will catch the light and give the wreath a bit of extra glam.
- You can also weave in a string of mini fairy lights around the wreath base to add an extra layer of shine and create a glowing effect at night.
- Add a Centerpiece or Bow:
- If you want to make the wreath more dramatic, consider adding a large metallic bow at the top or center. You can make the bow from the same metallic ribbon you used earlier, tying it into a large, elegant bow.
- Alternatively, a centerpiece of larger ornaments, a “Happy New Year” sign, or even a festive symbol like a champagne bottle or clock face would be a unique addition.
- Secure and Hang:
- Once the decorations are securely attached and the wreath is complete, it’s time to hang it on your front door. Use a sturdy ribbon or a wreath hook to hang the wreath at eye level for the perfect entrance.
- If needed, use a bit of hot glue or a floral wire loop on the back to ensure the wreath stays in place.
Perfect for Welcoming the New Year: This DIY festive wreath is a wonderful way to welcome guests into your home for New Year’s Eve. With its elegant metallic accents, sparkly ornaments, and natural pinecones, this wreath will set a celebratory mood right from the doorstep. Whether you hang it on your front door or display it as part of your entryway decor, this wreath creates an inviting and stylish atmosphere that kicks off the celebration with flair.
FAQ
1. What materials do I need for these DIY New Year decor ideas?
- The materials vary depending on the project, but common items include balloons, glitter, paint, ribbon, canvas, ornaments, pinecones, string lights, and wreath bases. Each idea includes a list of specific materials needed to complete the project.
2. How much time will it take to complete these DIY decorations?
- The time required for each project varies. Simple projects like glitter ball ornaments or balloon garlands can be completed in under an hour, while more intricate pieces like a balloon arch or firework-inspired wall art may take a few hours, including drying time for paint or glue.
3. Are these DIY decor ideas budget-friendly?
- Yes, many of these DIY New Year decor ideas are cost-effective, as they often make use of basic craft supplies or items you may already have at home, such as balloons or ribbons. You can also repurpose materials like old bottles or cardboard for certain projects.
4. Can I customize these DIY ideas for different New Year’s Eve themes?
- Absolutely! These DIY projects are versatile and can be easily customized to match your specific theme. You can change the colors of the ribbons, balloons, or paint to suit any color scheme, whether it’s a glamorous metallic theme or a cozy winter wonderland vibe.
5. Do these decorations require advanced crafting skills?
- Most of the DIY ideas are beginner-friendly and suitable for anyone, even if you don’t have much crafting experience. Some projects, like glittery party hats or DIY string lights, are simple and fun for kids and adults. Others, like a gold and silver balloon arch or firework wall art, may require a bit more time and patience but are still accessible to most crafters.
6. How do I make sure the decorations last for the entire night?
- For lasting decorations, be sure to use strong adhesive (such as hot glue or double-sided tape) to secure items like ornaments or ribbons. For balloon projects, ensure balloons are inflated properly and are kept away from sharp objects. If you use lights or candles, always check that they are placed safely to avoid accidents.
7. Can I involve my kids in making these decorations?
- Yes! Many of these DIY ideas are perfect for family involvement, such as making glitter ball ornaments, party hats, or even the firework-inspired wall art. Kids will enjoy the hands-on process, and it’s a great way to get everyone excited about the upcoming celebration.
8. Where should I display my DIY decorations?
- You can place your DIY decor in any part of your home! Some ideas, like the gold and silver balloon arch, work well as a grand entrance. Others, like the firework-inspired wall art or festive wreath, make great additions to walls or doors. Table centerpieces like champagne bottle arrangements or DIY glittery party hats add sparkle to party tables.
9. How do I store these decorations after New Year’s Eve?
- Many DIY decorations can be stored for future use if you take care when packing them up. For example, you can carefully deflate balloons for reuse, pack ornaments in boxes, and store ribbon and garlands in plastic bags or containers to prevent damage. For fabric-based items, like wreaths, hang them in a closet or store them flat.
10. Can I use these ideas for other holidays or events?
- Absolutely! While these DIY decorations are designed with New Year’s Eve in mind, many of the ideas, such as balloon arches, wreaths, and photo booth backdrops, can be adapted for birthdays, weddings, or other celebrations. Simply adjust the colors and themes to suit the occasion!
Hi, I’m Richa, the creative mind and passionate soul behind Hey Decor Girl. With a bachelor’s degree in Inter-space Design and a deep love for transforming spaces, I’ve dedicated my career to bringing style, comfort, and personality into homes. As an interior designer and architect, I’ve had the pleasure of crafting unique living environments that reflect the individuality of those who live in them.
At Hey Decor Girl, I share my expertise in all things home decor—from cozy living room makeovers to rustic farmhouse designs and everything in between. My mission is to inspire you to create spaces that not only look stunning but also feel like home. Whether you’re looking for the latest trends or timeless classics, I’m here to guide you every step of the way. Let’s make your dream home a reality, one stylish detail at a time.
DIY New Year DIY New Year Decor Ideas New Year New Year Decor Ideas
Last modified: November 16, 2024
![Hey Decor Girl [Latest Trending Decor Design Ideas]](https://heydecorgirl.com/wordpress/wp-content/uploads/2024/08/Heygirldecor-Logo.png)
