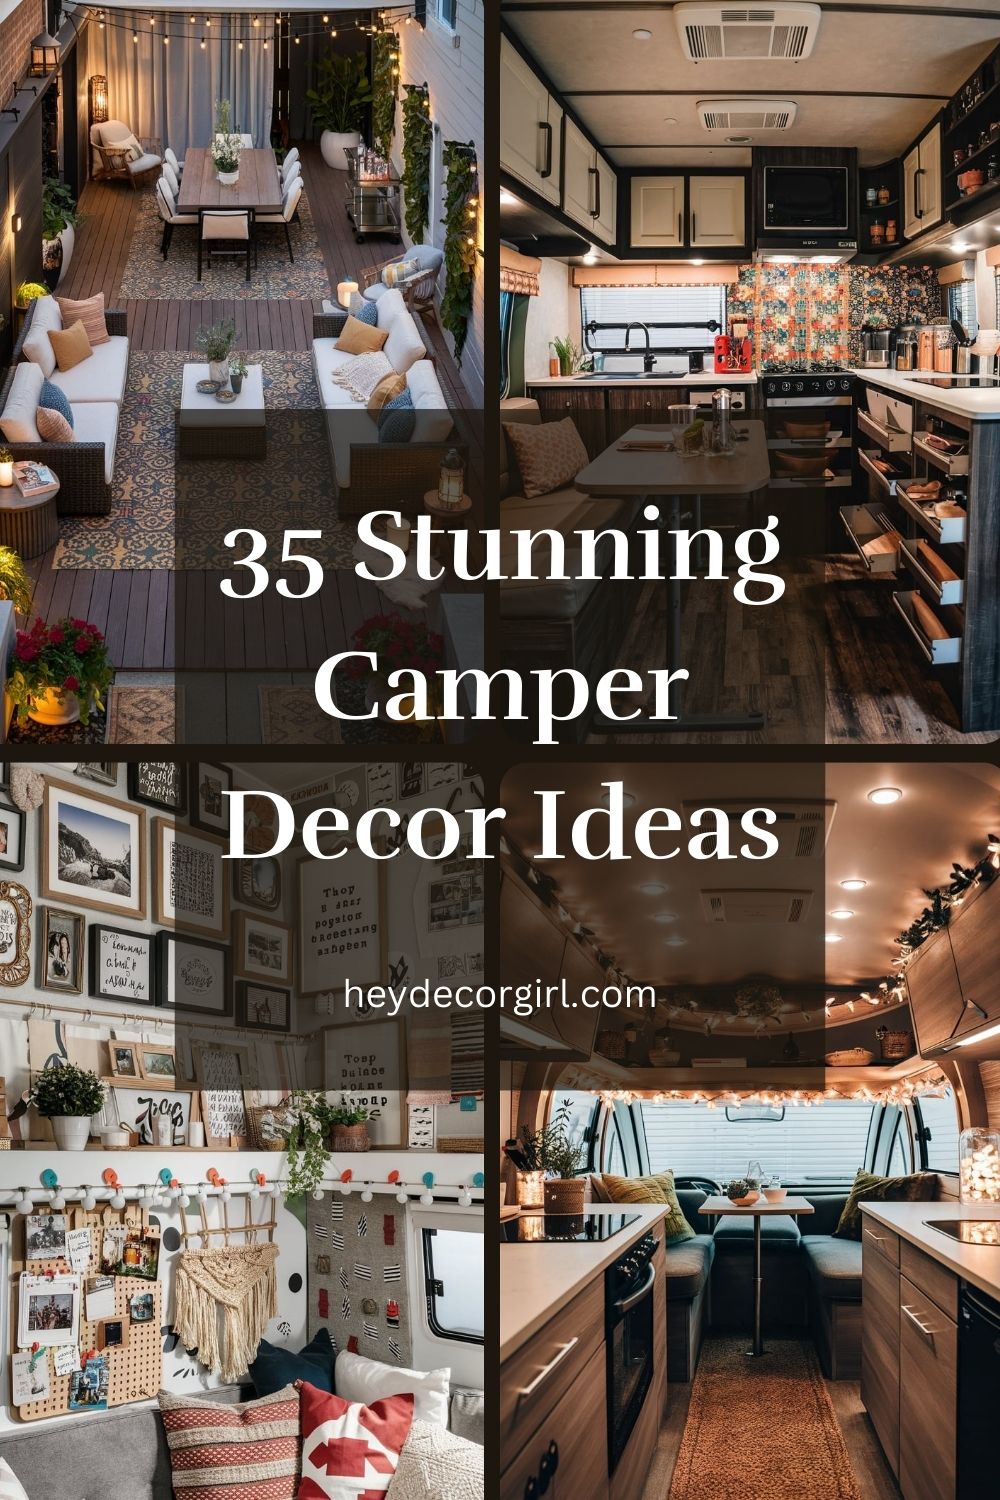
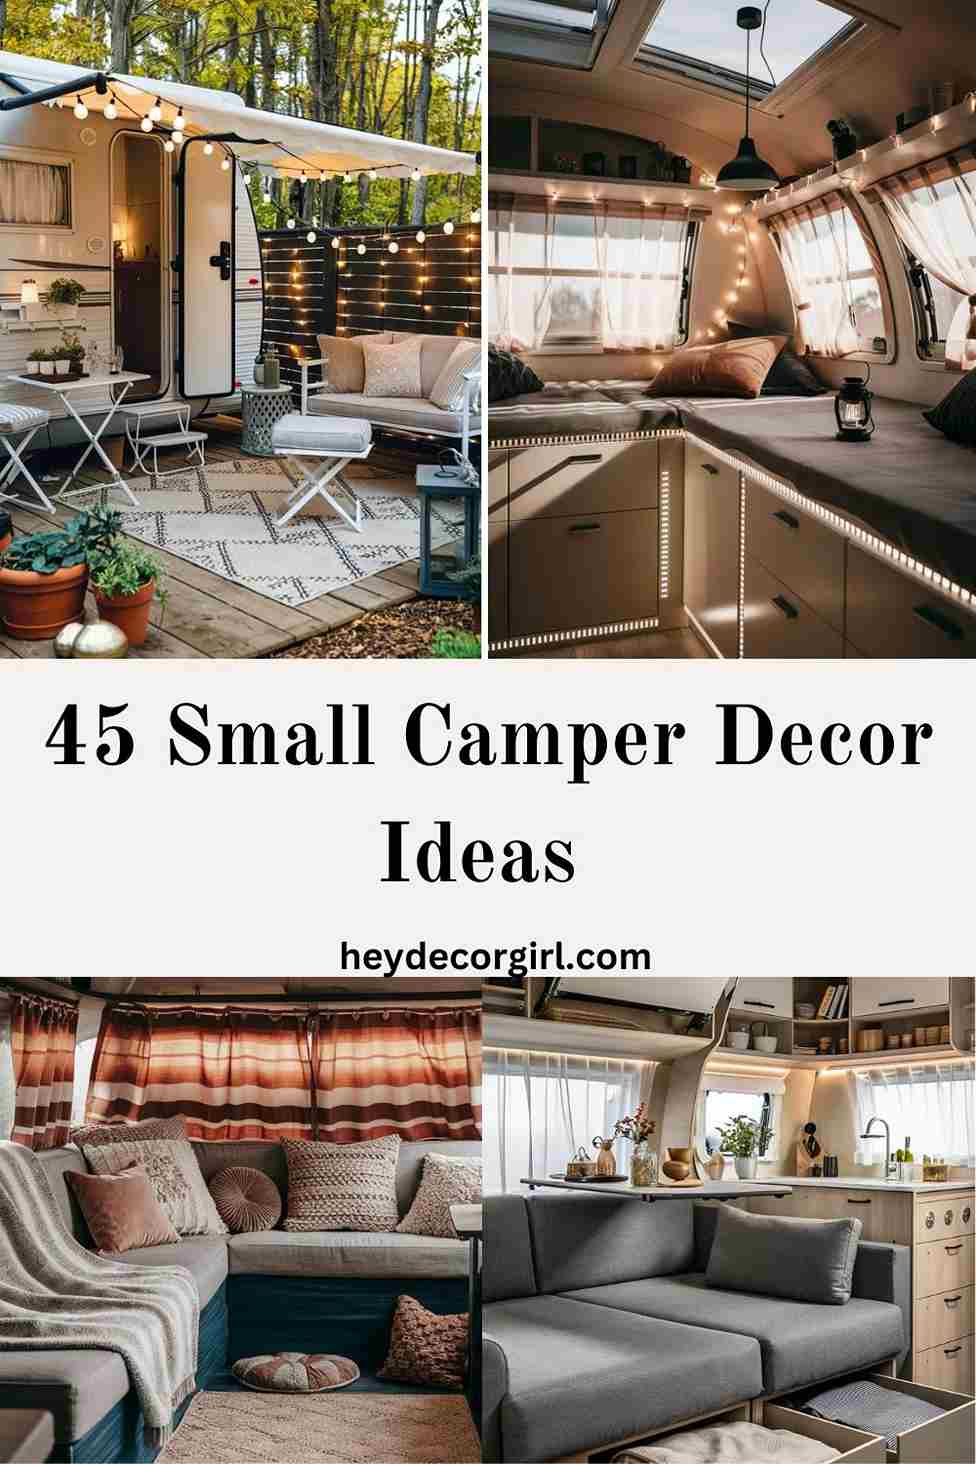
Camper Decor Ideas plays a crucial role in transforming a basic travel trailer into a cozy, functional home away from home. Whether you’re embarking on a weekend getaway or a cross-country adventure, the right decor can make your camper feel inviting and comfortable, enhancing your overall travel experience. From maximizing limited space to adding personal touches, the decor choices you make can greatly impact both the aesthetics and functionality of your mobile living space.
we aim to provide you with 35 stunning camper decor ideas that will help you create a stylish and practical environment. Whether you’re looking for smart storage solutions, cozy textiles, or innovative ways to personalize your space, these ideas will inspire you to elevate your camper’s interior and make every journey enjoyable.
Stunning Camper Decor Ideas
1. Maximizing Space with Smart Storage Solutions
When it comes to camper living, efficient use of space is key. Clever storage solutions can help you make the most of every inch in your compact environment. Here are some ideas to help you achieve a well-organized and functional camper:
Clever Storage Solutions for Small Camper Spaces
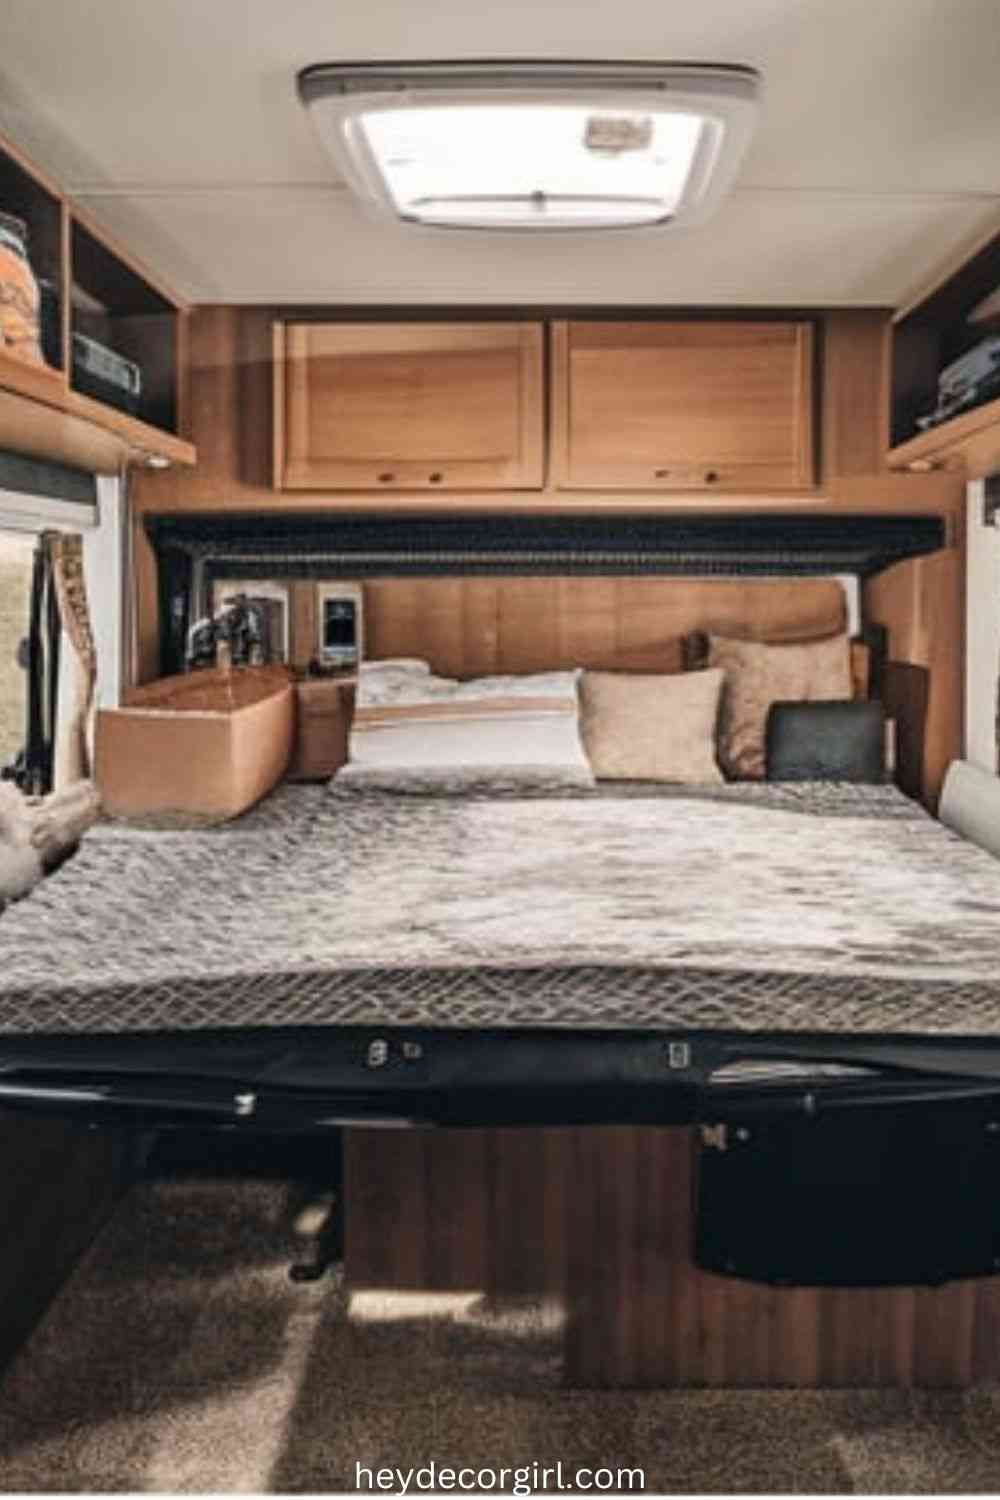
- Under-Bed Storage
- Utilize the space beneath your bed for storing clothing, gear, and other essentials. Consider installing sliding drawers or bins to keep items organized and easily accessible.
- Overhead Cabinets and Shelving
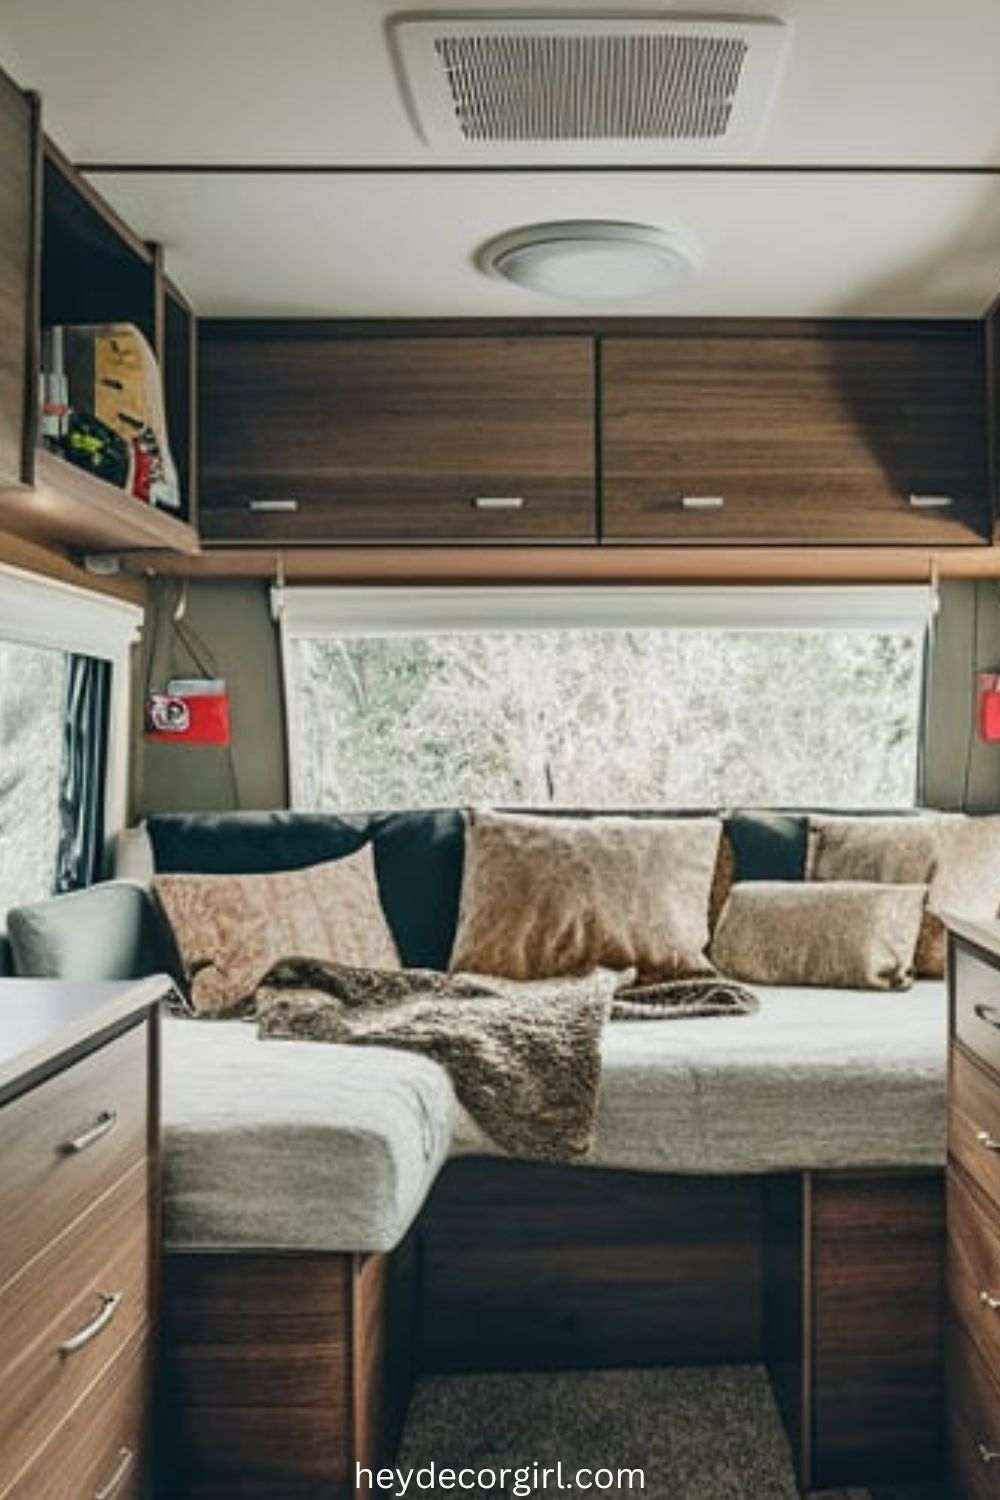
- Install overhead cabinets or shelves above seating and sleeping areas. This not only provides additional storage but also keeps frequently used items within reach.
- Vertical Storage
- Make use of vertical space by adding tall, narrow cabinets or shelves. This approach maximizes storage without taking up too much floor space.
- Magnetic Strips and Hooks
- Use magnetic strips to hold kitchen utensils or tools, and add hooks to walls or doors for hanging items like keys, bags, or jackets. These small additions can free up valuable drawer and cabinet space.
- Collapsible and Stackable Containers
- Opt for collapsible or stackable storage containers to easily store and retrieve items when needed. These containers can be stowed away when not in use to save space.
Use of Multifunctional Furniture and Built-In Storage Compartments
- Convertible Furniture
- Choose furniture pieces that serve multiple purposes, such as a sofa that converts into a bed or a dining table with built-in storage. These versatile options maximize functionality in a small space.
- Storage Ottomans and Benches
- Invest in ottomans or benches with hidden storage compartments. These can be used for seating, while also providing a place to store blankets, books, or other items.
- Built-In Seating with Storage
- Incorporate built-in seating that includes storage underneath. This can be especially useful for storing bedding, extra clothing, or camping gear.
- Pull-Out and Fold-Down Features
- Look for furniture and fixtures that can be pulled out or folded down when needed. For example, a fold-down desk or a pull-out pantry can be used when required and neatly tucked away when not in use.
- Custom Storage Solutions
- Consider customizing storage options to fit your specific needs. This could include built-in cabinetry, drawer systems, or shelving units designed to optimize your camper’s layout.
By implementing these smart storage solutions, you can transform your camper into a well-organized and efficient space, making your travels more enjoyable and stress-free.
2. Cozy Bedding and Textiles
Creating a warm and inviting sleeping area is essential for making your camper feel like a true home. By choosing the right bedding and textiles, you can add comfort and style while enhancing the overall ambiance of your space.
Choosing Comfortable and Stylish Bedding
- High-Quality Bedding
- Select soft, durable bedding materials such as high-thread-count cotton, flannel, or microfiber. Opt for hypoallergenic options if you have sensitivities.
- Choose bedding sets that include fitted sheets, flat sheets, pillowcases, and a cozy comforter or duvet.
- Layered Bedding
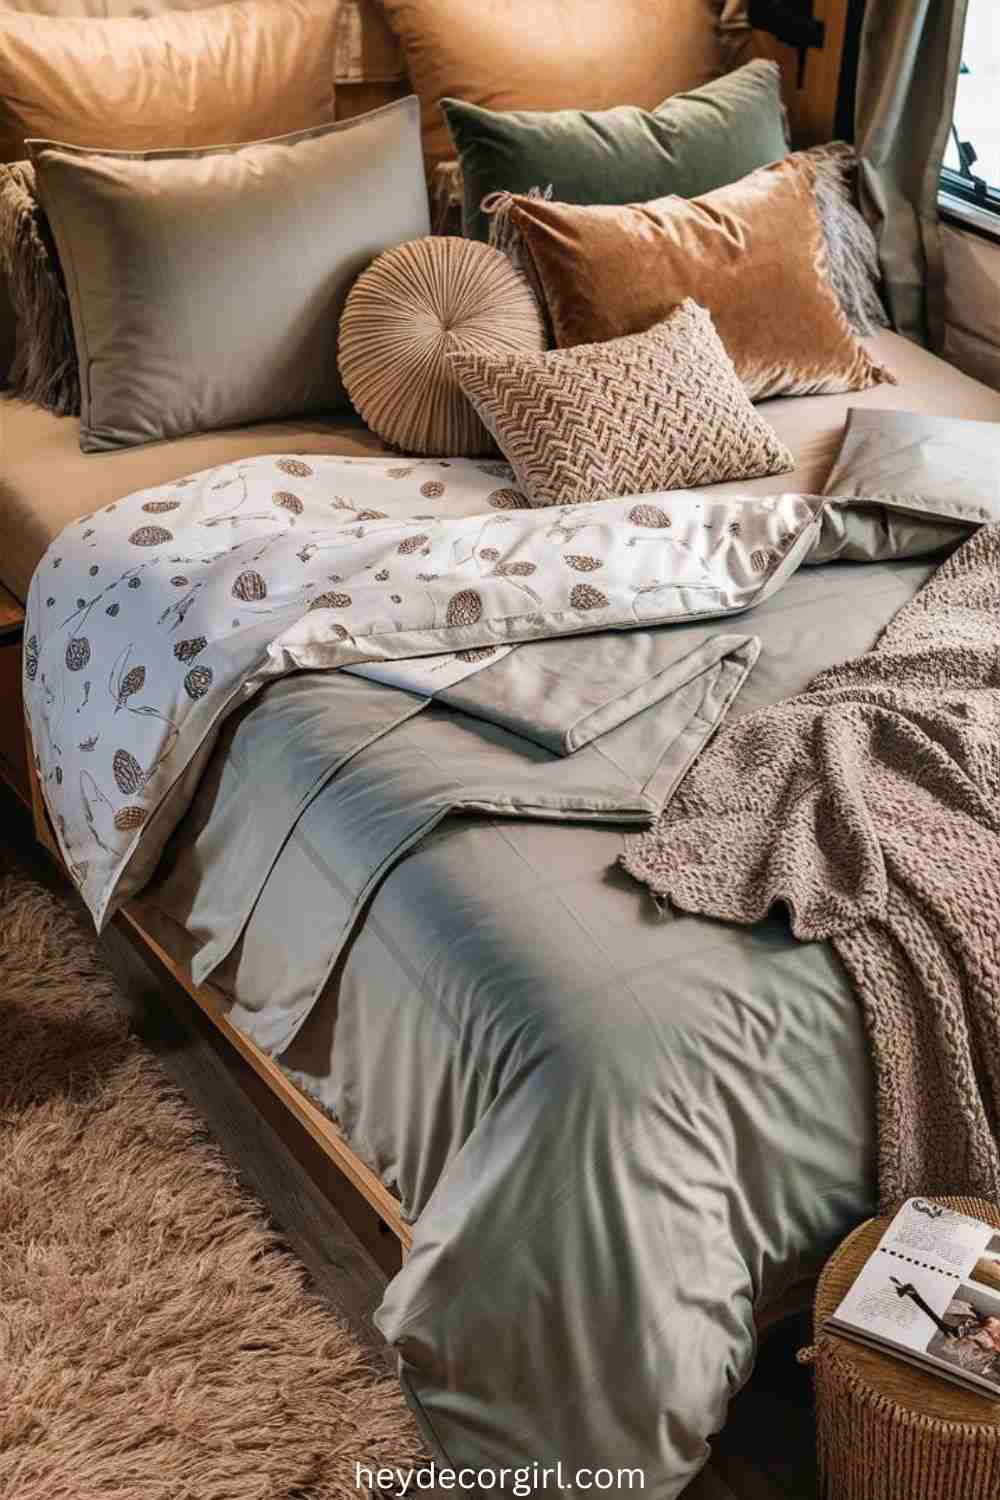
- Layer bedding for added comfort. Use a fitted sheet, followed by a flat sheet, a light blanket, and a warm comforter or duvet. This allows you to adjust layers based on the temperature and your comfort level.
- Coordinated Colors and Patterns
- Pick bedding that complements your camper’s interior color scheme and decor style. Choose patterns that add visual interest, such as stripes, florals, or geometric designs.
- Customizable Bedding
- Consider bedding with features that allow for customization, such as reversible comforters or duvet covers that can be changed based on mood or season.
Incorporating Throw Pillows, Blankets, and Rugs to Add Warmth and Texture
- Throw Pillows
- Add decorative throw pillows to your bed to introduce pops of color and texture. Choose a mix of sizes and shapes, including standard pillows, bolster pillows, and accent pillows with different fabrics or patterns.
- Cozy Throws and Blankets
- Drape soft throws or blankets over the foot of the bed or along the back of seating areas. Opt for materials like knit, fleece, or wool for extra warmth and comfort.
- Layer blankets in complementary colors or patterns for a stylish, cozy look.
- Textured Rugs
- Place a small, plush rug near the bed or in the seating area to add warmth and comfort underfoot. Consider materials like shag, wool, or a cotton blend for a soft feel.
- Choose rugs with patterns or textures that coordinate with your bedding and overall decor.
- Mixing and Matching Textures
- Combine different textures to create a rich, inviting environment. Pair smooth, crisp bedding with chunky knit throws and velvet pillows for a visually appealing and tactilely satisfying space.
- Seasonal Textiles
- Swap out bedding, throw pillows, and blankets to reflect the seasons. Use lighter fabrics and bright colors for summer, and opt for heavier, warmer materials in winter.
By thoughtfully selecting and layering bedding and textiles, you can create a cozy and stylish sanctuary in your camper, making your travel experiences even more enjoyable.
3. Stylish Window Treatments
Window treatments in a camper are not just about privacy—they also play a crucial role in enhancing the overall aesthetic of the space. Choosing the right curtains or blinds can create a cohesive look and make your camper feel more like home. Here’s how to select stylish window treatments that balance functionality and style:
Selecting Curtains or Blinds for Privacy and Aesthetic Appeal
- Privacy and Light Control
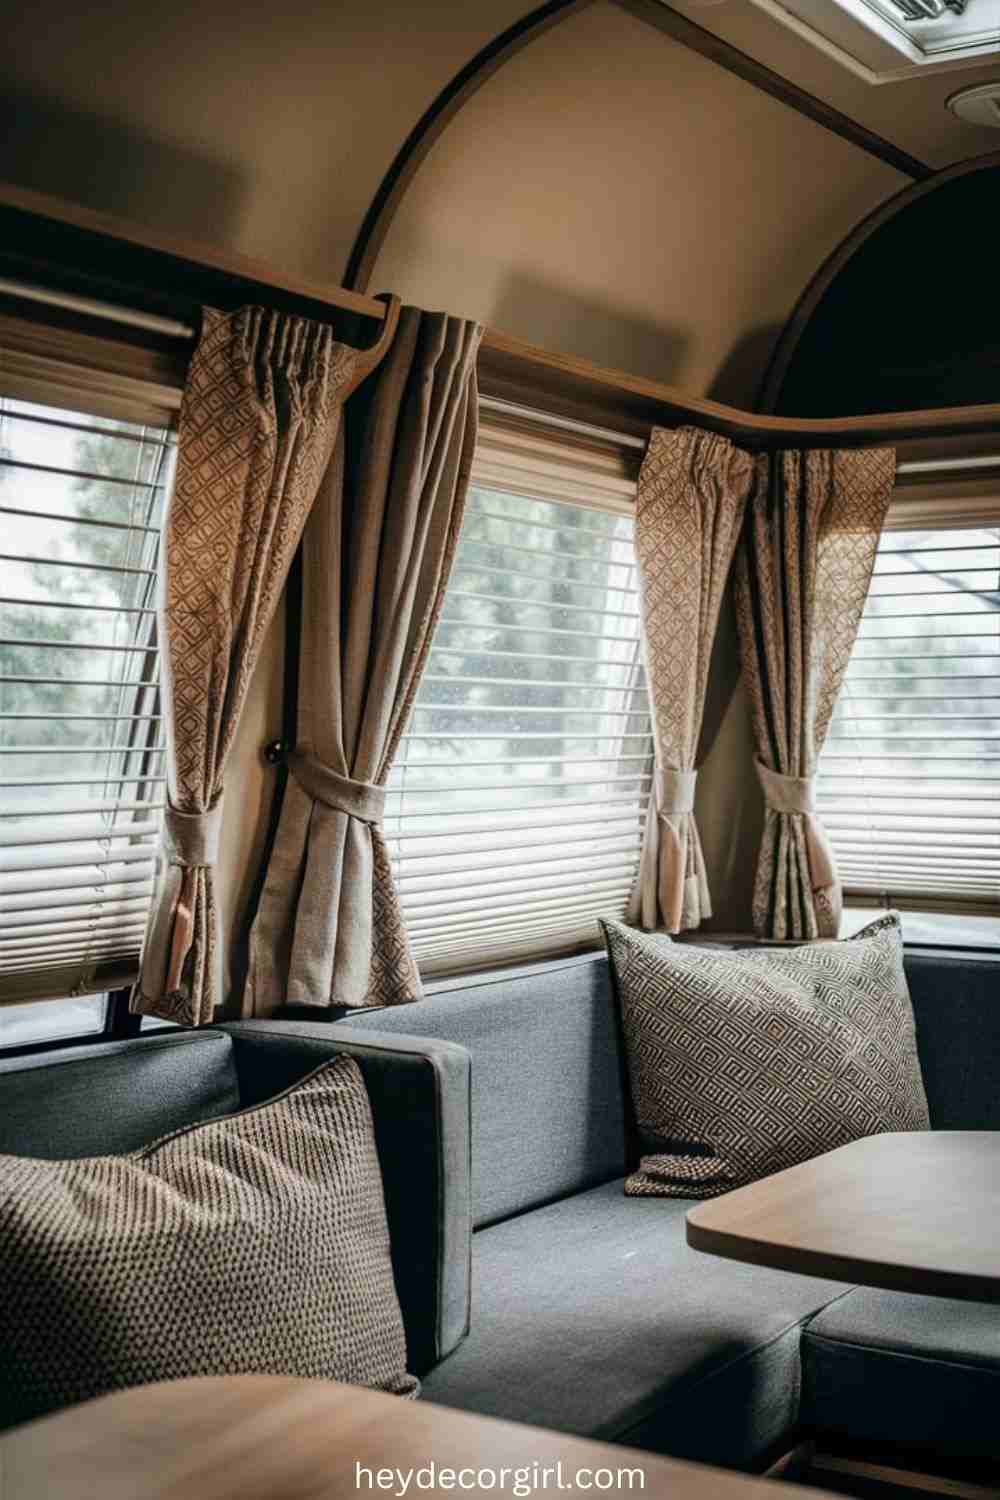
- Blinds: Opt for blinds that offer adjustable light control and privacy. Options include Venetian blinds, roller blinds, or cellular shades, which can be easily adjusted to let in light or block it out.
- Curtains: Choose curtains with a blackout lining if you need to block out light for sleeping or privacy. They can also be layered with sheer curtains for added versatility.
- Durability and Maintenance
- Blinds: Blinds made from materials like aluminum or faux wood are durable and easy to clean, making them ideal for the camper environment.
- Curtains: Select fabrics that are washable and can withstand frequent use. Materials like polyester blends or acrylics are both practical and stylish.
- Space-Saving Options
- Roller Blinds: These take up minimal space and can be rolled up completely when not in use, perfect for small camper windows.
- Curtains on a Track System: Installing curtains on a track system can allow for easy opening and closing, and the tracks can be fitted to save space.
Tips for Choosing Fabrics and Patterns
- Complementing the Camper’s Interior
- Color Coordination: Choose window treatments in colors that complement or match your camper’s interior palette. Neutral tones or coordinating hues can create a cohesive look.
- Patterns: Select patterns that enhance the decor without overwhelming the space. For example, subtle geometric patterns, stripes, or botanical prints can add visual interest while remaining tasteful.
- Creating Visual Balance
- Fabric Choices: Light fabrics like linen or cotton can create an airy, spacious feel, while heavier fabrics like velvet or wool can add warmth and coziness. Consider the climate and how it affects your choice of fabric.
- Texture and Layering: Mix textures for added depth. Combining sheer curtains with heavier drapes or adding a decorative trim can create a stylish layered effect.
- Functional Considerations
- Ease of Operation: Ensure that the window treatments are easy to operate, especially in tight spaces. Cordless options can be a safer choice in a camper.
- Size and Fit: Measure your windows accurately and choose window treatments that fit well. Custom or adjustable options may be necessary for irregularly shaped windows.
- Personal Style
- Custom Details: Add personal touches like decorative tiebacks, curtain rings, or matching valances to enhance the style of your window treatments.
- Seasonal Changes: Consider seasonal options, such as lightweight curtains for summer and heavier, insulated curtains for winter.
By selecting window treatments that balance privacy, functionality, and style, you can enhance your camper’s interior and create a more comfortable and visually appealing living space.
4. Functional and Decorative Lighting
Lighting is essential in a camper for both functionality and ambiance. It can make a small space feel larger and more welcoming while providing practical illumination for daily tasks. Here are some tips for incorporating functional and decorative lighting into your camper:
Types of Lighting Ideal for Campers
- LED Lights
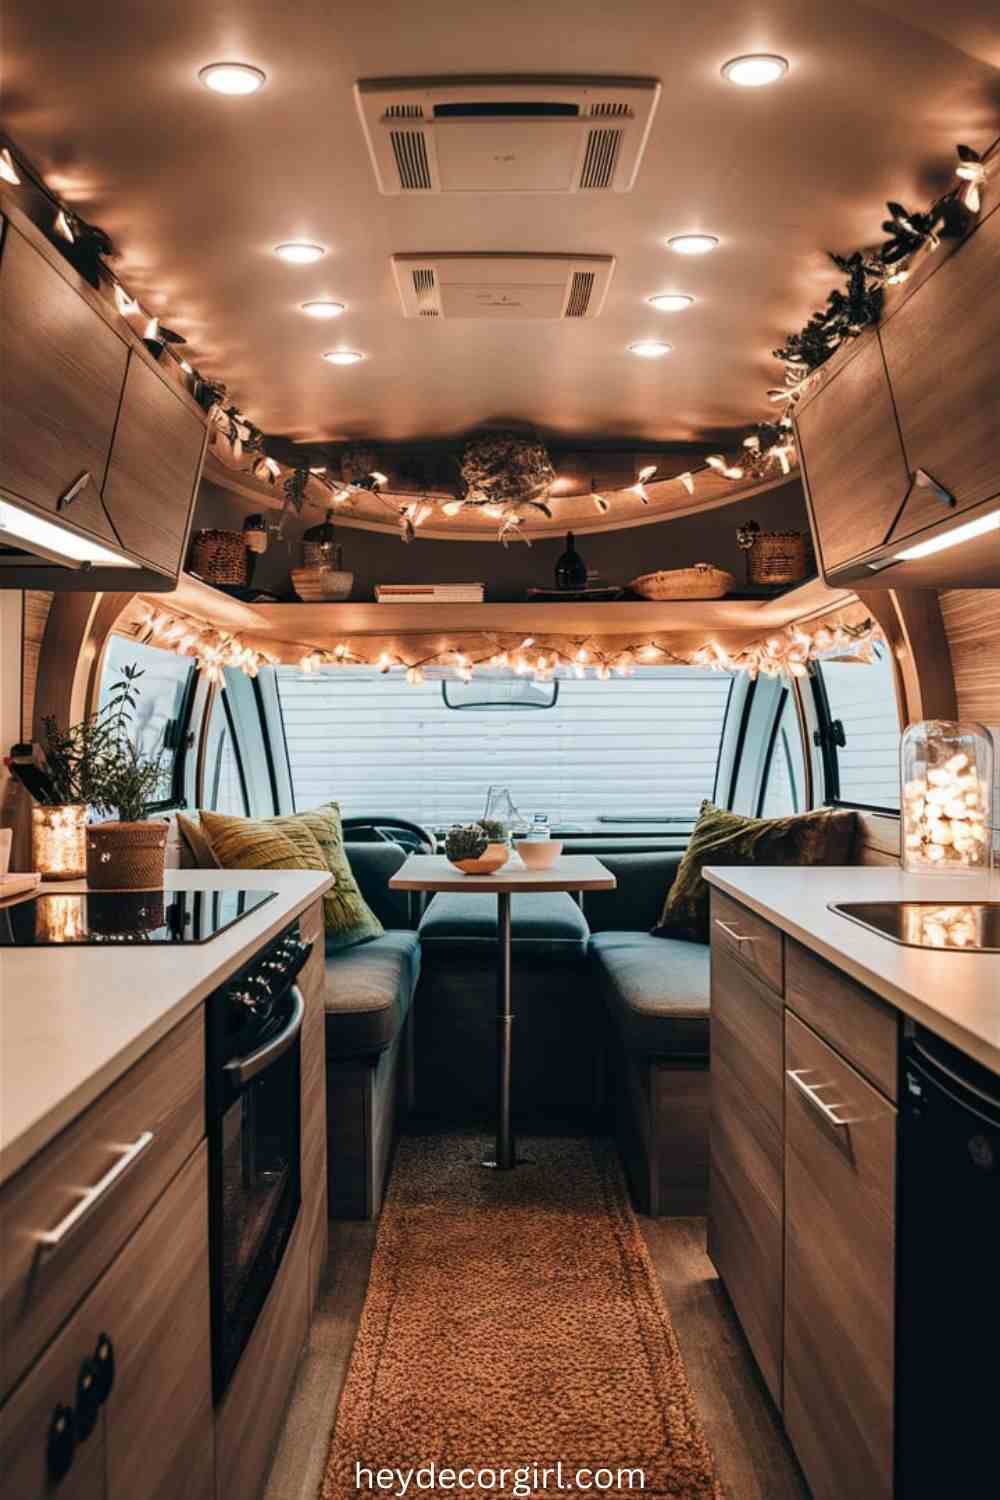
- Recessed Lighting: Install recessed LED lights in the ceiling to provide bright, even illumination without taking up space.
- Strip Lighting: Use LED strip lights under cabinets, along shelves, or around the perimeter of the ceiling to add a modern touch and provide accent lighting.
- Battery-Powered Lights: Opt for battery-operated LED lights for areas where hardwiring isn’t feasible. These can be placed in closets, under beds, or in other hard-to-reach areas.
- String Lights
- Decorative String Lights: Hang string lights along the ceiling, around windows, or across the interior walls to create a cozy, whimsical atmosphere. Choose options with a soft glow for a relaxed, ambient light.
- Fairy Lights: Use fairy lights in jars or as part of a decorative garland to add a touch of magic and charm to the camper’s interior.
- Task Lighting
- Clip-On Lights: Use clip-on LED lights for focused illumination on tasks like reading or cooking. They can be easily moved and adjusted as needed.
- Under-Cabinet Lights: Install under-cabinet lighting in the kitchen area to provide bright, direct light for cooking and cleaning tasks.
- Ambient Lighting
- Dimmer Switches: Incorporate dimmer switches to adjust the brightness of your lights according to the time of day or mood. This flexibility is especially useful in a small space.
- Wall Sconces: Install wall sconces for additional ambient light and a touch of elegance. Choose sconces with adjustable arms to direct light where it’s needed.
Ideas for Creating a Warm and Inviting Ambiance with Lighting
- Layered Lighting
- Combine Light Sources: Use a mix of ambient, task, and decorative lighting to create a well-balanced and inviting atmosphere. Layered lighting helps to define different areas of the camper and adds depth.
- Soft and Warm Tones
- Warm-White Bulbs: Choose warm-white LED bulbs to create a cozy, inviting glow. Avoid harsh, cool-toned lights that can make the space feel sterile.
- Dimmed Lighting: Use dimmable lights to adjust the ambiance from bright and energetic to soft and relaxing.
- Highlighting Key Areas
- Accent Lighting: Highlight specific areas such as artwork, shelves, or architectural features with accent lighting. This draws attention to these elements and adds visual interest.
- Mood Lighting: Incorporate LED lights with color-changing features or use light dimmers to adjust the mood of the space according to your preferences.
- Decorative Fixtures
- Unique Light Fixtures: Choose decorative light fixtures like pendant lights, chandeliers, or lanterns that reflect your personal style and enhance the camper’s decor.
- DIY Light Projects: Get creative with DIY lighting projects, such as custom lamp shades or illuminated decorations, to add a personal touch to the camper’s interior.
- Lighting with Functionality
- Adjustable and Flexible Lighting: Use lighting that can be adjusted or repositioned to suit different activities, such as reading, cooking, or relaxing. Flexibility in lighting ensures practicality and comfort in various scenarios.
By carefully selecting and arranging lighting in your camper, you can create a functional yet stylish environment that enhances both the practical use of the space and the overall ambiance.
5. Personalized Wall Art and Decor
Adding personal touches to the walls of your camper can make it feel more like home and reflect your individual style. Here’s how to creatively personalize your camper’s walls with art, photos, and decals, while keeping in mind the need for lightweight and removable options.
Creative Ways to Personalize Camper Walls
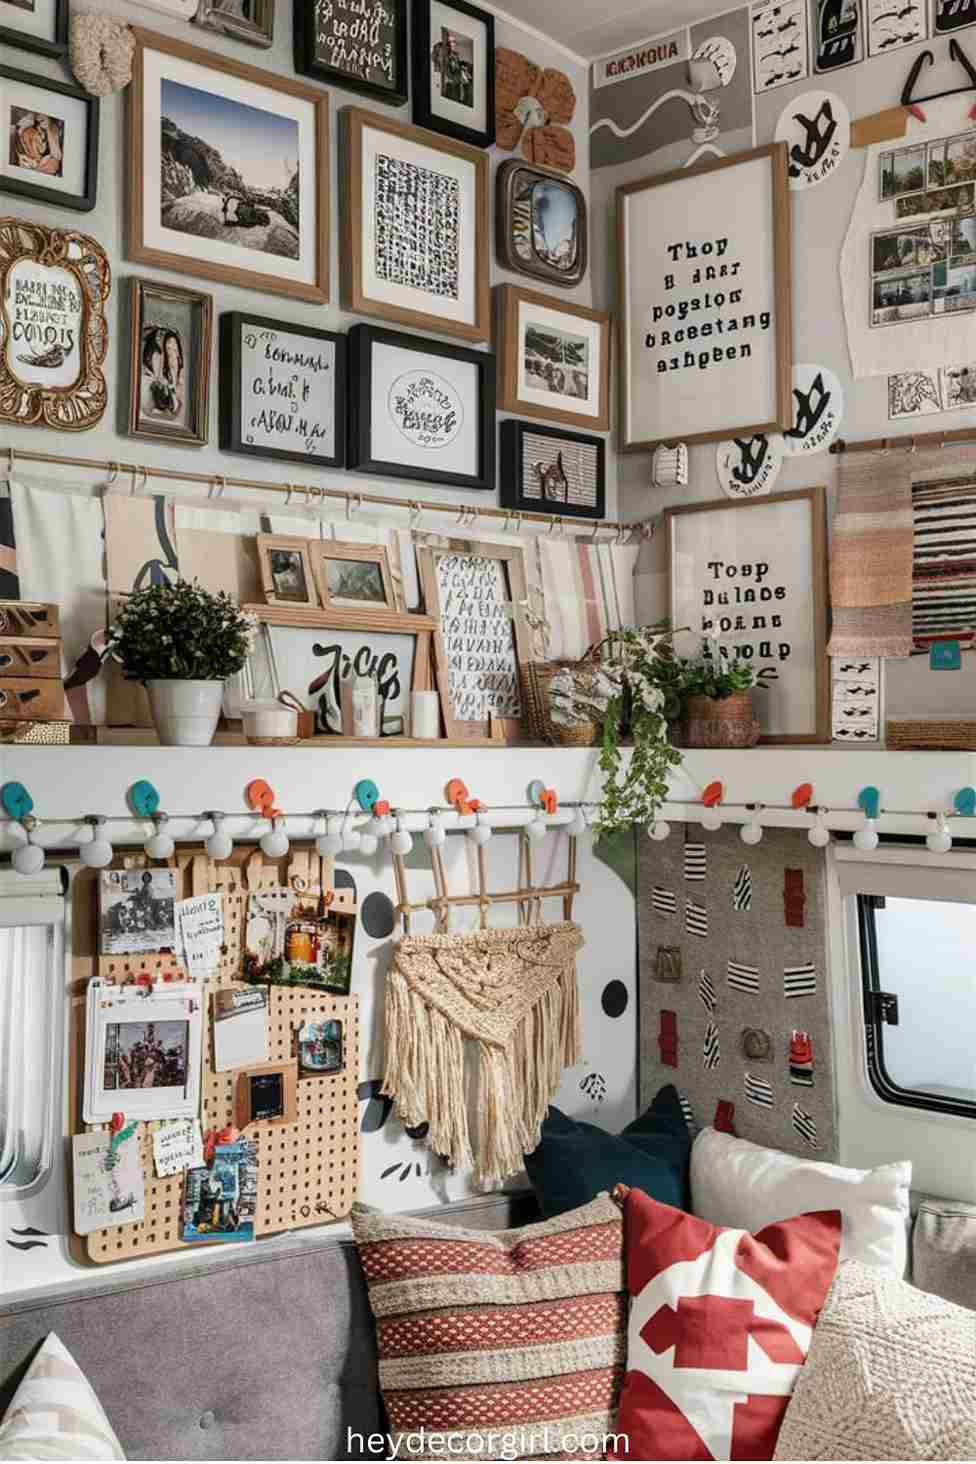
- Gallery Wall
- Photo Frames: Create a gallery wall with framed photos of family, friends, or travel memories. Use a mix of frame sizes and styles for a dynamic look.
- Art Prints: Include art prints or inspirational quotes in stylish frames. Choose pieces that resonate with your taste and enhance the camper’s decor.
- Custom Decals and Stickers
- Wall Decals: Use removable wall decals to add patterns, quotes, or images to your walls. Decals are easy to apply and remove, making them perfect for rental campers or frequent updates.
- Custom Stickers: Design custom stickers with personal motifs or travel themes. Stickers can be applied to walls, cabinets, or other surfaces to add a unique touch.
- DIY Art Projects
- Canvas Prints: Create DIY canvas prints with your favorite photos or artwork. Canvas prints are lightweight and can be easily hung or repositioned.
- Fabric Panels: Use fabric panels with your chosen prints or patterns. These can be mounted on lightweight frames or directly adhered to the walls.
- Hanging Art and Crafts
- Wall Tapestries: Hang lightweight wall tapestries or fabric art to add color and texture. They can be easily hung with adhesive hooks or removable strips.
- Macramé and Woven Art: Incorporate macramé or woven wall hangings for a boho-chic look. These can be hung using removable hooks or nails.
- Memo Boards and Corkboards
- Bulletin Boards: Install a corkboard or memo board to display photos, notes, or travel mementos. Choose lightweight, removable options that can be easily updated.
- Magnetic Boards: Use a magnetic board for a flexible display of photos and notes. Magnetic boards are practical and can be moved or repositioned as needed.
- Personalized Wall Murals
- Removable Wallpaper: Apply removable wallpaper or mural panels to create a feature wall with a custom design. These options are easy to apply and remove without damaging the walls.
- Peel-and-Stick Panels: Use peel-and-stick panels with patterns or textures to create a stylish and personalized backdrop.
Options for Lightweight and Removable Wall Decor
- Adhesive Hooks and Strips
- Removable Hooks: Use adhesive hooks to hang lightweight frames, art, or decor without damaging the walls. They come in various sizes and strengths to hold different items.
- Adhesive Strips: Utilize adhesive strips to mount frames or decor items. They’re easy to remove and won’t leave residue.
- Command Strips
- Picture Hanging Strips: Use Command picture hanging strips for a clean and damage-free way to hang artwork and photos. They come in various sizes and can hold a range of weights.
- Velcro or Magnetic Strips
- Velcro Strips: Attach art or decor using Velcro strips, allowing for easy removal and repositioning.
- Magnetic Strips: Use magnetic strips to create interchangeable displays for photos and art.
- Lightweight Frames and Materials
- Plastic or Foam Frames: Opt for plastic or foam frames that are lighter and easier to handle compared to glass or metal frames.
- Paper and Fabric Art: Choose lightweight paper or fabric-based art that can be easily hung or adhered to the walls.
By incorporating these personalized and versatile wall decor ideas, you can create a unique and comfortable atmosphere in your camper that reflects your personality and makes every trip feel special.
6. Space-Saving Furniture Options
In a camper, maximizing space without sacrificing comfort is key. Innovative furniture designs that are foldable, stackable, or convertible can help you make the most of your limited space while ensuring a functional and cozy living environment. Here’s how to incorporate space-saving furniture into your camper:
Innovative Furniture Designs for Space Savings and Comfort
- Foldable Furniture
- Foldable Tables: Compact tables that can be folded down or up when not in use. Ideal for dining or workspaces, they can be tucked away to save space.
- Fold-Down Wall Beds: Wall-mounted beds that fold down when needed and fold back up to create more living space during the day.
- Stackable Furniture
- Stackable Chairs: Chairs designed to stack on top of each other, allowing for easy storage when not in use. Perfect for dining areas or additional seating.
- Stackable Storage Bins: Bins or baskets that can be stacked vertically, providing flexible storage solutions without occupying too much floor space.
- Convertible Furniture
- Sofa Beds: Sofas that can be converted into beds, offering dual functionality for seating and sleeping. Ideal for maximizing space in a small living area.
- Murphy Beds: Wall-mounted beds that fold up into a cabinet or wall when not in use, freeing up space for other activities during the day.
- Convertible Ottomans: Ottomans that can be opened up to provide additional seating or storage, and sometimes even convert into a small bed or table.
- Multi-Functional Furniture
- Storage Benches: Benches with built-in storage compartments, which can be used for seating and to store items like bedding, tools, or outdoor gear.
- Drop-Leaf Tables: Tables with hinged sides that can be folded down to create a smaller surface area, perfect for compact dining spaces.
- Compact and Modular Designs
- Modular Seating: Modular seating arrangements that can be reconfigured to suit different needs and spaces. They often include built-in storage.
- Compact Appliances: Furniture that integrates compact appliances, like a microwave or mini-fridge, to reduce the need for additional kitchen furniture.
- Hidden Storage Solutions
- Under-Bed Storage: Beds with storage drawers or compartments underneath, ideal for keeping clothing, gear, or other essentials out of sight.
- Built-In Shelving: Shelves built into walls or furniture, providing additional storage space without using up floor area.
Examples of Space-Saving Furniture Pieces
- Foldable Dining Table: A wall-mounted table that folds down when needed and folds up to save space when not in use.
- Convertible Sofa Bed: A sofa that easily transforms into a bed, providing a comfortable seating area and an extra sleeping space.
- Murphy Bed Cabinet: A wall-mounted bed that folds up into a sleek cabinet, freeing up floor space during the day.
- Stackable Chairs: Chairs that can be stacked and stored neatly when not in use, perfect for dining or lounging.
- Storage Ottoman: An ottoman with a hinged top that opens to reveal hidden storage, ideal for keeping small items organized.
- Drop-Leaf Table: A table with hinged sides that can be folded down to save space when not in use, ideal for small dining areas.
By incorporating these space-saving furniture options, you can create a comfortable and efficient living space in your camper, making the most of every square inch while ensuring a cozy and functional environment.
7. Color Schemes and Paint Ideas
Choosing the right color scheme and paint ideas for your camper can dramatically transform its interior, making it feel more spacious and personalized. Here’s a guide to popular color palettes and tips for painting and updating your camper’s interior:
Popular Color Palettes for Camper Interiors
- Neutral Tones
- Whites and Beiges: Crisp whites, soft beiges, and warm taupes create a light, airy atmosphere and make small spaces feel larger. They provide a versatile backdrop for various decor styles.
- Greys: Light or mid-tone greys offer a modern, sophisticated look that pairs well with other colors and textures.
- Coastal Colors
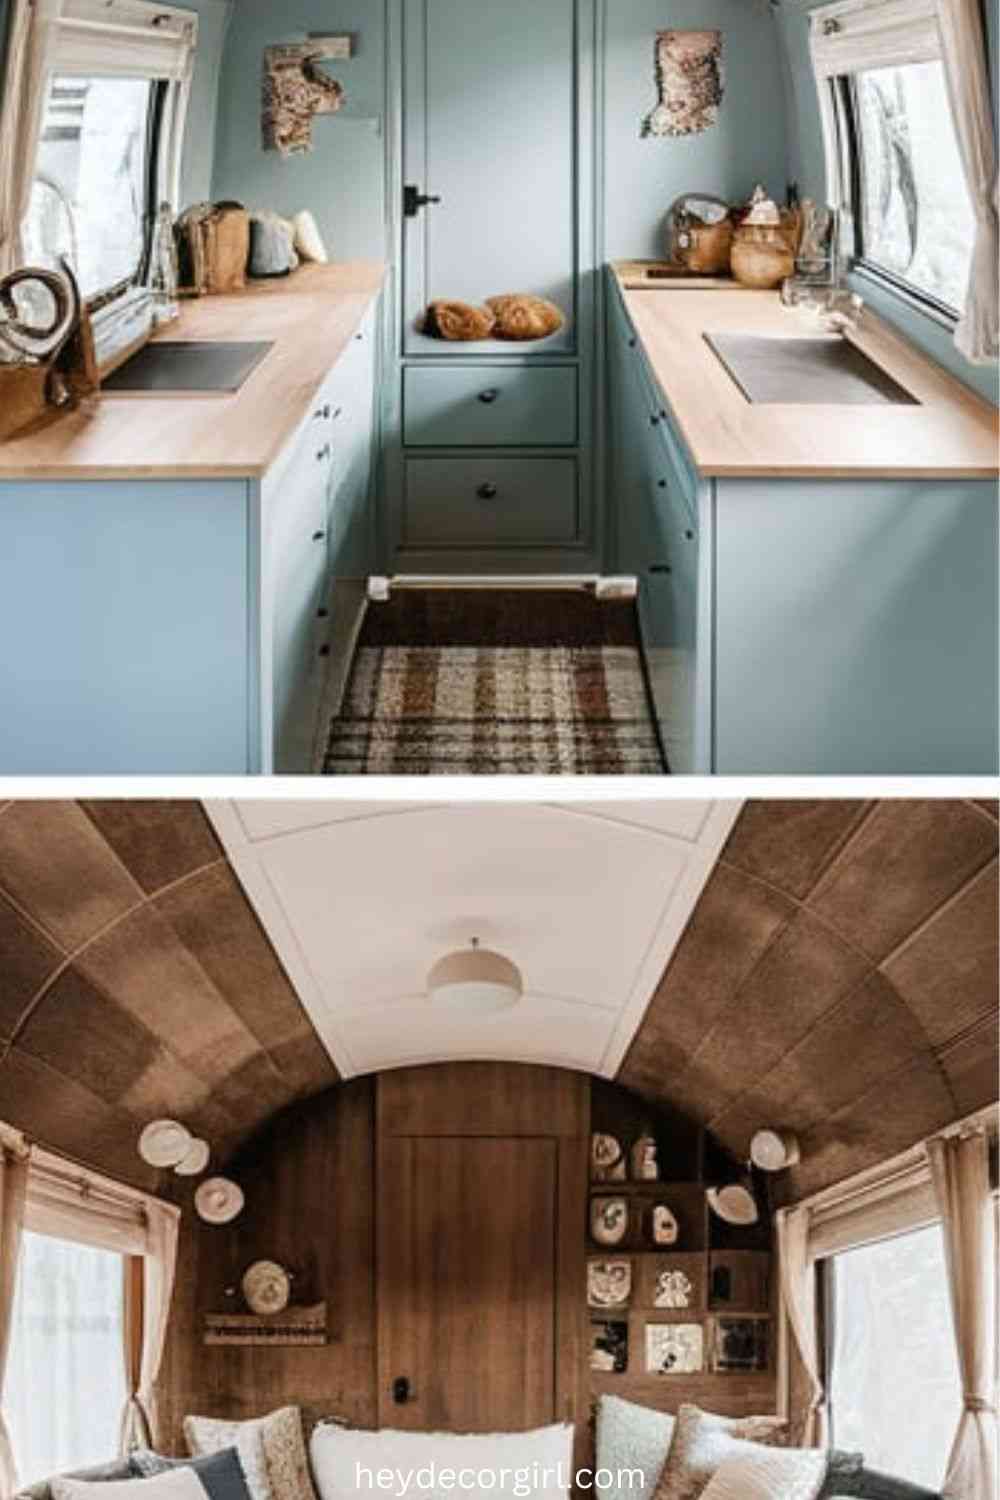
- Blues and Greens: Soft blues, seafoam greens, and aqua shades evoke a coastal, relaxed vibe. These colors can make your camper feel like a beachside retreat.
- Sandy Neutrals: Complement coastal colors with sandy beiges or taupes for a balanced, beach-inspired look.
- Earthy Tones
- Warm Browns and Greens: Earthy tones like terracotta, olive green, and rich browns create a cozy, grounded feel, ideal for a rustic or nature-inspired decor.
- Rustic Reds: Deep, earthy reds can add warmth and character, complementing wooden or natural finishes.
- Bold and Vibrant Colors
- Accent Walls: Use bold colors like navy blue, emerald green, or deep plum on accent walls to create focal points and add drama.
- Bright Accents: Incorporate vibrant hues like sunny yellow, coral, or teal through accessories or smaller decor elements for a lively touch.
- Modern Pastels
- Soft Pinks and Blues: Pastel colors such as blush pink, mint green, and sky blue offer a fresh, modern look. These colors work well in small spaces, adding a sense of lightness and charm.
- Neutral Pastels: Combine pastels with neutral tones like white or grey for a soft, balanced palette.
Tips for Painting and Updating the Camper’s Interior
- Choose High-Quality Paint
- Durability: Opt for high-quality, washable, and durable paints to withstand the wear and tear of camper life. Look for paint specifically designed for RVs or interiors with high traffic.
- Finish: Select a finish that suits your needs. Semi-gloss or satin finishes are durable and easier to clean, while matte finishes offer a softer look.
- Test Paint Samples
- Swatches: Before committing to a color, test samples on small areas of the walls to see how the colors look in different lighting conditions and against existing decor.
- Lighting Effects: Consider how natural and artificial light affects the paint color. Colors can appear differently depending on the lighting.
- Prep the Surface
- Cleaning and Sanding: Clean and sand the surfaces to ensure the paint adheres properly. Remove any old wallpaper or peeling paint for a smooth finish.
- Primer: Apply a primer to ensure even coverage, especially if you’re making a significant color change or painting over a darker color.
- Use Painter’s Tape
- Clean Lines: Use painter’s tape to mask off areas that you don’t want to paint, such as trim, windows, and corners. This helps achieve clean, sharp lines.
- Consider Accent Walls
- Focal Points: Create accent walls with bold or contrasting colors to add depth and interest. Accent walls can highlight specific areas, such as behind the bed or seating area.
- Incorporate Textures and Patterns
- Wallpaper or Decals: Add texture or patterns with removable wallpaper, decals, or stenciled designs. These can provide visual interest without overwhelming the space.
- Textured Paint: Consider using textured paint or techniques like sponging or rag-rolling for added dimension.
- Update Accessories
- Coordinated Decor: Match your new color scheme with updated accessories such as cushions, curtains, and rugs. This creates a cohesive look and enhances the overall design.
- Maintain Light and Airy Feel
- Light Colors: Opt for lighter shades to keep the space feeling open and airy. Dark colors can make small spaces feel more enclosed if not balanced with good lighting.
By selecting the right color scheme and following these tips, you can create a camper interior that reflects your personal style while maximizing the space and enhancing comfort.
8. Stylish Kitchen and Dining Areas
Creating a functional and visually appealing kitchen and dining area in your camper involves careful planning and smart design choices. Here’s how to decorate and organize these spaces while selecting compact and stylish accessories:
Ideas for Decorating and Organizing the Camper’s Kitchen and Dining Space
- Compact and Functional Layout
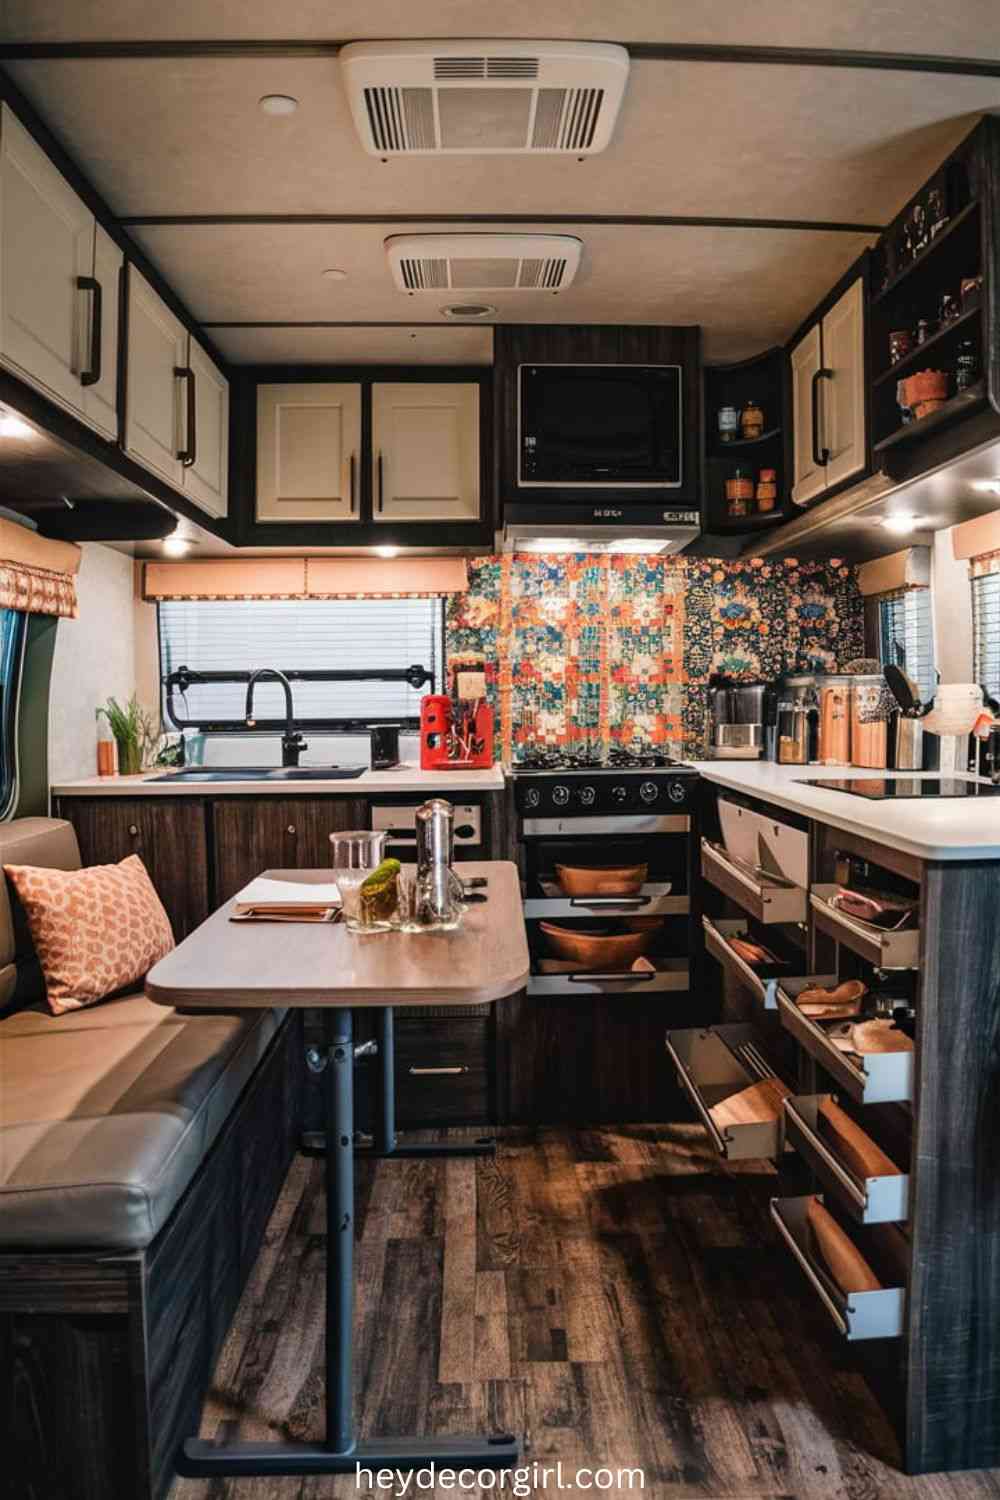
- Maximize Counter Space: Use wall-mounted shelves, racks, or hanging organizers to keep counters clear. Incorporate pull-out or fold-down countertops for additional prep space.
- Multi-Functional Furniture: Choose a dining table that doubles as additional counter space or storage. Consider foldable or drop-leaf tables to save space when not in use.
- Efficient Storage Solutions
- Cabinet Organizers: Utilize cabinet organizers like pull-out shelves, lazy Susans, or stackable bins to keep kitchen essentials accessible and neatly arranged.
- Drawer Inserts: Use drawer inserts or dividers to keep utensils, cutlery, and cooking tools organized and easy to find.
- Magnetic Strips: Install magnetic strips for knives or spice racks to free up drawer and counter space.
- Stylish Backsplashes and Wall Treatments
- Peel-and-Stick Tiles: Add a stylish backsplash with peel-and-stick tiles that are easy to apply and remove. Choose patterns or colors that complement your overall decor.
- Decorative Panels: Consider using decorative panels or vinyl wraps for a quick and stylish update to your kitchen walls.
- Compact and Stylish Kitchen Accessories
- Collapsible Items: Opt for collapsible kitchen accessories like measuring cups, colanders, and dish racks that save space when not in use.
- Compact Appliances: Choose compact appliances such as a small coffee maker, toaster, or multi-function cooker that fit neatly into the limited space.
- Smart Lighting Solutions
- Under-Cabinet Lighting: Install LED strip lights or puck lights under cabinets to brighten up the countertops and create a warm ambiance.
- Overhead Fixtures: Use stylish overhead lighting fixtures that provide ample illumination and enhance the space’s aesthetic.
- Decorative and Functional Tableware
- Nested Tableware: Use nested or stackable tableware to save space in cabinets and drawers. Choose designs that match the camper’s color scheme for a cohesive look.
- Portable Utensil Holders: Use portable or magnetic utensil holders to keep cutlery organized and easily accessible during meals.
- Cozy Dining Area
- Comfortable Seating: Add cushioned seats or a small bench with storage underneath for added comfort and practicality. Choose fabrics that are durable and easy to clean.
- Table Decor: Incorporate simple table decor such as a small vase, cloth napkins, or a decorative runner to enhance the dining experience.
- Personal Touches
- Themed Decor: Add personal touches with themed decor, such as vintage-style kitchenware, or travel-inspired accessories that reflect your style.
- Greenery: Include small potted plants or herbs that can be grown in compact containers, adding a fresh and natural element to the space.
Selecting Compact and Stylish Kitchen Accessories
- Space-Saving Tools
- Multi-Use Gadgets: Invest in multi-use kitchen gadgets like a combination can opener, bottle opener, and knife sharpener to reduce clutter.
- Foldable Cookware: Choose foldable cookware such as a collapsible sink or cutting board that can be easily stored away.
- Stylish Storage Containers
- Airtight Containers: Use sleek, airtight containers for storing dry goods, keeping them fresh and organized. Opt for clear containers to easily identify contents.
- Magnetic Containers: Consider magnetic spice containers or jars that can be attached to metal surfaces, saving valuable cabinet space.
- Decorative Details
- Chic Utensil Holders: Use stylish utensil holders or jars that complement the camper’s decor while keeping cooking tools within easy reach.
- Modern Dish Racks: Choose a modern dish rack or drying mat that fits the kitchen’s aesthetic while efficiently draining and drying dishes.
By incorporating these ideas and accessories, you can create a stylish and functional kitchen and dining area in your camper, making meal preparation and dining enjoyable and efficient.
9. Outdoor Living Spaces
Creating a cozy and functional outdoor living area can extend your living space and enhance your enjoyment of the great outdoors. Here’s how to set up a welcoming and stylish outdoor area with rugs, furniture, and lighting:
Creating a Cozy and Functional Outdoor Area
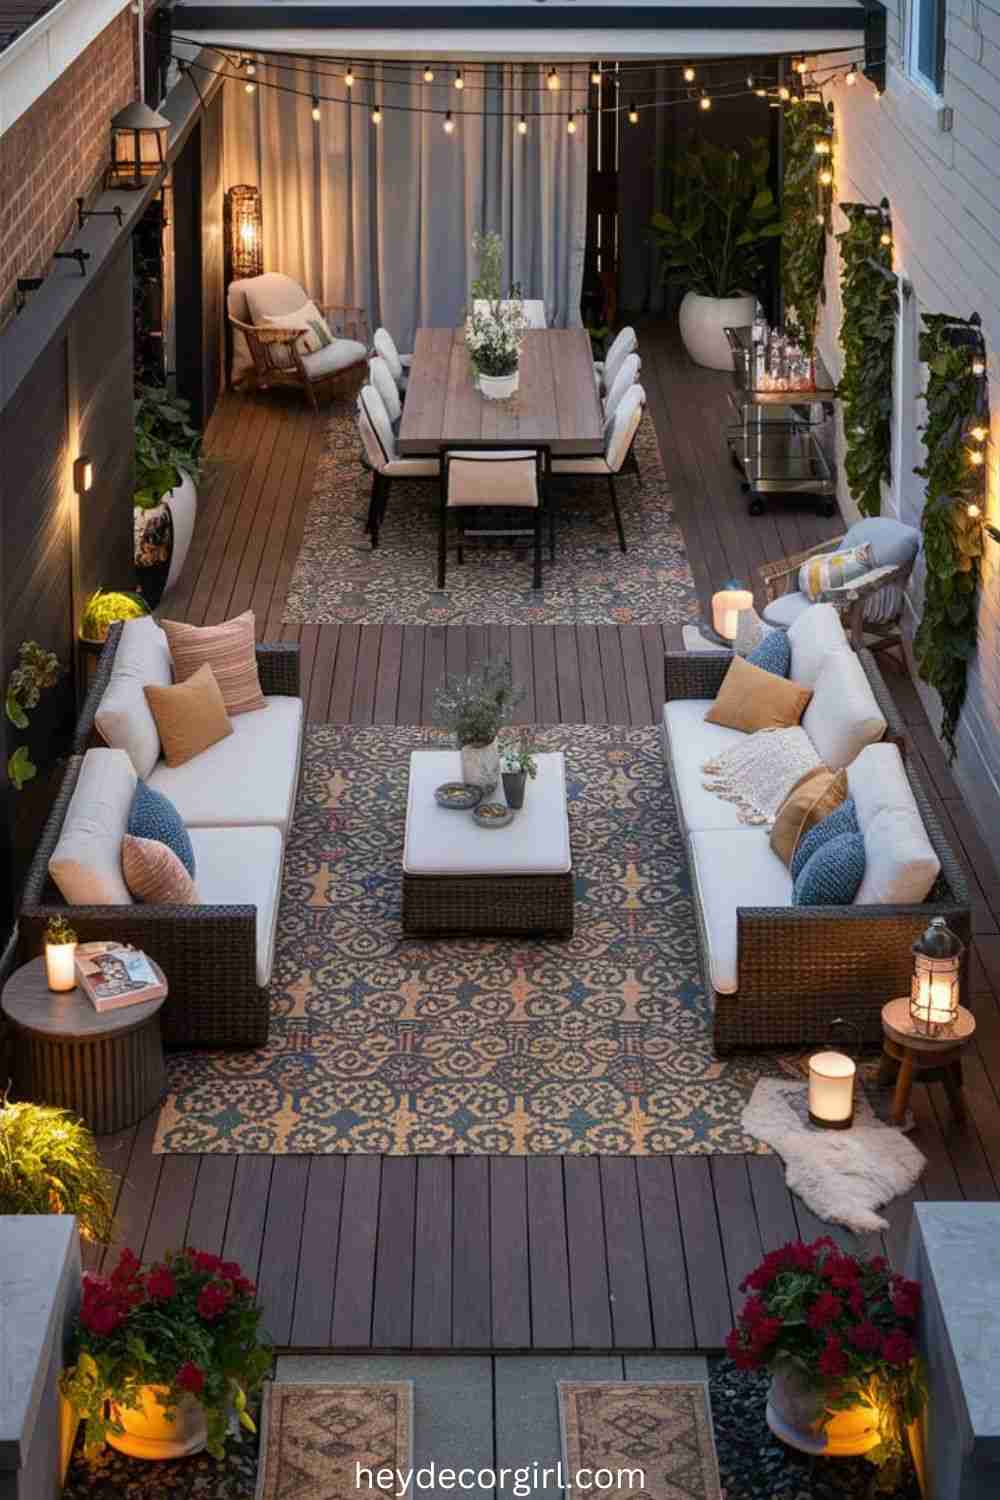
- Selecting Outdoor Furniture
- Comfortable Seating: Choose weather-resistant furniture such as cushioned sofas, armchairs, or lounge chairs made from durable materials like wicker, teak, or metal. Look for furniture with removable and washable cushions for easy maintenance.
- Functional Tables: Opt for tables that suit your needs, whether it’s a coffee table for relaxing, a dining table for meals, or a bar cart for entertaining. Consider multi-functional furniture that can be used for different purposes.
- Modular Seating: Modular outdoor seating that can be rearranged to suit different occasions or accommodate more guests.
- Incorporating Outdoor Rugs
- Durable Materials: Choose rugs made from outdoor-friendly materials like polypropylene or polyester that are resistant to moisture and fading. These materials are easy to clean and maintain.
- Size and Placement: Select a rug size that fits the seating area and defines the space. Position the rug under the main seating area to anchor the space and create a cohesive look.
- Enhancing with Lighting
- String Lights: Hang string lights or fairy lights above the seating area to create a warm, inviting ambiance. Opt for weatherproof options designed for outdoor use.
- Lanterns and Candles: Use lanterns or candles on tables or hanging from hooks to add a cozy, flickering light. Consider battery-operated or solar-powered options for convenience.
- Outdoor Floor Lamps: Place outdoor-rated floor lamps or torches to provide additional lighting and enhance the atmosphere.
- Adding Textiles and Accessories
- Throw Pillows: Use outdoor throw pillows to add color, pattern, and comfort to seating areas. Choose fabrics that are resistant to fading and moisture.
- Blankets and Throws: Incorporate outdoor blankets or throws for added warmth on cooler evenings. Look for materials that are durable and weather-resistant.
- Setting Up a Relaxing Space
- Privacy Screens: Add privacy screens or outdoor curtains to create a more secluded and intimate space. These can also provide shade and protection from the wind.
- Shade Solutions: Use umbrellas, pergolas, or awnings to provide shade and make the space comfortable during sunny days.
- Creating an Entertaining Area
- Outdoor Dining: Set up an outdoor dining area with a table and chairs for meals and gatherings. Add a tablecloth and outdoor tableware for a complete dining experience.
- Outdoor Kitchen: If space allows, consider adding an outdoor kitchen or grill station for cooking and entertaining. Include countertop space, a sink, and storage if possible.
- Incorporating Greenery and Plants
- Potted Plants: Use potted plants or planters to add greenery and color to the space. Choose plants that thrive in outdoor conditions and complement the overall decor.
- Vertical Gardens: Install vertical planters or wall-mounted gardens to save space and add a touch of nature.
- Personal Touches
- Decorative Items: Incorporate decorative items such as outdoor art, sculptures, or lanterns to add personality and style to the space.
- Outdoor Rugs and Mats: Use outdoor rugs or mats at entry points to keep the space clean and add an additional layer of comfort.
Tips for Setting Up an Inviting Space for Relaxing and Entertaining
- Define Zones
- Separate Areas: Create distinct zones for lounging, dining, and cooking to maximize functionality and enhance the flow of the space.
- Layer Lighting
- Ambient and Task Lighting: Combine ambient lighting with task lighting to create a well-lit and functional outdoor area. Use dimmable options for flexibility in setting the mood.
- Maintain Comfort
- Weather Protection: Use furniture covers or store items indoors during inclement weather to protect them and extend their lifespan.
- Seasonal Adjustments: Update textiles and accessories seasonally to reflect different times of the year and keep the space feeling fresh and inviting.
- Enhance the View
- View Enhancements: Arrange furniture to take advantage of the best views or natural surroundings, creating a more enjoyable and scenic outdoor experience.
By thoughtfully selecting furniture, rugs, lighting, and accessories, you can create a cozy and functional outdoor living space that is perfect for relaxing and entertaining.
10. Seasonal Decor Ideas
Adapting your decor for different seasons and holidays can keep your space fresh and festive throughout the year. Here’s how to easily update and swap out decor to reflect the changing seasons and special occasions:
Adapting Decor for Different Seasons and Holidays
- Spring
- Color Palette: Use pastel colors like soft pinks, light blues, and fresh greens. Incorporate floral patterns and bright, cheerful tones.
- Decor Elements: Add spring-themed decorations such as floral wreaths, colorful throw pillows, and light, airy curtains. Place potted spring flowers or small vases with fresh blooms around the space.
- Holiday Touches: For Easter, include decorative eggs, bunny-themed items, and pastel-colored tableware.
- Summer
- Color Palette: Opt for bright and vibrant colors such as sunny yellows, ocean blues, and vivid greens. Incorporate nautical themes or tropical prints.
- Decor Elements: Use lightweight, breathable fabrics for cushions and throws. Add outdoor elements like seashells, beach-inspired decor, and summer-themed table settings.
- Holiday Touches: For the Fourth of July, use red, white, and blue decor, including flags, bunting, and themed tableware.
- Autumn
- Color Palette: Embrace warm, rich colors like burnt oranges, deep reds, and golden yellows. Incorporate earthy tones and natural textures.
- Decor Elements: Add autumnal decorations such as pumpkin centerpieces, cozy blankets, and fall-themed wreaths. Use dried leaves, pinecones, and acorns as table or mantle decor.
- Holiday Touches: For Halloween, include spooky decorations like jack-o’-lanterns, bats, and ghosts. For Thanksgiving, use harvest-themed decor, including cornucopias and autumn leaves.
- Winter
- Color Palette: Choose cool, crisp colors like icy blues, snowy whites, and deep greens. Incorporate metallic accents such as silver, gold, or bronze.
- Decor Elements: Add cozy, warm touches with thick, knitted throws, and festive holiday decorations. Use winter-themed decor like snowflakes, pinecones, and frosted branches.
- Holiday Touches: For Christmas, include a decorated tree, stockings, and festive lights. For New Year’s, use shimmering decor, confetti, and celebratory elements.
Tips for Easy Updates and Swaps
- Seasonal Textiles
- Swap Out Cushions and Throws: Change your throw pillows and blankets to reflect the season’s colors and patterns. Store off-season textiles and rotate them as needed.
- Change Table Linens: Update tablecloths, runners, and placemats to match the current season or holiday theme.
- Decorative Accents
- Seasonal Centerpieces: Replace centerpieces on tables and mantels with seasonal items. For example, swap a summer seashell arrangement for a fall pumpkin centerpiece.
- Holiday-Themed Items: Incorporate holiday-specific decorations such as ornaments, garlands, and themed figurines. Swap these out for each holiday or special occasion.
- Wall Art and Prints
- Change Artwork: Rotate wall art or prints to match the season. Use seasonal motifs such as flowers for spring, leaves for autumn, and snowflakes for winter.
- Decorative Wreaths: Hang seasonal wreaths on doors or walls, changing them according to the time of year or holiday.
- Lighting
- Seasonal Lighting: Adjust lighting to suit the season. Use bright, colorful lights for summer and warm, cozy lights for winter. Incorporate holiday-themed lighting like string lights for Christmas.
- Outdoor Decor
- Seasonal Planters: Update outdoor planters and garden decorations to match the season. For example, use summer blooms, fall mums, or winter evergreens.
- Holiday Yard Decorations: Change outdoor decorations for holidays like Halloween, Christmas, or Independence Day.
- DIY and Craft Projects
- Seasonal Crafts: Engage in DIY projects to create seasonal decor items such as hand-painted pumpkins, homemade ornaments, or festive garlands.
- Upcycled Decor: Repurpose or update old decor items to fit the current season or holiday theme.
- Easy Storage Solutions
- Organize Seasonal Decor: Store seasonal decor in clearly labeled bins to make it easy to swap items in and out. Use clear containers to easily view contents.
By incorporating these seasonal decor ideas and tips, you can keep your space vibrant and festive year-round with minimal effort.
FAQ
1. What are some essential tips for decorating a camper?
- Maximize Space: Use multifunctional furniture and smart storage solutions to make the most of limited space.
- Choose Lightweight Decor: Opt for lightweight and removable decor items to keep the camper manageable.
- Focus on Comfort: Incorporate cozy textiles, comfortable bedding, and functional accessories to create a homey feel.
2. How can I make my camper feel more like home?
- Personalize Your Space: Add personal touches such as photos, artwork, and decor that reflects your style.
- Use Textiles: Incorporate throw pillows, blankets, and rugs to add warmth and comfort.
- Functional Lighting: Install warm and inviting lighting to create a cozy ambiance.
3. What are some space-saving furniture options for campers?
- Foldable and Convertible Furniture: Look for pieces that can be folded away or converted into different uses, such as a fold-down table or a bed that transforms into seating.
- Stackable Furniture: Use stackable chairs or tables that can be easily stored when not in use.
- Built-In Storage: Opt for furniture with built-in storage compartments to reduce clutter.
4. How can I decorate a small camper kitchen?
- Compact Accessories: Use compact and multi-functional kitchen tools and appliances.
- Organize Vertically: Utilize wall-mounted shelves and racks to free up counter space.
- Stylish Storage: Choose attractive storage solutions like clear containers or magnetic spice racks to keep the space neat.
5. What are some tips for adding cozy bedding and textiles in a camper?
- Choose Comfortable Fabrics: Opt for soft, durable bedding materials that can withstand travel.
- Layer Textiles: Use layers such as sheets, blankets, and throw pillows to add warmth and texture.
- Coordinate Colors: Select textiles that complement the camper’s overall color scheme for a cohesive look.
6. How can I update my camper’s decor for different seasons?
- Seasonal Textiles: Swap out throw pillows, blankets, and rugs for seasonal colors and patterns.
- Holiday Decorations: Add holiday-themed decor items such as wreaths, ornaments, and festive tableware.
- Change Wall Art: Update wall art or prints to match the season or holiday theme.
7. What types of window treatments are best for a camper?
- Lightweight Curtains: Use lightweight, easy-to-clean curtains that provide privacy and match your decor.
- Blinds or Shades: Consider blinds or shades that can be adjusted for light control and privacy.
- Custom Solutions: Use custom or adjustable window treatments to fit the unique sizes of camper windows.
8. How can I create a functional and stylish outdoor living space for my camper?
- Durable Furniture: Choose weather-resistant outdoor furniture that is both comfortable and stylish.
- Outdoor Rugs: Use durable outdoor rugs to define and enhance the outdoor space.
- Lighting: Incorporate string lights, lanterns, or outdoor-rated floor lamps to create a cozy atmosphere.
9. What are some ideas for personalizing camper walls?
- Wall Art: Hang lightweight artwork or prints that reflect your style.
- Decals or Stickers: Use removable decals or stickers to add a touch of personalization without permanent changes.
- Photos: Display personal photos in lightweight frames to make the space feel more like home.
10. How can I keep my camper organized and clutter-free?
- Smart Storage Solutions: Use built-in storage, stackable bins, and hanging organizers to keep items neatly stored.
- Declutter Regularly: Regularly assess and declutter to prevent accumulation of unnecessary items.
- Multi-Functional Items: Opt for furniture and decor that serve multiple purposes to maximize space efficiency.
Hi, I’m Richa, the creative mind and passionate soul behind Hey Decor Girl. With a bachelor’s degree in Inter-space Design and a deep love for transforming spaces, I’ve dedicated my career to bringing style, comfort, and personality into homes. As an interior designer and architect, I’ve had the pleasure of crafting unique living environments that reflect the individuality of those who live in them.
At Hey Decor Girl, I share my expertise in all things home decor—from cozy living room makeovers to rustic farmhouse designs and everything in between. My mission is to inspire you to create spaces that not only look stunning but also feel like home. Whether you’re looking for the latest trends or timeless classics, I’m here to guide you every step of the way. Let’s make your dream home a reality, one stylish detail at a time.
Camper Decor Camper Decor Ideas
Last modified: September 4, 2024
![Hey Decor Girl [Latest Trending Decor Design Ideas]](https://heydecorgirl.com/wordpress/wp-content/uploads/2024/08/Heygirldecor-Logo.png)
