Written by 1:28 pm Christmas Decor

20+ Stunning DIY Christmas Decorations Ideas

DIY Christmas Decorations Ideas
  • Save
Spread the love

DIY Christmas Decorations Ideas bring a special touch to the holiday season, offering a delightful way to express creativity and personal style. The joy of creating your own decorations not only allows you to customize your festive atmosphere but also provides an opportunity to craft meaningful memories with family and friends. Whether you’re assembling wreaths, making ornaments, or designing unique centerpieces, each project adds a layer of warmth and character to your home.

The importance of personal touches in holiday décor cannot be overstated. These handmade creations reflect your personality and values, transforming ordinary spaces into cozy, inviting environments filled with love and holiday cheer. Incorporating elements that resonate with your family traditions or aesthetic preferences helps create a festive ambiance that is truly unique. Embracing DIY decorations allows you to celebrate the season in a way that honors both your creativity and the cherished moments spent with loved ones.

Stunning DIY Christmas Decorations Ideas

1. Themed Decor Categories

When it comes to DIY Christmas decorations, embracing a specific theme can elevate your holiday decor and create a cohesive atmosphere in your home. Here are some popular themes to consider for your DIY projects:

1. Rustic Charm

Rustic-themed decorations draw inspiration from the natural beauty of the outdoors, often featuring elements like wood, burlap, and pinecones. You can create charming rustic wreaths adorned with dried flowers, handmade wooden ornaments, and garlands crafted from twine and evergreen sprigs. This theme is perfect for those who want to evoke a cozy, cabin-like atmosphere during the holidays.

2. Modern Minimalism

For a sleek and contemporary look, modern minimalism focuses on simplicity and clean lines. Use a limited color palette—think whites, blacks, and metallics—to create striking decorations. DIY projects might include geometric ornaments made from clear acrylic, simple candle holders, and monochromatic table settings. The emphasis here is on understated elegance, allowing each piece to stand out without overwhelming the senses.

3. Traditional Classic

Traditional Christmas decor is all about nostalgia and time-honored motifs. Incorporate classic colors like red, green, and gold, and use materials such as velvet and satin for a touch of luxury. DIY decorations can include handcrafted ornaments that mimic vintage styles, garlands made from popcorn or cranberries, and an elaborate, decorated Christmas tree. This theme is perfect for those who cherish holiday traditions and want to create a warm, inviting atmosphere.

4. Whimsical Wonderland

For a fun and playful approach, whimsical decor embraces vibrant colors, quirky patterns, and imaginative designs. Think of DIY projects like colorful paper ornaments, whimsical snowman decorations, and fantastical garlands made from felt or fabric. This theme encourages creativity and is perfect for families with children, adding a sense of joy and wonder to the holiday season.

5. Vintage Elegance

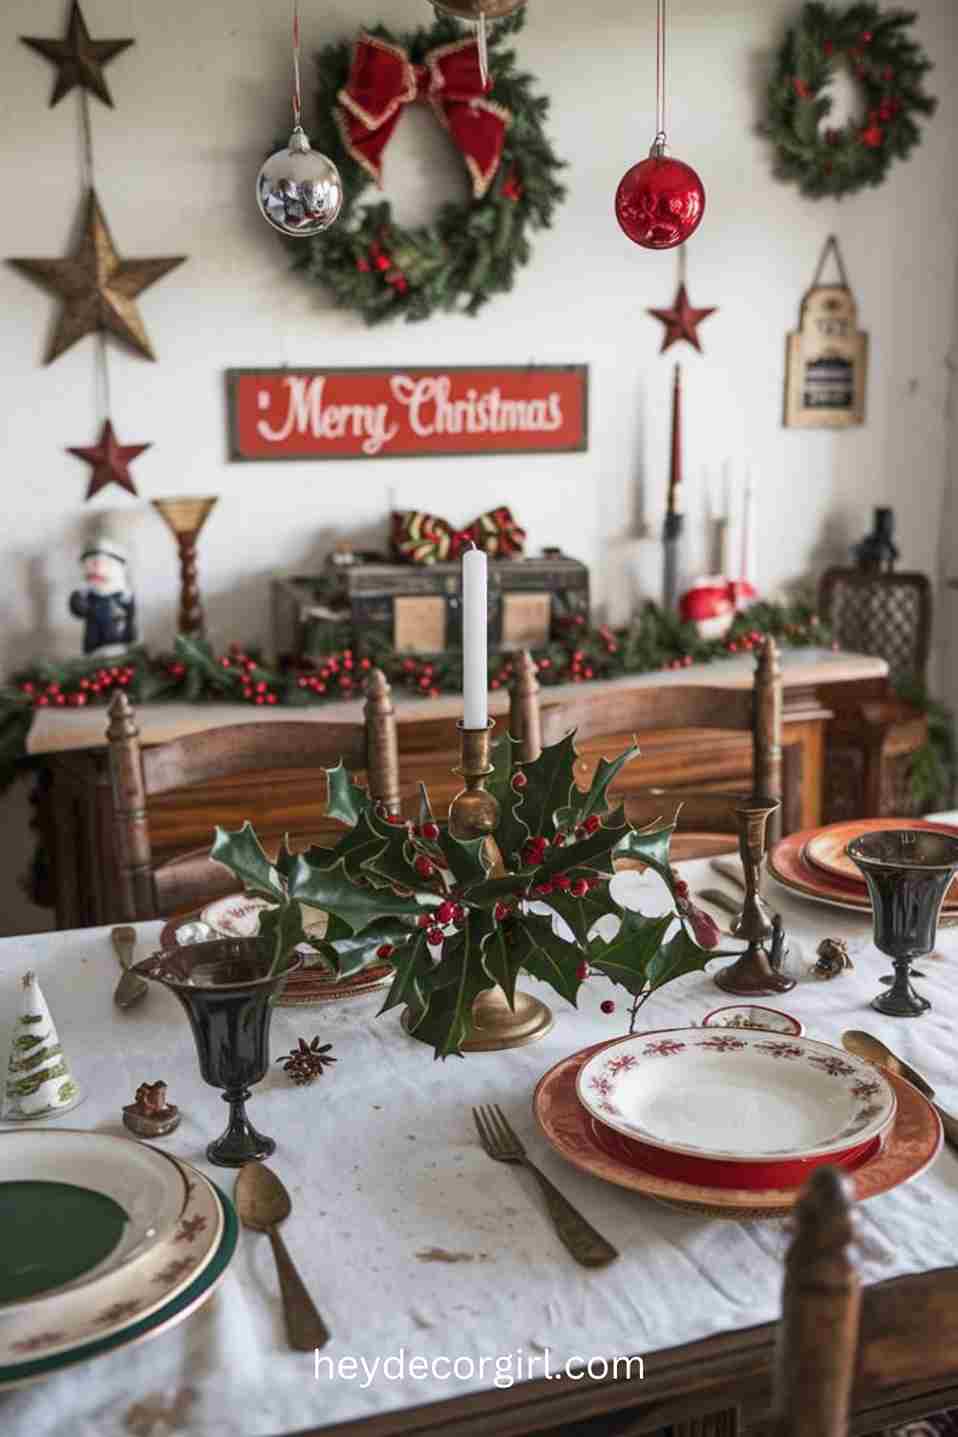
Drawing inspiration from past decades, vintage-themed decorations bring a sense of nostalgia to your home. Use lace, old-fashioned ornaments, and muted color palettes reminiscent of bygone eras. DIY projects could include repurposing antique items as decor, creating a vintage-style advent calendar, or crafting unique centerpieces using vintage china. This theme appeals to those who appreciate the charm and character of historical decor.

By selecting a theme for your DIY Christmas decorations, you can create a visually appealing and cohesive look that reflects your personal style. Whether you prefer the rustic charm of nature, the sleek lines of modern minimalism, or the nostalgic allure of vintage elegance, there’s a theme to suit every taste and preference, making your holiday season even more special.

2. DIY Christmas Wreaths

Creating your own Christmas wreath is a delightful way to add a personal touch to your holiday decor. Wreaths can be crafted from a variety of materials, with natural elements and whimsical designs providing endless possibilities. Here are some ideas for DIY Christmas wreaths that will enhance your festive spirit.

1. Wreaths from Natural Elements

Natural elements like greenery, pinecones, and berries can create stunning, organic wreaths that embody the essence of the season.

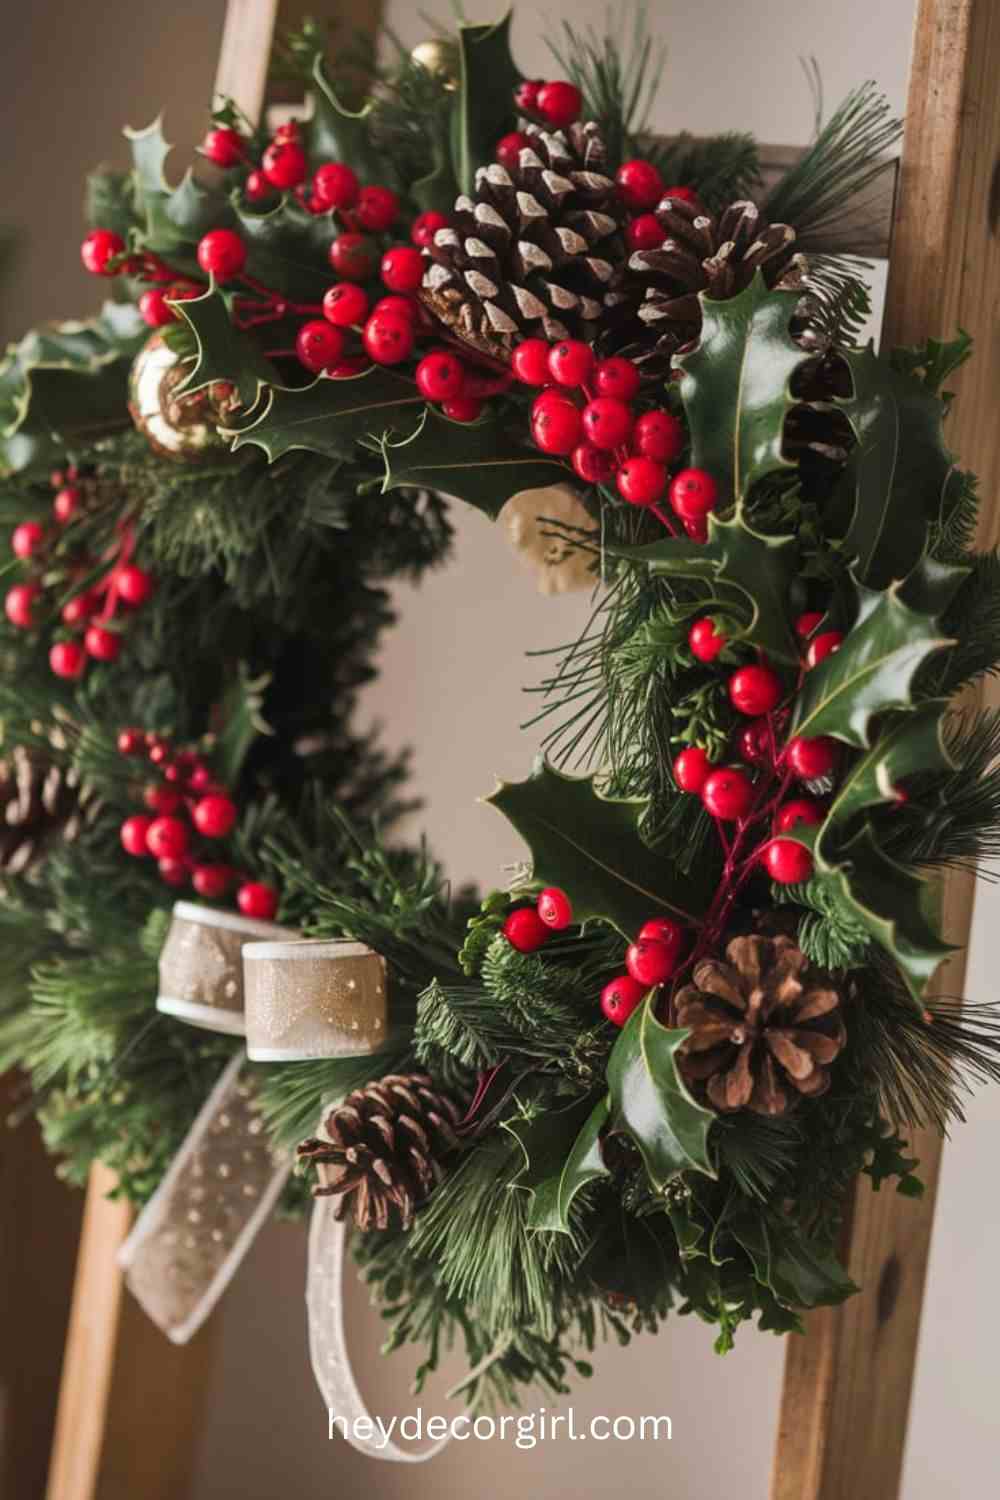
  • Evergreen Wreath: Start with a base made from a wire frame or a foam ring. Attach fresh or faux evergreen branches, layering them to create a full, lush look. Add clusters of pinecones, holly, or red berries for a pop of color. To enhance the wreath, tie a burlap or satin ribbon into a bow and attach it at the bottom or top.
  • Pinecone Wreath: Collect a variety of pinecones—large, small, and different shapes. Arrange them on a circular base, gluing or wiring them into place. You can spray-paint some pinecones in metallic colors for an elegant touch or leave them natural for a rustic vibe. Accent your wreath with additional elements like twigs or dried citrus slices for extra texture and interest.
  • Dried Flower Wreath: Use dried flowers such as lavender, eucalyptus, or grasses to create a unique wreath. Arrange the flowers in clusters and attach them to your base. This type of wreath adds a soft, fragrant element to your decor and can be customized with seasonal colors like deep reds or whites.

2. Whimsical or Themed Wreaths

For those looking to inject a bit of fun and creativity into their holiday decor, themed and whimsical wreaths are an excellent choice.

  • Ornament Wreath: Gather a collection of colorful Christmas ornaments in various sizes and shapes. Use a foam wreath form as your base and hot glue the ornaments all over it, creating a vibrant and playful look. You can mix and match colors and textures for a more eclectic feel, or stick to a specific color scheme for a more coordinated appearance.
  • Candy Cane Wreath: Craft a sweet wreath by using actual candy canes or faux versions. Arrange the candy canes in a circular shape and secure them together with a strong adhesive. You can embellish this wreath with ribbon, faux peppermint candies, or even miniature gifts to enhance the theme.
  • Themed Wreaths: Choose a theme that reflects your personality or interests. For example, if you love skiing, you could create a wreath adorned with miniature skis, snowflakes, and winter greens. A beach-themed wreath could include seashells and sand dollars, perfect for those who prefer a coastal aesthetic during the holidays.

By crafting your own Christmas wreaths from natural elements or whimsical themes, you can create unique decorations that reflect your style and add warmth to your home. Whether you prefer the classic look of greenery or the playful charm of themed decorations, the options are endless, allowing you to express your creativity and holiday spirit.

3. Festive Table Centerpieces

Table centerpieces are essential for creating an inviting and festive atmosphere during the holiday season. They serve as the focal point for your dining table, setting the tone for gatherings and celebrations. Here are some creative ideas for holiday centerpieces that incorporate candles, fruits, and seasonal flowers, along with a detailed guide for crafting a winter wonderland-themed centerpiece.

1. Candle and Fruit Centerpieces

Combining candles and fruits creates a vibrant and aromatic centerpiece that beautifully reflects the holiday spirit.

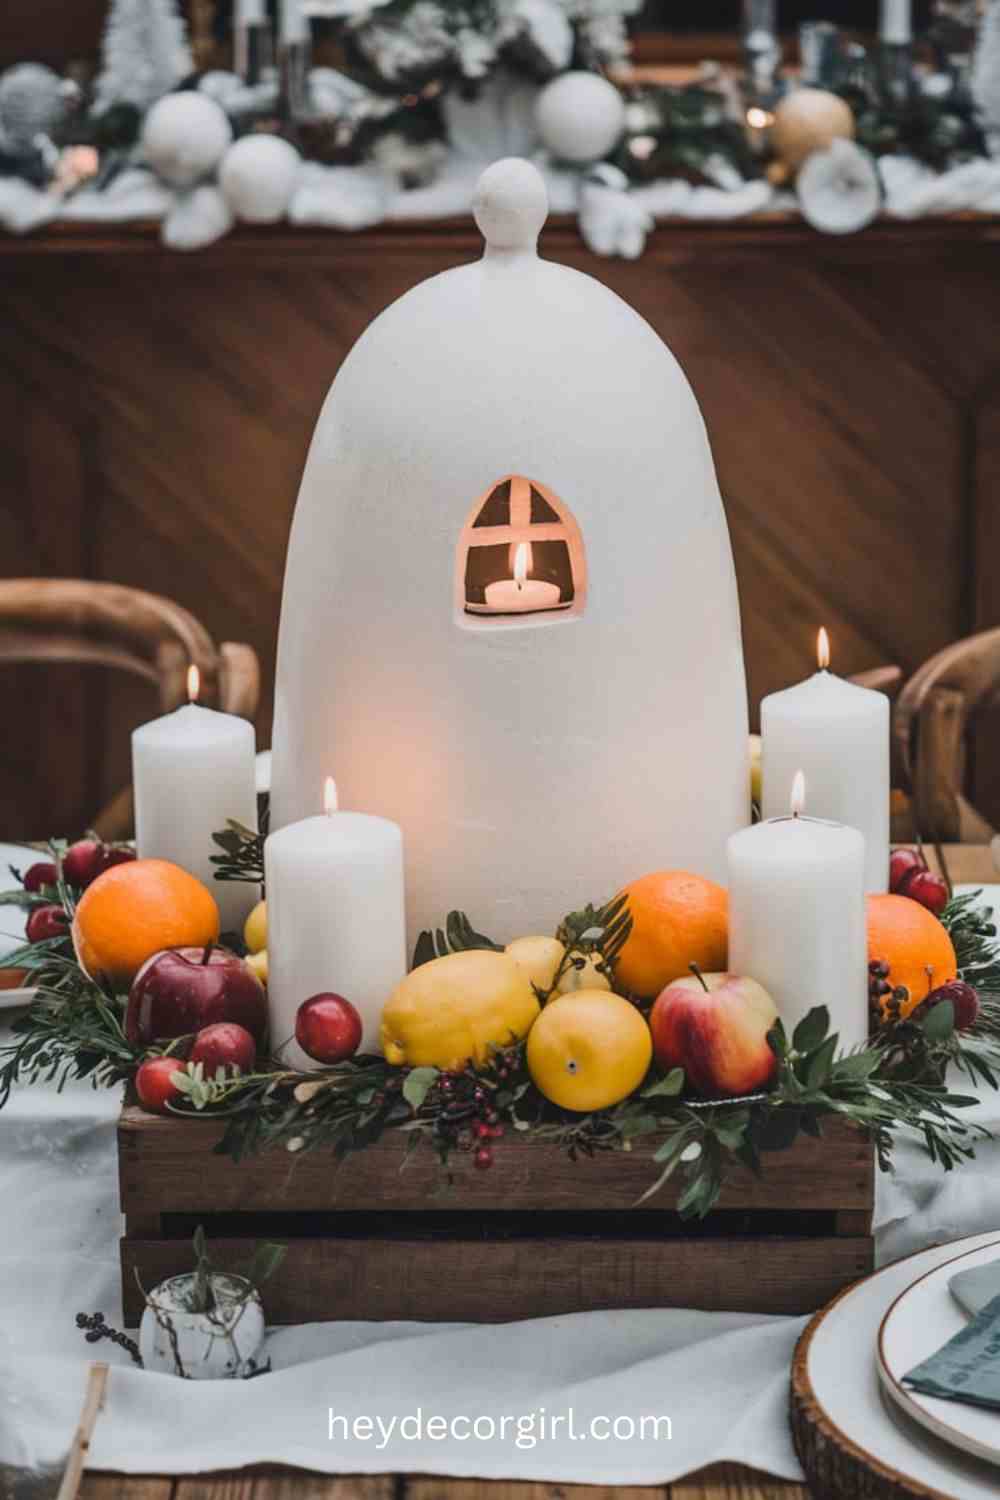
  • Candle and Citrus Arrangement: Use a shallow bowl or a decorative tray as your base. Arrange a mix of bright citrus fruits such as oranges, lemons, and limes around a central candle. Choose a tall, pillar candle for drama, or use multiple votives for a softer glow. Enhance the arrangement with sprigs of fresh rosemary or mint for a fragrant touch. You can also sprinkle some artificial snow around the fruits for a wintery effect.
  • Winter Fruit and Greenery Centerpiece: Fill a clear glass vase or bowl with seasonal fruits like pomegranates, apples, and pears. Nestle some evergreen branches or holly around the fruits for added color and texture. Place a cluster of floating candles on top of the arrangement in a shallow dish filled with water, creating a beautiful display that catches the light.

2. Seasonal Flower Centerpieces

Incorporating seasonal flowers can bring warmth and vibrancy to your holiday table.

  • Poinsettia and Pine Arrangement: Use a combination of red and white poinsettias with pine branches and cones. Arrange them in a decorative basket or a low bowl. You can add twinkling fairy lights or small ornaments for a touch of sparkle.
  • Mixed Floral Centerpiece: Create a centerpiece using a variety of seasonal blooms, such as amaryllis, winter roses, and tulips, arranged with greenery like eucalyptus or pine. Use a tall vase to elevate the arrangement, and consider adding cranberries at the bottom for a festive touch.

3. Winter Wonderland-Themed Centerpiece

To create a winter wonderland-themed centerpiece, follow these steps for a stunning display:

Materials Needed:

  • A large, clear glass or acrylic vase
  • White faux snow or cotton batting
  • Small decorative trees or figurines (e.g., snowmen, reindeer)
  • Battery-operated string lights
  • Silver or white ornaments
  • Candles (tea lights or votives)

Instructions:

  1. Base Layer: Start by placing a layer of white faux snow or cotton batting at the bottom of the vase. This will create the snowy effect and serve as the foundation for your centerpiece.
  2. Add Decorative Elements: Arrange small decorative trees or figurines in the vase, placing them securely in the snow. Position them at varying heights for visual interest. If using trees, consider a mix of sizes to create depth.
  3. Incorporate Lights: Carefully weave battery-operated string lights throughout the arrangement, ensuring they are evenly distributed and highlighting the decorative elements. This will add a magical glow to your centerpiece.
  4. Finish with Ornaments and Candles: Sprinkle silver or white ornaments around the base, and add candles on top of the snow for an elegant touch. If using votive candles, you can place them in small glass holders to keep the look polished.
  5. Final Touches: Once everything is arranged, turn on the lights to illuminate your winter wonderland centerpiece, and place it at the center of your table for a stunning focal point.

Creating festive table centerpieces is a wonderful way to celebrate the season and bring your holiday table to life. Whether you opt for natural elements, colorful fruits, or a whimsical winter theme, these centerpieces will enhance your dining experience and set the stage for cherished holiday gatherings.

4. Handmade Ornaments

Handmade ornaments add a personal touch to your Christmas tree and can become cherished keepsakes for years to come. Creating unique ornaments can be a fun and meaningful holiday activity, whether you’re crafting with family or making them as gifts. Here are some creative ideas for handmade ornaments, along with techniques for personalizing them.

1. Unique Ornament Ideas

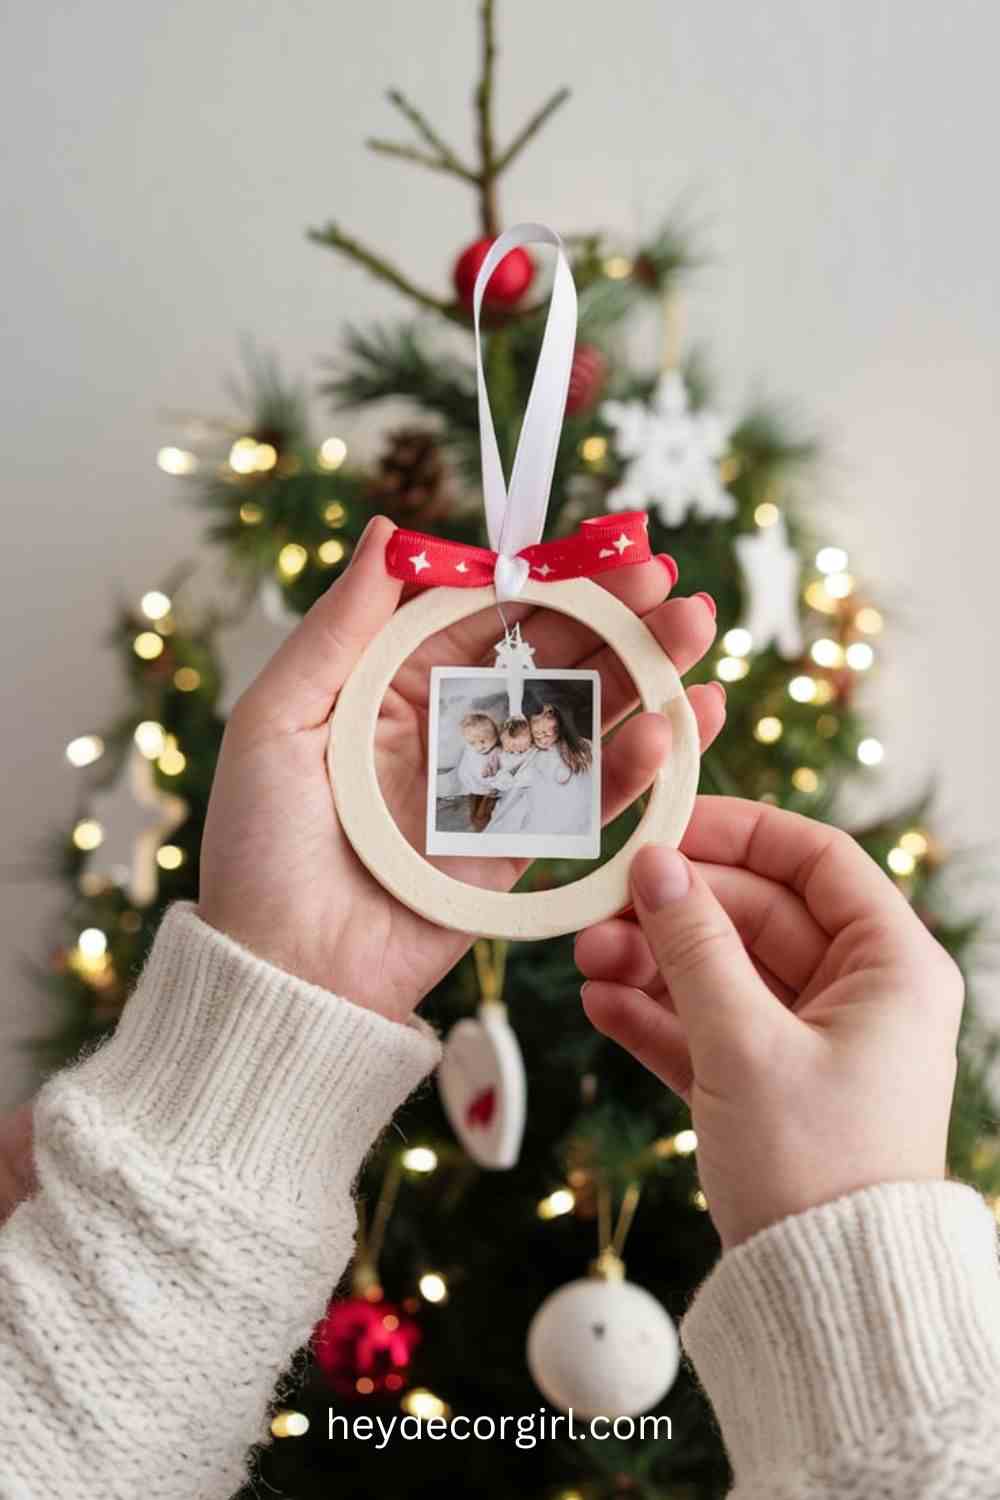
  • Photo Ornaments: Create custom photo ornaments to showcase your favorite memories. Use clear glass or acrylic ornaments that can be filled. Simply print your chosen photos, cut them to fit, and insert them into the ornament. You can also decorate the outside with glitter, ribbons, or paint for an extra festive flair. Another option is to use wooden slices or cardstock to create flat ornaments featuring photos, which can be adorned with twine for hanging.
  • Salt Dough Ornaments: Salt dough is a versatile and easy medium for making ornaments. To create salt dough, mix 1 cup of flour, 1 cup of salt, and 1/2 cup of water until a dough forms. Roll out the dough to about 1/4 inch thick and use cookie cutters to create various shapes. Before baking at 200°F (93°C) for about 2-3 hours, make sure to punch a hole at the top for hanging. Once cooled, you can paint, glitter, or seal them for a polished finish.
  • Fabric and Felt Ornaments: Use scraps of fabric or felt to sew or glue together fun shapes, like stars, trees, or animals. Fill them with stuffing to give them dimension, and add embellishments like buttons or beads for personality. These soft ornaments are perfect for families with small children, as they’re safe and lightweight.

2. Techniques for Personalizing Ornaments

Personalization can make your handmade ornaments even more special. Here are a few techniques to add names or dates to your creations:

  • Writing with Paint or Markers: Use acrylic paint or permanent markers to write names, dates, or short messages directly on the ornament’s surface. For glass or ceramic ornaments, use a fine-tip paint marker to ensure clarity. You can practice your lettering on paper first to get the desired look.
  • Stickers and Decals: If you prefer a neater finish, use alphabet stickers or printable decals to add names and dates to your ornaments. This is especially effective for photo ornaments where you want the focus to remain on the image.
  • Embossing or Engraving: For a more permanent option, consider embossing metal ornaments or engraving wooden ones. Many craft stores sell embossing tools and kits, or you can take wooden ornaments to a local engraver for a professional finish.
  • Ribbons and Tags: Attach personalized tags with names and dates using ribbon or twine. This adds an extra layer of charm and allows you to change the tag for different years or events. You can make tags from cardstock, wood, or even metal.

Creating handmade ornaments is not only a wonderful way to decorate your Christmas tree but also an opportunity to express creativity and preserve memories. Whether you choose to make photo ornaments, salt dough creations, or fabric designs, personalizing these decorations adds a heartfelt touch that makes the holiday season even more special. Enjoy the process, and let each ornament tell a story of love and joy during this festive time.

5. Christmas Garlands

Garlands are a versatile and festive way to enhance your holiday decor. They can be made from various materials, including paper, fabric, and greenery, allowing you to express your creativity and personal style. Here’s a step-by-step guide for making beautiful Christmas garlands, along with some creative ideas for incorporating them into your home.

1. Step-by-Step Guide to Making Garlands

A. Paper Garland

Materials Needed:

  • Colorful cardstock or wrapping paper
  • Scissors
  • String or twine
  • Hole punch or needle
  • Glue (optional)

Instructions:

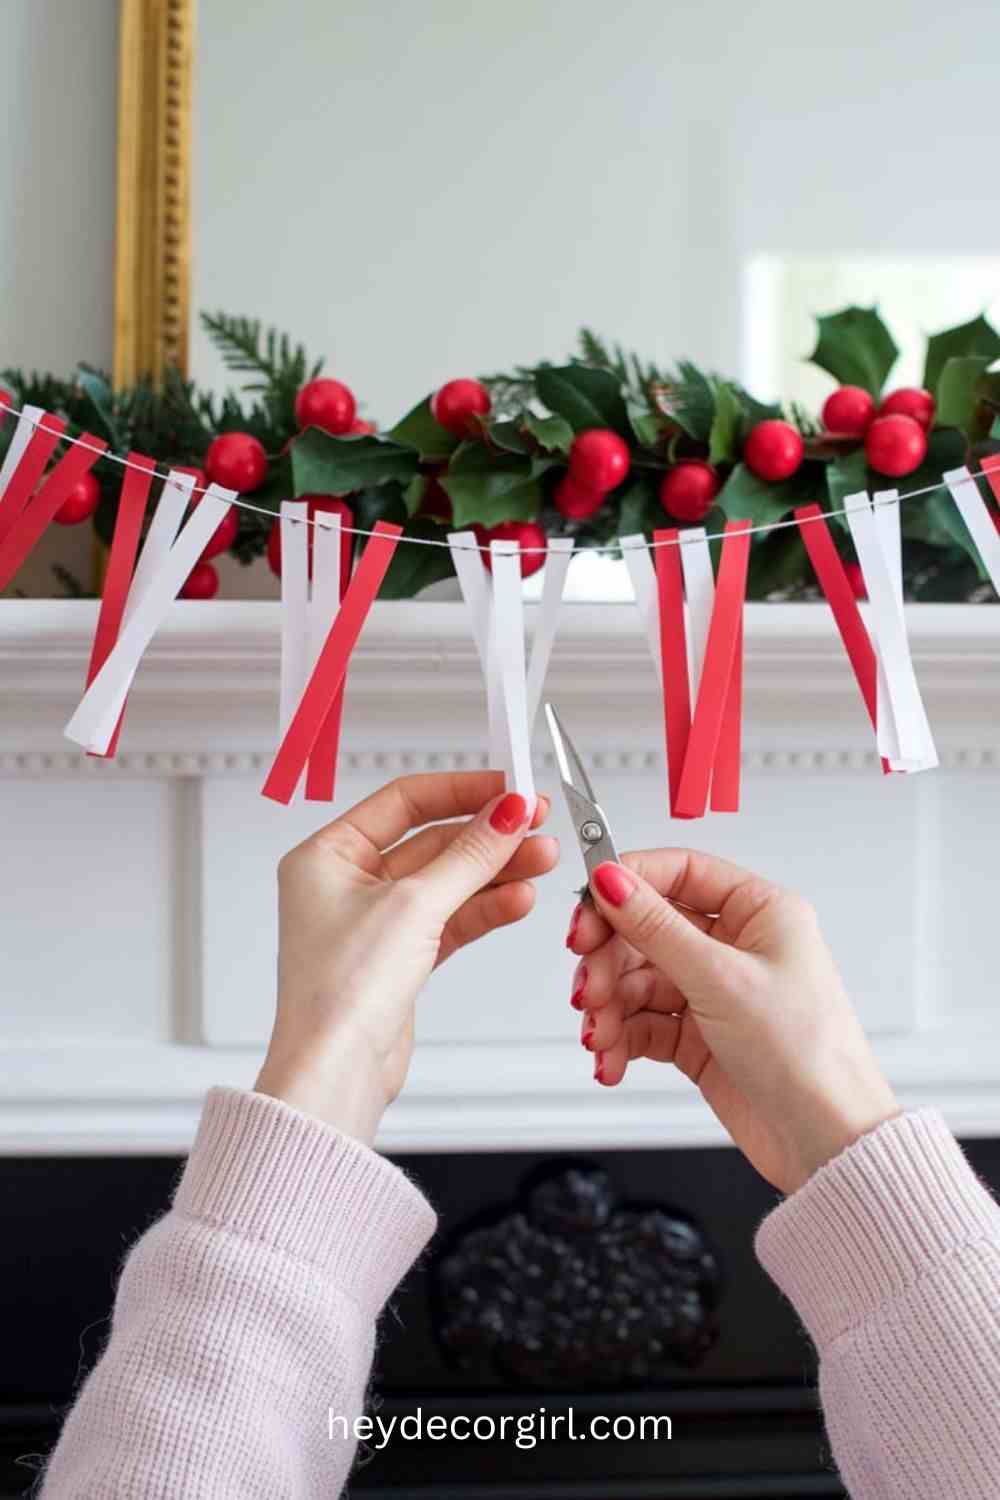
  1. Cut Shapes: Decide on the shape of your garland (e.g., stars, circles, or Christmas trees). Use scissors to cut out multiple shapes from the cardstock or wrapping paper. Aim for a consistent size for a uniform look.
  2. Punch Holes: Use a hole punch or needle to create holes at the top of each shape, making sure they are evenly spaced.
  3. String the Shapes: Cut a length of string or twine to your desired garland length. Thread each shape onto the string, spacing them evenly. You can secure them with a drop of glue if needed.
  4. Finish the Garland: Once all shapes are strung, tie the ends of the string to secure the garland. Hang it in your desired location.

B. Fabric Garland

Materials Needed:

  • Fabric scraps (holiday-themed or any color)
  • Scissors
  • String or twine
  • Sewing machine or needle and thread (optional)

Instructions:

  1. Cut Fabric Strips: Cut fabric scraps into strips of equal length and width, depending on your desired look (e.g., 2 inches wide by 8 inches long).
  2. Tie Fabric onto String: Take a strip of fabric and tie it around the string or twine, creating a knot. Repeat with additional strips, spacing them evenly along the string. You can mix and match colors and patterns for a playful look.
  3. Sewing Option: For a more finished look, sew the strips together along the top edge before attaching them to the string.
  4. Hang Your Garland: Once completed, hang your fabric garland on a mantel, stair railing, or wall.

C. Greenery Garland

Materials Needed:

  • Fresh or faux greenery (e.g., pine branches, eucalyptus, or holly)
  • Floral wire or twine
  • Optional decorations (e.g., berries, pinecones, or ornaments)

Instructions:

  1. Prepare Greenery: Cut your greenery into manageable lengths, ensuring a mix of different types for texture.
  2. Layer and Secure: Start by laying a few branches down in a row and securing them with floral wire or twine. Continue layering more greenery, working your way along until you reach your desired length.
  3. Add Decorations: If desired, incorporate additional decorations such as berries, pinecones, or small ornaments by attaching them with wire.
  4. Hang Your Garland: Use hooks or nails to hang your greenery garland on a mantel, door frame, or wall.

2. Creative Uses of Garlands Around the Home

Garlands can be used in a variety of ways to enhance your holiday decor:

  • Stair Railings: Drape garlands along the banister for a festive touch that draws the eye up the staircase. You can add ribbons or ornaments for extra flair.
  • Mantels: Use garlands as a focal point on your mantelpiece, layering them with candles and decorative items. This creates a warm, inviting display that highlights your holiday spirit.
  • Doorways: Hang garlands over doorways or entranceways to create a welcoming atmosphere for guests. A simple greenery garland with twinkling lights can set a cozy tone.
  • Tablescapes: Incorporate garlands into your dining table decor by placing them along the center as a base for candles, place settings, or centerpieces. This adds a natural element to your holiday meals.
  • Wall Displays: Create a stunning wall display by arranging garlands in a zigzag or cascading pattern. You can mix different types of garlands for an eclectic look or stick to a single style for a more cohesive design.

By making your own Christmas garlands and creatively incorporating them into your home, you can add a personal touch to your holiday decorations. Explore a variety of DIY Christmas decorations ideas, from colorful paper garlands to charming fabric designs and lush greenery options. These garlands will enhance your festive atmosphere and bring warmth and cheer to your space. Enjoy the process of creating and decorating, and let your unique style shine through!

6. Advent Calendars

Advent calendars are a cherished tradition that adds excitement and anticipation to the holiday season. Creating your own DIY advent calendar allows for personal touches and creativity, making the countdown to Christmas even more special. Additionally, incorporating DIY Christmas decoration ideas into your calendar can enhance its festive charm. Here are some unique designs for advent calendars, along with ideas for incorporating treats or messages for each day.

1. Various Designs for DIY Advent Calendars

A. Envelope Calendar

Materials Needed:

  • Small envelopes (can be decorated or plain)
  • String or ribbon
  • Clothespins or mini clips
  • Number stickers or markers
  • Treats or messages

Instructions:

  1. Prepare the Envelopes: Decorate each envelope if desired. You can use washi tape, stamps, or stickers to make them festive.
  2. Number the Envelopes: Use number stickers or markers to label each envelope from 1 to 24 (or 25, depending on how you want to structure your calendar).
  3. Hang the Envelopes: Use a length of string or ribbon to create a line where you can hang the envelopes. Secure it to the wall, mantel, or another suitable location.
  4. Attach Envelopes: Use clothespins or mini clips to attach each envelope to the string, spacing them evenly.
  5. Fill with Treats or Messages: Inside each envelope, place a small treat, a holiday-themed note, or an activity suggestion for the day.

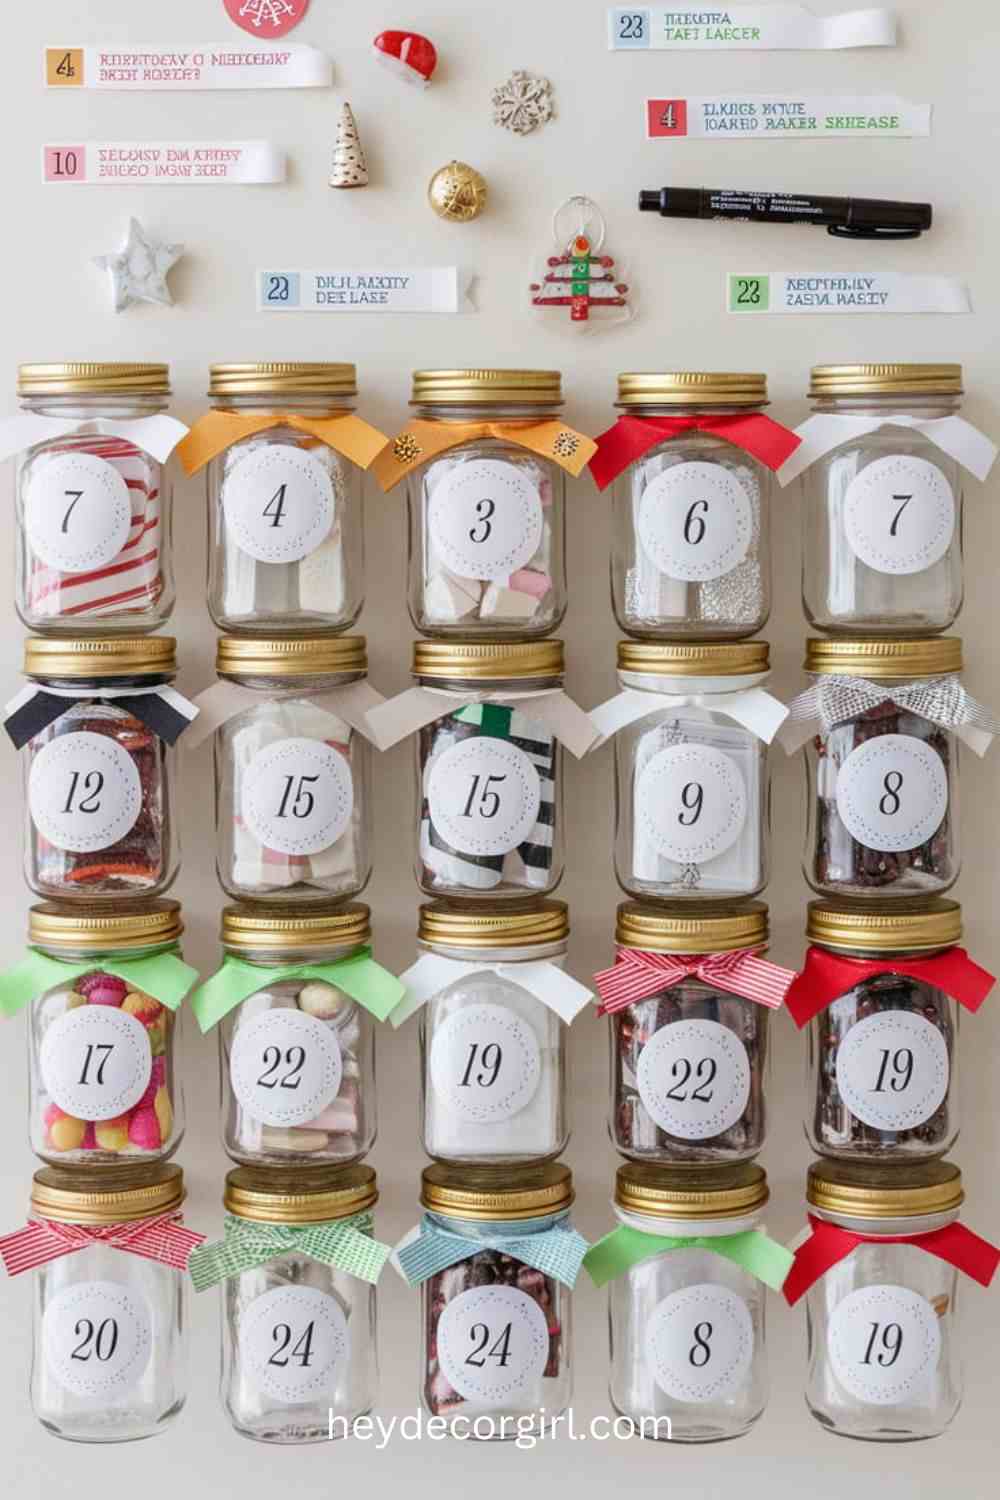
B. Jar Calendar

Materials Needed:

  • Small jars (e.g., mason jars or any decorative containers)
  • Number tags or labels
  • Treats or messages
  • Decorative elements (e.g., ribbon, twine)

Instructions:

  1. Label the Jars: Use number tags or labels to mark each jar from 1 to 24 (or 25). You can attach the tags with ribbon or twine for a rustic look.
  2. Fill the Jars: Add a variety of treats, such as candies, chocolates, or small toys, to each jar. You can also include handwritten messages or activities for each day.
  3. Arrange the Jars: Display the jars together on a table, shelf, or mantel. Arrange them in order, or create a fun, mixed display.
  4. Decorate the Jars: Enhance the jars with festive decorations, like wrapping them in twine, adding small ornaments, or placing a sprig of greenery on top.

C. Box Calendar

Materials Needed:

  • Small boxes (e.g., matchboxes, craft boxes)
  • Decorative paper or paint
  • Number stickers or markers
  • Treats or messages

Instructions:

  1. Decorate the Boxes: Customize each box with decorative paper or paint, ensuring each one is unique.
  2. Number the Boxes: Label each box with a number from 1 to 24 (or 25).
  3. Fill the Boxes: Place a treat, note, or small gift inside each box.
  4. Arrange the Boxes: Stack or arrange the boxes in a festive display, such as a pyramid shape or a straight line.

2. Incorporating Treats or Messages for Each Day

When filling your DIY advent calendar, consider a mix of treats and thoughtful messages to create a memorable experience:

  • Treat Ideas: Use a variety of sweets, such as chocolates, candies, or homemade cookies. Consider including small toys, stickers, or holiday-themed trinkets for added excitement.
  • Message Ideas: Write down fun holiday activities, inspirational quotes, or kind messages. Examples include “Watch a holiday movie,” “Write a letter to Santa,” or “Bake cookies together.”
  • Combination of Both: Combine treats and messages in each day’s compartment. For instance, include a small candy along with a suggestion for a holiday activity, creating a delightful surprise each day.

DIY advent calendars are a wonderful way to engage in the holiday spirit and create lasting memories. By customizing your design and carefully selecting treats and messages, you can bring joy and anticipation to each day leading up to Christmas, making the season even more special for you and your loved ones. Additionally, exploring various DIY Christmas decorations ideas can enhance your festive atmosphere, allowing you to showcase your creativity while celebrating the season.

7. Seasonal Wall Art

Creating seasonal wall art is a wonderful way to bring the spirit of the holidays into your home. Whether you prefer the elegance of canvas paintings, the warmth of framed quotes, or the charm of natural materials, there are countless ways to design festive decor that reflects your style. Here are some ideas for holiday-themed wall art, including techniques for using natural elements to achieve a rustic feel. Additionally, consider exploring DIY Christmas decorations ideas to enhance your holiday atmosphere and personalize your space even further.

1. Holiday-Themed Wall Art Ideas

A. Canvas Paintings

  • Abstract Holiday Art: Create a canvas painting featuring abstract shapes and colors that evoke the feeling of the season. For example, use reds, greens, and whites to represent Christmas or warm golds and deep reds for a more general winter theme. You can use sponges or brushes to create texture and depth.
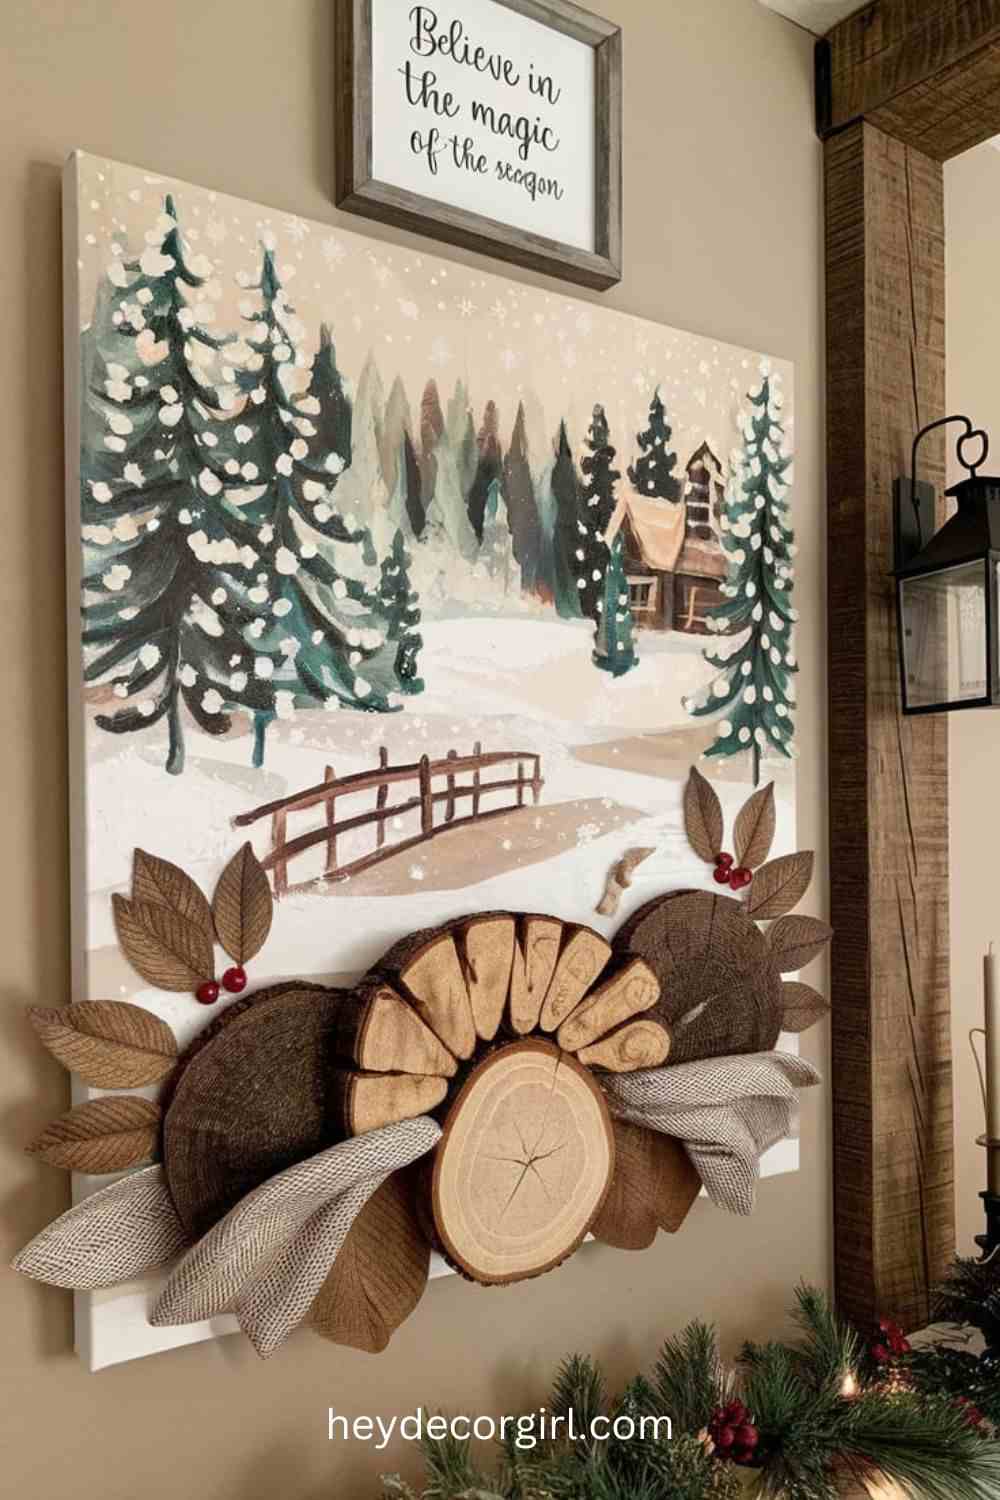
  • Nature-Inspired Scenes: Paint a winter landscape, such as snowy trees, a cozy cabin, or a peaceful woodland scene. These can serve as a serene backdrop for your holiday decor.

B. Framed Quotes

  • Inspirational Quotes: Choose favorite holiday quotes or lyrics from carols and frame them as wall art. You can use decorative paper, calligraphy, or printed fonts. Select frames that complement your decor style—rustic wooden frames for a farmhouse look or sleek metallic frames for a modern touch.
  • Seasonal Sayings: Create a series of prints that celebrate the season, like “Joy to the World,” “Let It Snow,” or “Peace on Earth.” Display them in a gallery wall format for an eye-catching arrangement.

2. Using Natural Materials for a Rustic Feel

Incorporating natural materials into your wall art can enhance its rustic charm and create a warm, inviting atmosphere.

A. Wood Slice Art

  • Decorative Wood Slices: Use natural wood slices as canvases for your artwork. You can paint festive designs, write quotes, or even burn images into the wood using a wood burner. Hang these slices directly on the wall or create a collage by grouping several together.

B. Wreaths and Garlands

  • Nature-Inspired Wreaths: Craft a wreath from natural materials like twigs, pinecones, and dried flowers. Decorate it with a simple bow or a few ornaments for a festive touch. Hang it on your wall or door as a beautiful statement piece.
  • Garland Displays: Create a garland from evergreen branches, dried oranges, or cinnamon sticks. String them together and drape them along your walls or around your framed quotes for a cohesive look.

C. Pressed Leaves and Flowers

  • Framed Botanicals: Collect seasonal leaves, flowers, or even pine needles, and press them between sheets of wax paper or in a flower press. Once dry, arrange them artfully in a frame. This not only adds a touch of nature to your decor but also captures the beauty of the season.

D. Fabric and Textiles

  • Textile Art: Use burlap, felt, or other fabrics to create wall hangings. You can sew or glue seasonal shapes like trees, stars, or stockings onto a fabric backdrop. Hang them in frames or from wooden dowels for a cozy, rustic feel.

Creating seasonal wall art is a delightful way to express your creativity and enhance your holiday decor, including DIY Christmas decorations ideas. Whether through canvas paintings, framed quotes, or using natural materials, you can craft beautiful pieces that reflect the warmth and joy of the season. Enjoy the process of designing and displaying your artwork, transforming your home into a festive haven for family and friends.

8. Outdoor Decorations

Transforming the exterior of your home with DIY Christmas decorations ideas can create a warm and inviting atmosphere during the holiday season. From dazzling light displays to charming yard signs, there are endless possibilities to showcase your festive spirit. Here are some tips for making outdoor decorations, along with fun ideas for creating snowman or reindeer decorations that will delight your neighbors and guests.

1. Tips for Making DIY Outdoor Decorations

A. Light Displays

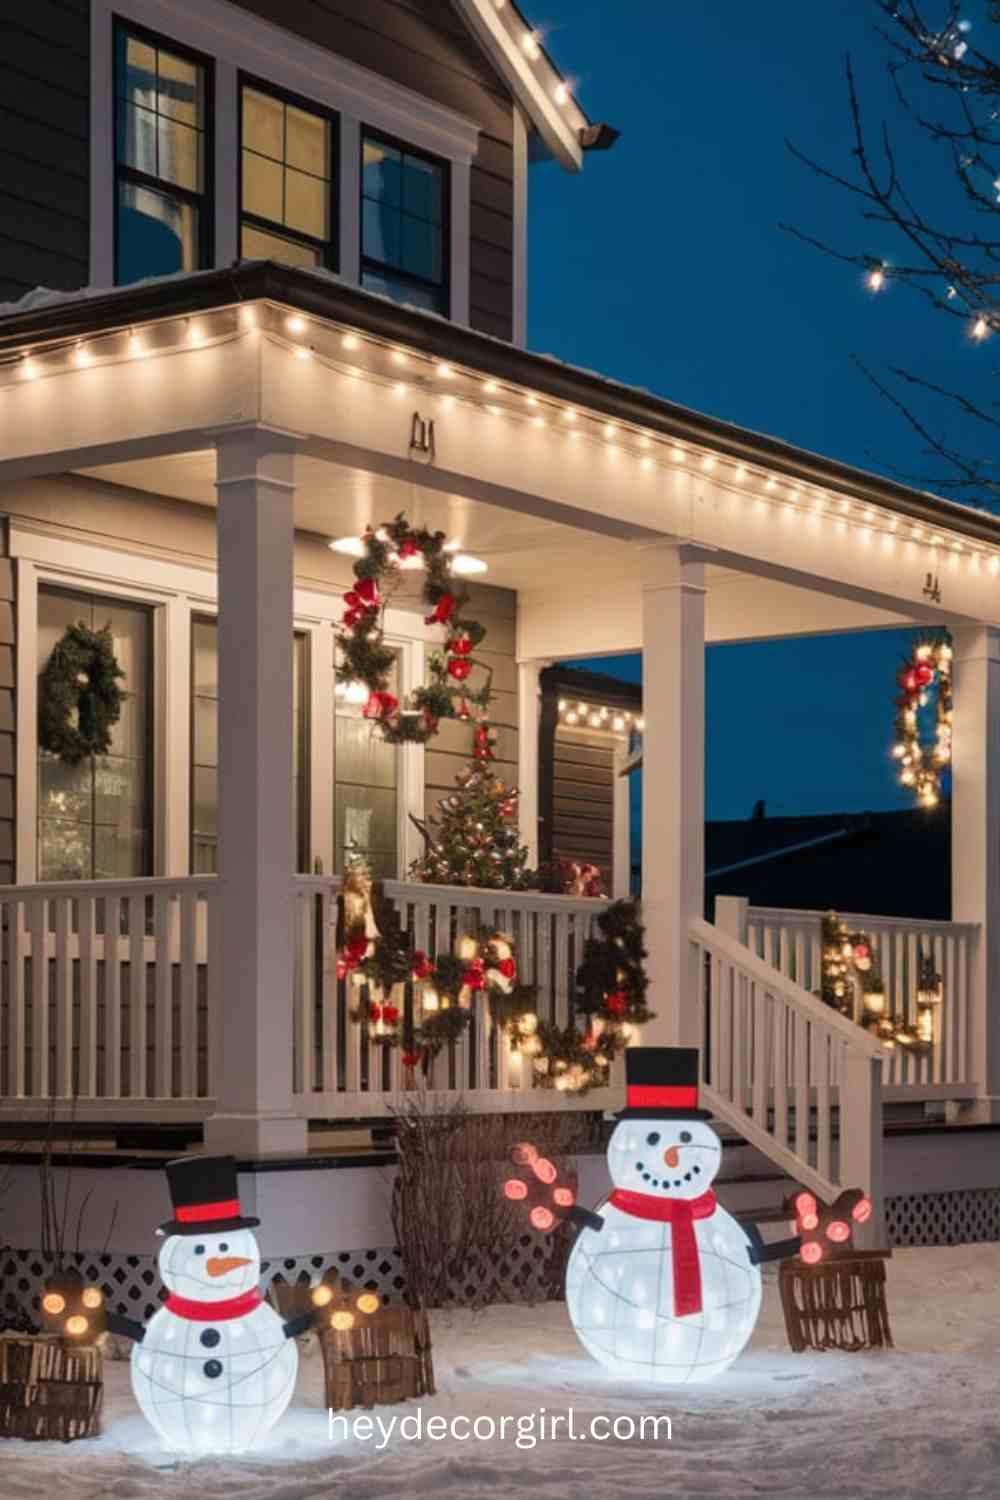
  • String Lights: Use string lights to outline your home’s architecture, wrap them around trees, or drape them over fences. Consider using different colors to create a whimsical effect or stick to white lights for a classic look. To secure the lights, use outdoor-rated clips or hooks.
  • DIY Lanterns: Create your own lanterns using mason jars or recycled containers. Fill them with battery-operated tea lights or fairy lights, and hang them from trees or place them along pathways to illuminate your yard.
  • Illuminated Figures: Make your own light-up figures, such as stars or snowflakes, using wire frames and lights. You can shape the wire into various designs and wrap it with lights for a stunning display.

B. Yard Signs

  • Wooden Signs: Craft wooden signs with festive messages like “Welcome Winter” or “Let It Snow.” Use weather-resistant paint to ensure they withstand the elements. You can also attach hooks to hang ornaments or stockings for added charm.
  • Painted Rocks: Decorate large rocks with festive designs or messages using outdoor paint. These can serve as unique yard decorations that add personality and cheer to your landscape.
  • Garden Stakes: Create garden stakes with seasonal themes, such as Christmas trees, candy canes, or snowflakes. Cut shapes from wood or sturdy cardboard, paint them, and attach them to stakes for easy insertion into your garden beds.

2. Fun Ideas for Creating Snowman and Reindeer Decorations

A. Snowman Decorations

  • Tire Snowman: Stack old tires to create a large snowman. Paint them white and add facial features with paint or felt. Use a hat and scarf made from fabric or old clothing for added character. This makes a fun and durable decoration that can withstand winter weather.
  • PVC Pipe Snowman: Construct a snowman using white PVC pipes. Cut the pipes into various lengths for the body, and stack them securely. Decorate with paint, buttons, and a hat to bring your snowman to life. You can also add a small broomstick made from twigs for an authentic touch.
  • Inflatable Snowman: If you prefer something low-maintenance, consider using inflatable snowman decorations. These are easy to set up and take down, providing instant festive cheer to your yard.

B. Reindeer Decorations

  • Wooden Reindeer: Use wooden pallets or logs to create rustic reindeer figures. Cut the wood into the shape of a reindeer, and paint or stain it for a charming finish. Add antlers made from branches for a natural look.
  • Reindeer Planters: Transform old wooden crates or buckets into reindeer planters. Paint them brown, add eyes and a nose, and fill them with seasonal plants or flowers. These adorable decorations can add color and life to your outdoor space.
  • Antler Yard Stakes: Create reindeer antlers using wire or sturdy branches. Attach them to stakes and place them in your yard to mimic a herd of reindeer. This whimsical touch will surely bring smiles to passersby.

By incorporating these DIY Christmas decorations ideas and outdoor decorations into your holiday decor, you can create a festive atmosphere that welcomes friends and family. From dazzling light displays to charming snowman and reindeer creations, let your creativity shine and spread holiday cheer throughout your neighborhood. Enjoy the process of crafting and decorating your exterior, turning your home into a winter wonderland that captures the magic of the season.

9. Christmas Tree Alternatives

While traditional Christmas trees are a beloved symbol of the holiday season, there are countless creative alternatives that can add a unique flair to your festive decor. Whether you’re short on space, looking for something unconventional, or simply want to express your creativity, these non-traditional Christmas tree ideas can help you celebrate the season in style. Incorporating DIY Christmas decoration ideas can further enhance your festivities, allowing you to personalize your space. Here are some innovative ideas for Christmas tree alternatives, along with decor suggestions that fit various spaces and styles.

1. Creative Ideas for Non-Traditional Christmas Trees

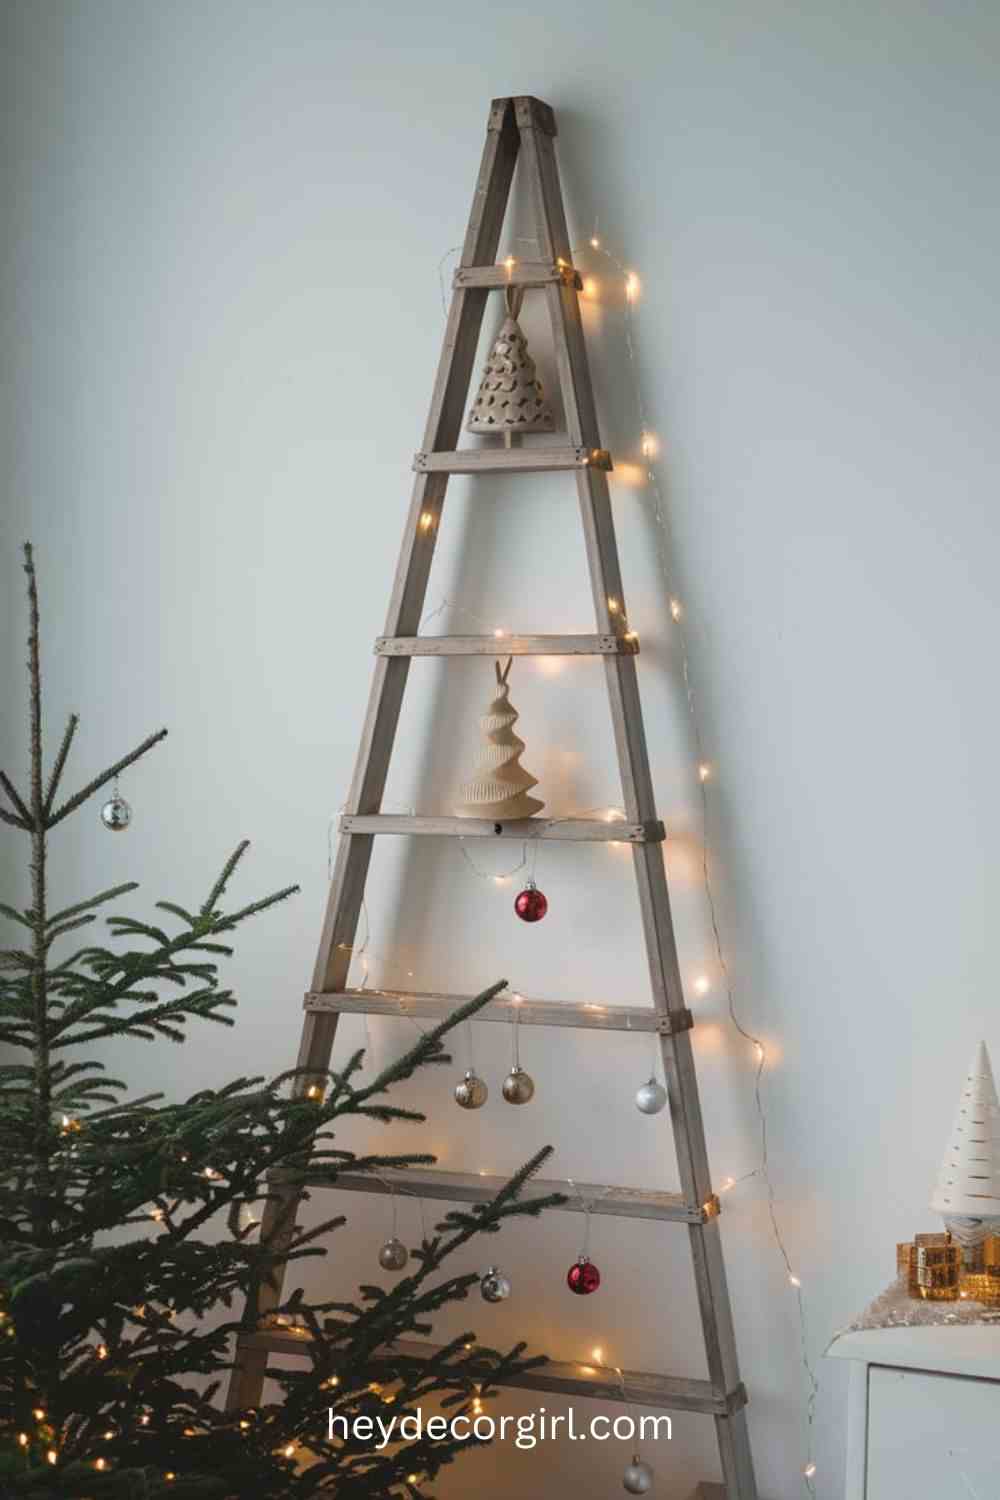
A. Ladder Trees

  • Use of Old Ladders: Repurpose an old wooden ladder as a Christmas tree by leaning it against a wall. Decorate the rungs with ornaments, garlands, and lights. You can hang stockings from the steps or add small potted plants for a whimsical touch.
  • Painted Ladder: Give a wooden ladder a fresh coat of paint in festive colors like red or green, then adorn it with twinkling lights and holiday decorations. This approach makes a bold statement while maintaining a rustic charm.

B. Wall Trees

  • Wall-Mounted Tree Design: Create a tree shape on your wall using string lights or garlands. Arrange them in a triangular pattern and add ornaments, ribbons, or photos to complete the look. This is a fantastic space-saving option for smaller homes or apartments.
  • Vinyl or Chalkboard Tree: Use removable wall decals or chalkboard paint to draw a tree shape on your wall. Decorate it with chalk art or attach lightweight ornaments with adhesive putty for a customizable and temporary display.

C. Book or Box Trees

  • Stacked Books: Arrange a collection of books in the shape of a Christmas tree. Stack them by size, starting with larger volumes at the bottom and working your way up. Decorate with a star or a festive ribbon on top and add small ornaments or lights between the books for added charm.
  • Decorative Boxes: Use decorative boxes or storage bins to create a tiered tree. Stack the boxes in the shape of a tree and embellish them with ornaments, greenery, or lights. This approach is perfect for a modern or minimalist aesthetic.

2. Decor Ideas for Various Spaces and Styles

A. Small Spaces

  • Tabletop Trees: Opt for a small, tabletop tree made of materials like wood, metal, or felt. These trees can be placed on a side table, desk, or kitchen counter, bringing holiday cheer to compact spaces without overwhelming the area.
  • Hanging Trees: Create a hanging tree from branches or a wire frame suspended from the ceiling. Decorate it with lightweight ornaments and ribbons, giving the illusion of a floating tree that saves floor space.

B. Modern and Minimalist Styles

  • Geometric Shapes: Use geometric forms, like triangular wood frames or metal structures, to create a contemporary tree design. Keep decorations simple and monochromatic for a sleek look that fits modern aesthetics.
  • Natural Elements: Consider a tree made from natural materials like driftwood or branches. Arrange the pieces to form a unique tree shape, and adorn it with subtle, nature-inspired decorations like pinecones or dried flowers.

C. Rustic and Traditional Styles

  • Rustic Wooden Tree: Create a tree from reclaimed wood, either by stacking planks or cutting them into tree shapes. Add rustic ornaments, burlap ribbons, and twinkling lights for a warm, cozy feel.
  • Greenery Tree: Construct a tree shape using fresh or faux greenery, such as pine branches or eucalyptus. Decorate it with natural elements like berries, pinecones, and earthy ornaments for a classic and organic look.

By exploring these Christmas tree alternatives, you can bring a fresh perspective to your holiday decor while accommodating your space and style preferences. Whether you opt for a ladder tree, a wall-mounted design, or a creative stacking method, these non-traditional trees can become the centerpiece of your festive celebrations. Embrace your creativity and enjoy crafting a holiday display that truly reflects your personality and home.

10. DIY Gift Wrapping Ideas

Gift wrapping is an essential part of the holiday season, but it can also be an opportunity to showcase creativity and add an extra touch of decor to your presents. Instead of traditional wrapping paper, consider innovative ways to wrap gifts that not only protect the items inside but also serve as beautiful decorations. Here are some unique DIY gift wrapping ideas, including the use of fabric, decorated boxes, and natural elements like twigs and dried flowers. Additionally, you can incorporate DIY Christmas decorations ideas to personalize your gifts even further, making them not only visually appealing but also memorable for the recipients.

1. Innovative Ways to Wrap Gifts

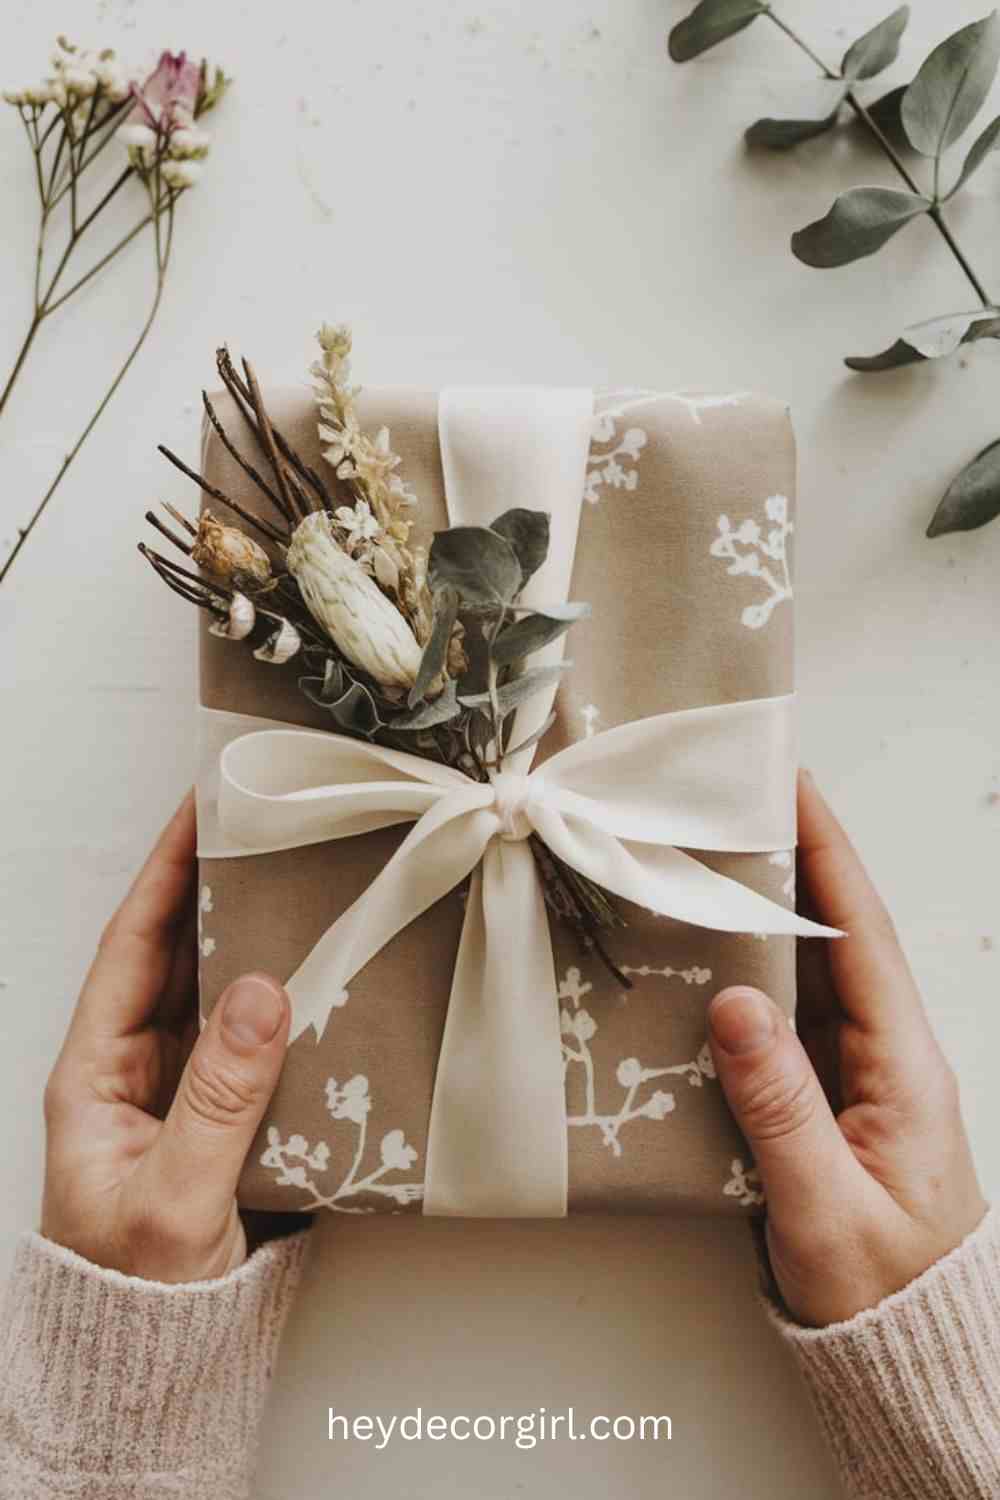
A. Fabric Wraps

  • Furoshiki Technique: Use fabric scraps or old scarves to wrap your gifts in the Japanese art of furoshiki. This eco-friendly method not only looks stunning but also eliminates waste. Choose festive fabrics with seasonal patterns or colors to enhance the presentation. Tie the fabric securely with a knot or ribbon for an elegant finish.
  • Sewn Fabric Bags: Create simple drawstring bags from festive fabric. Sew the edges, leaving an opening at the top, and use a coordinating ribbon or twine to cinch the bag closed. These reusable bags make excellent gift wraps and can be used by the recipient afterward.

B. Decorated Boxes

  • Upcycled Boxes: Transform old shoe boxes or other containers into decorative gift boxes. Paint or decoupage them with wrapping paper, fabric, or decorative paper to match the occasion. Add embellishments such as ribbon, twine, or stickers for a personalized touch.
  • Layered Box Wrapping: Use a combination of boxes of different sizes to create a layered effect. Wrap each box separately in different decorative papers or fabrics, then stack them for a visually appealing gift presentation.

2. Incorporating Natural Elements

A. Twigs and Branches

  • Nature-Inspired Accents: Gather small twigs or branches to create rustic accents for your gift wrapping. Attach a twig to the top of your wrapped gift using twine or ribbon for a charming, woodland-inspired look. You can also tie a small bunch of twigs together for a more substantial decoration.
  • Twig Ornaments: Create small ornaments using twigs to adorn your gifts. Shape the twigs into stars or hearts, and secure them with twine. These natural ornaments add a personal touch and can be reused by the recipient as holiday decor.

B. Dried Flowers and Greens

  • Dried Flower Embellishments: Incorporate dried flowers, such as lavender, eucalyptus, or baby’s breath, into your gift wrapping. Tuck a small bouquet under the ribbon or tape it to the top of the gift. The natural colors and textures bring a beautiful, organic element to your presentation.
  • Evergreen Sprigs: Use sprigs of pine, fir, or cedar to embellish your wrapped gifts. Secure them with twine or ribbon for a festive touch that also gives a fresh scent. This is especially lovely for winter gifts and adds a seasonal feel.

3. Final Touches

  • Personalized Gift Tags: Create handmade gift tags using cardstock or recycled materials. Decorate them with stamps, drawings, or calligraphy to add a personal touch. Attach them with twine or ribbon for a cohesive look.
  • Baking Paper and Kraft Paper: Use baking paper or kraft paper as a neutral base for wrapping gifts. These materials can be decorated with stamps, drawings, or stencils, allowing for a rustic yet chic presentation.

By exploring these DIY gift wrapping ideas and DIY Christmas decorations ideas, you can turn your presents into stunning displays that double as decor. Incorporating fabric, decorated boxes, and natural elements not only elevates your gift-giving but also reflects your creativity and care for the environment. Embrace the spirit of the season by wrapping your gifts in a way that delights both the eyes and the heart.

FAQ

1. What materials do I need for DIY Christmas decorations?

You can use a variety of materials depending on the DIY Christmas Decorations Ideas you choose, including fabric, paper, wood, greenery, paint, and natural elements like pinecones and twigs. Craft supplies like scissors, glue, ribbons, and lights are also commonly needed.

2. Are these DIY projects suitable for beginners?

Yes! Many of the DIY Christmas Decorations Ideas cater to various skill levels, with simpler projects designed for beginners and more complex ones for experienced crafters. Each project will typically include detailed instructions to guide you.

3. How can I personalize my DIY decorations?

You can personalize your decorations by incorporating your favorite colors, adding names or initials, using family photos, or choosing specific themes that resonate with your style. Many DIY Christmas decorations ideas allow for customization in both design and materials, giving you the freedom to create unique and meaningful holiday decor.

4. Can I use these decoration ideas for spaces other than my home?

Absolutely! DIY Christmas decoration ideas can bring a personal and festive touch to any space. While the ideas focus on home decor, many can be adapted for outdoor spaces, parties, or community events. You can also use them for offices, schools, or anywhere you want to spread holiday cheer.

5. How can I incorporate eco-friendly practices into my DIY projects?

For DIY Christmas Decorations Ideas, consider using sustainable materials, such as recycled paper, fabric scraps, and natural elements from your yard. Additionally, using non-toxic paints and adhesives and opting for LED lights can make your holiday decor both eco-friendly and energy-efficient.

6. What are some easy DIY Christmas decorations for kids?

Kid-friendly projects include making paper snowflakes, decorating pinecones, creating festive ornaments from salt dough, and crafting simple garlands. These DIY Christmas Decorations Ideas are fun and can help children develop their creative skills.

7. How can I store my DIY decorations for future use?

Store your decorations in sturdy boxes or bins, and wrap delicate items in tissue paper to prevent breakage. Label the containers for easy identification, and keep them in a cool, dry place to maintain their quality. For a personal touch, consider incorporating some DIY Christmas decoration ideas, which can add a unique and festive charm to your holiday decor while keeping it budget-friendly.

8. Can I adapt these ideas for other holidays or seasons?

Yes! Many of the DIY Christmas Decorations Ideas can be modified for other holidays by changing the colors, themes, and materials. For instance, use pastels for Easter, warm tones for fall, or bright colors for summer celebrations.

9. Where can I find inspiration for new DIY decoration ideas?

In addition to this guide and DIY Christmas decoration ideas, you can find inspiration from craft blogs, social media platforms like Pinterest and Instagram, and holiday magazines. Craft fairs and local workshops can also provide fresh ideas and techniques.

10. Are there any safety tips I should keep in mind while crafting?

Always use tools carefully and follow safety instructions, especially when using scissors, hot glue guns, or paints. When working on DIY Christmas Decorations Ideas, ensure proper ventilation for adhesives or paints, and supervise children during crafting activities to create a safe and fun environment.

Visited 12 times, 1 visit(s) today

Last modified: November 4, 2024

Close