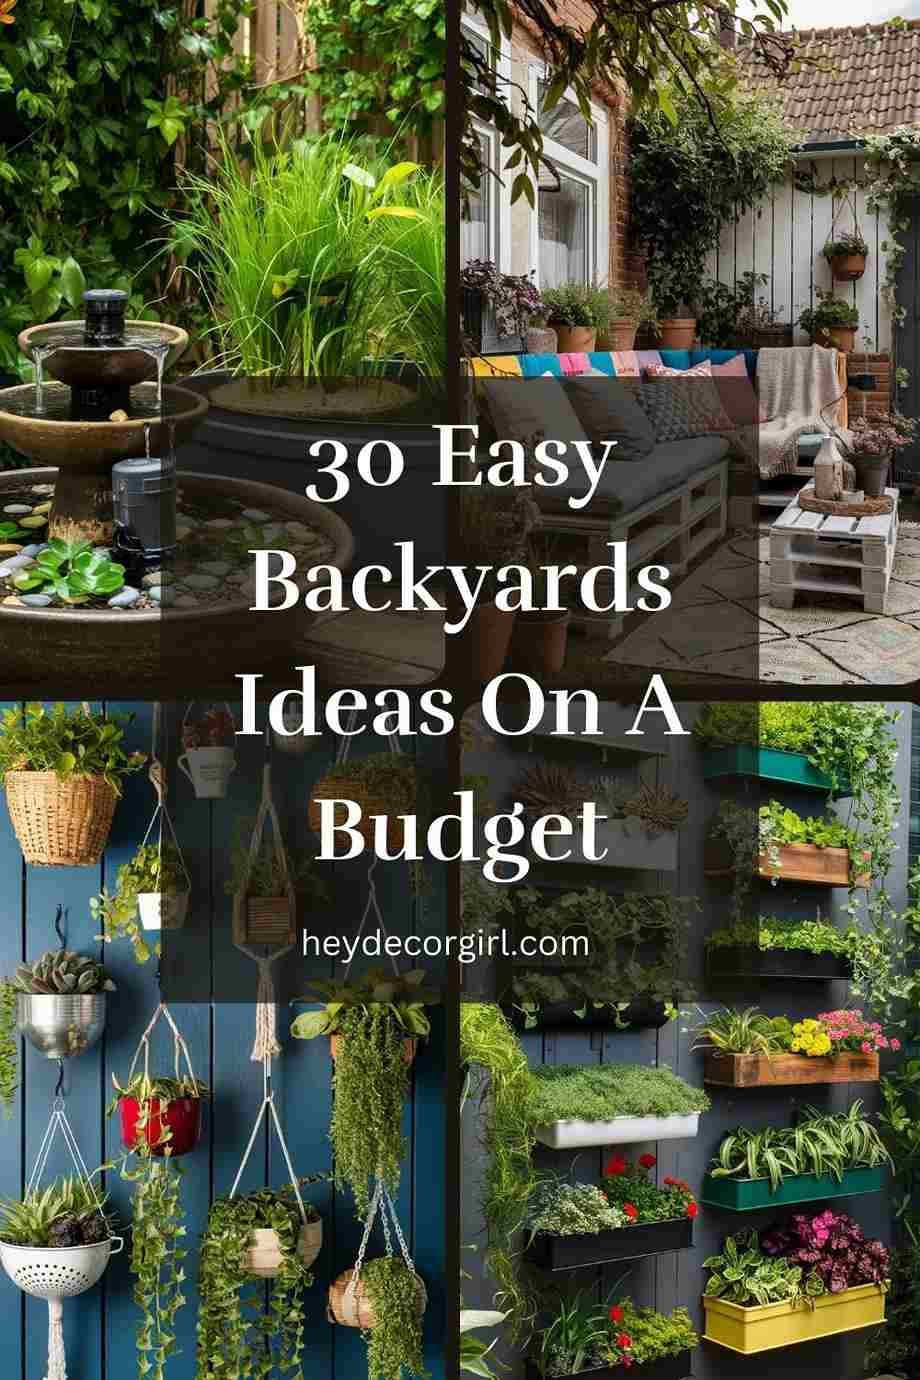
Who says you need a big budget to create a beautiful backyard? With a little creativity and some DIY magic, even the simplest outdoor space can be transformed into a cozy, stylish retreat. I’m Richa, and in this post, I’ve gathered 30 clever and affordable backyard ideas to help you turn your yard into a place you’ll love spending time in—without spending a fortune.
Whether you’re working with a tiny patio or a larger garden space, there are plenty of ways to refresh it without breaking the bank. From repurposing old furniture and adding handmade decor to building your own fire pit or setting up a charming container garden, the possibilities are both exciting and accessible. These ideas are perfect for anyone who wants to create a relaxing, welcoming vibe outdoors—on a budget that actually works. Let’s get inspired and start crafting a backyard you’ll be proud of!
Backyards Ideas On A Budget
1. Revamp Existing Furniture
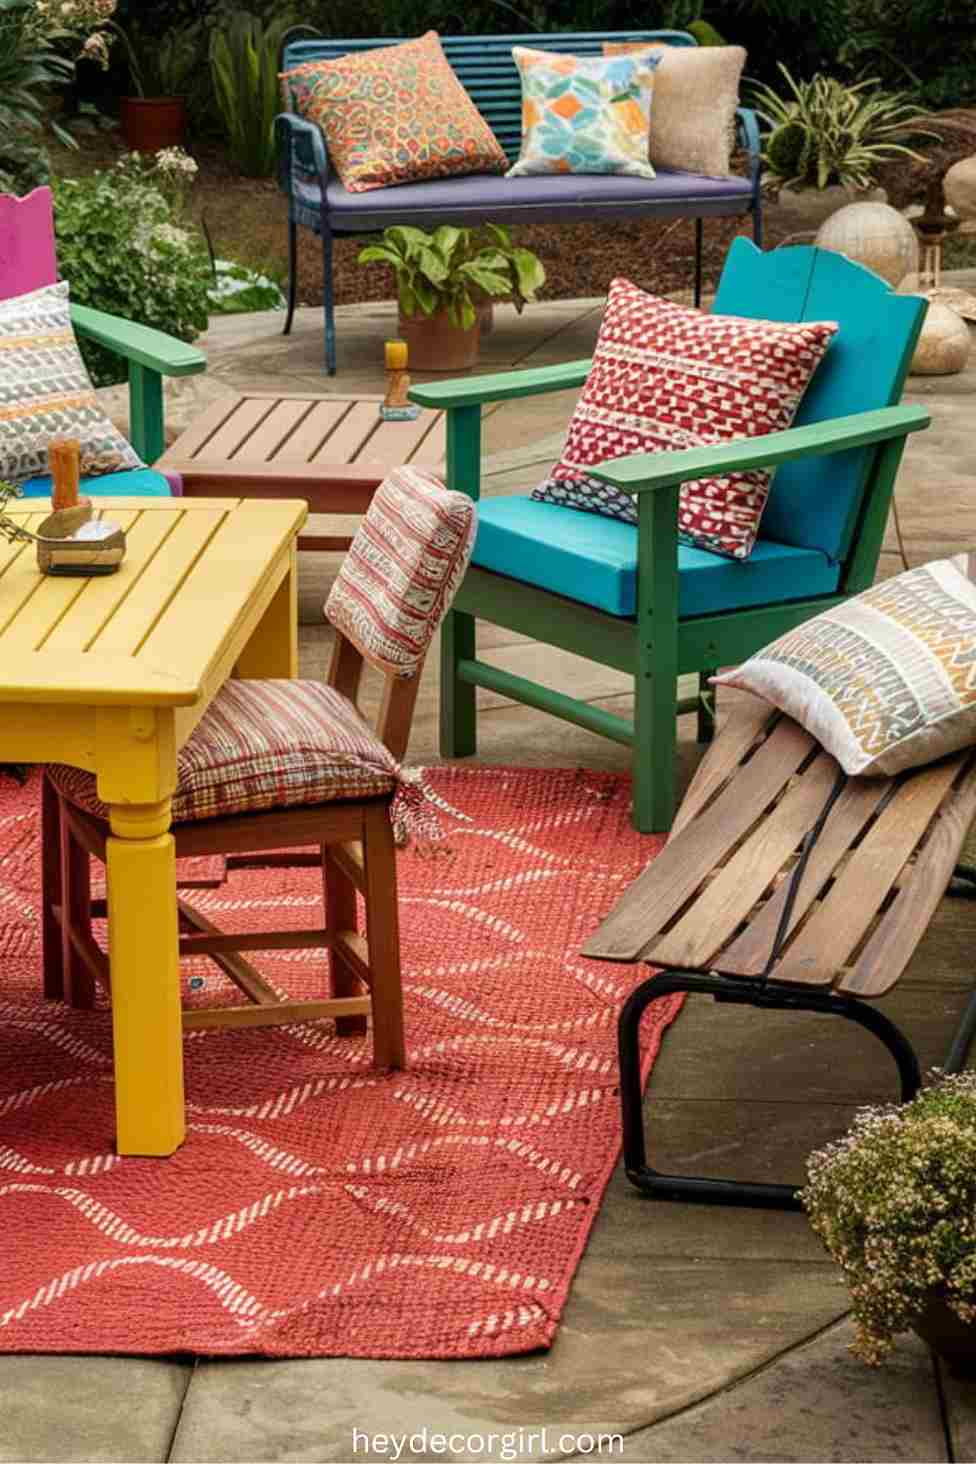
Transforming your backyard furniture doesn’t require a big budget—just a bit of creativity and some simple updates. Start by repainting or staining old furniture to give it new life. A fresh coat of weatherproof paint in bold or neutral tones can instantly modernize worn pieces, while staining enhances natural wood grain for a classic, refreshed finish.
Next, revamp your cushions and pillows with DIY covers. Use outdoor fabrics in fun prints or repurpose old clothes for a custom touch. These updates not only add comfort but also infuse your space with personality. Finally, tie it all together with a budget-friendly outdoor rug to define your seating area and boost style. Choose weather-resistant materials that are easy to clean and coordinate with your updated décor. These simple upgrades can turn your existing furniture into a vibrant, cozy retreat—without overspending.
2. DIY Fire Pit
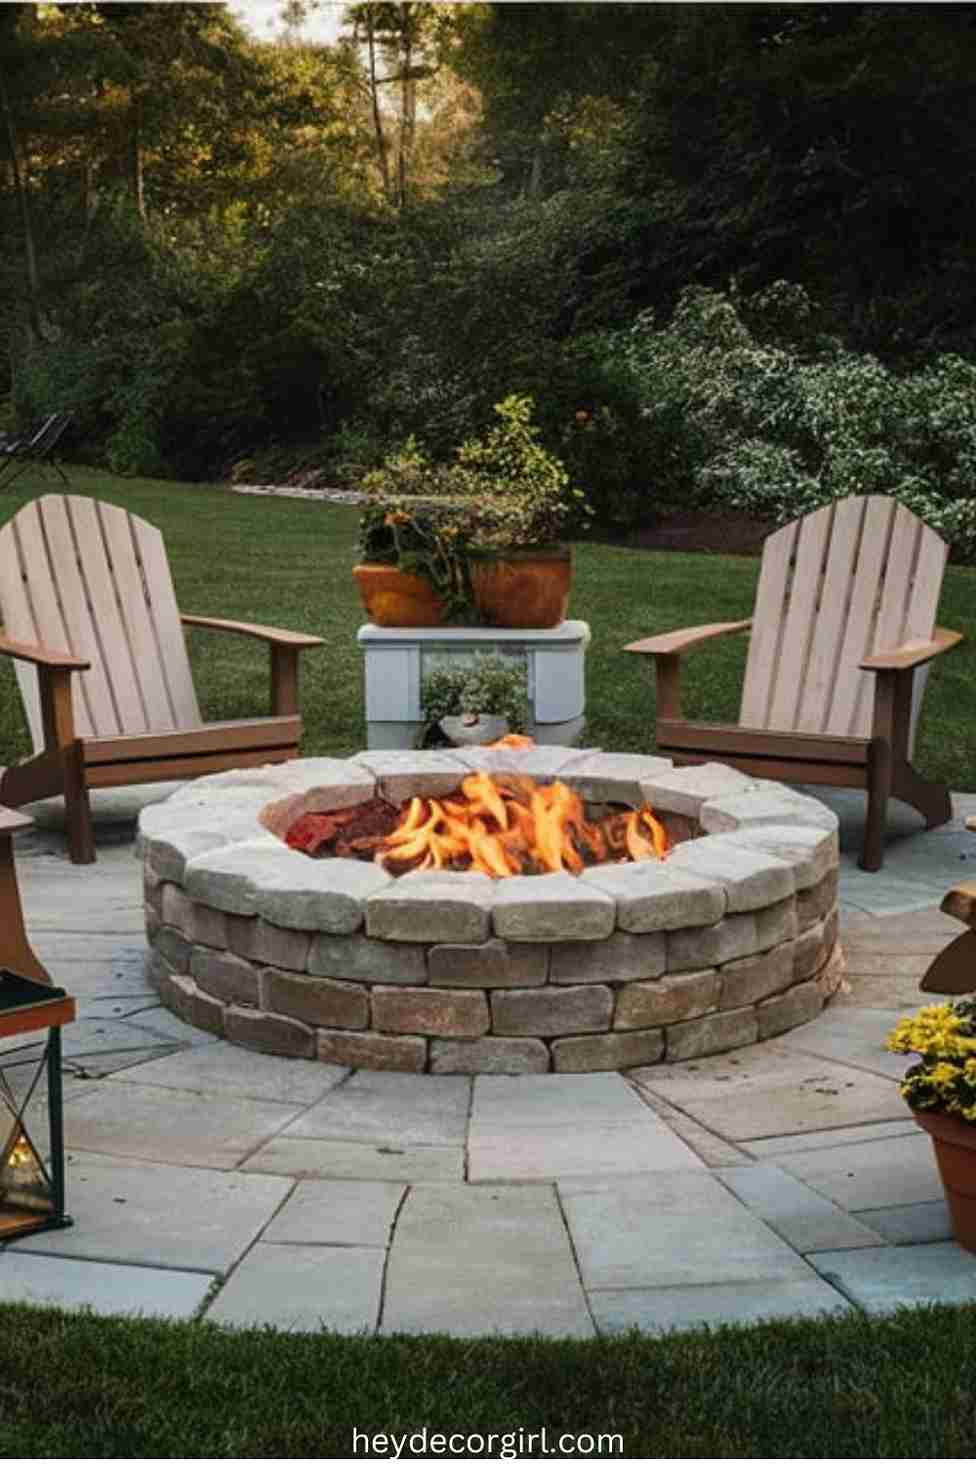
Creating a DIY fire pit is a budget-friendly way to add warmth and charm to your backyard. With affordable materials like bricks, pavers, or a repurposed metal bowl, you can design a cozy focal point for outdoor gatherings. Simple options include a stone or brick circle, a metal fire bowl surrounded by blocks, or a paver pit with gravel and sand—all customizable to fit your space and style.
Start by choosing a safe, flat area away from flammable structures. Mark and dig out the fire pit space, lay a gravel base for drainage, and build your chosen design using stacked bricks, pavers, or concrete blocks. Add a fire pit insert if desired, and finish with decorative touches like surrounding seating or landscape edging. Always do a safety check before lighting. With minimal investment and some weekend effort, you’ll enjoy countless cozy nights around your handmade fire pit.
3. Outdoor Lighting on a Budget
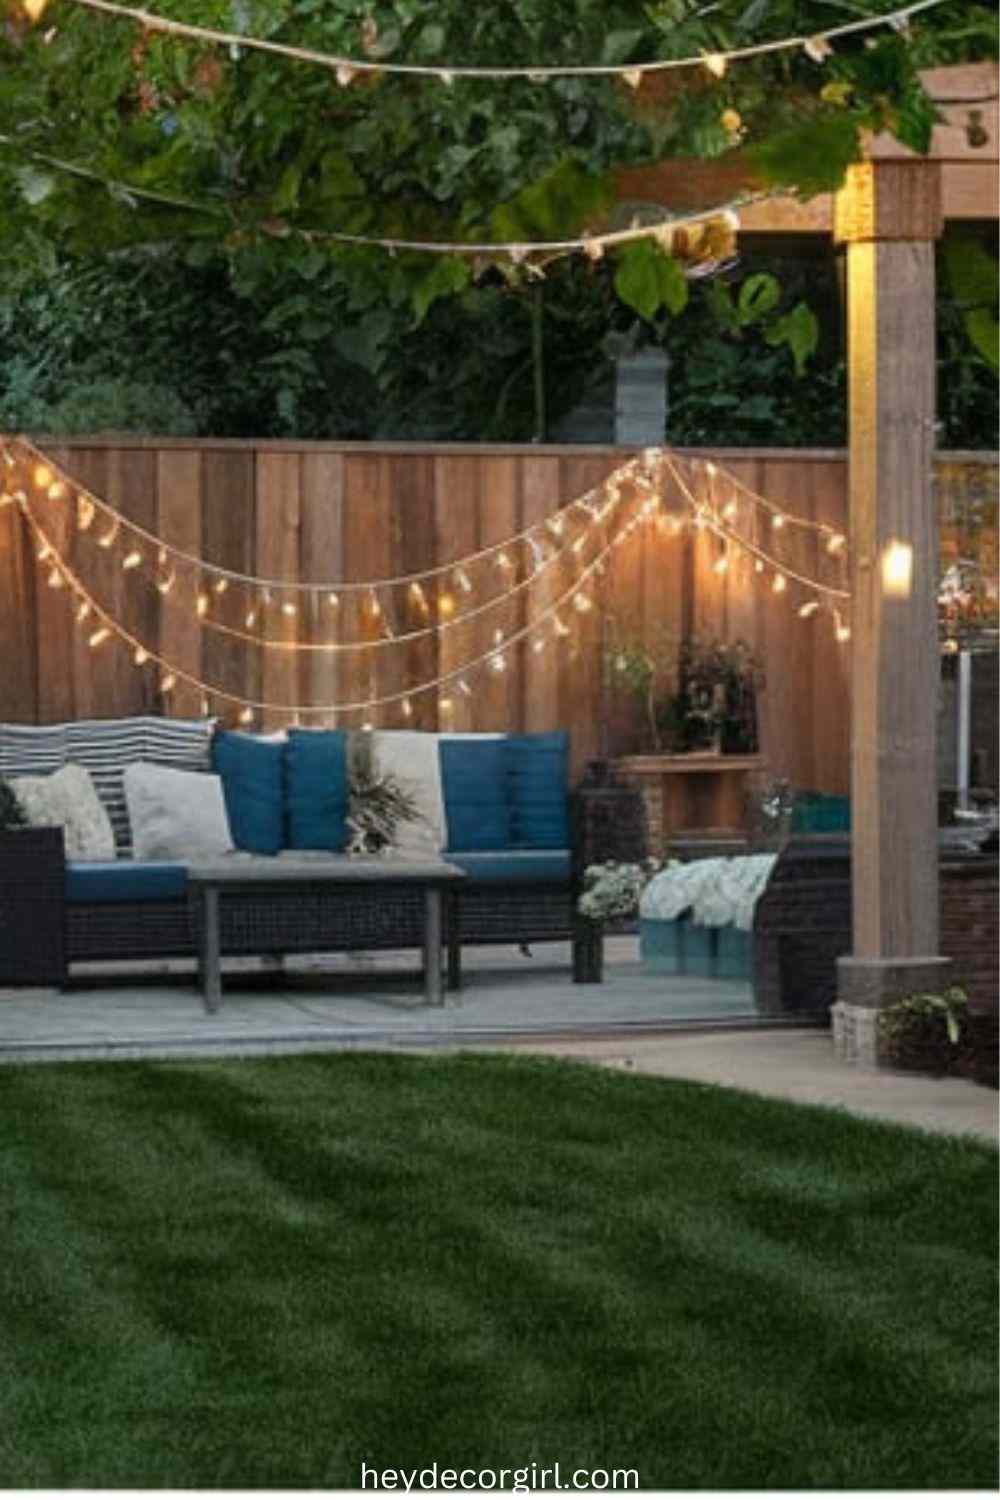
Enhancing your backyard with outdoor lighting doesn’t have to break the bank—simple, creative touches can transform your space into a magical evening retreat. String lights are a go-to for affordable ambiance; drape them across fences, trees, or pergolas for a cozy glow. Choose energy-saving LED bulbs in styles like fairy lights or Edison bulbs to match your vibe. Complement them with lanterns—both hanging and tabletop—to add dimension and charm around seating areas or walkways.
For a personalized touch, try DIY lanterns using mason jars and candles. Decorate jars with paint or twine, add LED or tea light candles, and place them along paths or hang them from branches. To boost sustainability and savings, install solar-powered lights—from path markers to garden spotlights and even solar string lights. They’re easy to set up, cost nothing to run, and eco-friendly. With these budget-conscious ideas, your backyard can shine beautifully night after night.
4. Planters and Garden Beds
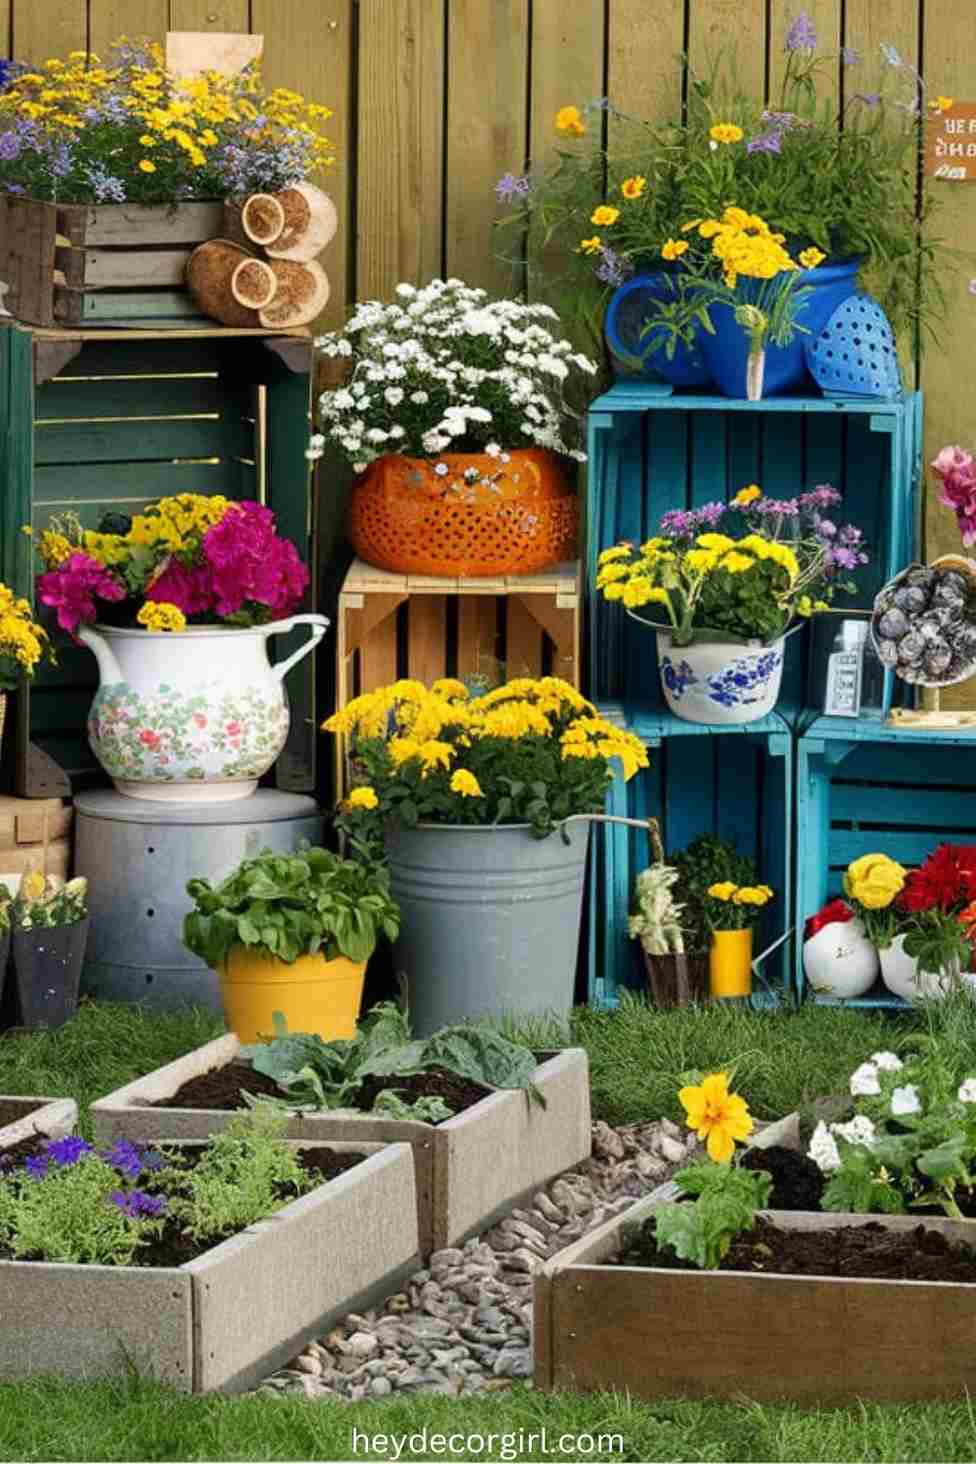
Creating a vibrant garden doesn’t require a big budget—just a bit of creativity and resourcefulness. Start by repurposing containers like old buckets, wooden crates, or even teapots as planters. Just make sure they have drainage holes, and give them a facelift with weatherproof paint or line them with fabric for added flair and moisture control. These unique touches add personality while saving money.
For larger planting spaces, build simple raised beds using reclaimed wood, old bricks, or metal troughs. A 4×8-foot bed is manageable and easy to build with basic tools. Fill them with a DIY soil mix using compost, peat moss, and perlite for a nutrient-rich base. Save more by starting plants from seeds or sourcing them from local swaps and community gardens. Focus on perennials for long-term savings and continuous blooms. With these affordable ideas, you can turn your backyard into a lush, colorful haven without stretching your wallet.
5. Garden Pathways
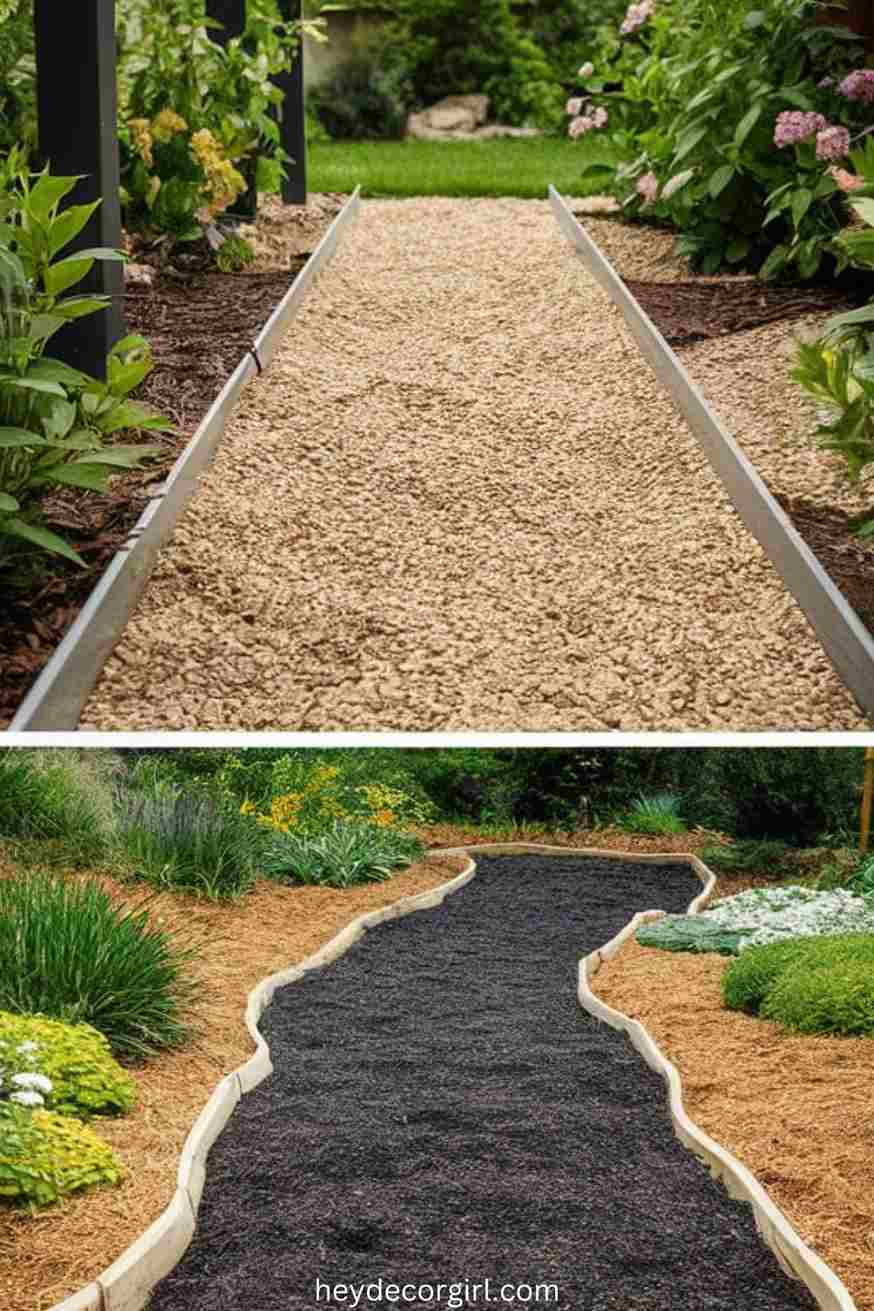
Designing budget-friendly garden pathways adds both function and beauty to your backyard without straining your wallet. Using affordable materials like gravel, mulch, or reclaimed bricks, you can craft walkways that complement your outdoor style while offering easy access through your garden.
Gravel pathways are simple and low-maintenance—just dig a few inches deep, lay landscape fabric to block weeds, and top with crushed stone or pea gravel. Add edging to keep it tidy. Mulch paths work similarly and offer a softer, natural look perfect for informal gardens. For a more polished, vintage feel, reclaimed bricks or pavers can be arranged in creative patterns over a level sand base, then stabilized with more sand between gaps.
Whether you’re laying a rustic mulch trail or a charming brick walkway, these DIY projects are accessible and cost-effective. Follow the step-by-step guides, and you’ll enhance your garden’s appeal while staying well within budget.
6. DIY Outdoor Art
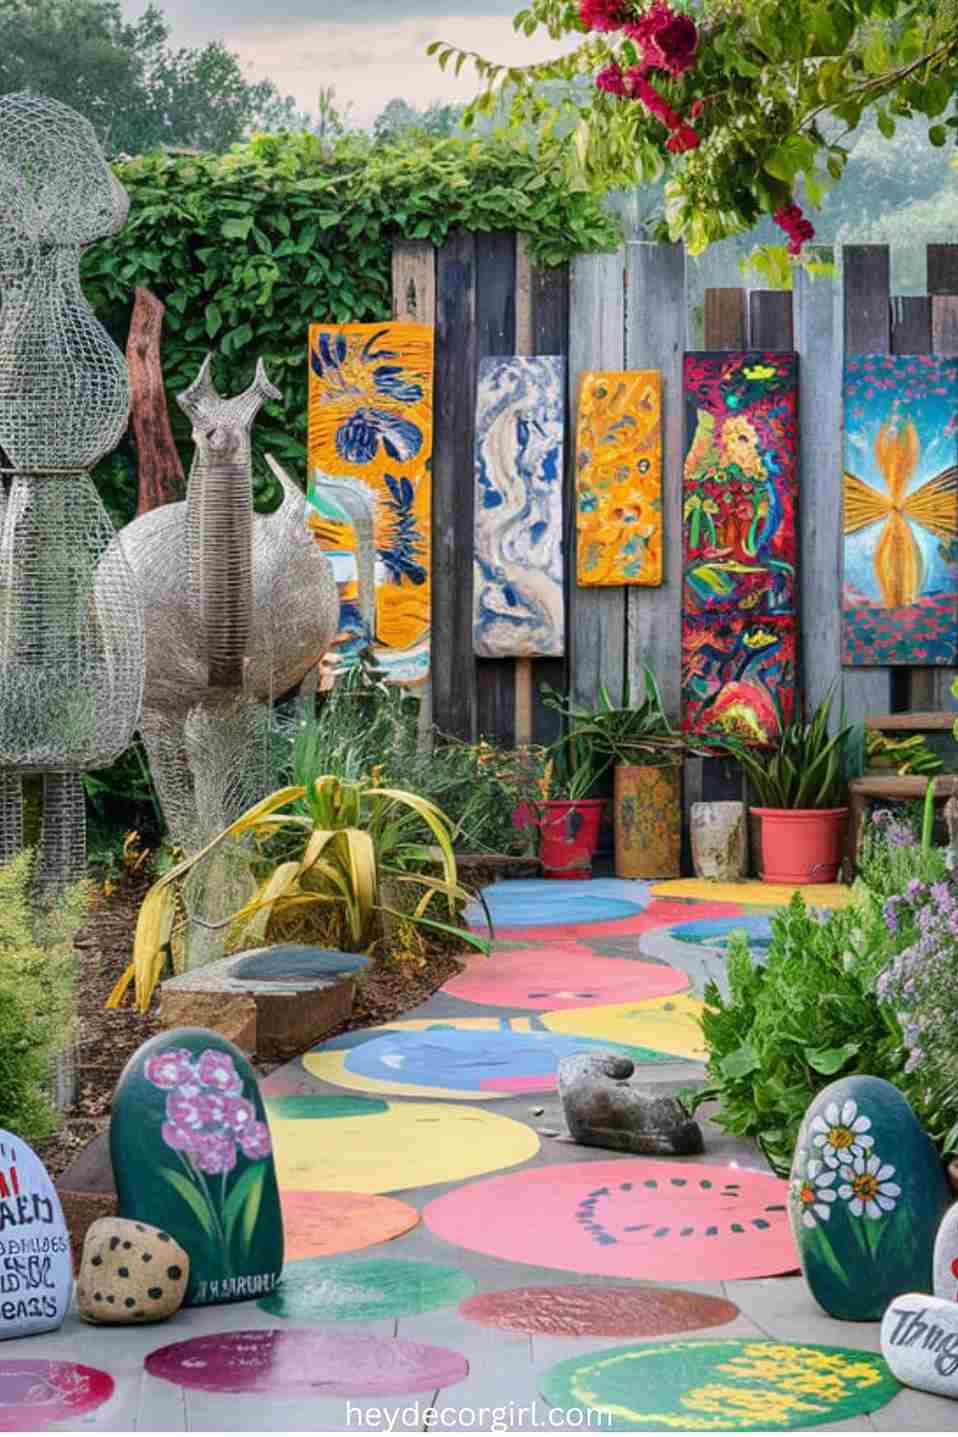
Adding your own artistic flair to your backyard doesn’t have to be expensive. With a few DIY touches, you can elevate your garden or patio into a truly personalized retreat. Try crafting garden sculptures from wire mesh and concrete or repurpose scrap metal and old tools into whimsical shapes—just add paint and a touch of creativity. For vertical spaces, brighten fences or exterior walls with painted wooden boards or weather-resistant canvas art, using stencils to create clean, eye-catching patterns.
Want to make a subtler statement? Painted garden stones are an easy and fun way to dot your flower beds or pathways with pops of color and charm. Use smooth stones, durable outdoor paints, and a sealer for lasting results. And for your patio, stencil designs can completely transform plain concrete—use geometric or floral motifs, apply outdoor paint with a roller, and finish with a weatherproof sealant.
These projects are perfect examples of Backyard Ideas on a Budget that bring personality and joy into your outdoor living area without overspending.
7. Outdoor Seating Areas
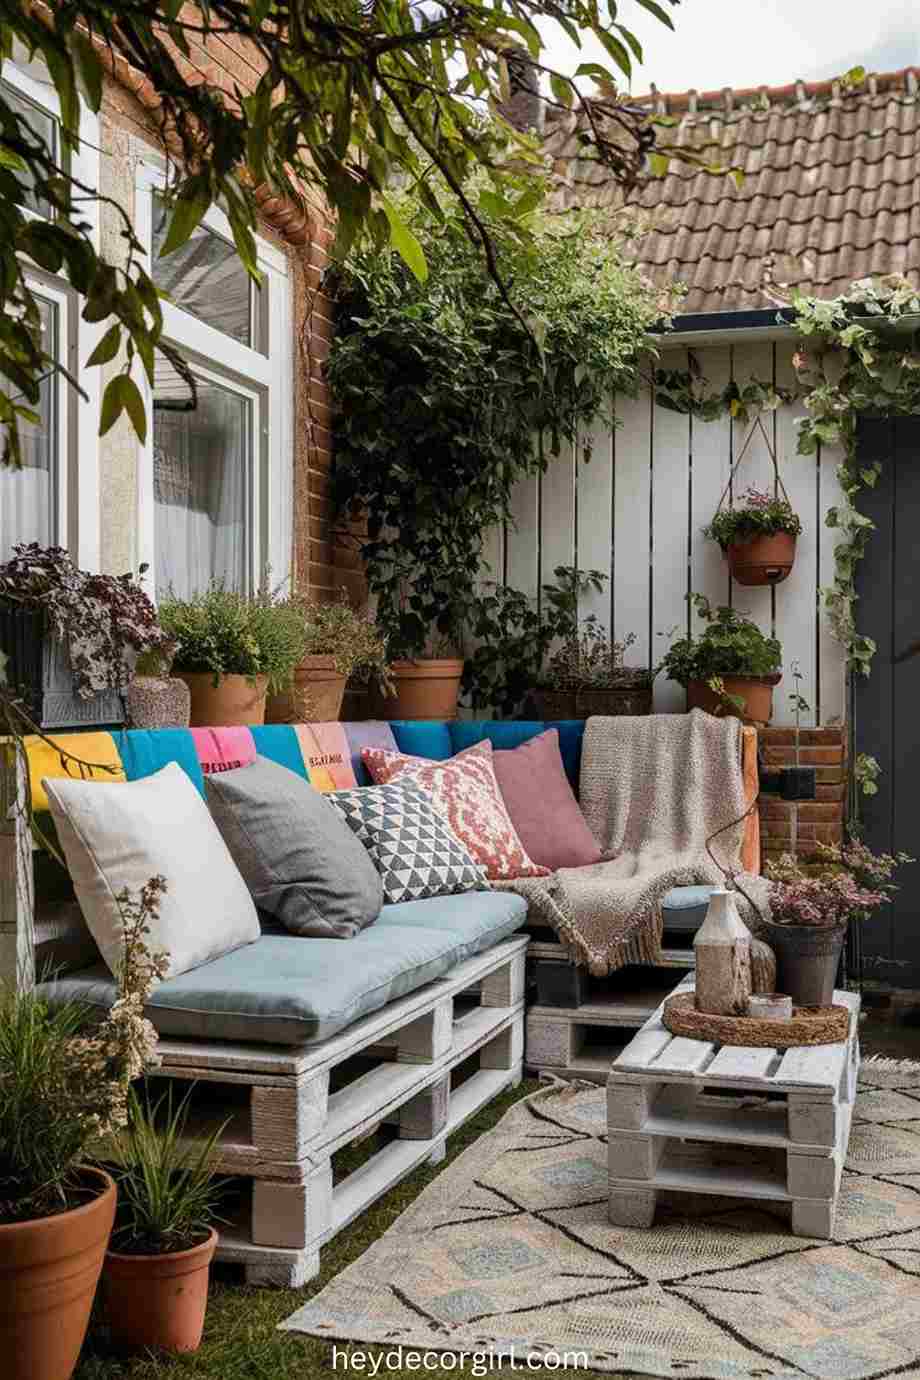
You don’t need a big budget to create a cozy and inviting outdoor seating area. With a few DIY tricks, like building simple benches from wood or pallets, you can add functional charm to your backyard or patio. Sand them smooth, paint or seal for weather protection, and top with soft outdoor cushions for comfort.
Add cozy throws, an outdoor rug, and a few potted plants to bring the space to life. Mix colors and textures that reflect your style, and don’t forget a small table for drinks or snacks. These little touches turn even the simplest setup into a warm, welcoming spot for relaxing or catching up with friends.
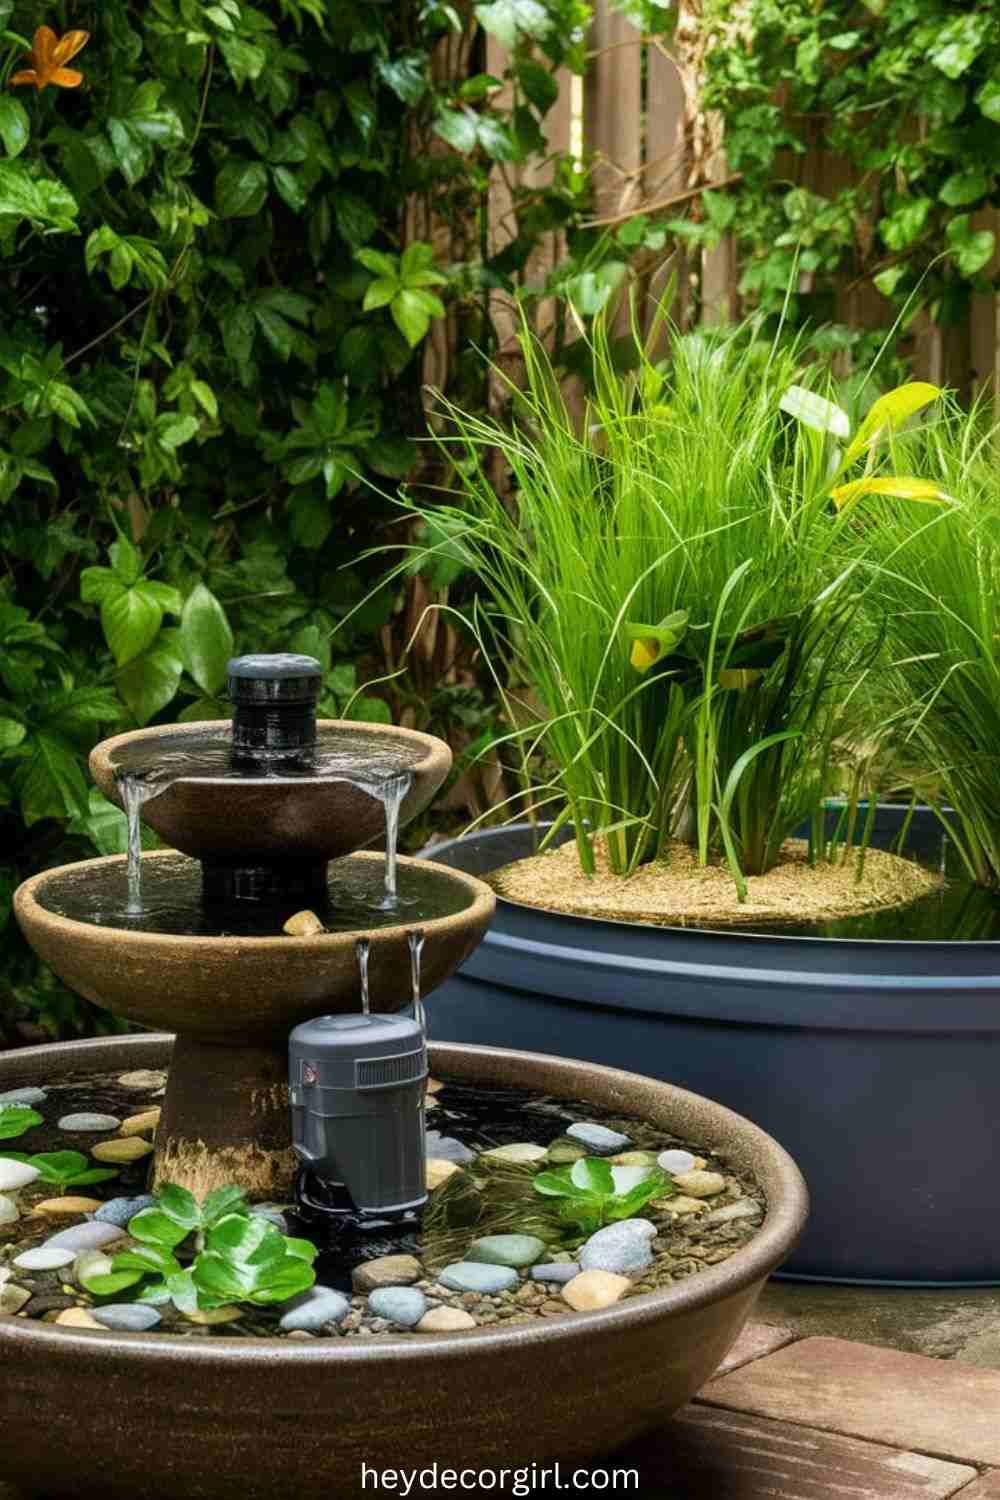
8. Simple Water Features
Adding a water feature to your backyard doesn’t have to break the bank. A simple DIY fountain using a large bowl or pot, a small water pump, and a few decorative stones can instantly bring a sense of calm to your space. Just place the pump at the bottom, hide it with pebbles or small plants, and enjoy the soothing sound of running water.
For a more natural vibe, try a DIY water garden using a large tub or bucket. Fill it with clean water, aquatic soil, and floating or submerged plants like lilies or grasses. You can even add a small pump for gentle movement. These affordable water features not only enhance your garden’s look but also create a relaxing, spa-like atmosphere with minimal effort.
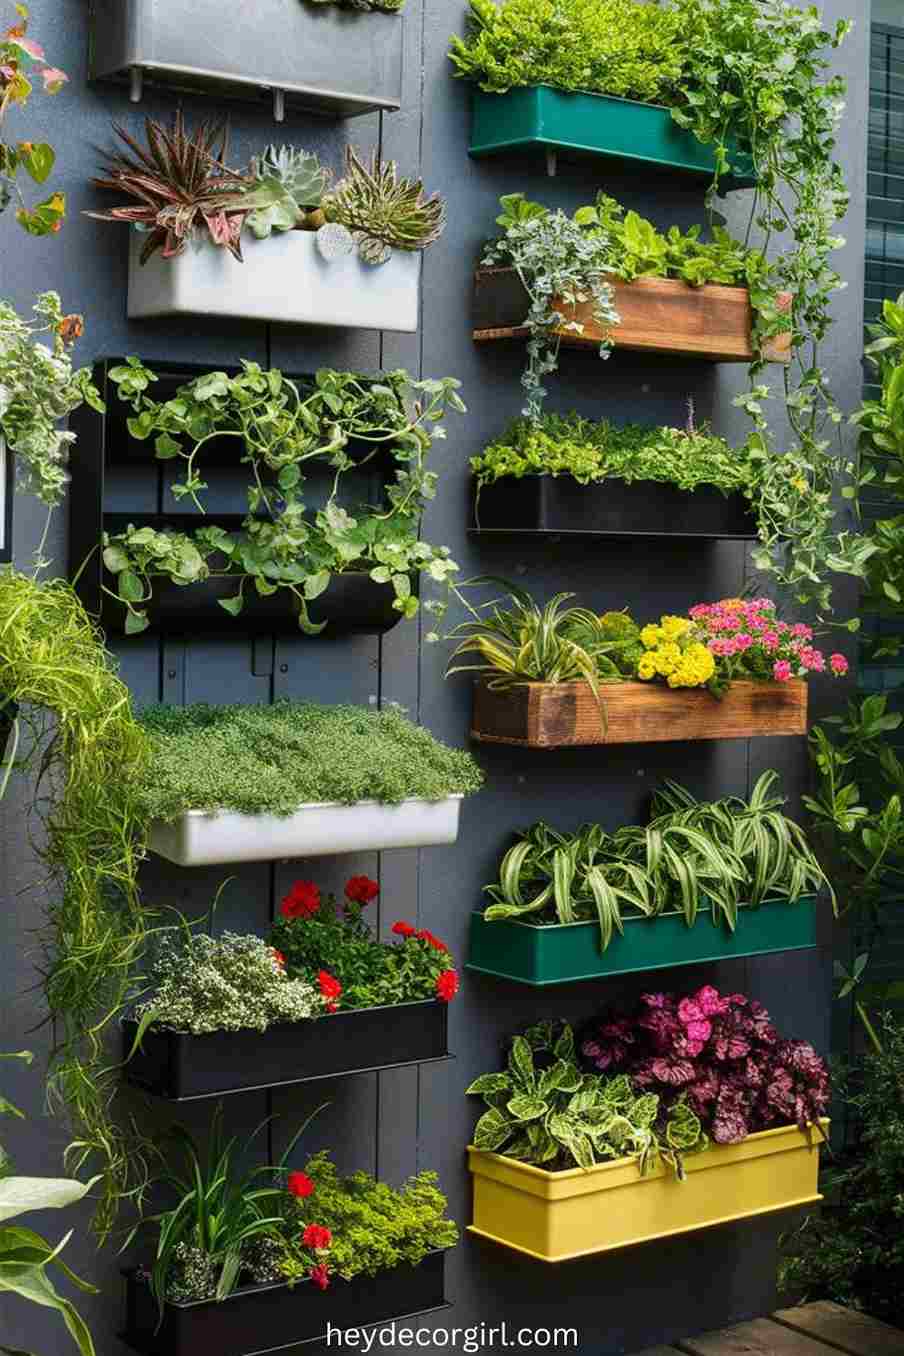
9. Vertical Gardens
Vertical gardens are a brilliant, budget-friendly way to green up small spaces, especially in urban backyards or patios. Wall planters and mounted shelves let you creatively arrange herbs, succulents, or flowers directly on your fence or house wall. Just install brackets or shelves, pop in a few pots or planters, and enjoy a burst of life where you least expected it.
For a rustic and affordable twist, repurpose a wooden pallet into a living wall. Line it with landscape fabric to hold soil, fill in your favorite plants, and either lean it securely or mount it vertically. Vertical gardens don’t just look amazing—they also save space and bring nature closer to home.
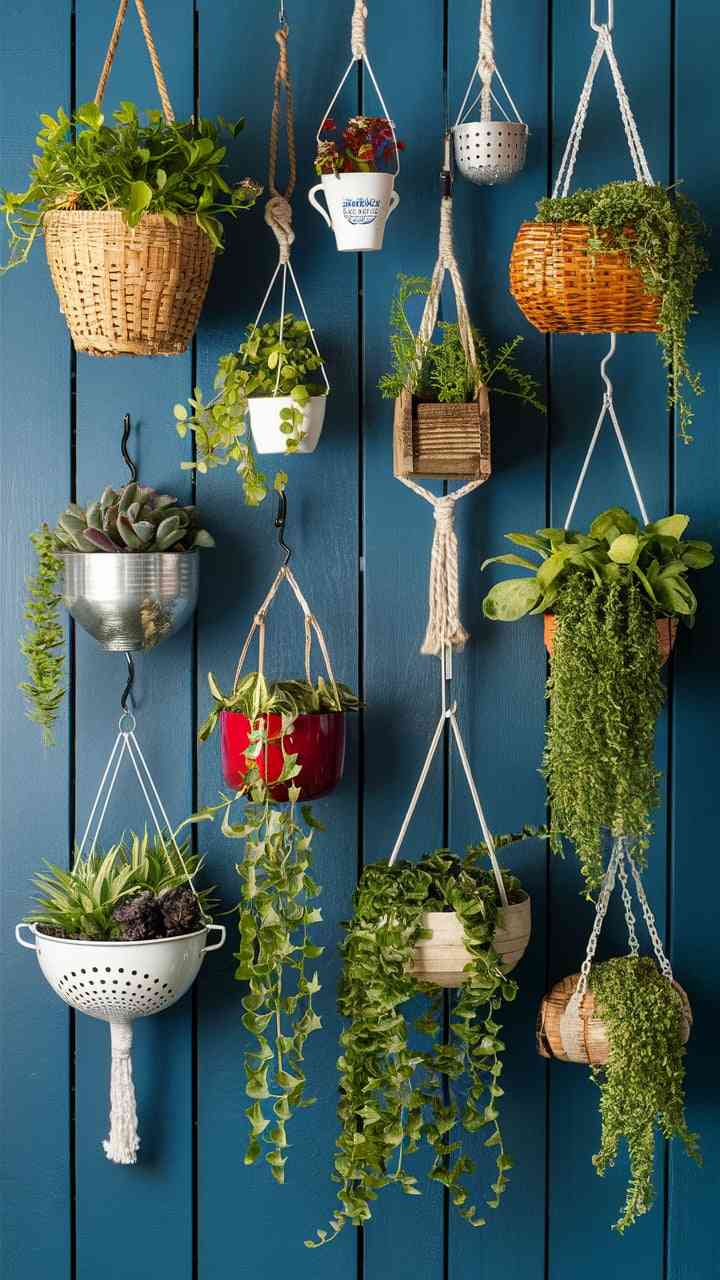
10. Hanging Gardens
Hanging gardens are a creative and space-saving way to bring greenery to your home, whether indoors or outside. By repurposing everyday items—like old cans, tea cups, or plastic bottles—you can craft unique hanging planters on a tight budget. Add hooks, cords, or macramé hangers, fill with soil, and choose a mix of trailing and upright plants for a layered, eye-catching look.
To maintain a thriving hanging garden, ensure proper drainage and water regularly, as hanging containers dry out quickly. Arrange your planters in spots with suitable light and protect them from harsh weather if outdoors. With a little care and some DIY spirit, your hanging garden can become a vibrant focal point that brings natural beauty to any space.
FAQ
1. What are some inexpensive ways to improve my backyard?
Inexpensive ways to enhance your backyard on a budget, or “Backyard Ideas On A Budget,” include DIY projects like building simple fire pits, creating vertical gardens, repurposing old furniture, and adding affordable outdoor lighting. You can also use creative and budget-friendly materials such as reclaimed bricks for pathways and repurposed containers for planters. For more budget-friendly backyard ideas, consider exploring ways to maximize your space with cost-effective solutions and innovative designs.
2. How can I create a cozy outdoor seating area on a budget?
“You can create a cozy outdoor seating area by revamping existing furniture with fresh paint or new cushions. Adding outdoor rugs and throws can also help to define and warm up the space. For backyard ideas on a budget, DIY benches using pallets or wood are an affordable option for extra seating. Backyards ideas on a budget can be further enhanced with creative and cost-effective DIY projects.”
3. What are some budget-friendly options for outdoor lighting?
Budget-friendly outdoor lighting options include using string lights, lanterns, and solar-powered lights. DIY lanterns can be made from jars and candles, while solar lights are cost-effective and easy to install, providing both illumination and a touch of elegance. For additional inspiration, check out Backyard Ideas On A Budget to explore creative ways to enhance your outdoor space without breaking the bank.
4. How can I build a simple fire pit without spending a lot of money?
To build a simple, budget-friendly fire pit, you can use affordable materials like concrete blocks, bricks, or even repurposed metal containers. For more inspiration, check out “Backyard Ideas On A Budget” to explore creative and cost-effective ways to enhance your outdoor space. Follow a basic step-by-step guide to assemble the fire pit, ensuring it is stable and safe for use.
5. What are some easy DIY projects for creating a vertical garden?
Easy DIY vertical garden projects include using wall-mounted planters or shelves to display plants and repurposing wooden pallets for vertical planting. You can also use recycled materials like plastic bottles or old baskets to create hanging planters. For those looking to enhance their outdoor space, backyard ideas on a budget can be combined with these methods to create a stylish and affordable garden area.
6. How can I make a small water feature on a budget?
Create a small, budget-friendly water feature by using affordable materials like large bowls, pots, or repurposed containers. For a great addition to your backyard ideas on a budget, install a small submersible pump to circulate the water and add decorative elements like stones or pebbles to enhance the look. These backyard ideas on a budget can bring a serene touch to your outdoor space without breaking the bank.
7. What are some low-cost ways to improve garden pathways?
Inexpensive materials for garden pathways include gravel, mulch, or reclaimed bricks. You can create simple, stylish paths by laying down these materials and ensuring proper edging to define the pathway and keep the materials in place. For additional inspiration, check out our “Backyard Ideas On A Budget” to discover more cost-effective ways to enhance your outdoor space.
8. How can I create DIY outdoor art for my backyard?
DIY outdoor art can be created by crafting garden sculptures from wire and concrete, painting and decorating garden stones, or using stencils for patio designs. These projects can be done with affordable materials and add a unique, personal touch to your backyard. For more budget-friendly outdoor projects, check out our guide on Backyards Ideas On A Budget.
9. What are some budget-friendly ideas for outdoor planters and garden beds?
“Budget-friendly options for outdoor planters include repurposing containers such as old buckets or crates. For garden beds, you can build simple raised beds using inexpensive wood or bricks. Consider using affordable soil and plant options to keep costs down. Backyards ideas on a budget can also include creative DIY projects, such as making your own outdoor furniture or adding simple, inexpensive decorations to enhance the space.
10. How can I make the most of a small backyard on a budget?
Maximize a small backyard on a budget by utilizing vertical space with wall planters or hanging gardens. Opt for multi-functional furniture, such as benches with storage, and choose low-maintenance plants to reduce upkeep. Creative landscaping and smart organization can make even a small space feel inviting and functional. These Backyards Ideas On A Budget can transform your outdoor area into a charming retreat without breaking the bank.
Visited 28 times, 1 visit(s) today
Hi, I’m Richa, the creative mind and passionate soul behind Hey Decor Girl. With a bachelor’s degree in Inter-space Design and a deep love for transforming spaces, I’ve dedicated my career to bringing style, comfort, and personality into homes. As an interior designer and architect, I’ve had the pleasure of crafting unique living environments that reflect the individuality of those who live in them.
At Hey Decor Girl, I share my expertise in all things home decor—from cozy living room makeovers to rustic farmhouse designs and everything in between. My mission is to inspire you to create spaces that not only look stunning but also feel like home. Whether you’re looking for the latest trends or timeless classics, I’m here to guide you every step of the way. Let’s make your dream home a reality, one stylish detail at a time.
Backyards Ideas Backyards Ideas On A Budget
Last modified: July 3, 2025

![Hey Decor Girl [Latest Trending Decor Design Ideas]](https://heydecorgirl.com/wordpress/wp-content/uploads/2024/08/Heygirldecor-Logo.png)
