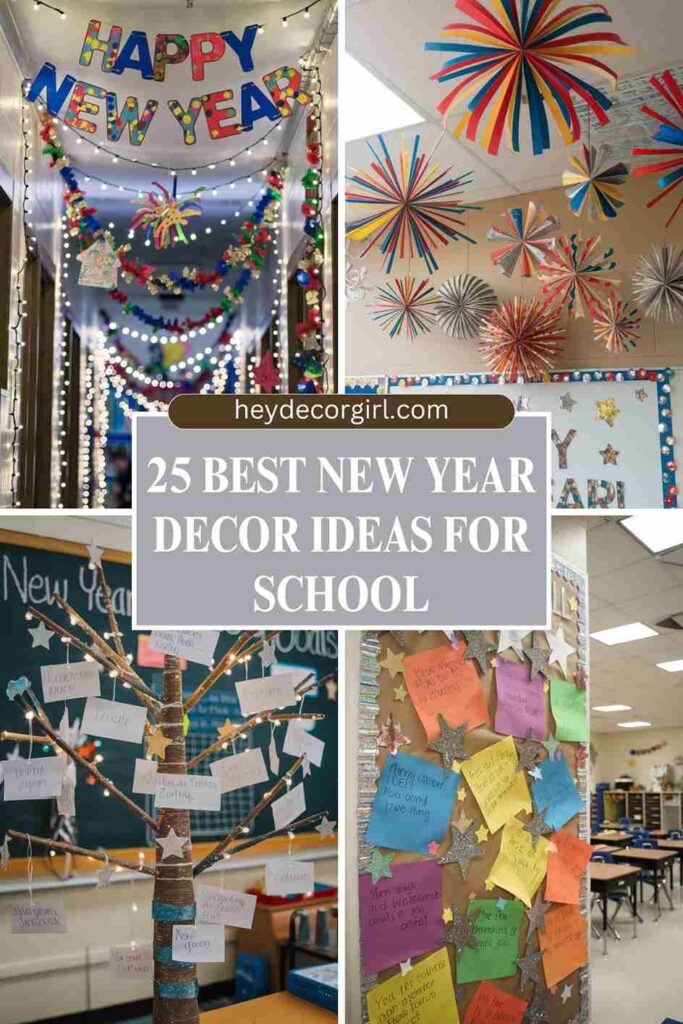
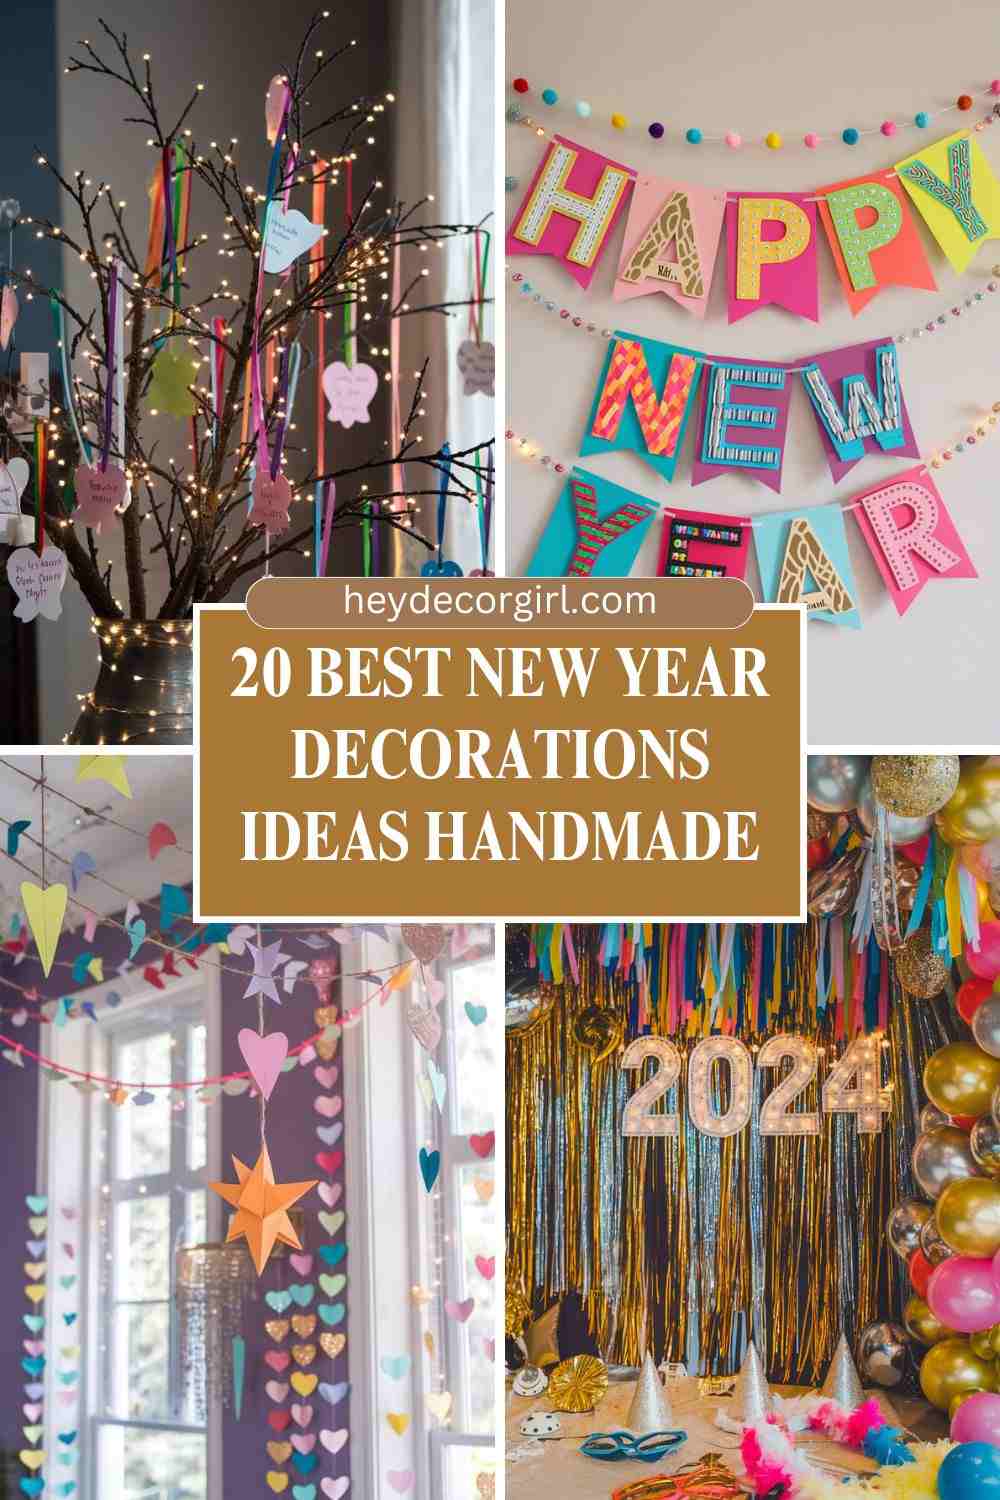
These New Year Decorations Ideas Handmade are a creative addition to any area that gives it some flair and a holiday-like atmosphere. Whether it is glittery accents or colorful garlands and homemade hats, every concept in this collection is chosen as a way to make a personalized event a rowdy party. You can either go out there and make a big statement or simply add a few nice details to it, but either way, having handmade decorations will guarantee that your New Year setup will be made to seem like it was personalized specifically to you, and will be the best possible backdrop to a great celebration.
With the world about to enter the New Year, a lot of individuals start seeking ideas on how to revive their decorations and create a celebratory mood to embrace a new year. The decorations made by hand bring a feeling of charm and warmth, which is not available in items sold in stores. Along with being cheaper, DIY decorations can be fully customized, and you can decide the color, the theme, and designs to use that match your personal taste and the atmosphere you desire to achieve with your celebration. Besides, it is also a good and enjoyable experience to create your own decorations, where you can invite your family and friends and make the preparations even more special.
Best New Year Decorations Ideas Handmade
1: Glittery Mason Jar Candle Holders
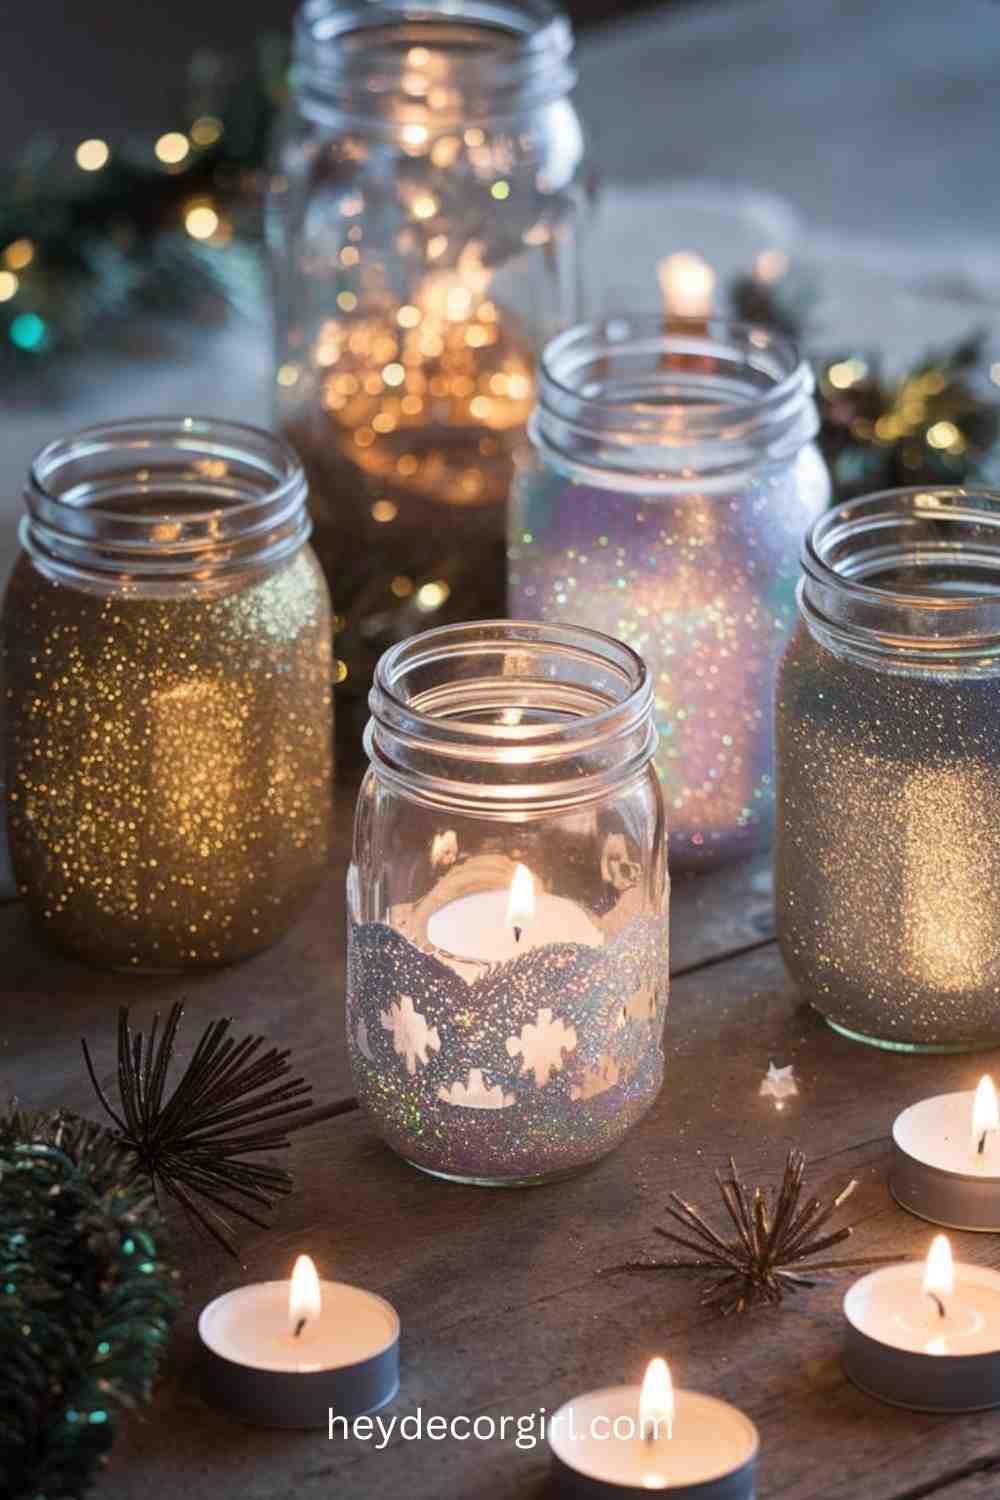
It is a simple, but gorgeous DIY activity that will add a glittery touch to any New Year celebration by transforming ordinary mason jars into glittery candle holders. The candleholders make the environment of your space look warm and inviting, nd they also give a touch of elegance and charm to it.
Materials Needed:
- Mason jars (whatever size you prefer, that is all).
- Fine glitter (gold, silver, or mixed colors to create a festive impression), Mod Podge, or clear-drying glue
- Foam brush or paintbrush
- Tea lights or mini LED candles.
Step-by-Step Instructions:
- Read the Mason Jar: wash and dry the mason jars properly so that the glue and glitter adhere properly.
- Apply Glue: Cover exterior of Jar: Apply a thin, even coat of Mod Podge or glue to the outside of the jar using a foam brush or a paintbrush. Depending on the design, you can apply glue to the entire jar to have a glittery overall effect, or you can use the glue on the bottom half or in patterns.
- Add the Glitter: Generously sprinkle the area covered with the glue on the piece of paper (to keep the excess on the paper) with glitter, and turn the jar around so that none of the areas are left without glitter. Tap off the glitter very lightly, and in case of need, sprinkle more glitter over the spots missed.
- Seal the Glitter: When the layer of glue and glitter is dry, cover the glitter with the thin layer of Mod Podge to seal it. It will not allow glitter to flake away and make the jar more resilient. Let it dry completely.
- Add the Tea Light: After the jar had dried, place a tea light or a small LED candle inside. When it is lit up, the candle will produce a beautiful glow that glitters through the glitter.
Color Theme Suggestions:
- Gold and Silver: Traditional metallic sounds are a high-end and festive appearance that is ideal during a New Year’s Eve party.
- Mixed Colors: You can combine glitters (e.g., gold, silver, and rose gold) and make it a fun and colored effect.
- All White/Iridescent Glitter: To create an icy and wintery appearance, it is better to apply white or iridescent glitter to be less glamorous and more magical.
These mason jar candle holders have an eye-catching glittery look and can be used as table centerpieces, mantel decorations, or outside lighting, and are versatile enough to be used in your New Year decor.
2: DIY Confetti Balloons

Confetti balloons are easy and quick to make, and they are a good addition to any celebration during the New Year. Such balloons are whimsical, and they are incredibly beautiful as a backdrop to the party, a centerpiece, or as a simple sprinkling of the room.
Materials Needed:
- Cleared latex balloons (you want to use at least 12 inches and larger so that it is easier to fill)
- Confetti (metallic, color, or a theme of your choice)
- Balloon pump
- Optional: Static spray or dry tissue paper.
Instructions:
- Prepare the Confetti: To begin with, make your choice of confetti colors. You may leave it in a monochromatic appearance, either with gold or silver, combine the metallics, or maybe colored confetti that suits your theme of the day, the New Year.
- Adding Confetti to the Balloon: Adding confetti to the balloons can be achieved by slowly adding a small portion of the confetti to each balloon via a funnel or by pinching the confetti. Be cautious not to put in excess of the confetti since this may cause the balloon to be heavy and lower its capacity to rise in the air.
- Inflate the Balloon: Blow up the balloon: Blow up the balloon with a balloon pump to the desired size. This helps the confetti to spread evenly over the balloon. To have a fun tip, any dry cloth or tissue can be used to rub the outside of the balloon to create some kind of static effect, which will cause the confetti to stick to the sides of the balloon.
- Seal and Arrange: Fill them, tie off the balloon, and serve as desired. To give it an extra visual effect, you may have pairs of balloons or put on some ribbon or a string of matching colors.
Color Theme Tips:
- Classic Metallics: Gold and silver confetti will provide a classy, old-school impression that would be great on a New Year’s bash.
- Vivid and Bold Colors: To be playful, dress in such colors as pink, blue, and green.
- Match to Your Theme: When you are looking for a certain theme, like a winter wonderland, then use white or iridescent confetti to look frosty.
Homemade confetti balloons are not complicated, but they can serve as a striking decoration at any party and add festivity to the area as well as the celebratory mood.
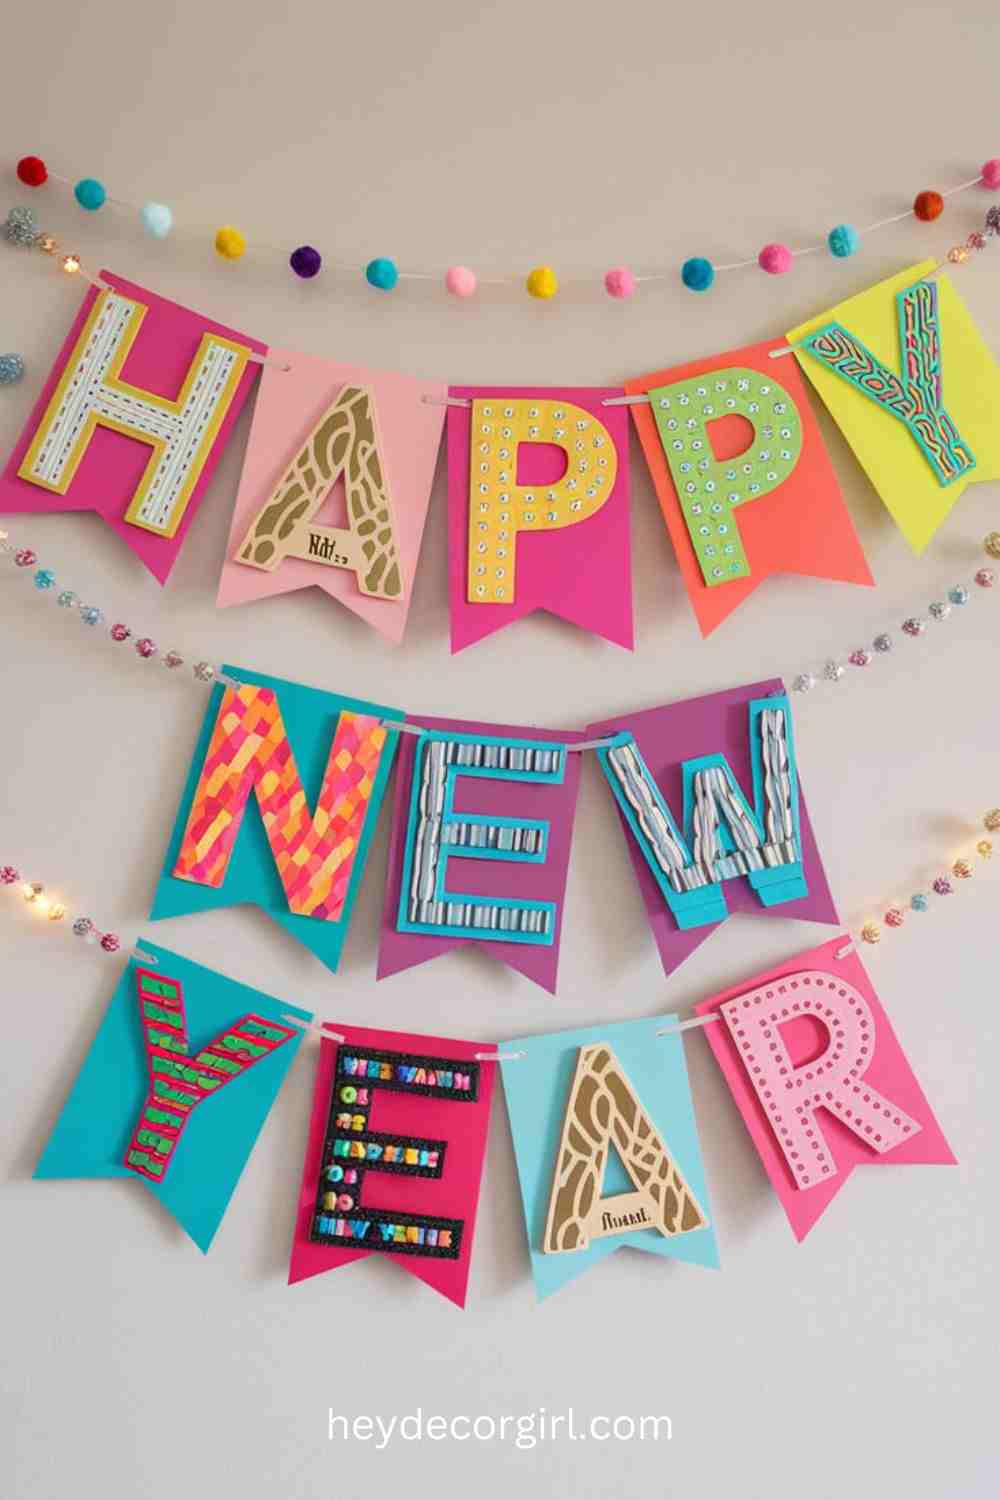
3: Handmade Paper Garland
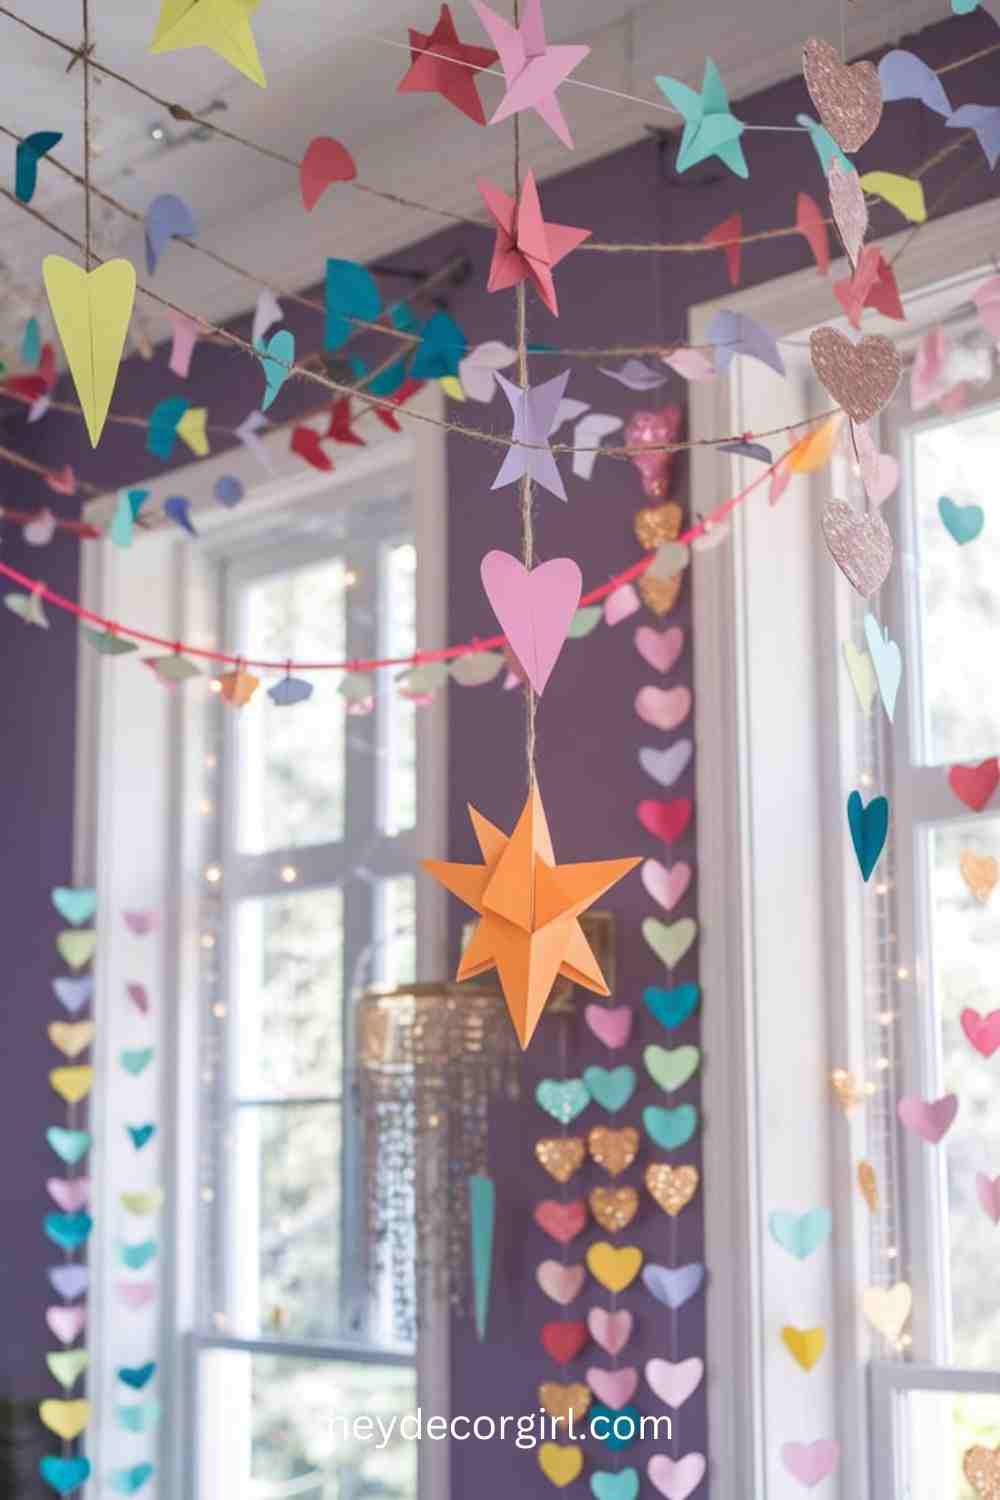
A homemade paper garland is an easy, personalized, and inexpensive decoration that can simply turn any place into a New Year’s celebration. You can use paper garlands to decorate the walls, windows, mantel, or party tables with colors and texture, either using traditional shapes such as stars and hearts, or be creative and use geometric designs.
Materials Needed:
- Paper (construction paper, patterned paper, er or any form of decorative paper).
- Scissors
- String, twine, or thread
- Glue or a stapler
Garland Styles:
- Stars: Prepare star figures with colored paper and tie them up into a glittering chain of twinkling festive decorations that catch the spirit of the New Year.
- Hearts: To make a more playful romantic theme, cut heart shapes out of paper and hang them on a length of twine to create a cute, colorful appearance.
- Geometric Shapes: You can make modern garlands by cutting out geometric shapes such as circles, triangles, or diamonds in any number of colours. A bold eclectic mix and match.
- Tassel Garland: To achieve a more textured appearance, cut long pieces of paper, twist, and tie them to a string to have a fun and dynamic garland.
Hanging or Draping: Instructions:
- Cut the Shapes: Choose your shape or theme of the garland and cut out the shapes with your scissors, out of your paper. You may stick to a uniform size, or change them to an eclectic appearance.
- Preparing the String: Take a piece of string or twine, long enough to cross through the area you want it to. Depending on the size of the area, you can also have several garlands.
- Tape the Shapes: Tape the Shapes Tape the cut-out shapes to the string with glue, tape, or by stapling them at intervals. Make sure that all shapes are spaced out to look even. When you are using very fine shapes, stick them down so that they do not fall off.
- Hang or Draping the Garland: After making up your garlands, they can be hung on the walls, or the edges of tables, or even the ceiling, where you like. Multiple garlands can be used in layers to combine the texture and depth as well.
The garlands made of handmade paper are always cute and can be easily customized to match any color or style of the New Year. No matter what kind of scheme you want, classic gold and silver or a flashy combination of vibrant colors, these garlands will help you to personalize your celebration.
4: Countdown Clock Wall Art
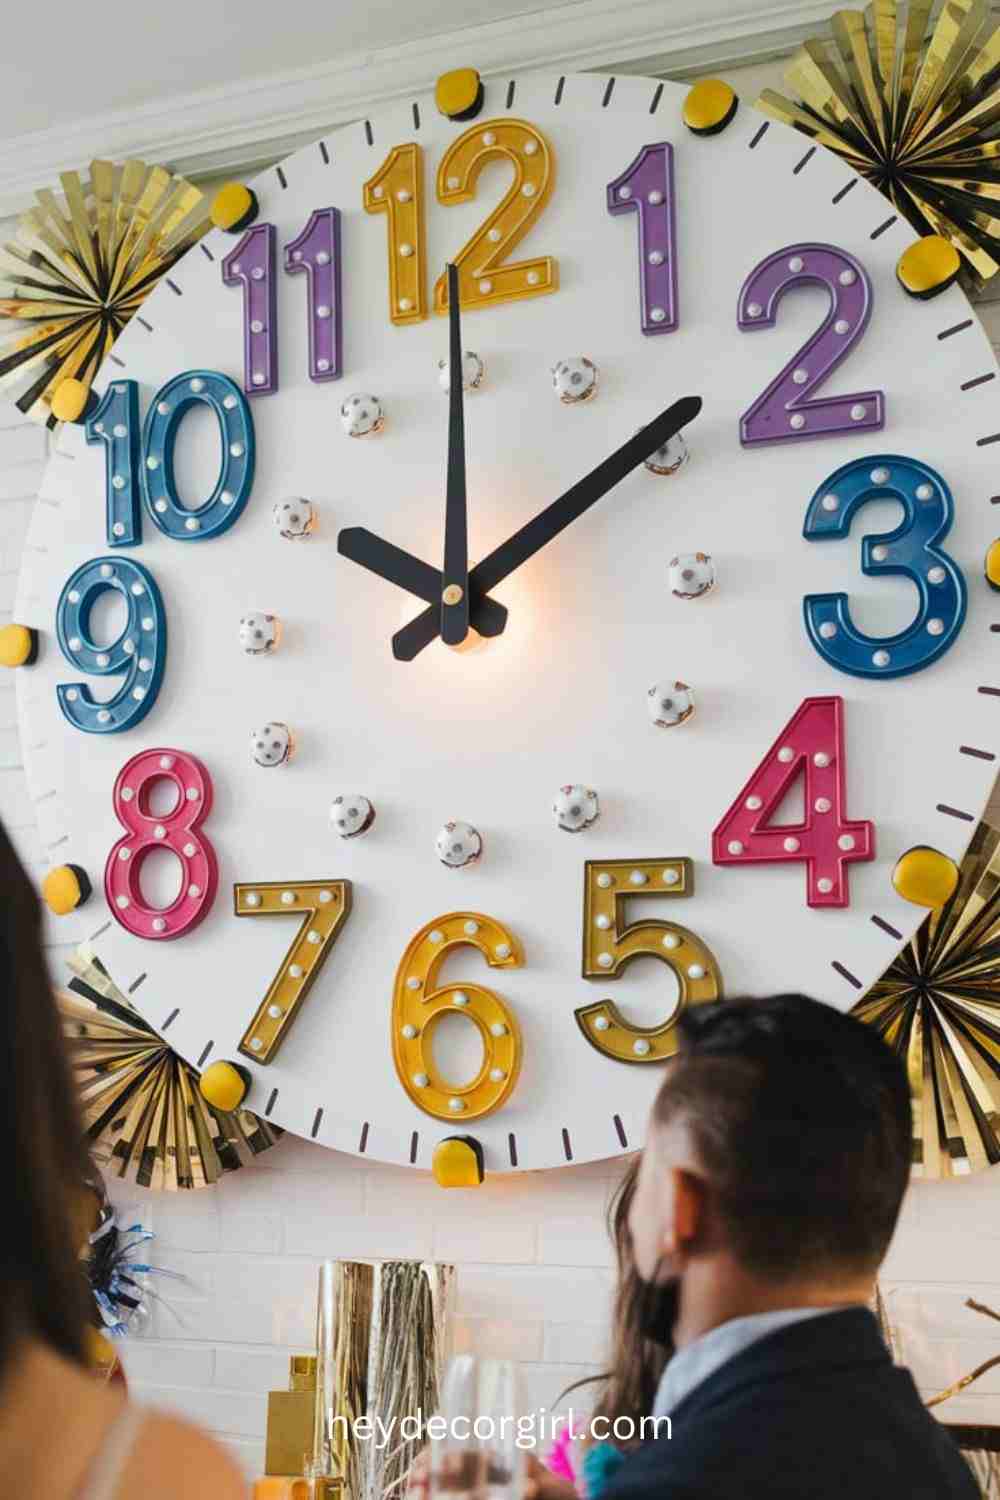
One of the most amazing and engaging methods of creating anticipation for the New Year is a countdown clock wall art. This do-it-yourself project can be used as a fun area of interest in addition to providing excitement and energy to the celebration, particularly as the clock runs out towards midnight.
Materials Needed:
- Large clock face printout (is available online, or draw one)
- The signs (in bold color or metals)
- Foam board or poster board (large, due to the sturdiness)
- Ruler
- Scissors
- Clock hands (they can be made up of paper or a cutout on the cardboard)
- Push pins or tiny hooks (to fit in the hands of the clock)
Visit the Countdown Clock:
- Read the Clock Face: a. Print a large clock face or draw a template of a clock face on a foam board or poster board. Make sure that the figures and hands are huge so that they can be easily viewed over a distance.
- Clock Decoration: with colored pens or markers, pop the clock face. The clock will have a festive and celebratory appearance because of bright colors, metallics, or glitter. You can apply gold to the numbers, silver to the hands, or you can use a combination of bright colors to suit the theme of the New Year.
- Make the Clock Hands: Cut an hour hand and a minute hand. With a piece of paper or cardboard, cut one clock hand (a minute hand) and one (an hour hand). Place them in the centre or rather the middle of the clock by using a small push pin or hook, and leave the hands to move freely.
- Prepare the Countdown: Using a clock manually on New Year’s Eve, you can begin by setting the hands of the clock to time a few hours earlier than it will be at the time of midnight. The further towards midnight the clock hands, the better as the time goes on, and you get anticipation. You may also write down notes every hour, funny quotes, or resolutions of the New Year to keep your guests entertained.
Suggestions on Making the Countdown Clock Appear More Attractive:
- Bright Colors: Vibrant colors such as neon pink or electric blue, or bright yellow can be used to bring about an exciting and invigorating atmosphere to the clock face.
- Metallic Accents: Metallic gold, silver, or holographic markers will be reflected, and such accents will make the clock more appealing and more noticeable as the night at midnight approaches.
- Add Glitter or Sequins: To add more glitter, paste some glitter or sequins onto the clock numbers or sides to make it shine.
- Choose a Bold Font: When making your clock, use bold and dramatic fonts when writing the numbers, and make it look more like a Christmas holiday.
One of the most impressive methods to maintain the energy level is to have a countdown wall art that can help to make the New Year celebration a personal event. The hands would get nearer to midnight, and this would lead to more excitement and build a memorable experience among the guests.
6: Festive Photo Booth Backdrop
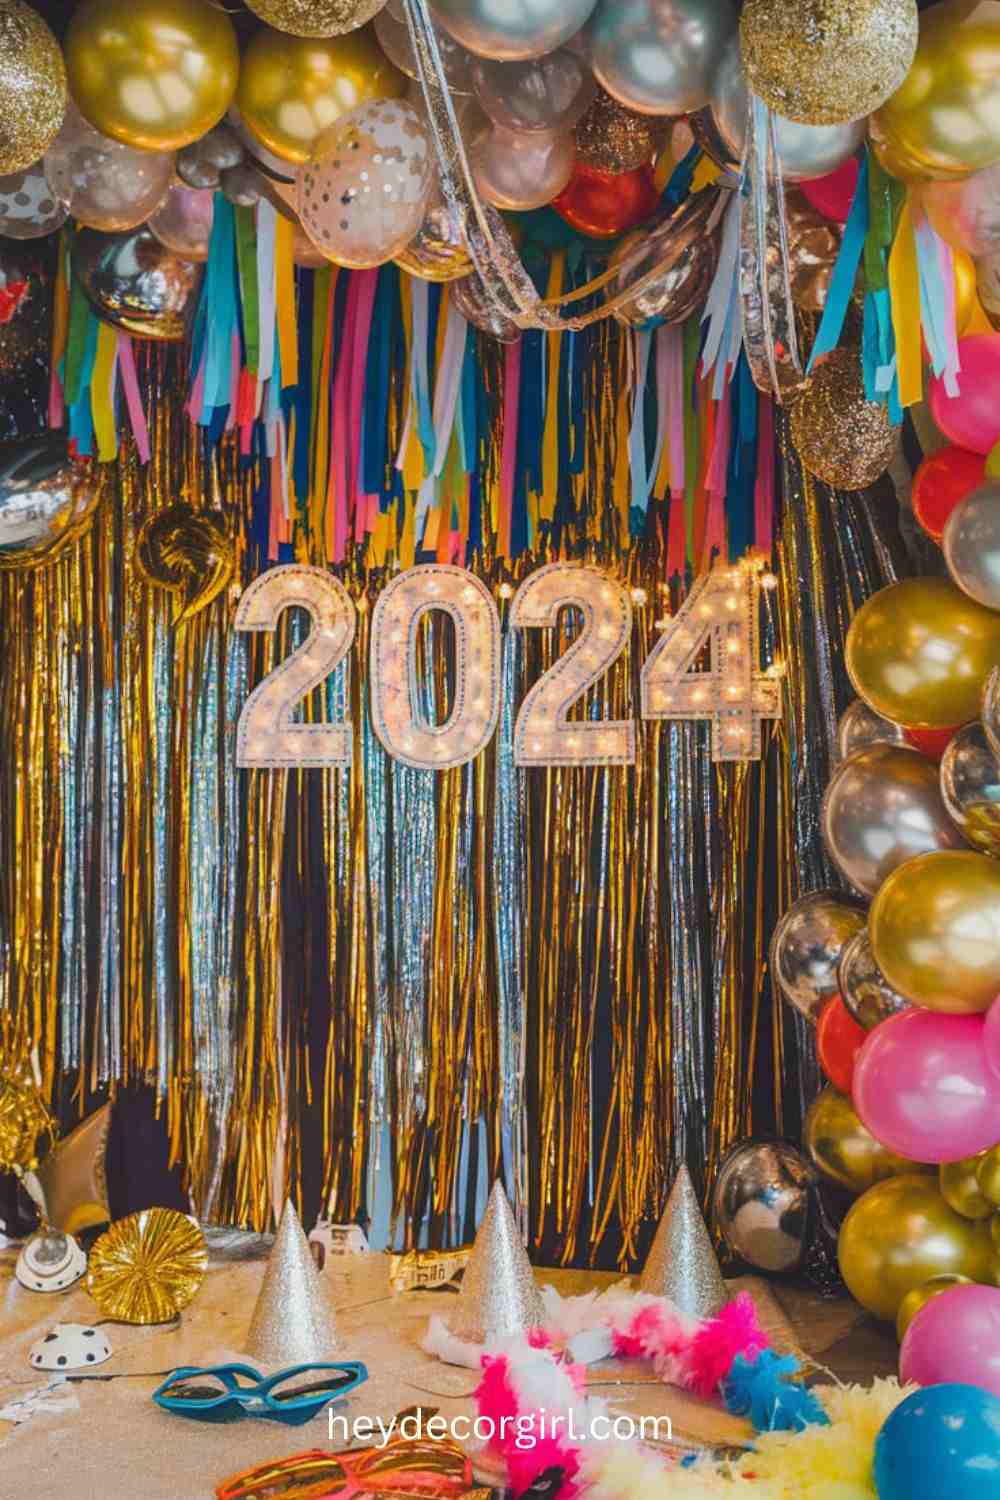
An amateur photo booth backdrop is a great idea to share memories and make your New Year even more entertaining. All you need are a few basic materials to create an exciting and interesting photo booth that will make your guests feel like celebrities, not to mention that it will all add to the party atmosphere.
Materials Needed:
- Streamers (metallic or foil, or paper, in varieties and colors of your choice).
- Balloons (in matching colors)
- Fun props (hats, glasses, boas, noisemakers, etc.)
- Sign (or custom number cutoutsinon 2023 or 2024.
- Tape or command hooks
- String or ribbon (for hanging)
Photo Booth set-up instructions:
- Photo Booth Area: This is where you choose a corner or a wall in your party area where you will take photos as a backdrop. It must be out of busy places so that guests are able to pose without inconveniences.
- Hang the Streamers: Streamers are decorative items made of metallic, foil, or paper (festive colors, such as gold, silver, or even multicolor) that will be tacked to the wall or cover a section of the space. You could be able to hang them either vertically in a flowing appearance or horizontally to produce a curtain appearance. To enhance the effect, you can use alternative colors or add some streamers that are iridescent streamers to get some glitz.
- Add Balloons: Group the balloons of different sizes on the background to make it three-dimensional and interesting to observe. Attach helium-filled balloons to the wall using tape or tape regular balloons to the wall. It would be a good idea to use the numbers 2023 or 2024 balloons as the center of the background.
- Design the Sign: Make a large, high-profile signage that says 2023 or 2024 (or a personalized message) to celebrate the event. The cardboard or foam board is used to make the sign, and you can decorate it with glitter, paint, or stickers. Make the sign visible in the middle or above the photo space so that it is visible in photos.
- Add Fun Props: Have fun props around, such as New Year props, such as hats, glasses, feather boas, or noisemakers around so the guests can play with them during the photo taking. This assists in making the photos more exciting and makes everybody participate.
- Preparations: Install a camera on a tripod or identify an area where the guests can easily take their own photographs, or hire a friend to be a photographer. A selfie stick can also be purchased by you to have additional fun. Ensure that the light is appropriate for taking good pictures.
Tips for Making it Unique:
- Personalized 2023 or 2024 Sign: Large, bold figures should be used to emphasize the year in the background. It is even possible to add glitter or string lights in order to make the sign show up.
- Themed Props: Pair your props to the theme of the New Year, e.g., themed photo booth props: themed hats, themed glasses, etc.
- Twinkling Lights: To add glitz, hang some fairy lights or LED lights about the backdrop or around the number sign to have a twinkling, party atmosphere.
- Color Coordination: Select the color theme of streamers and balloons that fits into the rest of your party image (e.g., silver and gold to make it look elegant, or bright and vivid colors to make it look fun).
A homemade photo booth backdrop will add an additional flavor to your New Year’s celebration and provide a unique place where your guests can take their pictures. Novelty props, colorful colors, and specialized features will make this photo booth a memorable experience and a grandiose to all present!
7: DIY Noisemakers
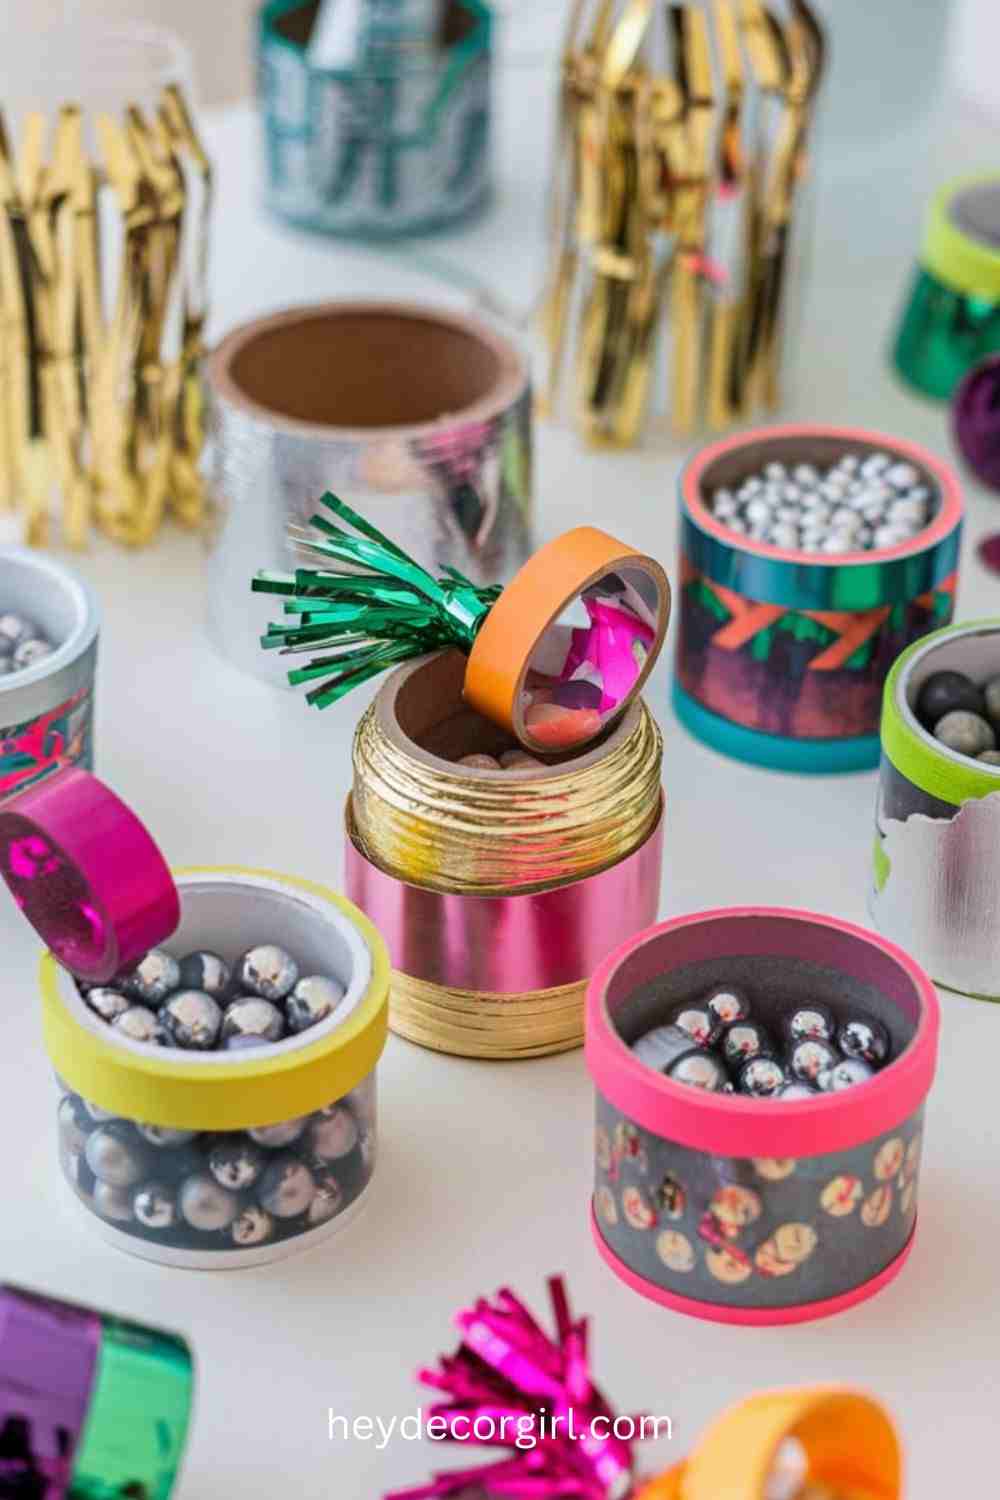
Noisemakers are easy to build and enjoyable to make, and are a great way to make your New Year’s countdown more exciting. These are fun to make and simple instruments, which can be rattled in the last days of the year, and one can hear them shaking with the current celebrations as the clock marks the midnight hour. Make them personal and use bright colors and decorations depending on the theme of your celebration.
Materials Needed:
- Small containers (e.g, empty toilet paper rolls, plastic cups, or small jars).
- Beads, rice, or little rocks (to make the sound).
- Decorative tape (e.,g. washi tape, glitter tape, or metallic tape)
- Stickers/glitter (can be used to add some decoration)
- Scissors
Make the noisemakers by following these directions:
- Get the Containers ready: Select small containers such as empty toilet paper rolls, plastic cups, or even small jars. These will form your foundations of noisemakers. When you are using paper rolls, you may tape one end in order to form a sealed tube.
- Pour in the Noise Maker Filling: A few little beads, dry rice, or small rocks into the container. You do not want too much–no more than you have to make a rattle against mixing. Beads produce a sharp sound; dry rice produces a lighter sound.
- Close the Containers: In case you were using open containers such as paper rolls, close the other end using tape to avoid the filling falling out. It is also possible to use decorative tape to cover any open sides or make a fun shape around the container.
- Decoration of the Noisemakers: Bind the container with colored or metallic tape. You can take neon color, metallic gold and silver, or festive motifs such as stripes, polka dots, or zigzags. Extra flair can be created by using glue on glitter, stickers, or fun embellishments.
- Shake and Celebrate: Your self-made noisemakers are not prepared for the countdown! At the end of the year, give them to your visitors and prepare to shake them in anticipation of midnight.
Suggestions for Decorating:
- Metallic Colors: Metallic gold, si, or copper tape is used to give a glamorous, New Year’s Eve appearance. This makes the noisemakers festive and glamorous.
- Neon Colors: To have more fun, a more energetic one, choose the bright neon tape, pink, green, or orange. Such colors will be conspicuous and will introduce a mischievous aspect to your partying.
- Add Special Sparkle: Add glitter or rhinestones to your noisemakers to make them especially festive and sparkly.
Home-made noisemakers are easy but efficient to make the atmosphere of celebrating the New Year very vivid and joyful. These noisemakers are bound to put everyone in the party mood with the personalized ornaments and exclusive designs.
8: New Year Wishing Tree
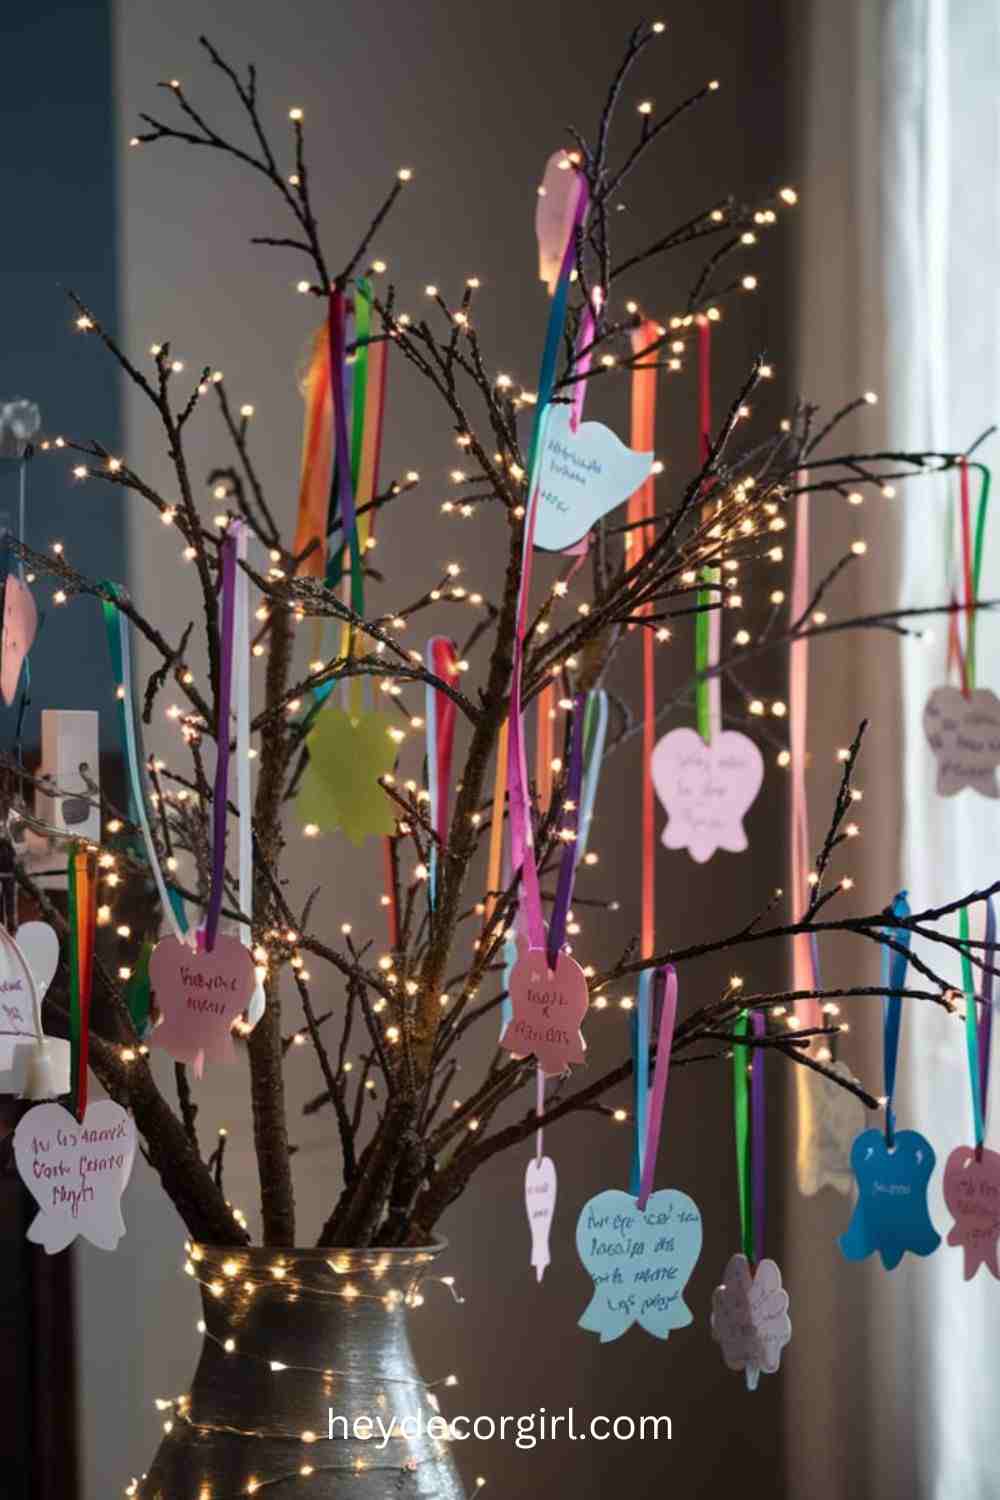
The New Year wishing tree is a unique and socializing means of entertaining your guests and adding some additional magic to your party. This is a DIY project on writing down hopes and wishes for the coming year, and it is a meaningful and personal tradition for the guests. Being a highlight, it creates a beauty in the decor and makes everyone reflect on making his/her wishes for the New Year.
Materials Needed:
- Branches (real or artificial, according to your choice)
- Paper (bright festive colors are preferable).
- Pens or markers
- Ribbon (to hang the wishes)
- A vase, pot, or container (in which the branches are to be placed)
- Ornamental features (these may be optional: fairy lights, glitter, or ornaments)
To make the wishing tree:
- Gather the Branches: Find a few branches; natural ones in your yard, or fake ones in a craft store. The branches must be strong enough to bear the wishes, but not too tight to prevent the ribbons from being suspended freely. When using real branches, ensure that they are clean and dry.
- Prepare the Base: To store the branches, you will set the branches in a container like a vase, pot, or anything that will hold them in an upright position. Stones, sand, or floral foam can be used to fill the base to make certain that the branches remain firmly in their places.
- Draw the Wishes: Cut the paper into small and easy-to-write things, such as rectangles, hearts, stars, or circles, are effective. Give pens or markers in colorful degrees to the guests to write their resolutions or wishes in regards to the New Year. Request guests to be innovative and individual in their messages.
- Add Ribbon to Hang: After the wishes are written, cut little pieces of ribbon and fasten each wish to the en, forming a means of hanging the notes at the end of the branches. You may simply tie the ribbon to the wish or place a small paper on the ribbon to connect the ribbon to the note.
- Hang the Wishes: Secure the ribbons to the branches and then hang the wishes without clustering them closely, so that the wishes appear to be evenly spread. Encourage visitors to make their wishes during the evening and make the tree more festive and interactive.
Suggestions to Put Together the Tree as the Focal Point:
- Fairy Lights: Entwine a few strands of string lights around the tree branches to bring it a warm effect. The lights will ensure the tree shines, and it is well realized, particularly during the evening.
- Decoration Touches: Tie pretty ornaments or glitter, or fake snow to the tree to bring out the winter touch. You may even put small bells or stars to add some festive embellishment.
- A New Year’s Theme: Customize the decoration of a tree to fit your color scheme or theme of your New Year’s Party. Decorate with metallic ribbons, silver and gold ornaments, or seasonal items such as snowflakes.
- Location on a Focal Point: Locate the wishing tree in a place of great visibility to the guests,g. close to the entrance, beside the party ta,ble or in the middle of a living room.
Not only will the New Year wishing tree be a beautiful centerpiece, but it will also make the interaction of your guests and the creation of a sentimental experience. It is an enjoyable and considerate approach to taking note of all the hopes and dreams of everybody in the coming wh ich takes your celebration even more unique.
9: Handmade Party Hats
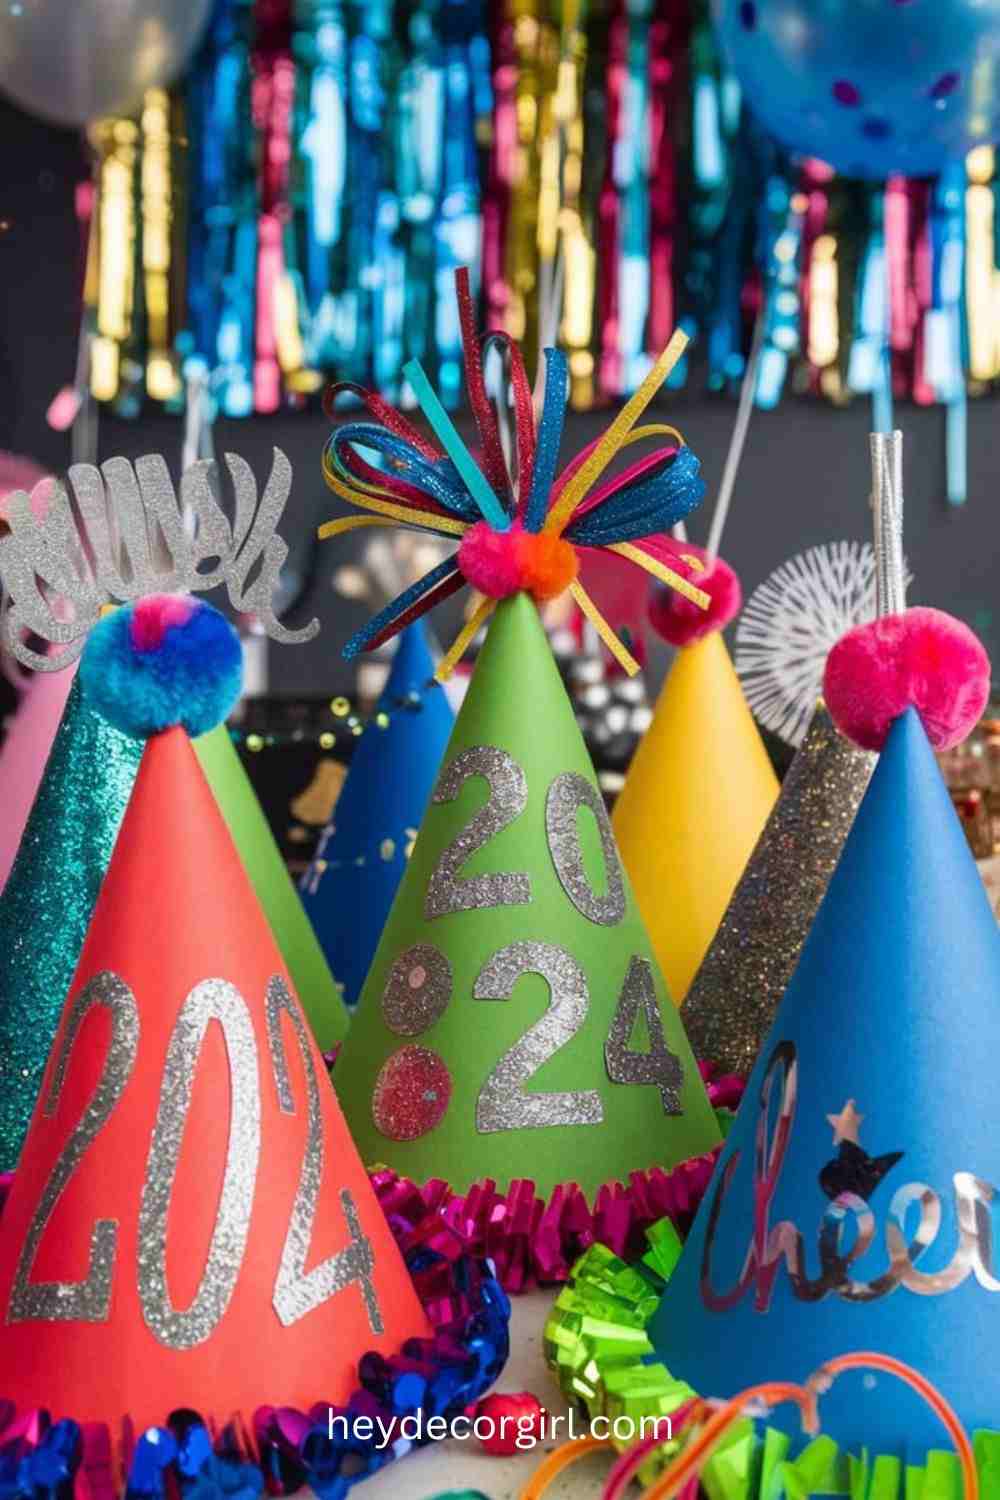
Party hats are rather entertaining and creative things to make your New Year even more joyful. They are also custom hats that are easily manufactured using simple materials that you can use to come up with your own designs that can make the hat reflect the theme of the party, or you can make each guest have a touch of their own.
Materials Needed:
- Construction paper (bright colors such as gold, silver, or neon are good)
- Glue (or glue sticks)
- Glitter (can also be added to sparkle)
- Elastic bands (to secure the hat)
- Scissors
- Markers, stickers, or decorations (optional in case of additional customization)
Directions on how to make your own New Year’s Hats:
- Cut the Construction Paper: Cut the piece of construction paper long enough to go around the head of a person. A band of sufficient strength ought to be made with a strip 3-4 inches wide.
- Form the Cone Shape: Get the strip of construction paper and make a cone shape by folding the two ends of the paper together. Interlock the ends and affix them to maintain the shape.
- Add Elastic Bands: To ensure that the hat stays on your head, cut a piece of elastic band that will be long enough to be under your chin. Glue or small staples. Attach one end of the elastic band to the hat inside.
- Decorate the Hats: Time to have fun–time to decorate! Bring out glitter, markers, or stickers to be festive to the hat festives. You have an option of metallic colors, such as gold or silver, or opt for a neon appearance. Add glittery things at the edges, and think of writing the year (2024) in big numbers to commemorate the event.
- Personalize Every Hat: To make them more personalized, include the name of the guests or a nice message, such as cheers! or “Happy New Year! Onto their individual hats.
- It is also a good idea to stick other ornaments such as pom-poms, sequins, or ribbons so that every hat will be unique.
- Let the Fun Start: When the hats arereadyy then give them to your guests and allow them to wear them during the celebration. The custom hats will be a great ice breaker and will make your party add a fun and playful feel to it.
Concepts to bring Extravagance:
- Glitter and Sparkles: To give the hats a glamorous appearance, apply glitter to the ends of the hats or use rhinestones with glue to give the hats a glittery appearance.
Year Numbers: Place the year in large and bold numbers, to make the hats even more specific to the New Year’s. You may use metallic numbers or glittery stickers, or use foam cutouts to make them dimensional. - Theme Decorations: In case your party has a certain theme (e.g., black tie, winter wonderland, or a retro atmosphere), the decorations will need to be corresponding. There are snowflakes and silver accents in case of a winter theme; gold sequins and feathers in case of a glam look.
Homemade party hats are the ideal expression of creativity and individuality for the New Year party, where every party attendee is presented with an entertaining gift as a reminder of the event. These are simple hats that can be made by anyone, and they also put everyone in the holiday mood!
10: Glitter-Dipped Wine Glasses
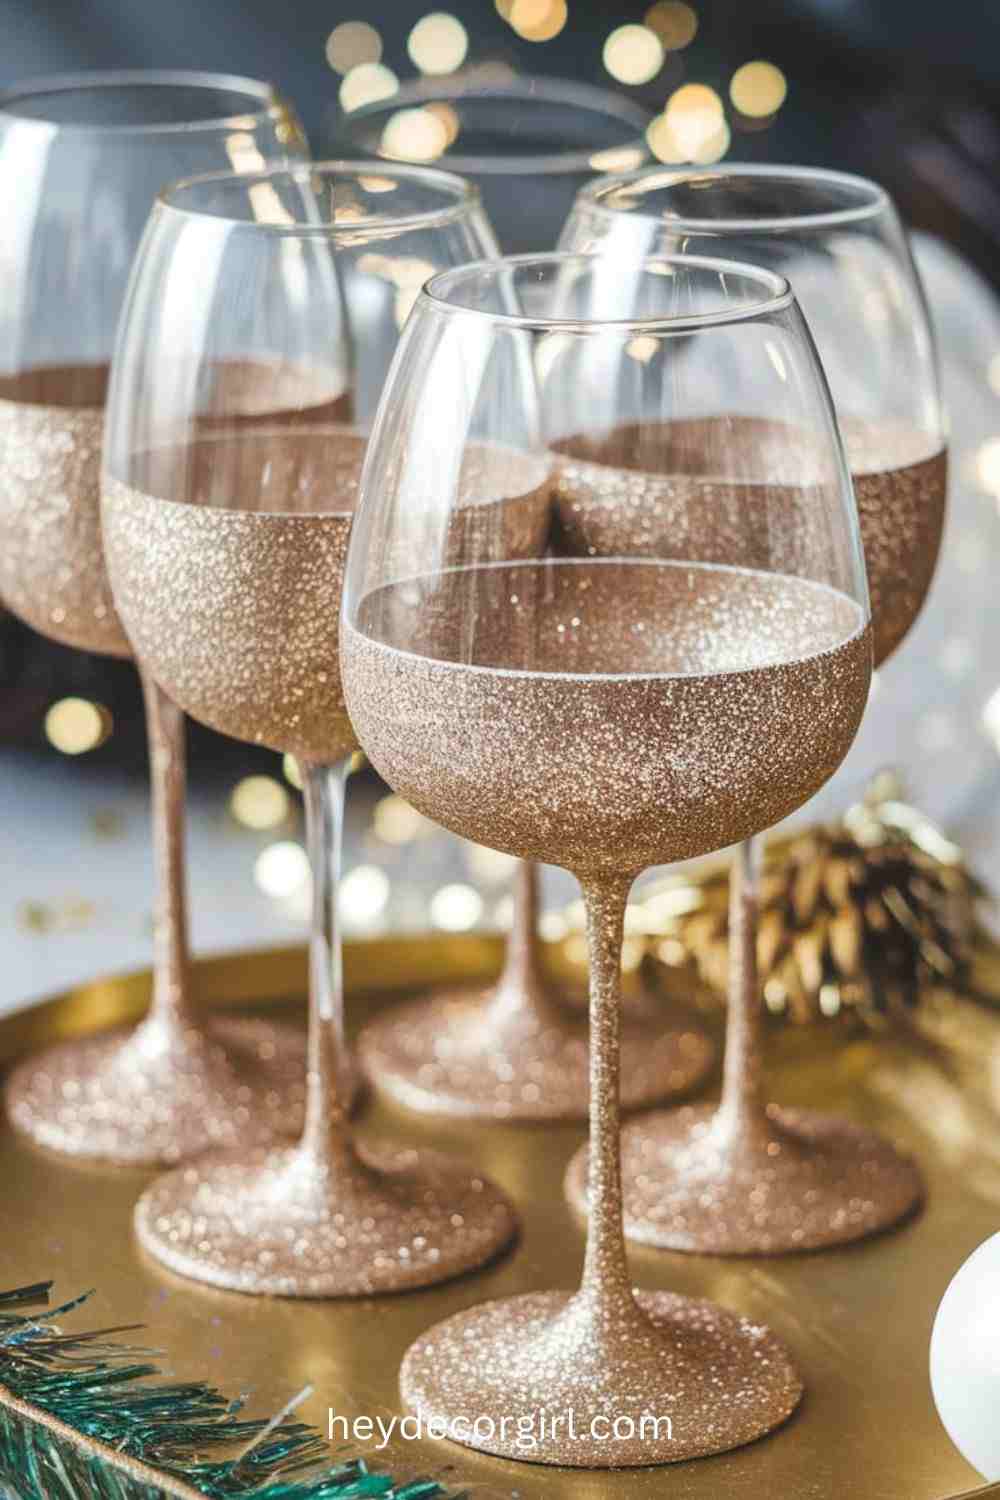
Glitter-dipped wine glasses will give your New celebration a fancy and celebratory feel, and each toast will be all the more special. These crystal glasses reflect the light well, illuminating the party mood as you tick off to midnight.
Materials Needed: Wine glasses (of any size or style, as you like)
- Glue (decoupage glue or craft glue would be best)
- Glitter (fine glitter is best when you want a smooth and sparkly effect)
- Paintbrush (not mandatory, to apply the glue)
- A disposable tray or plate (to receive the unwanted glitter)
Directions on How to Decorate the Glasses:
- Preparation of the Glasses: It starts by cleaning the wine glasses. Ensure that they are clean and do not contain dust or any oils that would prevent the glue from adhering.
- Apply the Glue: With a paintbrush, or just out of the bottle, apply a thin, even coat of glue around the bottom or the main part of the wine glass. You may also cut the bottom part only or put the whole stem into it to get a more dramatic effect.
- Apply the Glitter: Once the glue is still wet, sprinkle the glitter all over the part to be glued. Place the glass on a disposable plate or tray to receive any possible glitter. It is also possible to roll the glass in a shallow dish of glitter gently to even it out. It is important to apply the coating uniformly.
- Let It Dry: Leave the glittered part to dry. This can take several hours; thus, be patient. Before using the glasses, it is significant that the glue and glitter are soaked in.
- Shake Off Excess Glitter: When the glasses are dry, shake off any pieces of glitter and check the final result. Additional glue and glitter may be applied in case you would like your glitter to be more extensive.
Cleaning and Safety Tips:
- Avoid Glittering the Rim: To be on the safe side, do not glitter the rim of the glasses on which the beverage will be served. This is to avoid the chances of glitter being spilled into the drink.
- Seal the Glitter: To be sure that the glitter does not shed, you can lightly spray the glittered sections with a clear acrylic sealer or varnish. This will fix the glitte, and maintain your glasses in shining condition all through the night.
- Hand Wash Only: The glasses with glitter and dip must be hand-washed with care not to spoil the glitter. Wipe with a soft sponge and mild soap, a nd never scrub harshly; this will remove the glitter.
- Drink Carefully: The glitter may cause the glass to be a little fragile; thus, be careful when handling it. Do not shake them too roughly or shake them too hard.
The ideal way to make your New Year glittering is to coat glasses with wine glitter. Not only are these custom glasses functional and convenient drinking vessels, but also attractive party accessories, which makes each celebration feel glitz and glam.
FAQ
1. So, what do I require to begin making decorations for the New Year?
A. Building paper, glitter, glue, mason jars, balloons, scissors, ribbon, and festive markers are common materials. Most of the projects also need the use of simple items such as string, paper, and simple craft supplies, which can easily be found at craft stores.
2. Is it possible to design the decoration for a certain theme?
A. Absolutely! The decoration ideas are able to work with many of them. You are the one to make them metallic or neon, winterwonderlande, or thematic to the party; you can modify these homemade decor anyway.
3. How many hours do they spend preparing New Year decorations made manually?
A. The decoration will take time, depending on how complicated it is. Some basic crafts, such as glittered wine glasses or homemade party hats, can require roughly 30 minutes to one hour. More complex adornments, such as homemade photo booth backdrops or wishing trees, could require several hours to finish.
4. Can children assist in these DIY decorations?
A. Most of the decoration concepts, such as making paper garlands or noisemakers, are child-friendly. Nevertheless, there are materials such as glitter or scissors that children might require supervision by adults. Non-toxic glue and paint to be used should be used to ensure safety, and it is important to keep children in mind.
5. What do I do to make the decorations last till the entire party?
A. High-quality materials and fixing your crafts in place would help to make your decorations more durable. As an illustration, be sure that glitter is well sealed using a spray sealant, and make sure that projects such as garlands or party hats are well sealed using a strong adhesive. When hanging decorations, make sure that they are safely hung such that they do not fall throughout the celebration.
6. Is there anything special I have to be skilled at to make these decorations?
A. The majority of the projects are easy to follow and do not need any special skills. Basic crafts such as paper garlands, homemade confetti balloons, and noisemakers can be tried by anyone. Even more elaborate decorations, such as photo booth backdrops or wishing trees, can be undertaken with a little patience.
7. Where can I hang my home-made decorations?
A. The location is based on the ornamentation. Decorate using hanging garlands and banners around doorways or walls to make it look celebratory. Put the wishing tree at the center stage and have glitter-dipped wine glasses or noisemakers as decorations on the party table. Photo booth decorations must be installed in a place that is easily accessible by guests to capture photos.
8. Would it be possible to use these homemade decorations in years to come during the New Year celebrations?
A. Yes! Most of these ornaments, such as party hats, garland, and wine glasses, are reusable in future occasions. Simply ensure that you keep them well so that you do not break them, and every year, you can change the designs a little to have something new.
9. What would happen if Casran runs out of glitter or other crafting materials in the project?
A. In case of a material shortage, visit your local craft store or online to order it and get it in a few days. Alternatively, you can get inventive and replace them with other supplies you may have at home, such as sequins, metallic markers, or shiny foil.
10. Can some of these decoration concepts be eco-friendly?
A. Yes! A lot of the thoughts of the decoration can be created using the materials that are eco-friendly, such as recycled paper as a garland, biodegradable confetti, or recycled containers as DIY noisemakers. Also, a wishing tree can be made using natural objects such as pinecones or branches in an excellent, sustainable fashion.