Before-and-after bathroom makeovers are living proof that renovation — no matter how big or small — can last a lifetime. What makes these dramatic changes so valuable is that they can demonstrate the hidden potential lurking behind an old, tired bathroom. By contrasting the old and the new, homeowners and designers can easily perceive how subtle changes can transform a room from ordinary to inspired.
Bathroom renovations go beyond just making a few changes around the outlook of the space; they are a complete transformation that can result in both aesthetic and functional improvement. From updating old fixtures, reconfiguring the layout, and modernizing with new design elements, these renovations can greatly enhance the user experience. From transforming a crowded mess into a serene retreat to turning a boring room into one full of color and style, there’s nothing like the amazing feeling that comes from a job well done!
Amazing Before-and-After Bathroom Makeovers
1. Classic Elegance: From Dated to Stunning
Before: The bathroom had tired old fittings and tiles. There was an ugly, mismatched palette of ceramic tiles and fixtures that were so dated as to be oppressive in their motivation-sucking blandness. The vibe is very outdated, not so cute, and not at all practical.
After: The makeover added contemporary and chic finishes that totally updated the room. The tired old tiles have been replaced with modern, smooth bathroom wall and floor tiles – think large format porcelain or marble-effect styles for a more polished finish. New fixtures, such as a chic sink and faucet, as well as freestanding soaking tubs in the bathroom, have brought smart style to everyday life.
Key Changes:
- Color palette: A pair of ‘blah’ beige and grey walls became a bright, up-to-date color scheme. Soft neutrals, warm grays, cool whites, and soft beiges played a role in establishing an airy, timeless feel and helped bring out the room’s elegance.
- Tile Switch: Old ceramic tiles were replaced with high-end contemporary ones. Large format tiles, glossy subway tiles, or even marble were part of the more cohesive side to upscale.
- Lighting: The cool contemporary look of modern fixtures was added. Or you could choose sleek wall sconces, a statement chandelier, or recessed lighting to add up the wattage and highlight everyone’s elegant updating.
2. Minimalist Makeover: Simplifying Space

Before: The bathroom featured a mishmash, busy design with too many things and adornments. The room included unsightly fixtures, clashing patterns, and a color palette that further contributed to the chaos. The space was tight and cluttered with unnecessary features.
After: The makeover took on a streamlined, minimalist aesthetic and emphasis on simplicity and function. It was a streamlined space, full of clean lines and an overall neutral color palette. Smart storage was used to clear away clutter, leaving an open and calm space.
Key Changes:
- Simplicity: The new style had minimal elements – fixtures and cabinetry – with little detailing and no ornamentation. It became a source of order and peace.
- Neutral Colors: The palette was refreshed with soothing neutrals such as whites, grays, and beiges. These colours contributed to a relaxed, airy atmosphere, which gave the minimalistic look some depth.
- Smart Storage: Some smart storage was added to keep it organized, uncluttered, and everything in place. They considered floating vanities, built-in shelves, and hidden storage to preserve the room’s modern look.
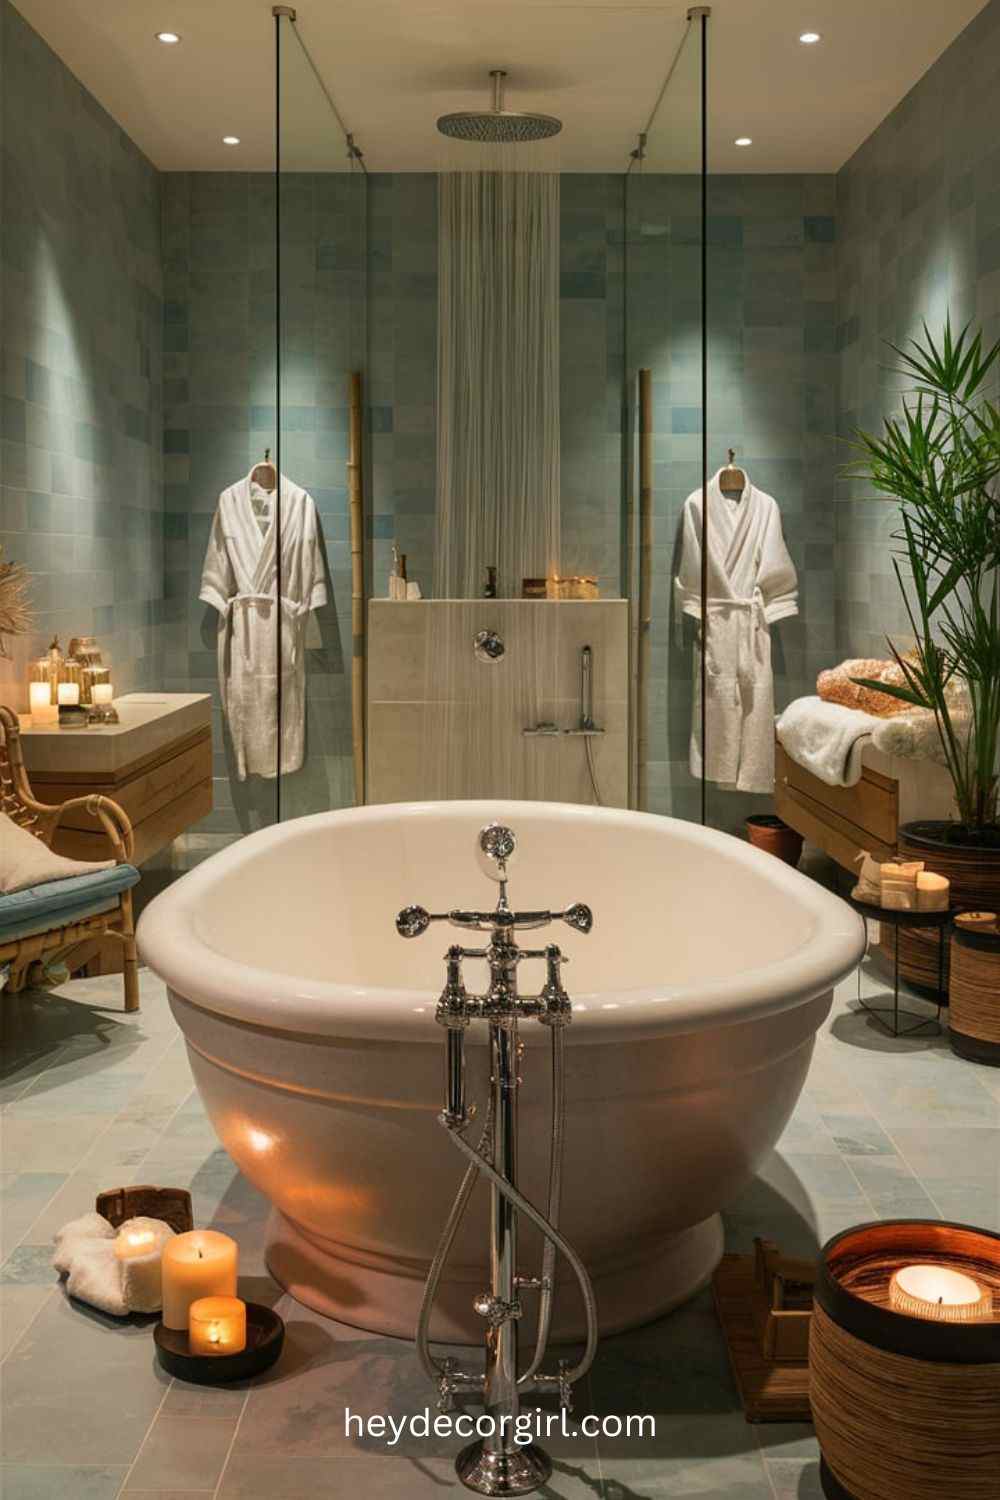
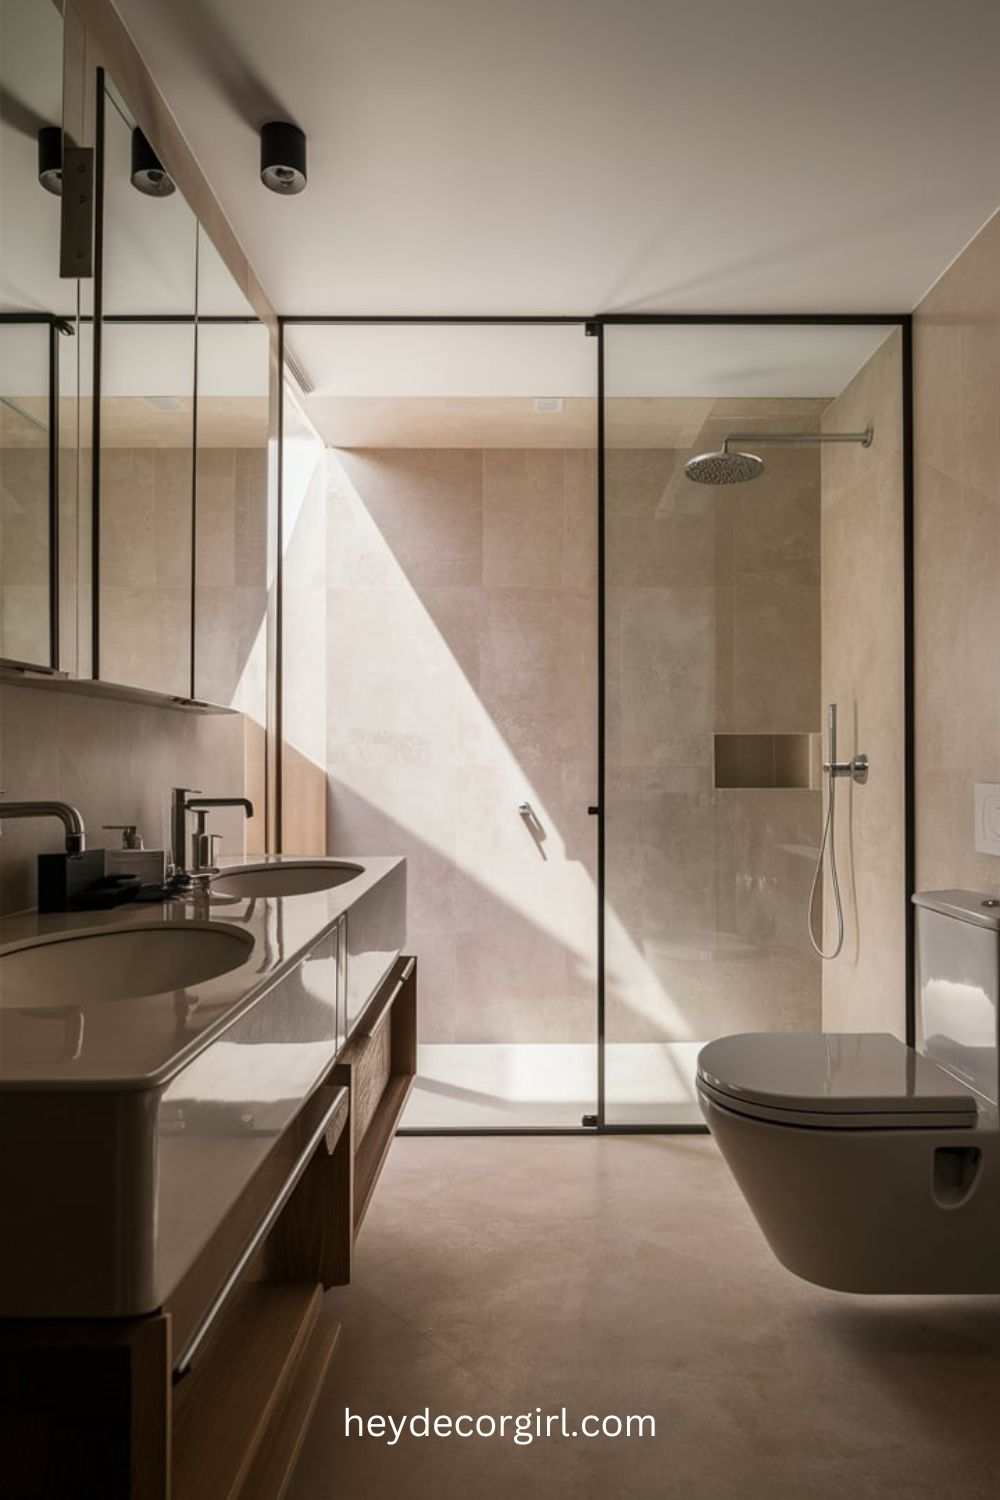
3. Luxurious Spa Retreat: Adding Relaxation
Before: The bathroom was plain-Jane and practical, with builder-grade fixtures and an unembellished look. The tub/shower was simply tiled, and the room was sparse in that it did not look inviting as a place to unwind. The ambience in general was workman-like, no-nonsense, and functional rather than decorative.
After: The bathroom is now a trendy spa haven, with a high sense of luxury and relaxation. A free-standing tub served as the centerpiece, adding a polished feel and encouraging relaxation. Adding a rain shower delivered a spa-like experience with a soft, gentle rainfall feeling. The new color for walls was replaced with something more soothing, like a soft blue, pale green, or warm gray, to create a calm and relaxing space. High-end touches, such as chic fixtures and polished finishes, were also part of the upscale update.
Key Changes:
- Telgan Freestanding Tub: A contemporary freestanding tub replaced the old standard one, and it serves as a fashionable focal point as well as a luxurious bathing station.
- Rain shower: A smooth rain-showerhead was also fitted to perfect your shower experience with its tender and rainfall-like stream, conjuring an ideal feeling of spa and freshness.
- Calm, Cool, and Collected: A calming color palette also lends itself to helping one relax; light blues, greens, or even neutral grays will all have you feeling relaxed and at ease.
Also Read: Best Colors For A Bathroom In Feng Shui
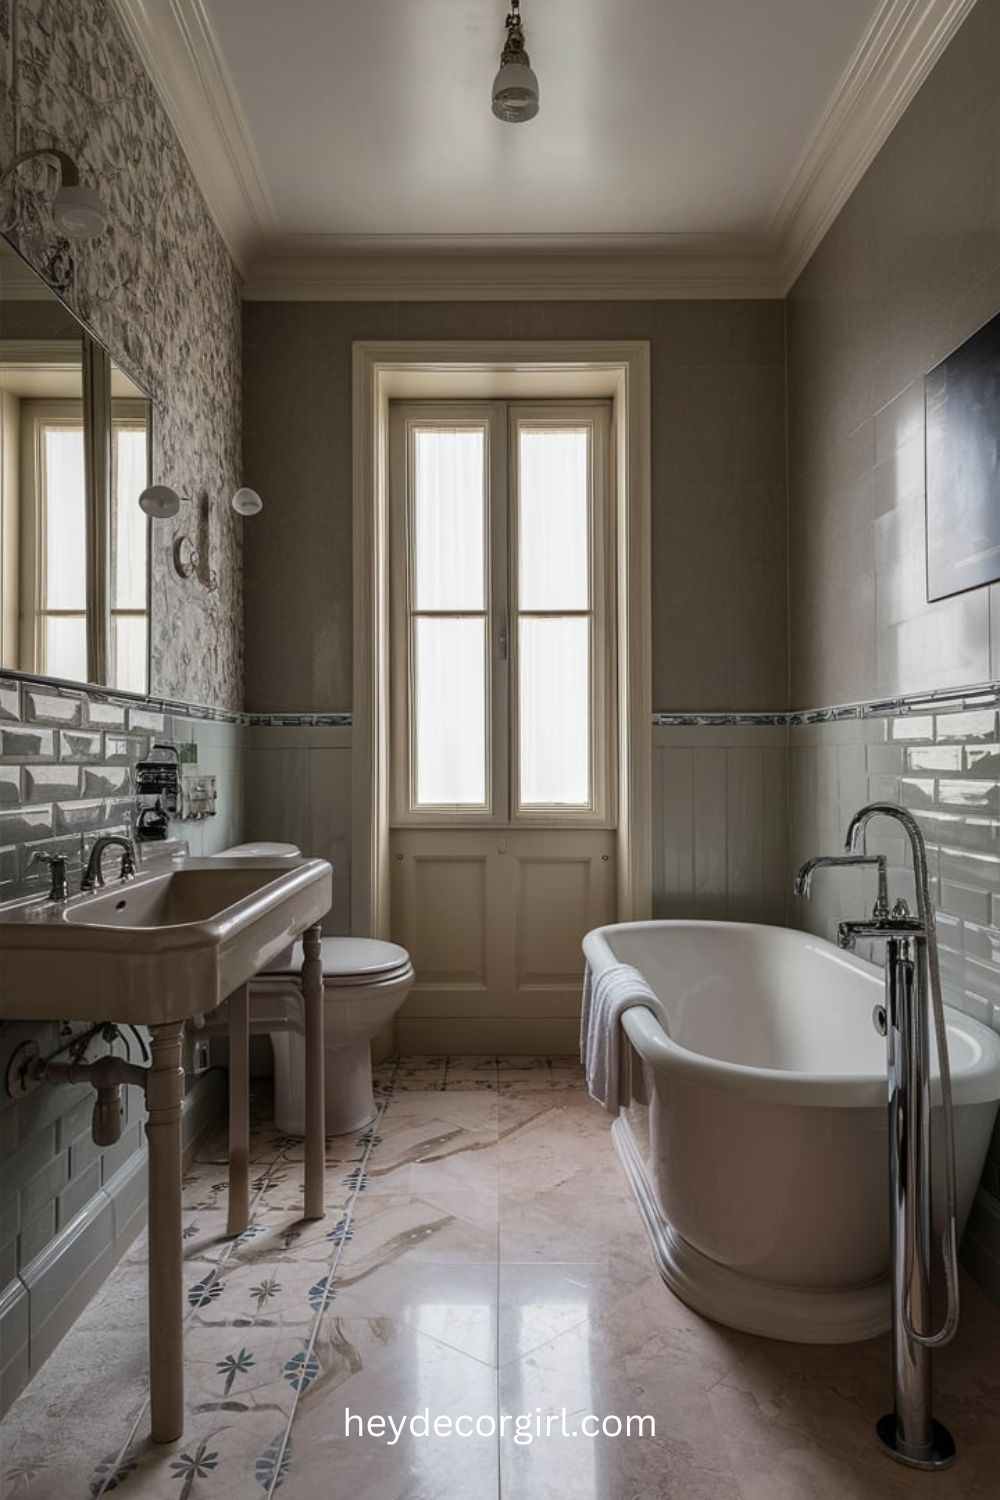
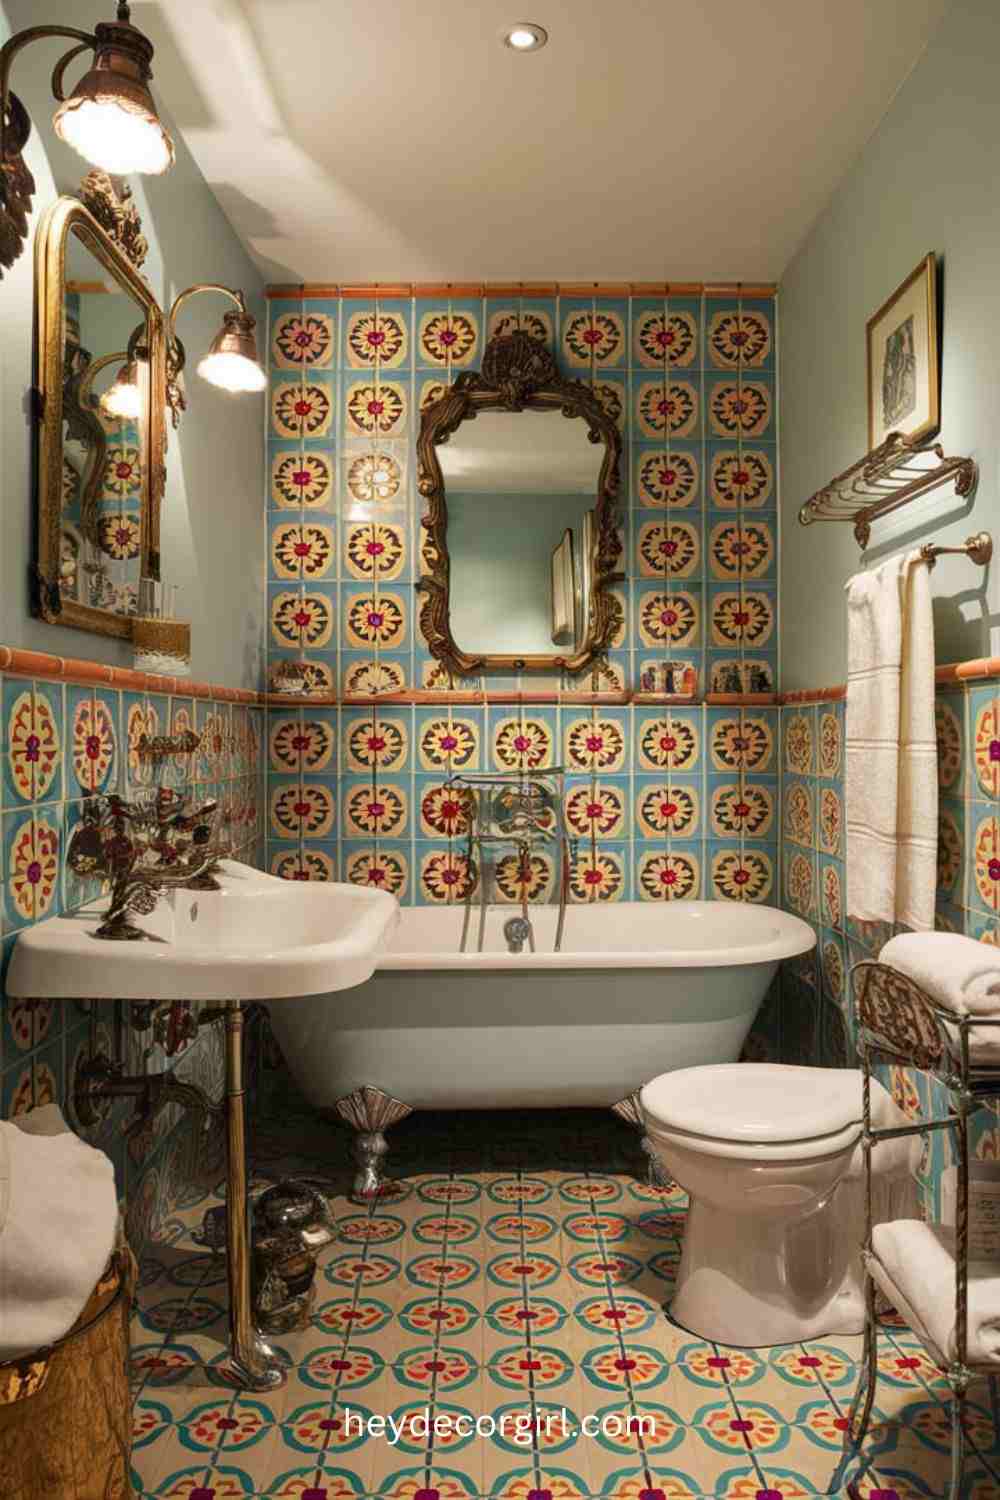
4. Vintage Charm: Reviving Classic Styles
5. Bold and Modern: Embracing Vibrant Desi
Before: The bathroom was simple and uninspired, with nondescript fixtures and nothing that stood out. The kitchen was shabby chic in appearance, catering more to functionality than overall style, with nothing standing out or reflecting the essence of the era. It looked functional, but had no personality or character about it.
After: The makeover added a vintage-style touch that could easily mix old charm with contemporary comforts. In the bathroom, fresh tiles in ornate shapes and bold colors breathed new life into the space, one that was whimsical and vintage. Antique elements, including a pedestal sink with decorative basins, old-fashioned faucets, and a vintage-style free-standing tub, were included to elevate the classic look of the room.
Key Changes:
- Retro Tiles: The untouched walls and floors were updated with retro-look tiles, such as patterned encaustic or plain subway with a historical flair. These tiles gave the bathroom a bit of character and an old-world feel that set the scene for my vintage journey.
- Old Fixtures: To match the retro tiles, old-fashioned or antique-style fixtures were selected. This will include a beautifully detailed pedestal sink, vintage disposable clawfoot accompany model, and brass or polished nickel faucets. These details added to the timeless feel of the bathroom with a nod to modern convenience.
- Special Touches: One-of-a-kind accents were incorporated to complete the retro style, including a vintage mirror with a decorative frame, old-fashioned light fixtures, and traditional towel bars or hooks. All of these little touches brought a human element and made for an inviting, cohesive vintage feel.
The end product was a bathroom that felt both cool and nostalgic, vintage design meets modern convenience.
Before:
- True to monochrome and dreary, the bathroom theme is oh so neutral.
- Dated fixtures and a shortage of character leave something to be desired.
- It had become a featureless, nondescript room with basic tiles and plain walls.
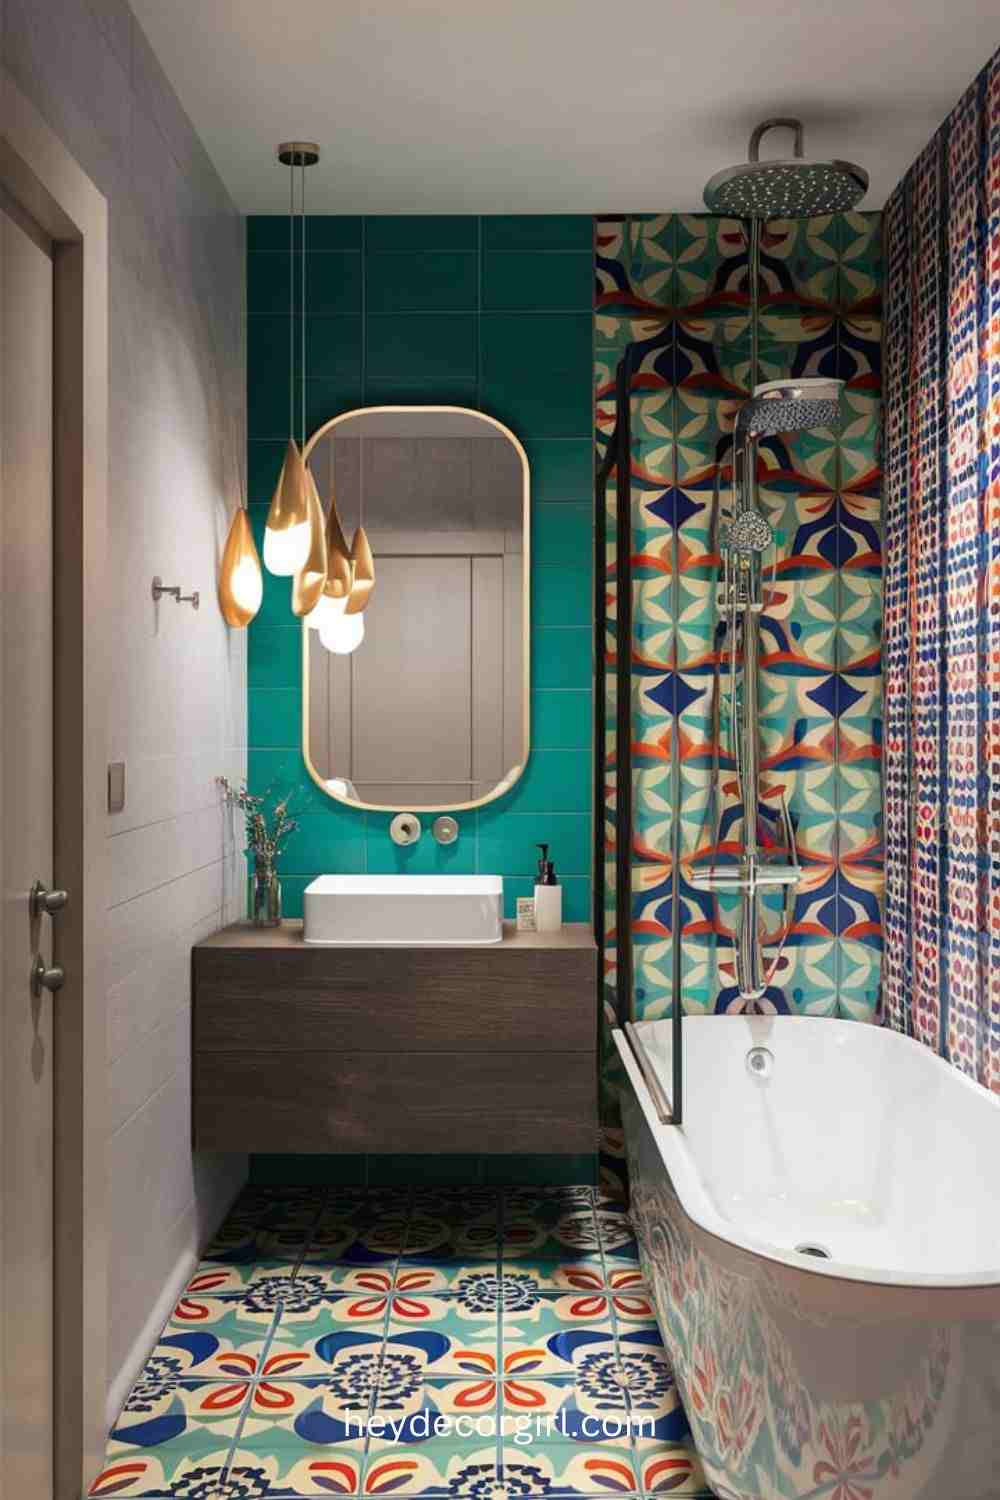
After:
- The bathroom was infused with bright colours and modern fixtures to inject vigour and life into the room.
- Vivid Colors: Bold, vivid colors on walls, tiles, and other elements caught the eye, which included deep teal, electric blue, or vibrant orange.
- Contemporary Design Elements: Contemporary see-through Floating Vanities, geometric patterned tiles, and minimalist faucets were introduced.
- Accent Details: An oversized or interestingly shaped statement mirror, vibrant artwork, or graphic tiles, and cool light fixtures gave personality and a contemporary vibe.
- Colour Palette: Vibrant mix of contrasting colours or bold colour blocking for a fresh and modern look.
6. Coastal Escape: Bringing the Beach to Your Bathroom
Before:
- This is a boring layout with no character or personality to it.
- Also kind of a standard, earth-toned color palette.
- Traditional fittings and fixtures that are not in the style of a coastal property.
- No frills other than just pure basic tiles and plain surfaces without much texture or interest.
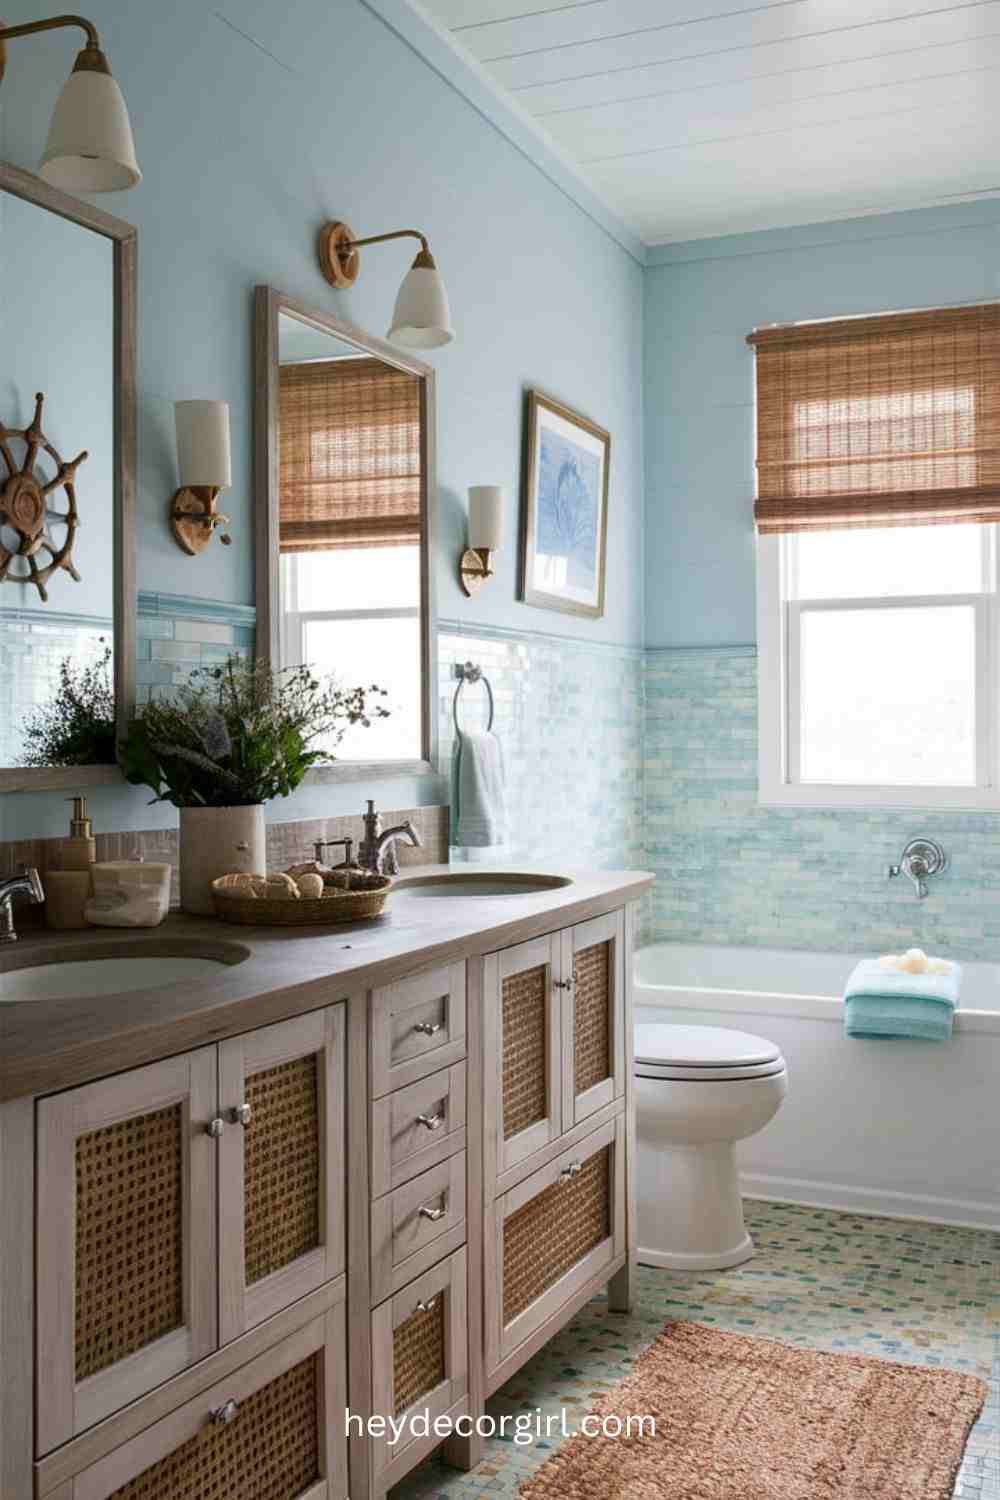
After:
- A beachy, coast-inspired transformation.
Key Changes:
- Soft Breezy Tones: A range of ocean-inspired colors adds the soft and airy nature you can get from sea foam green, sandy beige, and fresh white. The colors give the space a light and airy feeling that harkens to a beachside.
- Beachy Features: Utilize beach-themed decorations, which may include marine-style wall art, seashell cutouts, or beach-based fixtures. Fixtures may have a brushed nickel or chrome finish and diver down flag accents.
- Organic Textures: Bring in organic textures to elevate those coastal vibes. This might be driftwood details, woven baskets, or textured wall treatments that feel seaside. Use wood-look tiles or stone surfaces for a natural touch.
Visual Elements:
- Color Palette: Light, breezy shades such as pale blue and green, and sandy beiges give the space an airy, open vibe.
- Decor, Nautical and beach themed decor, such as seashells, driftwood, and underwater art, are used to set the mood.
- Textures: Be sure to include organic materials and textures such as woven rugs, wood accents, and stone or tile with an organic finish.
- Fixtures: To round off the beach-chic look, pick light fixtures with a coastal feel– sea-inspired glass or woven elements are a great option.
Also Read: Beautiful Bathroom Decorating Ideas
7. Space-Saving Solutions: Maximizing Small Bathrooms
Before:
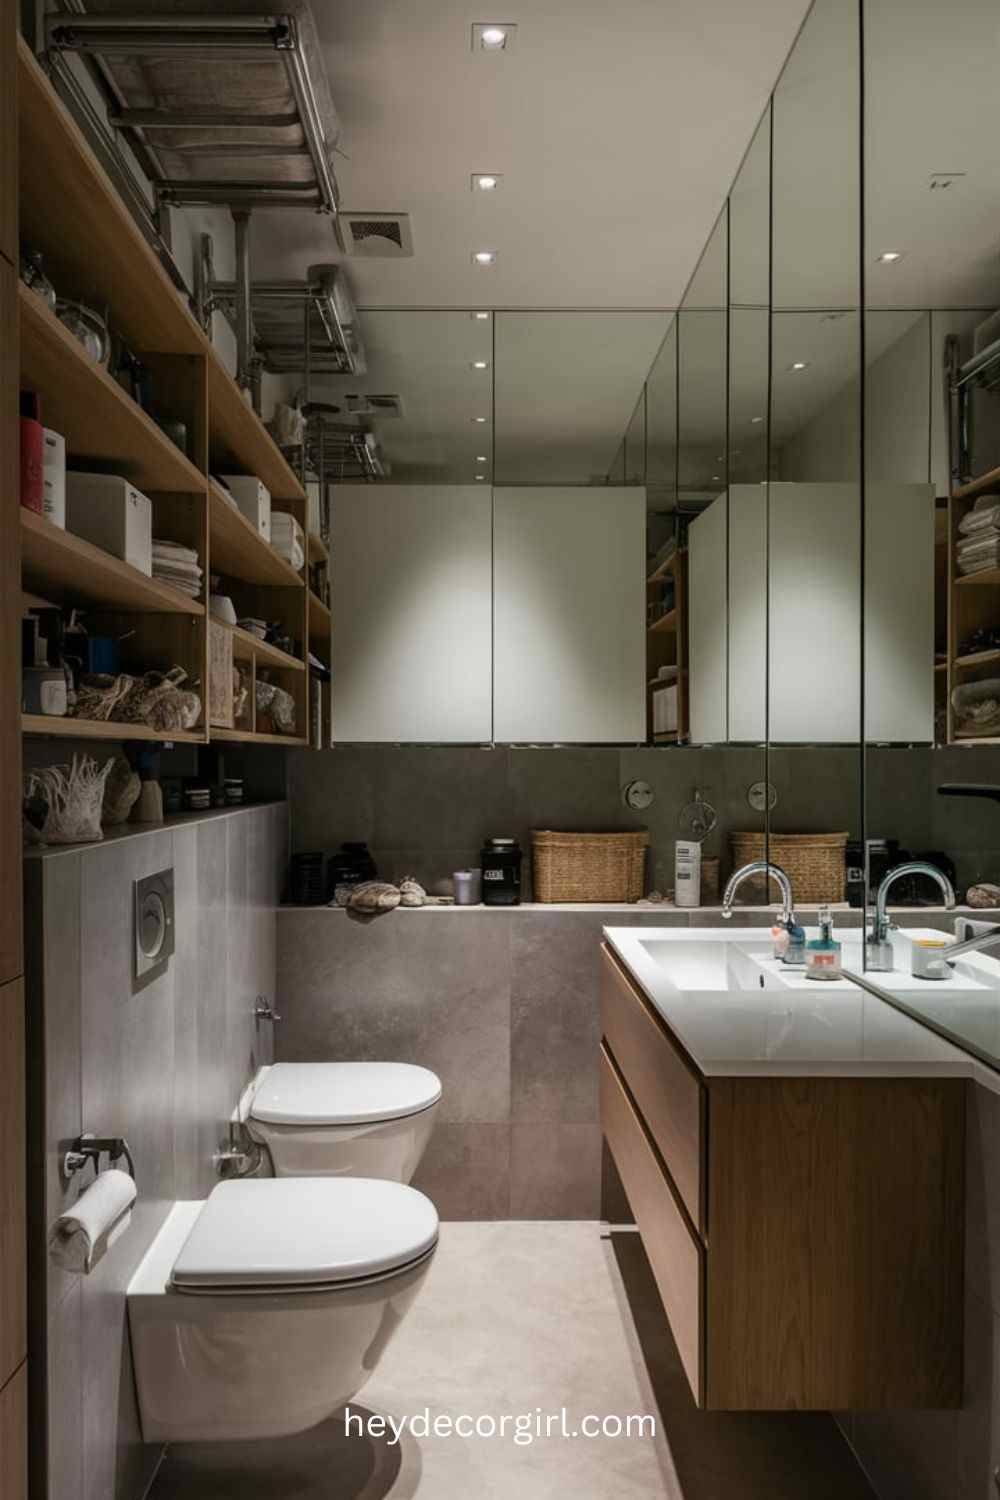
Description: A small and cluttered bathroom with minimal storage and floor space. The room has clunky fixtures, cookie-cutter vanities, and a lack of storage, which makes the space feel cramped and inefficient.
After:
- Details: A well-thought-out hidden bathroom conversion optimizing space with functionality and efficient storage spaces. The design incorporates:
- Floating Vanities: Swapping the conventional floor-mounted vanities with floating ones creates a more flexible and open space.
- Wall-Mounted Fixtures: The use of wall-mounted toilets and sinks extends less into the space and allows for more maneuvering.
- Mirrored Surfaces: Fitting a large wall mirror or mirrored cabinet to bounce light around and make the room seem bigger. Mirrored tabletops bring integrated function to the design.
Visual Elements:
- Vanities: Streamlined, floating vanities that incorporate storage options, like drawers or open shelves, for organized and accessible essentials.
- Fixtures: On the wall, a toilet and sink with a sleek appearance to free up floor space.
- Storage: Creative storage options like built-in shelves, medicine cupboards, or recessed cubbyholes to store toiletries and other products will save needed space.
- Mirrors: Big, wall-to-wall mirrors or mirrored cabinets that reflect light and make the space feel larger.
The remodeled bathroom should look and feel more airy and organized, thanks to each design feature serving a specific function, but also one that is sleek and contemporary.
8. Rustic Retreat: Adding Warmth and Character
Before:
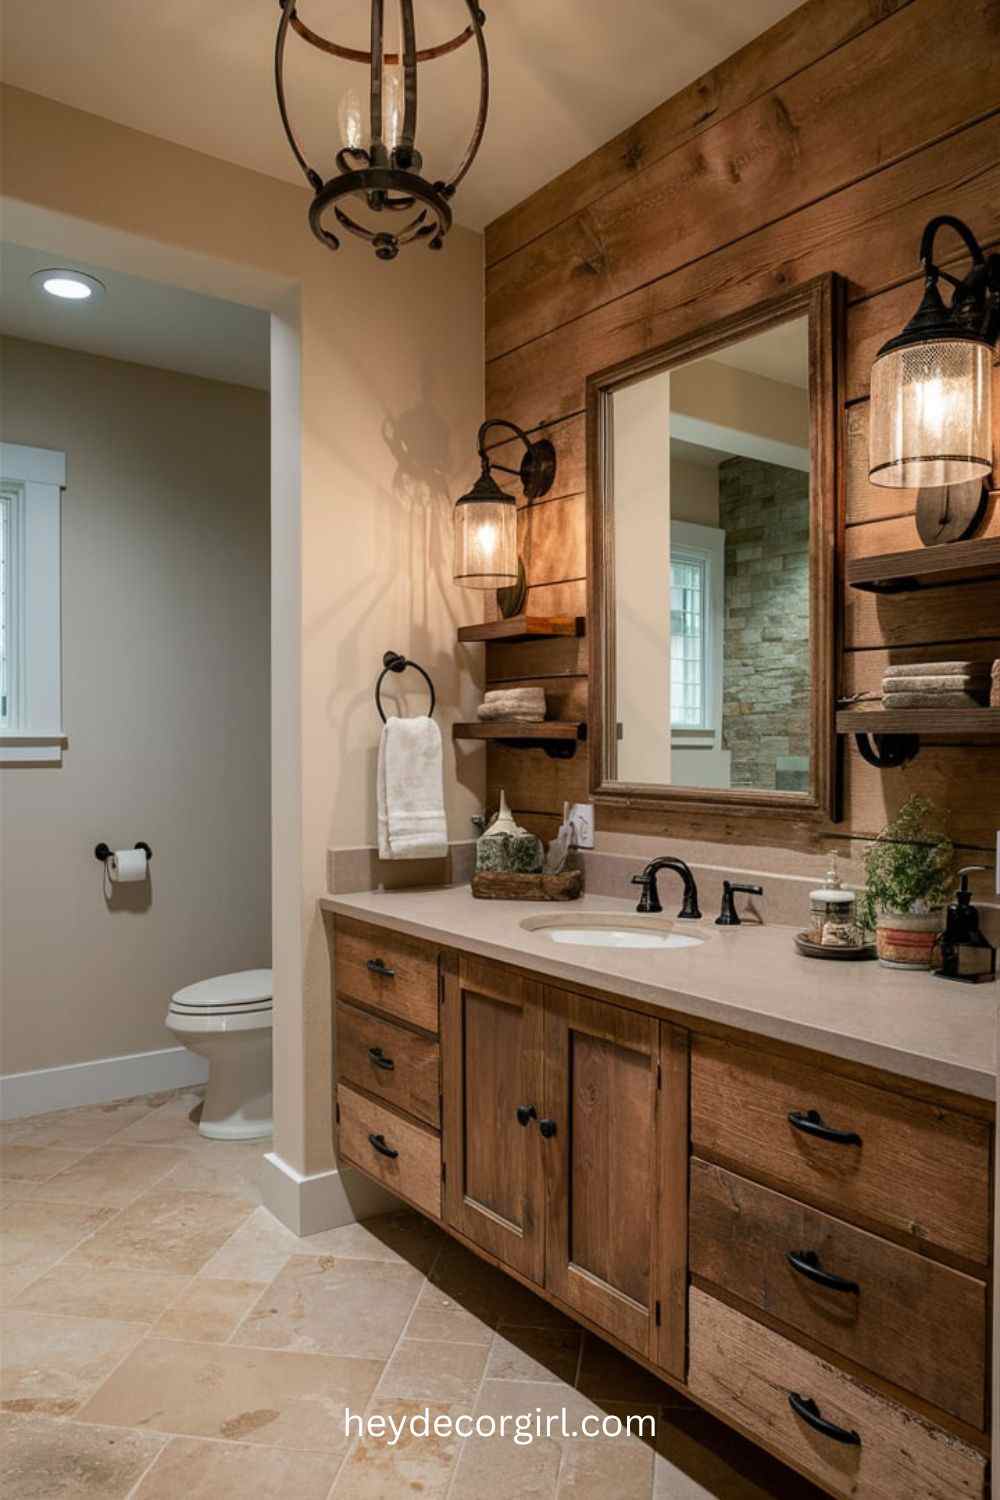
Description: A bland, standard-issue bath with generic fixtures and finishes. “There is no warmth, and nothing with which to relate,” he writes, citing the “cookie-cutter style” of woodwork along with a design devoid of character except for some generic wall finishes, textiles, and furniture.
After:
- Description: This charming and earthy bathroom is full of warmth and personality, a result of natural materials mixed with warm, cosy elements. The design features:
- Wood Tones: Add warm, natural texture to the space with reclaimed-wood vanities, wood wall paneling, or rustic shelving.
- Stone Accents: Incorporate stone for countertops, flooring, or an accent wall. Choices such as natural stone tile flooring or a stone backsplash add to the earthy, country character.
- Atmosphere setting warm light: Our string lights give off a soft, romantic glow, suitable for both indoor and outdoor decoration. Think about fixtures such as rustic sconces, lantern-style lights, or an old-fashioned chandelier.
Visual Elements:
- Vanities: A distressed or natural wood-grain finish and vintage hardware on a rustic-looking vanity.
- Stone Elements: For flooring or a feature wall, with textures that increase depth and visual appeal.
- Lighting: Warm, welcoming light will be presented as distressed wall sconces; an antique iron chandelier or pendant lighting with a rustic feel.
- Decor: Include snug extras like a woven carpet, wooden frames for mirrors, and decorative items that bolster the rustic look.
Yes, the remodeled bathroom needs to feel like a contestant for that welcoming warmth one expects in their home, and illustrate just how much rustic charm can reboot an ordinary space into something with warmth and character.
9. Contemporary Chic: Sleek and Stylish Updates
Before:
Description: Old bathroom with a lot of bulky fixtures and an overall busy design. This space has the same kind of traditional touches with overly bulky old-fashioned vanities and hardware that date everything and make it aesthetically inferior.
After:
- Description: A modern and trendy bathroom design with cool, sleek lines that is minimalistic. Key updates include:
- Contemporary Vanities: Because the contemporary vanity is defined slightly differently from its modern counterpart, this style tends to be sleeker and simpler in appearance, with clean lines and sometimes high-shine finishes or floating design for a more open, spacious touch.
- Frameless Glass Showers: Beautiful frameless glass shower surrounds featuring clean lines, which enhance the feeling of openness and light.
- Minimalist Decor: A minimalist decorating style with an emphasis on simplicity. Neutral colors, geometrical designs, and a few selected accessories, for example.
Visual Elements:
- Vanities: Modern vanities are simple in their design, frequently floating, plus they have attached storage systems. Finishes might feature a glossy white or natural wood.
- Showers: Frameless glass shower doors with sleek and minimal hardware. The design should accentuate the transparency and openness of the space.
- Light fixture: A contemporary light fixture, such as recessed lights or a plain pendant or sconces for wall lighting, which adds to the clean modern appearance.
- Decor: Neutrals with pops of black or metallics, geometric tiles or prints, and minimalist accessories like sleek soap dishes and chic towel rods.
The new modern bathroom design should portray a sleek, functional, and beautiful look that does not cramp your style or detract from the crisp, fresh ambiance of your home.
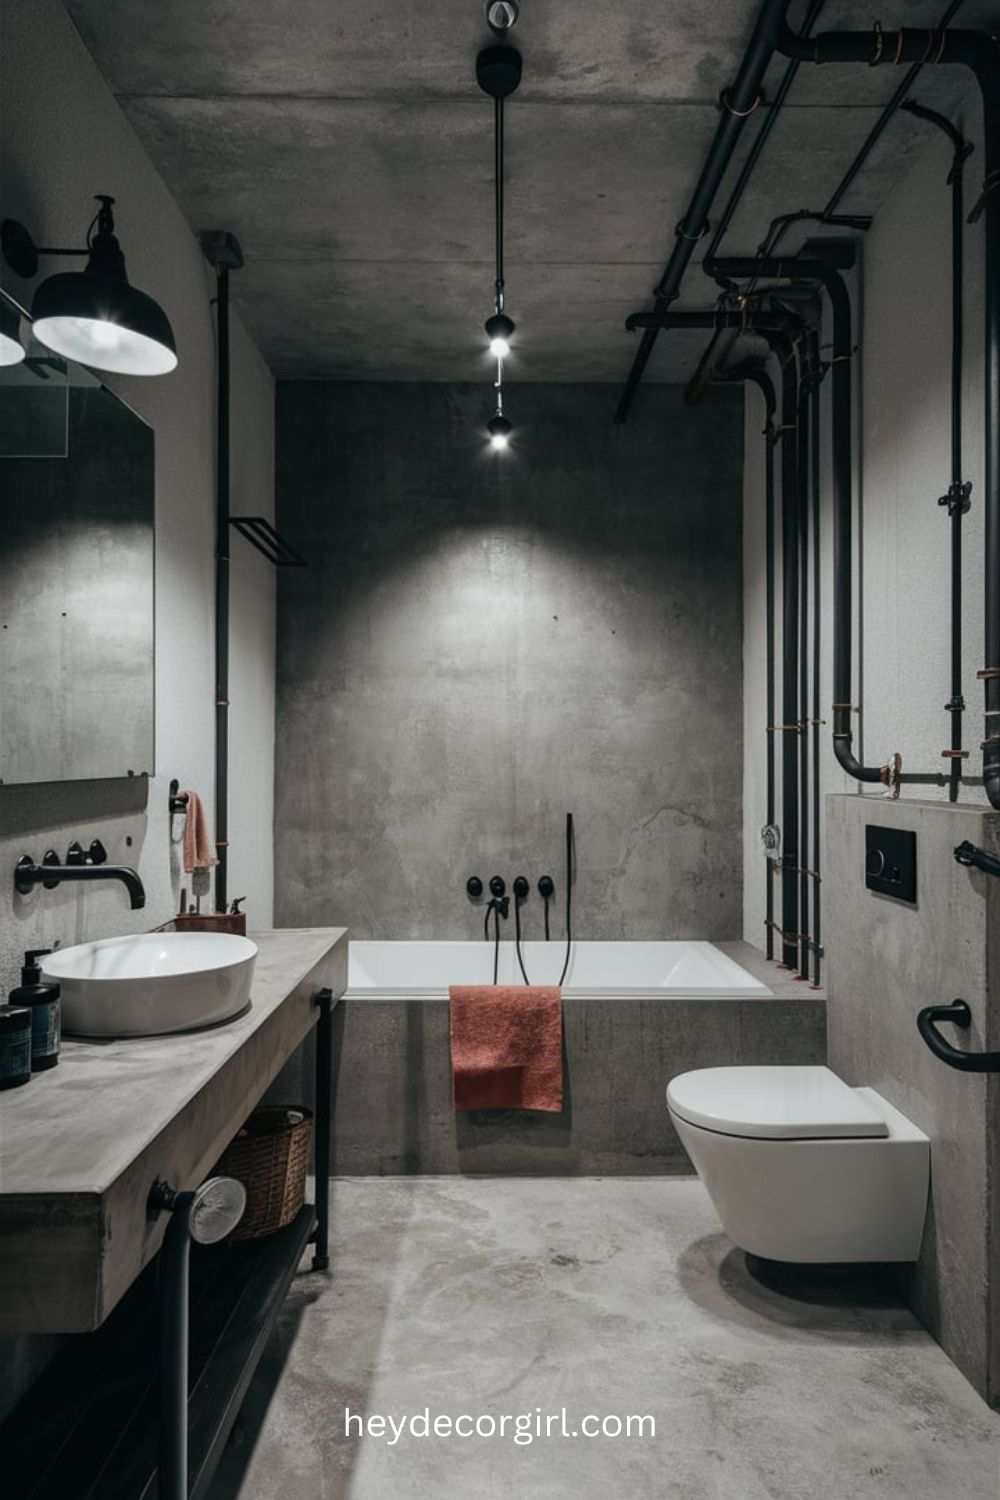
10. Industrial Edge: Incorporating Raw Elements
Before:
The Bathroom: A boring, plain bathroom with run-of-the-mill fixtures and finishes. It is a generic design, it contains elements which doesn’t have any identity or style. It is described as looking “bland and mediocre” with no specific flair.
After:
- Description: A jaw-dropping industrial bathroom with raw and bold design features. The room now has an urban and raw feel to it and a few statement differences from what it was before, including:
- Exposed Pipes: Exposed pipes and fixtures that create an industrial look. These elements were intentionally kept raw to add to the room’s gritty feel.
- Concrete Finishes: Floors or walls made of concrete, embodying industrial vibes. The sitter doesn’t hide much about himself; the brutal texture and solidity of concrete are integral to its design.
- Metal touches: Metals are used with industrial sink faucets, shelving, and light fixtures. Metal details could be blackened steel, brushed nickel, or copper and contribute to the overall industrial feel.
Visual Elements:
- Pipes: Exposed pipes, or the visible plumbing where the black or metallic-painted finish runs along the wall or ceiling.
- Concrete: Rough, industrial-looking concrete floors, walls, or countertops. Concrete can be left natural, or a sealer may be added for protection.
- Metal Fixtures: Industrial-look faucets and showerheads in matte black or brushed metal. He often installed raw or distressed metal shelving, towel bars, and light fixtures.
- Light: Exposed bulbs, metal pendant light, or vintage style sconces with an industrial feel that supports the space’s rawness and edge.
- The remade master bathroom should express the strong industrial look with raw materials and design that are coolly hep to an urban sensibility.
You May Also Like:
Conclusion
Before-and-after bathroom makeovers offer dramatic evidence of the power of good design and construction. In the before and after shots of a bathroom, which illustrate what was in place compared to the new design, it’s easy for us to see how style, materials, and layout all change how functional and visually pleasing a room will be. Whether bloodless modern facelift, homespun shabby chic, or with a swash of industrial honesty, these revamps just go to show how even the most ordinary of places can be made exceptional.
When I can take a bathroom from outdated and uninspired to a statement-making retreat, it reminds me how important design really is. From contemporary vanities and frameless glass showers to rustic wood finishes and industrial concrete, each transformation has its own inspired approach to updating the space. These are not only cool design projects, they also underline how important it is to make a place your own and how good minds think (not always, of course) in the same direction.
FAQ
1. What are some common elements in successful bathroom makeovers?
Bathroom makeovers that include updated fixtures, new flooring or tile, and quality lighting are also affordable with the help of an Electrician in Spokane, WA. Modern design features and using space to the max are also important.
2. How can I make a small bathroom look larger after a makeover?
To make a small bathroom look bigger, decorate with bright colors, use mirrors, and choose clear shower doors to create the illusion of extra space. Bright tiles and streamlined fixtures can also make a tiny space feel bigger.
3. What are some budget-friendly tips for a bathroom makeover?
Budget-friendly ideas include painting existing fixtures, adding peel-and-stick tiles, swapping out hardware, and searching for sales on secondhand materials. See what these simple Bathroom Makeovers Before and after will look like, just a few of the things you can do with yours!
4. How do I choose the right color scheme for my bathroom makeover?
Opt for a colour scheme that matches your style and its overall aesthetics. Light, natural colors can help create a peaceful atmosphere and make the space seem larger. When in doubt, try accent walls or pop of color accessories. Before-and-After Bathroom Makeovers show examples of how a new color and accessories can change the look.
5. What are some popular trends in bathroom design right now?
Trends of the moment embrace earthy materials, floating vanities, frameless and blackened metal partitions, and touches of automation. See how these elements combine to produce a revamped bathroom. Bold tile patterns, mixed metal fixtures, and environmentally friendly solutions are also in demand.
6. How long does a typical bathroom makeover take?
The time it takes to change up a bathroom varies depending on how much work you’re doing. Minor updates — painting and switching out fixtures, for example — tend to take a few days; larger ones, such as replacing plumbing or tiling, can require a couple of weeks. But as Before-and-After Bathroom Makeovers demonstrate, these timelines are long enough to completely change a space — in some cases even more than once!
7. Can I do a bathroom makeover myself, or should I hire a professional?
Simple updates, such as paint, hardware, and accessories, can often be DIY. For more complicated jobs, like those that require a contractor to do tubing and electrical work, or to install intricate components, you’re better off hiring a professional. Before-and-After Bathroom Makeovers will frequently feature professional bathroom makeovers on these types of larger projects, where you can really see a difference.
8. What should I consider when planning a bathroom makeover?
Budget, how the space is used, style preference, and condition of fixtures and plumbing will influence your choice. It is also important to plan for materials and fixtures that can withstand long-term wear and tear. Before-and-After Bathroom Remodel Inspiration and ideas for remodeling a small bathroom.
9. How do I handle unexpected issues during a bathroom makeover?
To plan for unforeseen problems, create a contingency budget and surround yourself with good experts. Tackle issues as they come and plan your design to be adaptable if need be. You can learn a lot from the Before-and-After Bathroom Makeovers above to use in these situations.
10. Can I make over a bathroom in stages?
Oh yes, doing a series of upgrades on a bathroom makes sense – especially if you’re trying to stay within a budget. Begin with key updates, and then roll out more changes as time and resources permit. Be sure to also capture Before-and-After Bathroom Makeovers in your bathroom journal to visually account for the changes!